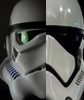
Darth Emphatic[CMD-DWM] Posted February 7, 2017 Share Posted February 7, 2017 I remember when I built my first armor...there were no labels, lol. The shape for the shins really should help with what gues where. Your calf juts in on the inside and is smoother on the outside. 1 Link to comment
ukswrath[TX] Posted February 7, 2017 Author Share Posted February 7, 2017 3. Shins/Calves 3c. Assembly In this section we'll assembly the shins. As with the forearms and biceps I found it easier to assemble one side of the shin first, let dry, then assemble both sides together. The front cover strips are 20mm the rear 25mm. As also you may have noticed the back half of the shin is not glued together (info for the new recruits). More on that later. For now measure and cut the front and rear cover strip to length as describe in previous chapters. NOTE: The front cover strip will run the full length of the armor, the rear starts just below the upper return edge. Ready for assembly. In this section we'll be gluing the front and rear cover strips to the OUTSIDE shin/calf half. NOTE: When fully assembled the calf cover strip will attach to the inner (mentioned above) via velcro or elastic and bra hooks (most commonly used methods). Apply glue, attach 1/2 the cover strip to the armor and secure. Let dry After After glue has dried glue the front shins halves only. Finished Right shin Time for the sniper knee. To be cont..... Link to comment
ukswrath[TX] Posted February 7, 2017 Author Share Posted February 7, 2017 I remember when I built my first armor...there were no labels, lol. The shape for the shins really should help with what gues where. Your calf juts in on the inside and is smoother on the outside. I actually found it's more confusing to have the instructions than not. What makes it worse is Anovos isn't actually supplying instructions, it's a part list with corresponding numbers, where in some cases don't match. AHHHH! Link to comment
ukswrath[TX] Posted February 7, 2017 Author Share Posted February 7, 2017 3. Shins/calves 3d. Sniper knee trimming and assembly. In this section I'll finish up the trimming on the knee plate, prepare it for install then install. NOTE: For those who don't know this belongs on the left knee. Remove all lower return edge. Taper upper to match the taper of the shin armor. First off remove all the lower return edge then test fit. NOTE: If you leave the return edge intact it WILL split the armor material when trying to test fit or install so do this first. Afterwards place on the shin and note the taper of the shin armor in relation to the sniper plate. Note: Though not required it is recommended (IMHO) the front section of the sniper plate be flush with the front shin outer cover strip for maximum strength. Trim accordingly. Before After Check alignment Prepare to attach to shin. NOTE: The sniper plate will be glued in three areas, center, left and right corners. I've found it much easier to glue the front first, let dry then attach the corners. Apply glue, clamping device then let dry. Finished, after sniper knee install. Link to comment
Darth Emphatic[CMD-DWM] Posted February 8, 2017 Share Posted February 8, 2017 Great stuff and awesome guidelines. Thanks for this build, Tony. Link to comment
Fivezero[TX] Posted February 9, 2017 Share Posted February 9, 2017 Great build, keep it up! Link to comment
mikidymac Posted February 14, 2017 Share Posted February 14, 2017 Great work Tony and about time, LOL. My shins were mislabeled again. I am glad I went back through this and realized I forgot all about the tube stripes that Anovos sent me. Hopefully the GML did not notice in my wife's submittal pics as her approval is pending and on hold due to the elections. Link to comment
Darth Emphatic[CMD-DWM] Posted February 14, 2017 Share Posted February 14, 2017 That gives you time to add them and resubmit Link to comment
mikidymac Posted February 15, 2017 Share Posted February 15, 2017 They will go on this weekend but I don't want to bother our GML. He indicated he would be very busy with the election and couldn't do anything until after that. It will be corrected but I am not going to bother him unless he brings it up. Link to comment
ukswrath[TX] Posted February 22, 2017 Author Share Posted February 22, 2017 Sorry for the delay Link to comment
ShadowDriver[TX] Posted February 22, 2017 Share Posted February 22, 2017 Awesome job on these posts! Between the TK thread and this one its been super helpful in getting me through my TX build. Just about an hour left to finish it! Sent from my LGLS992 using Tapatalk 1 Link to comment
Darth Emphatic[CMD-DWM] Posted February 23, 2017 Share Posted February 23, 2017 Awesome job on these posts! Between the TK thread and this one its been super helpful in getting me through my TX build. Just about an hour left to finish it! Sent from my LGLS992 using Tapatalk An hour before you needed to troop in it? 1 Link to comment
ukswrath[TX] Posted February 23, 2017 Author Share Posted February 23, 2017 Awesome job on these posts! Between the TK thread and this one its been super helpful in getting me through my TX build. Just about an hour left to finish it! Sent from my LGLS992 using Tapatalk My pleasure, glad to be of assistance 1 Link to comment
ukswrath[TX] Posted February 24, 2017 Author Share Posted February 24, 2017 Final shin photos posted back in the shin section. Link to comment
ukswrath[TX] Posted February 24, 2017 Author Share Posted February 24, 2017 4. Thighs 4c. Pre assembly. NOTE: Sections 4a. thigh trimming & 4b. thigh ammo belt are illustrated back on page one. In this section we'll measure, cut and prepare the thighs for assembly. The thighs use a 20mm cover strip and so we'll be trimming each side approximately 10mm starting at the return edge. Starting with the left thigh or whatever floats your boat, measure approximately 10mm out from the front return edge. This what you should have after trimming both left and right sides. Once you've cut both left and right sides perform a test fit to see if any excess needs to be removed or maybe shims added for the larger troopers. The goal is 1/2" clearance between your body and the armor. If you need to remove material make sure your remove an equal amount from both sided. If you need to add it then do the same, equal from both sides. This will ensure the rear cover strip is centered and not offset. For the larger troopers, to gain more room trim the upper and lower return edge as needed. At this point your should be ready to assemble. To be cont.. Link to comment
ukswrath[TX] Posted February 24, 2017 Author Share Posted February 24, 2017 4. Thighs cont... 4d. Assembly Part 1. In this section we'll assemble the thigh sections. Again I'm starting with the left thigh. Like in the previous sections mentioned, measure the longest section of the two halves, front and back. NOTE: The front and back cover strips start at the top of the armor and stop just above the lower return edge as seen here in the screen used armor. Now measure and cut the front and rear 20mm cover strips. As mentioned above, install front and rear cover strips on the inner or outer half on both left and right legs. Afterwards let dry. After drying Peal back the protective coating of plastic and apply glue then connect the inner and outer halves at the FRONT ONLY! Let dry. Afterwards To be cont... Link to comment
ukswrath[TX] Posted February 24, 2017 Author Share Posted February 24, 2017 4. Thigh cont ... 4d. Thigh assembly Part 2 In this section we'll finish closing off the thighs by connecting the rear sections. This section is a bit tricky. The front sections were pretty because we attached a flat cover strip to a relatively flat thigh armor surface, the rear sections are not flat, instead they have some curvature. This is the reason I installed the cover strip on one side first making the final assembly that much easier. To ensure both rear halves are parallel when finished, using painters tape and tall or double stacked magnets and force the cover strip area and armor inward. Photos are worth a thousand words so let's do this and you see what I'm taking about. Apply the glue to the inside of the cover strip or outer section of the armor. Connect and secure the two sides. Have several sections of painters tape ready to apply. If you apply the tape tightly over the magnets it will flex the armor inward. NOTE: This armor made by Anovos is very thin, I do not claim the process will work exactly the same with other manufactures. After drying Next up, installing the thigh ammo pack. 1 Link to comment
Kylorick[501st] Posted February 26, 2017 Share Posted February 26, 2017 This is awesome build thread mate keep up the good work Sent from my iPad using Tapatalk Link to comment
ukswrath[TX] Posted February 26, 2017 Author Share Posted February 26, 2017 Thanks for the kudos Ricky Link to comment
ukswrath[TX] Posted March 1, 2017 Author Share Posted March 1, 2017 4. Thighs cont... 4f. Thing ammo belt install. In this section I'll install the right thigh ammo belt using 5/16" head double cap rivets. Starting withe the ammo belt. Anovos was gracious enough to pre set the drilling holes needed to mount the belt to the thigh, and to my surprise they were located close enough to canon standards, go figure. Anyway all I have to do was drill 1/8" holes. I elected to start on the inside of the thigh to mark and install the double cap rivet mount. It really doesn't matter which side you begin with as long as each end of the belt is equally spaced from the last rear corner of the thigh when finished. I calculated the hole of the mount will be roughly 1" from the rear thigh corner. NOTE: The belt upper edge is roughly the same level as the upper edge of the thigh return edge. After drilling belt measure, mark than drill thigh mounting hole. Remove protective film from mounting corners. Using the rivet tool install cap rivet. NOTE: It doesn't matter from which direction you install the rivet. Once finished with one side wrap the belt around the thigh and verify the outer location to mount. Drill hole. Install cap rivet. NOTE: I found it much easier to just let the belt hang down during this process. You can slide it into its correct position when finished. Finished: Note: The belt packs do NOT have to be aligned with the front cover strip. Original OTTK armor ammo belts were mounted all over the place. At this point i usually flip the thigh over and apply a few drop of E6000 to secure the ammo belt to the thigh. After the glue dries paint the rivet heads black. Link to comment
ukswrath[TX] Posted March 1, 2017 Author Share Posted March 1, 2017 13. Helmet Accuracy modifications: So I'm going to jump ahead here a bit and talk about the helmet. As with the ANOVOS OTTK armor there were some areas of the helmet that are not accurate in the OTTK world like the ear screws that come flat head but should be "V" head and slotted. The Hovi tip screens are also too fine and should be a bit more course. I didn't like the tube stripe color either which was glossy black and barely recognizable, and finally I wanted to clean up the Vcoder lines and extend the frown past the last tooth as seen with ANH Stunt Centurion armor. From what I've read in the CRL none of these will prevent you from being approved "Specialist", though I could be wrong. Anyway in the next four sections I'll illustrate how to update these areas. 13a. Frown and Ear Screws First remove the ears. Since I'll be replacing the screws as mentioned above there's no better time than now get started. NOTE: Save the ear screws as you'll need them for the Thermal Detonator accuracy update we'll be performing a bit later. Using paint thinner remove the old tube stripes. Remove the internal padding exposing the screw nuts. Install tube stripe stencils (purchased from Trooperbay). Place the the tube stencils so the the edge of the tube stripe itself will be roughly a #2 pencil width distance from the face and the most forward stripe is roughly near the front face Hovi tip socket. Sorry the image is so difficult to see, Tape off and paint Using Testors flat black paint the tube stripes. Once dry carefully remove the stencils. Ear Screws. As mentioned before the ear screws are incorrect and will be replace with "V" head slot screws. I purchased 6 "V" head screws with a 6.5mm head (which is close to screen accurate and used with the OTTK armor). Drill out the existing holes to accommodate the new screw shafts which slightly larger. Test fit. Paint Tester glossy black then reinstall. Next up Hovi Tip screen replacement.... Link to comment
ukswrath[TX] Posted March 1, 2017 Author Share Posted March 1, 2017 13. Helmet Accuracy Modifications cont....: 13b. Hovi Tip screen update. So accurate tips should have screen material with roughly 7-8 strands of wire within the 17mm inner diameter of the tip. The Anovos supplied tip screen is roughly 20+ strands which is too fine. In the following illustration I'll demonstrate how to update the screen mesh. First remove the Hovis by removing the screw from inside the helmet. Using a small screw driver or pic pry the old screen out. Be careful to not damage the hovi tip. The next step is easier if you remove the center section. Using a 3/8" deep socket or equivalent pop out the center. NOTE: There is some glue holding it in place but it shouldn't be too difficult to remove. I've done about 1/2 dozen of these Anovos tips, they're all the same. Here's some hovi tips mesh pre-cut and ready to install. You can find this material in some flour sifters (dollar store) or I sell a set for $3 shipped US. Place the Hovis narrow side down. Using the same socket used to punch out the center, press in the new screen material until the socket will not go any further. They should roughly look like this when finished. Old & New Add E6000 and reinstall the base then let dry. Reinstall in the helmet. 1 Link to comment
ukswrath[TX] Posted March 6, 2017 Author Share Posted March 6, 2017 11. Thermal Detonator 11a. Trimming. Thermal Detonator comes pretrimmed from Anovos. No additional trimming was needed. 11b. In this section I'll be painting the tube prior to assembly. Using a Scotch Brite pad lightly scuff the tube to remove the top layer of film or dirt. Measure the end cap widths then apply painters tape to each end of the tube minus 1/8". Minus 1/8" is to allow for full paint coverage due to imperfections in the end caps. Install and trace out panel. Install painters tape minus 1/8" for panel imperfections. Paint assembly glossy black or similar. Afterwards remove tape. Using a sander, dremel or other remove some pipe material on the outer edges of the tube without paint. This will allow the end caps to install easier. Afterwards test fit caps. Using the original Anovos TD belt clips prep and paint the same color as tube. Paint screw heads now or later. I painted them before Let dry and prep for assembly. Link to comment
ukswrath[TX] Posted March 6, 2017 Author Share Posted March 6, 2017 11. Thermal Detonator cont.... 11c. Assembly (using accurate screws). NOTE: As discussed in the "Helmet Update" section the machine screws used to secure the ears are incorrect for that application. The screws Anovos provided to attach the belt clips to the TD are also inaccurate however, the good news is the Anovos ear screws are a perfect match for the TD clips (Pan head and slotted). In this section we'll continue with the assembly. Starting with the TD Control Panel, apply and glue panel. Temporarily install end caps Install clips so the the edge mates against the end caps and the control panel. Afterwards using a sharpie or similar locate and mark the clip mounting holes. Measure mounting screw (I think they were 1/8") and drill holes in tube. Install clips as shown. Install end caps and paint screw heads if you haven't done so already. Finished Link to comment
retrofire[501st] Posted March 6, 2017 Share Posted March 6, 2017 Beautiful work as always brother. Have you built a TK before😄 Link to comment

Recommended Posts
Create an account or sign in to comment
You need to be a member in order to leave a comment
Create an account
Sign up for a new account in our community. It's easy!
Register a new accountSign in
Already have an account? Sign in here.
Sign In Now