amcclary
-
Posts
85 -
Joined
-
Last visited
-
Days Won
2
Content Type
Profiles
Forums
Events
Everything posted by amcclary
-
"Shoulders are painted matte green olive grey (similar to Pantone 350u) with moderate weathering. " Should be "Shoulders are painted matte olive green (similar to Pantone 350u) with moderate weathering. " Olive Grey is actually a different color altogether. Its the color of the jacket, not the shoulder bells. The Pantone color is olive green. Referencing the Pantone color though as something to be similiar to though is good. In the print and design industry Pantone references are almost always used in brand bibles.
-
I'm good with the shoulders and biceps.
-
Whats next to review. Lets get this CRL rolling. The public is getting restless.
-
3D printed and Fiberglass are usually the most accurate because both these methods allow hard edges and details. ABS vacuum formed has soft details because of how the plastic is pulled over the mold. All of the corners are rounded Fiberglass is the most durable followed by ABS vaccuum formed. 3D printed can crack easily and how strong it is depends a lot on the skill and settings of the person who setup the print.
-
Question regarding sizing for armor kit options
amcclary replied to twnklfngrs's topic in Imperial Death Trooper
Seth, You might also check out our kit. We do make a version for people over 6'3" One of my first cliets was 6'5". https://plasticarmsdealer.com/listing/604813828/death-trooper-armor-kit-v2-gel-coated -
Ok are we reviewing what is on Page 1 of this thread or what is being posted at the end of the thread?
-
If you look up Colorrite Techno Grip 350U, the 350U is just a Pantone color which is a military Olive Green. Expecting people to buy that specific paint would be a big boom for that company but not needed. Greens are also extremely hard to photograph and are affected by light. GMLs would never be able to really tell the exact color unless a Pantone chip was included in the photo which just isn't going to happen. The best way to put this in the CRL is "an Olive Green mat which is close in color to Pantone 350U" The biceps should also offer the option of white with gold stripes and the red design for medics. Biceps Bicep cover strips are raised and beveled with a added strip layer on top. Left bicep is olive grey with moderate weathering. Right bicep armor is painted red with three yellow squares on the cover strip, with moderate weathering or White with gold stripes and red markings as shown for Mudtrooper medics. Biceps shall have moderate weathering.
-
I am fine with all of this for the belts.
-
Sorry Raider, missed that one. I just saw the one ISBear quoted. Moving on.
-
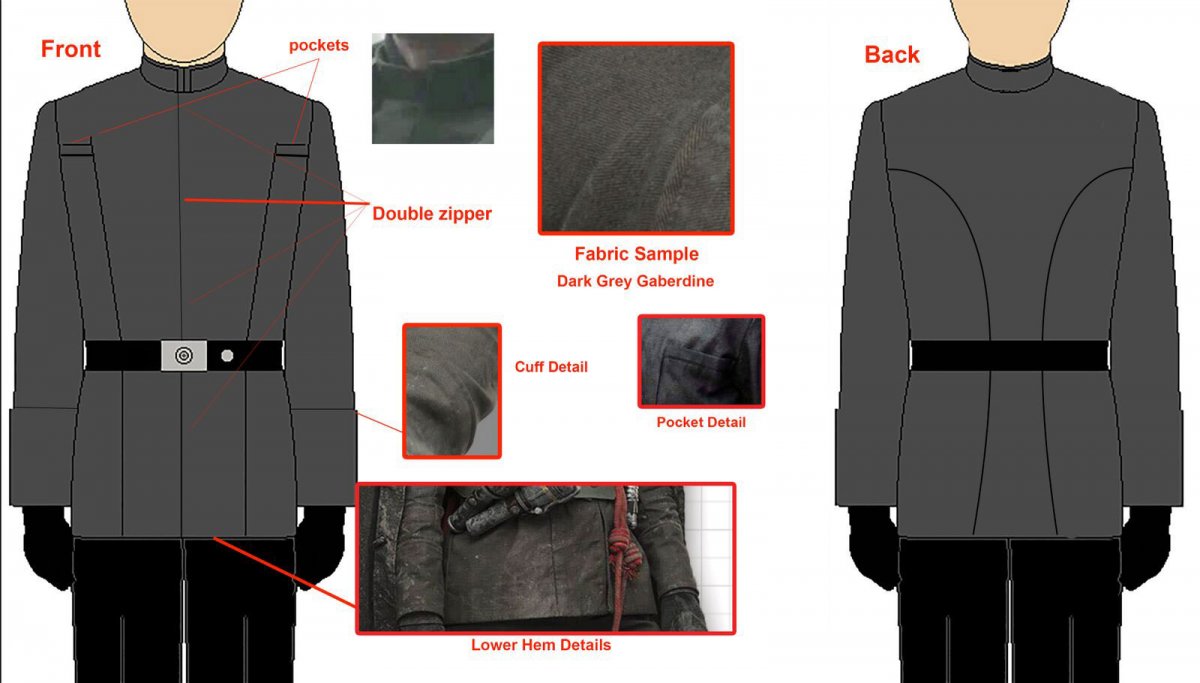
Jacket Jacket is Olive Drab Belgian M64 Style. Pockets shall have no flaps visible. Bottom of jacket shall hang between upper and mid thigh. Visible parts of jacket shall be moderately weathered. Optional: If jacket is worn without shoulder armor, an imperial cog patch must be sewn onto each shoulder I think we have established that the jacket isn't a Belgian M64 so I think putting this in there is going to confuse people. We know it was something custom. I would go with a description like this: The jacket is a custom made jacket made from a German Field Olive Grey Denim like weave The jacket has only two visible pockets which are on the upper breast toward the outside It has a seam near the waist and extends down to to the upper to mid thigh There is a zipper which extends from the top collar down to the middle seam, this zipper is hidden. The bottom of the jacket is squared off and the sleeves have cuffs similar to a German Elite M32 Officer The collar at the top is squared off at the top in a mandarin style A cog patch should be on each shoulder if the shoulder armor is not worn. All visible parts of the jacket should be weathered heavily and muddy. If we wanted to make it easier/cheaper for people, then a level one could go something like this. The jacket is dark grey or olive grey in color. If a dark grey is used, it should be dusted lightly with an olive green paint. The bottom of the jacket is squared off and the sleeves have cuffs similar to a German Elite M32 Officer There should be no pocket flaps and the jacket should extend down to the mid to upper thigh. If you are not using Olive Grey then all visible parts of the jacket should be heavily weathered with brown and light grey mud. A level one must be worn with armor and the cloak. Note that the actual color of material of the jacket becomes a lot less apparent once the jacket is heavily weathered with mud. Shoulder Bells Each shoulder bell is a mirror image of the other. The detailing of each shoulder bell is asymmetrical. Shoulders should have a longer flat edge that covers top of bicep with a shorter flat edge that connects to chest armor Shallow grooves are present in a pattern matching the photo. Shoulders are painted olive grey with moderate weathering. The part of the shoulder bell with the arched line at the bottom goes toward the back of the costume.
-
"There are four images I can reference to that show the buckle - Han, Val, Medic and generic MT. The last two can be seen in the SOLO Visual Guide. Buckles were the exception rather than the rule but they did exist. " I am looking really closely at the photos in the visual guide and all I am seeing is folds of fabric from the pants bunched up at the top of the boot not buckles. Do you have higher resolution photos of the shots in the book or others that show these buckles? This may have been another inconsistency in the costumes because actually finding Russian officer boots with a buckle at the top is very rare. The aviators worn ones with a buckle but it was pretty large and would easily be seen in the photos. There are photos of troopers that clearly don't have these buckles. They clearly are not on the ones in the photos of the Trooper used for the standee. I have super high res photos of these. (Higher than what was printed in the standee.) I think this should be an option in the CRL if its put in.
-
Wondering where the buckles at the top of the boots is coming from? Do we have references to this? I went through all my reference photos and couldn't find any. I have the WW2 Russian Officer boots and the soles, tops of the boots, and stitching all seems to match the high res photos I have. I can see the tops of both side in this photo and don't see them? These are WW2 era Soviet Officer boots and they don't have any buckle for adjusting at the top and the soles and stitching on the sides match the photos. Other than that, I think the description is good.
-
At this point I think we know enough about this costume to put together at least a level 1 CRL. I too would be willing to help. There may be some more minor details we find out later but those could be added as level 2 . There is a lot of enthusiasm for this costume and if a CRL isn’t developed in a timely fashion then people will lose interest. I saw this happen with the Pratorian Guards.
-
Good info Darren. So here are a couple of questions: Do you know if the zipper ended at the seem or does it go down a bit further? Does one side of the jacket overlap the other or do the two parts meet in the middle like my sample?
-
I just received the first sample from our tailor. There are changes that need to be made but thought it might provide a place for discussion. We put in a double zipper on it. How do we know the zipper doesn't extend to the bottom? What are the references for this?
-
Case in point.

-
That all sounds good. My only change is that in the description of the color "olive grey that leans more toward dark grey" or even specify a Pantone color. If you Google "Olive Grey" you end up with a really wide range of tones between Olive Green and Grey. Olive Grey I feel is not descriptive enough.
-
I actually found it on a different site, but looks like the same cloth. https://nickoftime.net/p-11458-olive-14oz-bull-denim-woven-fabric.aspx
-
I think I have found the fabric. Its 100% cotton so washed a few times I think it would look spot on. Darren is right that its called Olive Grey Denim. But we need to be careful of this because I also found a number of "Olive Greys" that were a lot more green than grey. What appears to be used was much more grey than olive.
-
I would say the for level one that the jacket is a dark grey or washed black lightly dusted with the olive green. I found this is easier to get a match on what was used than to try to take a olive jacket and get it to grey. Its quite easy to dust the dark grey with a mist of green when you are weathering it with mud. Jason and I spent a lot of time going over the jacket and here is what we think is pretty darn close. Truth is about the only part that really matters is the sleeves and the part that comes out under the armor. Once you have everything on you don't see much of it. I actually think I am going to replace whats under the armor with mesh to let in cool air. Its hot. The only shot we have of the collar is shown here. From what Darren has posted on the color of the armor, I found that the numbers in Technogrip's numbering sequence is actually Panatone colors which is awesome. Thanks Daren. https://www.pantone.com/color-finder/350-CP https://www.pantone.com/color-finder?q=7535U
-
I just haven't had the heart to spray paint them yet. But it will happen.
-
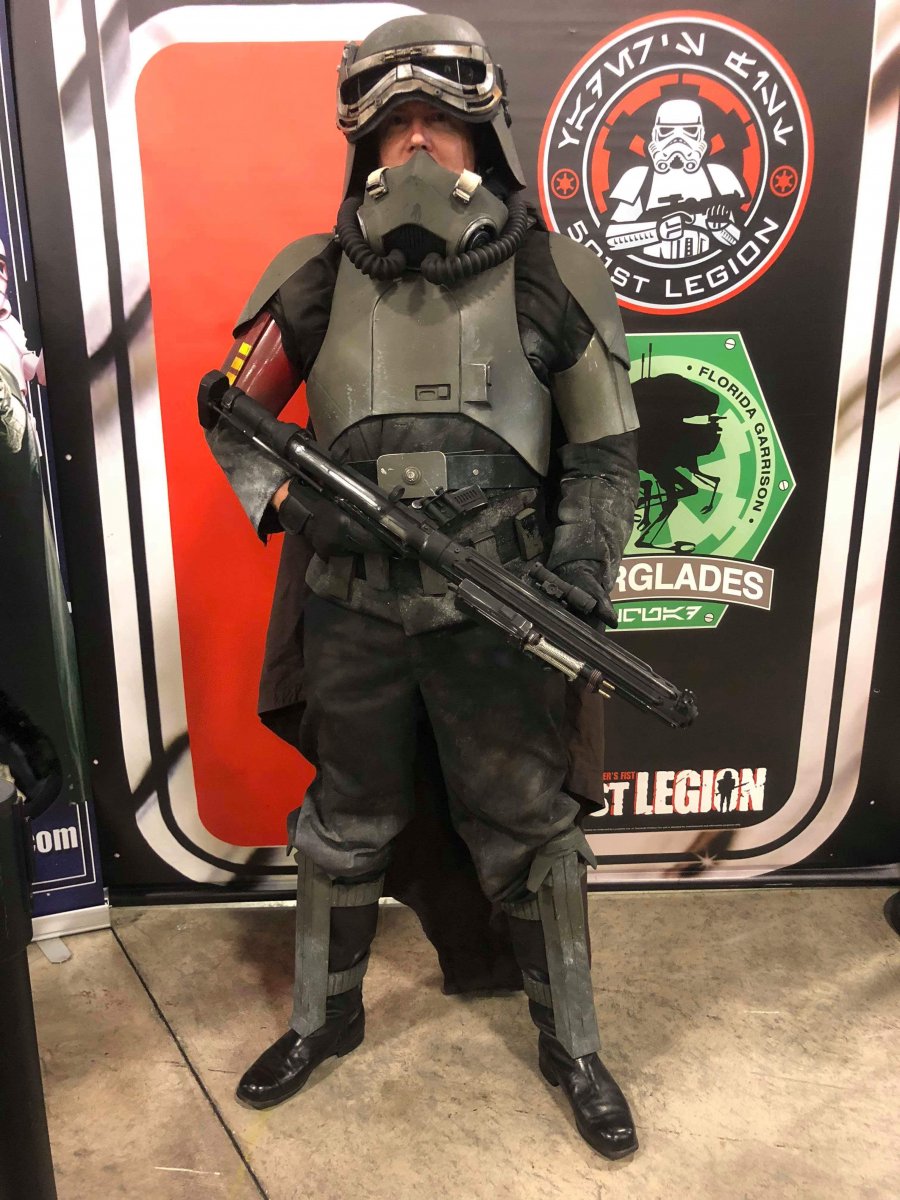
I put together a page on my studios web site with more photos of my costume and its parts. http://www.mcclarydesign.com/2018/07/17/mud-trooper-project/ Here are a few photos from the page.
-
I plan on gluing some black EVA foam just under the point of the shin guard so there is padding there. I might also be adding some velcro under the straps and putting some on the boot so the shin guard stays up just a bit instead of resting on the foot. But I am hoping that just adding some foam under it will allow the guard to move without putting a pinch on my foot.
-
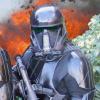
After building the armor, comparing it against all the photos, here is where we are at and some observations made while wearing the costume to a con. First of off this is a fun costume to troop in. It gets a lot of attention and is comfortable compared to most. The cloak is also fun. Beware though that when it hangs down fully people can step on it. It can be buttoned in an up position, but long term it might be better to modify it so its shorter and doesn't hit the ground. There are two main pinch points in this costume. At the elbo where the biceps meet and on the top of the foot where the shin guards meet. The biceps pinch when you raise your forearms with the blaster. The top of your foot gets pinched if you step forward and the shin guard has slipped down. We are still working on confirming the exact size of the goggles but we are pretty sure of them. What we built matches perfectly the high res images we have with our CAD models when we photo matched them in the computer with multiple photos. Depending on the angle of the camera/lens or where the goggles get worn they can look big. So we are double checking. But based on the photos in the visual guide of the troopers, they are large goggles. (See photo of Sharluy Greslin) The same is true of the respirator, but again its large as well. Much larger than the paint respirators we wear in our shop. But comparing to the photo of Collum Woslo, it too is very large. The helmet size we are very sure of because we know that a skate like helmet was used on the interior. We used a basic skate helmet as the inner liner of this helmet and modeled it around it. Darren has said that this was probably a custom liner, but you can tell from the photo of Val its size is comparable to a basic skate helmet. To put the respirator in its up position, we used hooks inside of the helmet and rings on the straps seen at the top of the mask. This worked pretty well and I am guessing from the photo of Collum Woslo in the guide that this is how its done, though we don't know the exact hooking mechanism because its not seen. I recommend the hook and ring method because its relatively easy to do and there isn't much room up there for your hands to work fasteners.
-
We have also done a lot of research on the jacket and comparing photos available as well as a few very high res ones I acquired. The jacket we have been told is a custom one. So based on the details we do know from photos and other Star Wars costumes from the Empire, the attached drawing is what we think at this point it looks like with logo patrches on the shoulders. (not shown)