ibskyde
-
Posts
32 -
Joined
-
Last visited
About ibskyde
SpecOps Info
-

-
Costumes
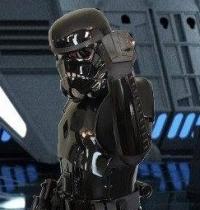
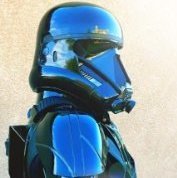
Shadow Stormtrooper
Support Info
-

-
Supporter Datestamp
2018
Recent Profile Visitors
275 profile views


ibskyde's Achievements
")


-
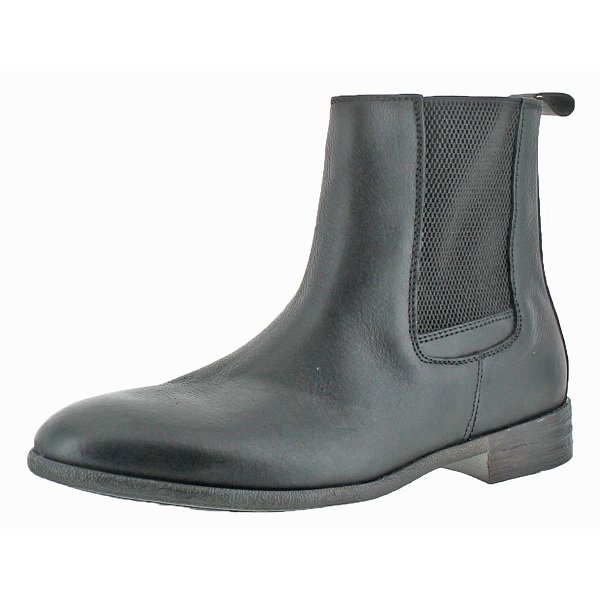
I'm looking to try out a different pair of boots for my shadow... do these look OK? Or would that little strip at the bottom of the elastic area rule them out? Thanks!

-
Could a build using the MP40 ammo packs on the waist belt in lieu of the standard drop boxes still be potentially approved for Specialist status? http://databank.501st.com/databank/File:TX_Belt_Ammo_Packs.jpg Or would the standard drop boxes be required? I only see mention of the drop boxes in the specialist requirements... wasn't sure if it if implied that only builds with those drop boxes would be eligible, or if those specific requirements referencing the drop boxes only apply in the case that drop boxes are present, but can be ignored if the other ammo packs are used instead. Thanks! J
-
Once those last couple of pieces dried, I cut and bent a couple strips of aluminum and got the TD and clips knocked out. Once I got the ammo packs in, I was able to wrap things up. Found I had a couple minor adjustments to make, first with the TD clips and the angle they had the panel pointing (ended up just bending them a bit to fix), then with some of the strapping (needed to shorten the straps holding the shoulder bells on, and decided to lengthen the strap a bit between my forearms and biceps). Just found out today that the finished armor was approved!
-
About 6' even, and down to 211 pounds at the moment (though was closer to 230 when I started... found a diet that's been working for me). Hoping to get down to 200... though if at that point I determine that the shimming would no longer have been necessary, I'll be a bit peeved I started painting and ran into some trouble with some odd 'frosting'/'wrinkling' effect on several pieces. Sanded down a couple times and eventually started over with a different paint and had better luck with that. The thigh shim doesn't look too bad, at least not from a distance. Up close unfortunately you can tell that I'm not an expert sander, and the putty line can by made out, and not terribly straight at that. After painting the helmet, I applied new decals and re-painted the details. Bucket, Mark II! Still waiting on the arms, a thigh, and the TD paint to dry, but otherwise done with painting. Re-assembled the torso... thought for sure I'd end up scratching the paint, but miraculously I managed to avoid it. Hoping tomorrow I can get the TD clips cut, bent, and attached. Then Monday the ammo packs should arrive (I ended up changing my mind and opted to go with the MP40 ammo packs rather than the drop boxes)… should be able to get those on and the holster attached at that point. Then, hopefully just small tweaks, if any (fingers crossed).
-
Sanded several of the pieces down and tried again, with similar results. Sanded it all again and did 1 thigh with the same process, same paint, and did the other with the same process, but a different paint (switched to rustoleum gloss black enamel, rather than the painter's touch stuff). The different paint seemed to work better without issue... redid all of the pieces with that paint, the problem hasn't happened again. /shrug Thanks for the comments!
-
Clear and about 82 degrees. Thanks!
-
I've been attempting to paint my shadow trooper pieces this last week, using Rust-oleum 2x ultra cover paint + primer gloss black. Every piece was similarly sanded thoroughly from 800 grit up to 3000, and wiped down with microfiber and tack cloth prior to painting. Some of the pieces have turned out fairly well after a few coats: Then out of nowhere, this started happening on the next pieces after a couple of coats, even though the pieces were prepped and the coats applied with the same method and timing: Anyone happen to see anything like this before that might be able to offer me some insight on what I might be doing wrong? I can sand it down again (as much as i HATE sanding)... I'm just scared to waste the time and effort and additional paint before I know how to prevent the same thing from happening again. Thanks! Jon
-
Ended up doing quite a bit over the last week, though never got around to posting. Wrapped up the belt (minus the holster... waiting for it to show up): Spent a lot of work on the biceps and thighs - neither fit without needing a shim. Took a few attempts on the thighs... originally I wanted as few seems as possible, and wanted to make use of the existing raised ridge for the cover strip on one side at least. The first attempt at a shim only had 1 seam, but sadly threw the cover strip way off to the side, and it just looked goofy. Tore it apart and opted to have 2 seams so I could put the cover strip more towards the middle. Tried it first with some ABS paste I had mixed up. Had a hard time getting a goldilocks perfect consistency, and even taking forever sanding it with high grits (800/2000/2500/3000), I was still unable to buff out the scratches afterwards with Novus or Meguiar's. Finally said the heck with it... going to use the epoxy and I'll just paint the armor instead. Once I made that decision, needless to say I started going crazy with the sanding heh. Also filled in the seams from the kidney plate shims, and after browsing a bunch of build threads decided that while the rivets for the ab/kidney connections were evenly spaced and the appropriate distance from the side edge, I didn't like how far from the top and bottom edges I had put them. So ended up relocating those and filling the holes. And also worked on the TD (still some cleanup to do before painting, and still need to cut and bend the clips): Was finally ready to do a test fit of everything tonight (took the decals, lenses and rubber off the helmet to prep for paint, and obviously I still need to rivet in the thigh ammo belt). Still some adjustments and a lot of cleanup to do prior to paint- shoulder bell straps clearly need to be way shortened, and the elastic loops on the brackets holding the chest to the ab need to be a bit longer... I found the chest kept trying to pop up on top of the ab edge, and also tries to pull to the right a bit. Other than those items though, things seemed to fit pretty well.. though I'm still uncertain if I'm showing too much cheek under the butt... feels like to keep the gaps on the back/kidney/butt plates to a minimum, it pulls the butt plate pretty high. Not sure if it looks too noticeable or if it looks normal. Getting close! Items I'm still aware of needing to wrap up: - chest/ab elastic loops resizing - shoulder bell connector strap shortening - thigh ammo belt attachment - TD clips - holster - elastic loops to hold abs shoulder straps to elastic shoulder straps / back - final sanding and clean up - paint paint paint! (decided to paint the boots as well... couldn't find good black ones I liked that were available anytime soon. Thought I got some at a good deal but ended up being too short up the ankle and too pointy-toed for my liking) - reapply helmet details - velcro hand guards to gloves (i've got the rubber hand guards in... just need to glue velcro to the back so that I can interchange them with my white TK ones with my gloves)
-
Started working on the shims on the ab/kidney gap as well as the rear of the biceps and thighs. ABS paste seems to work alright, though after sanding it smooth I'm having trouble getting the shine back. Not sure if I need to go up to a higher grit when sanding or what (been going up to 2000 before hitting it with the 3 levels of Novus), or if Meguiar's would work better. Trying desperately to avoid having to paint it. I'll try and throw up pics of the bicep I've been working on so far tomorrow to see if anyone has any words of wisdom they can pass onto me. Added snaps to the chest for the shoulder straps. Glued the sniper plate to the left shin. And started working on the belt. And riveted the straps to the left of the ab plate.
-
Well, I ended up picking up a pair of those boots and got them in yesterday. They ended up being quite a bit pointier-toed than I was expecting... apparently I just didn't pay close enough attention to the original picture. I've got them here next to my TK boots... would they still look acceptable with this toe style, or no? They don't go up quite as far up the ankles either as the boots for my TK. At rest when I put the shins on, they still look fine, though once I start walking then the shins push up and uncover the tops of the boots within a couple of steps... hopefully the elastic stirrup method that others have suggested would fix this, assuming the toe style wouldn't rule these out anyways.
-
Added snaps to the ab plate... As well as the riveted strap... And the snaps on the butt plate side. Also started gluing straps on the shoulder bells... And the back... Tried fitting the other pieces to see what trimming/shimming might be needed. Was barely able to get the shin plates wrapped around... think I can make those work as-is. Biceps fit with the excess material I have yet to snip off, but barely. Unfortunately I think there'll be too much of the raised edge for it to look good without a massively wide cover strip. Not sure if I'll be able to heat it up to try and ease out the ridge a bit... more likely I'll probably have to trim it back and then shim it... hoping not though as the spare plastic I was provided is quite a bit thicker, and won't likely curve easily for an area like the bicep pieces Thighs wouldn't close either.... likely going to need to shim here as well... ugh.
-
Started on the shins yesterday... Screws I was waiting on for the torso showed up as well.. ended up a bit longer than I expected. Felt like stepping into an iron maiden Trimmed the pieces up a bit last night and started mounting the brackets tonight. Sadly I was almost positive the kidney piece was oriented correctly (the last set I built had the notch on the bottom sides... this one didn't and wasn't clear to me anyways which side was 'up') until i connected the butt to it and saw that the curve on the edges didn't quite look right. It looked better when I flipped it, but unfortunately I had to move the brackets, so now I have a couple of holes to fill up later, or else trim down the return edge a bit so the holes aren't noticeable. Always something Test fit it a bit... I'm a little overweight, so even though I left a lot of the extra plastic on the ends of the kidney and ab pieces, i still had to suck it in a bit to get it taped Which is more preferable... having the excess plastic left on the pieces to fill the gap (trimmed slightly so the edges are at least straight/parallel), or cutting the excess off and gluing in a shim instead? I'm also a tad on the taller side... while the chest and ab pieces fit alright, when the back/kidney/butt pieces are lined up, the butt piece just feels a bit high. I know the gap between the kidney and the butt should be as little as possible... preferably non-existent... feels like I have quite a bit of cheek coming out of the bottom of the butt piece though heh is that just normal for how it wears? Or is it OK to bring it down a bit and widen the gap between the butt and the kidney slightly?
-
Thanks guys! Much appreciated
-
Results while I was searching for boots included this auction: https://www.ebay.com/itm/Mens-Ankle-Dress-Boots-Slip-On-Almond-Round-Toe-Leather-Chelsea-Luciano-D-510/122886732044?var=423339090784&epid=21012257433&hash=item1c9c9eb90c:m:mL2JNSzh8Vvf_vCHkI-iGhg Looking at the black ones (obviously), do they appear that they'd meet the requirements for a shadow stormtrooper? Thank you much! Jon
-
Thanks for catching that! Not sure what happened... I had the edge on each half of that forearm trimmed to half the appropriate width, and the other forearm strip is correct... must have just been daydreaming when I cut that strip. I slimmed it to the proper width and re-glued, along with the fronts of the biceps and thighs. Also painted the ear screws on the helmet and painted and added the aerators. Just need to throw in some padding and a chin strap. On the fence on how much I'll be able to fit in for electronics. My TK helmet was from RS Prop Masters... not sure if it's just the difference in the molds between theirs and ATA's or if I trimmed or riveted/screwed the pieces together incorrected, but it feels like tighter quarters inside this helmet. Going to likely have to cut the machine screws down a bit.