Zugor
-
Posts
37 -
Joined
-
Last visited
-
Days Won
1
Recent Profile Visitors
322 profile views

Zugor's Achievements
")


-
It has been a bit but I finally got to clear coat the armor today. Some of the parts need a little buffing to shine them up but for the most part it's time to start assembly.
-
My boots arrived today. The leather on these boots is pretty thin. They fit a little loose and feel like vinyl. I know they are leather but really soft and thin. Does anyone have experience with Crowprops? Is this what they usually deliver? It looks great but feels a bit, I don't want to say cheap but they don't feel like boots we used to get from TKBoots.
-
I got ambitious over the weekend and painted all the parts, now everything has two coats of paint. Only trouble is I ran out of paint so I need to save up some money to get some more paint. If you don't know red auto paint is the most expensive paint there is. I think the color darkened up nicely from the first coat. One more coat of paint on everything and then I will clear coat it. The only parts that I haven't hit with paint yet are the helmet "ears" and the shins which still need me to make the magnetic closure parts. I think I am going to hit the back sides of some of these parts in areas that could possibly show, like the chest plate straps just so all the potentially visible areas are red and no chance of someone seeing the underlying plastic color like you can in this picture.
-
Thanks! I just wish it was going faster. I had some time so I spent about 2 hours sanding the dome of my helmet. I am using 100 grit sandpaper. I was using 220 but it was taking a really long time to get the paint off and I started loosing my patience. The 100 is a bit rough but it gets the job done and I go over it with the 220 to remove any scratches that would show up after painting. I am also thinking that if I see any scratches after I primer it I can sand that area down with 400 and respray it with primer to fill in the scratches, but I haven't seen any scratches in the other parts so I think I am good. Its amazing to me how hard it is to get this spray paint off the plastic. I think once the paint has cured its just about bullet proof and given that this helmet has been hanging around for a few years before I started working on it I would say the paint on it has definitely cured. The next time I get to work on this I will try to get the rest of the paint off and then primer it. Then I will work on the ears and then the magnetic shin closures before setting everything up for paint and clear coat.
-
I think I have the vast majority of the enamel spray pain off of the plastic. There is a little left in the crevasses but hopefully the primer will seal it in and the urethane paint and clear coat won't effect it. Here I have sprayed the face plate with one coat of adhesion promoter and two coats of flexible primer. Now I will set this down and finish sanding the dome of the helmet. This way I can see if the primer will cause the enamel to bubble up or if I dries on like I hope it will.
-
Yeah, I think I gave myself some tennis elbow sanding this the other night. I woke up and my arm was hurting pretty bad. At least I know it will look awesome when finished, though the road to getting there is no fun.
-
I have been sanding my helmet, trying to get the enamel spray paint off is turning out to be a big job. The grey is the primer under the red spray paint. I am not looking forward to getting up into the mic tip wells or any of the other crevasses that are difficult to sand out. I was using a palm sander but that was heating up the plastic too much starting to melt. I may need to put some extra plastic behind the holes for the ears to give it a bit more strength. If I didn't need this for my magma trooper I would keep it as a distressed trooper.
-
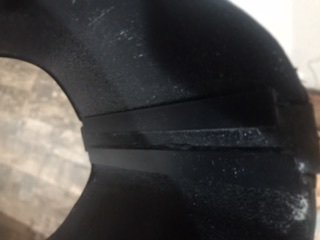
I finished assembling my shins. I had to add shims to get them to fit around my calves and the cover strip ended up a bit wide. You can see the shim in this image. Now all I need to do is make and install the magnetic closure parts and then I can paint them. I do still need to do a little trimming on the cover strips but I will do that after I have the magnetic closures in place.
-
I have been trying to sand off the red spray paint from this WTF helmet. I have tried paint thinners, olive oil, brake fluid, and even eggs and nothing seems to loosen this paint that doesn't melt the plastic too. So I am sanding it all down trying to get to the plastic beneath the spray paint. I tried spraying primer over the unsanded paint but the primer flakes off. I also sprayed these parts with adhesion promoter and flexible primer. The belt is damaged a bit where I had to remove the rivets so I put plastic behind the belt to reinforce the area. The buttons will cover the damage but I have to find new ones because the originals didn't come off well.
-
I was directed to CrowProps by several people, they will cost a fair bit of cash but since there aren't any other options for a size 14 boot they will have to do.
-
I have more parts ready for paint, unfortunately the paint store is out of primer. Hopefully they will have more on Friday. I am still looking for a boot supplier if anyone knows of someone let me know.
-
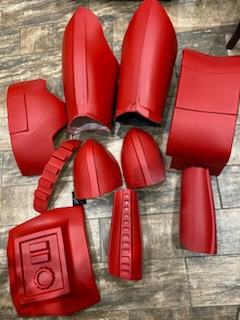
Here are the parts primered parts painted with a first coat of red. I plan to hit these with another coat or two of red and then two or three of clear. I need to get the rest of the parts ready for paint first tho

-
I am as actually hoping for a black primer base to give the red some depth. I did pick a darker red, they call it “pull me over red” so we shall see. I did spray the parts with one coat of red yesterday but they definitely need another two coats and then the clear. I will try to get pics of the base coat up later today.
-
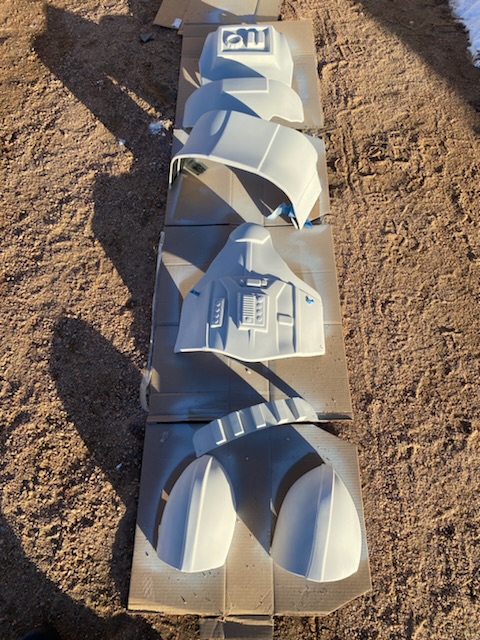
Sorry it’s been a while since I posted on this project. COVID put a crimp in my plans. I have been working on this and bought some used Anovos parts to replace the ones that broke. I also went an learned how to paint and bought an HVLP spray gun. I decided to put adhesion promoter on some parts yesterday and then put a grey primer over the top of that. Some of you are thinking that’s two primers and you’re right. My goal with the second primer is to get a consistent base color so the shade is consistent from part to part since the parts are different colors. Here are the parts layed out getting primered.
-
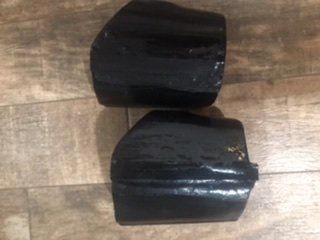
Sorry I had to peel off this project for a while, had to build a new TK bucket because of a stain that developed on my old one. Turns out if you spread a lot of ABS paste on parts they become brittle and snap off like On this back plate. I have successfully extended my bicep parts to fit me. I had to shim them by an inch on each side. I just need to sand them down to smooth.