
JAFO
-
Posts
238 -
Joined
-
Last visited
-
Days Won
10
Content Type
Profiles
Forums
Events
Posts posted by JAFO
-
-
15 minutes ago, Raider said:
Congratulations and thank you for posting a great build thread.
Thanks David. This costume was a pleasure to build and I'm thrilled to be a part of the SpecOps family
-
I'm delighted to report that I heard back from my GML and I have now earned my Spec Ops prefix!
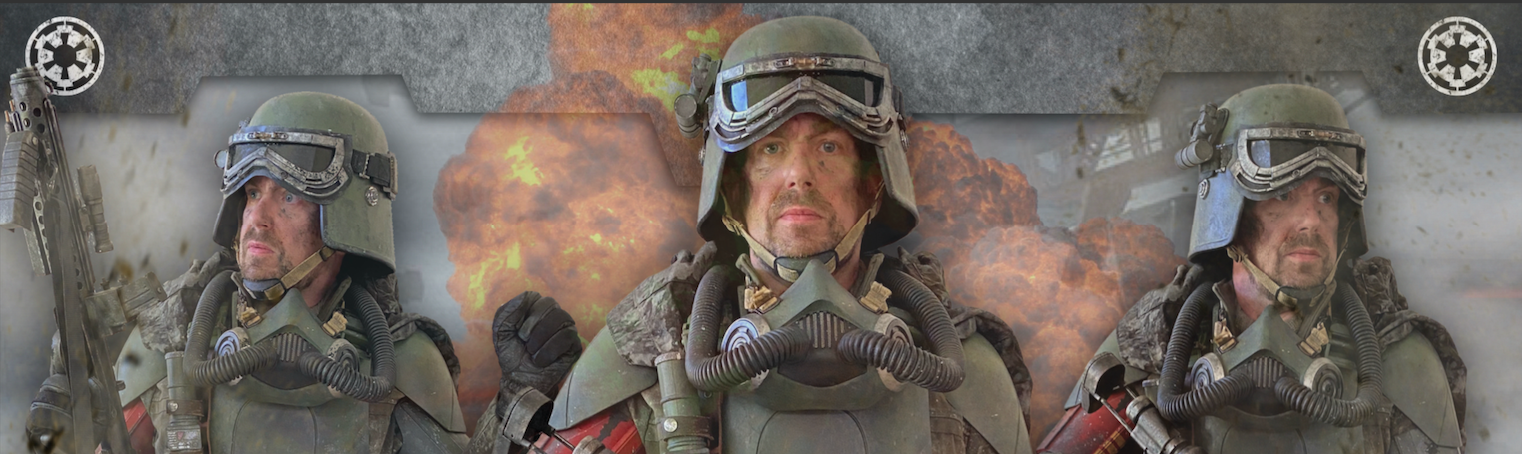
TX11412 is ready for duty!

-
 1
1
-
-
In theory, this build started in 2018 with the acquisition of found parts and other gear but the REAL build started in ernest on 28 February 2020. Who would have known (even then) how world events would be shaped and that being forced into ISO was an ideal situation for a costume builder on a mission. Sure, I've still had family and other life stuff to get on with but I have been spoilt with extra time that meant this build could move forward at pace. Having said that, I still faced time challenges in not being able to get out to the shops for necessary supplies when they ran out. I was at the mercy of the postal system.
At the end of the day, I consider this a solid two-month build. A fun journey that reached its destination yesterday when I tried on the full kit, and submitted approval pics to my GML.
I have always envisioned this build as a face character. We know the production kits were never designed for performers to wear the respirator and, personally, I much prefer the look of the weathered grunt. It puts the human in Star Wars.
I loved the look of this character when I first laid eyes on it. I love it even more now that I get to wear it.
I look forward to adding the TX prefix to my numbers and joining Spec Ops some time soon.
-
One part of the build I had least been looking forward to were the goggles. It's no surprise that they kept getting pushed back on to the bench whilst I found something else to do. Lens to cut and bend. Lens to glue without blooming and fogging. Rubber seal to cut to shape then glue in place. It was fraught with peril. Truth be told, they were a challenge but I took my time, worked very methodically, and I'm very happy with the result.
First job was to carefully create a recess in which the lens could sit. I took my time with this one, opening up the recess little by little until I was happy.
I also took the time to do some patch work painting with the Vallejo gun metal to cover any exposed white resin parts.
I located the Shade # 5 replacement welding lens I'd had stashed somewhere for months and then drawing through the goggle lens created a template which issued up to cut-out the lens material.
After scoring the lens I then bent the sides by hand - carefully!!! - to create the angled effect. I then clamped the lens in place and decided to leave for a couple of days so the lens could settle in shape, hopefully making it easier when it came to gluing.
When it came time to glue the lens I settled on Loctite 60Sec - not as runny as the 495. I used VERY sparingly and dotted it around the recess. I ensured to work in front of a fan which I left going for a few hours whilst the glue dried. This was to help dry the lens waste and also disperse the vapours from the CA glue which cause lenses to bloom and fog. I did get a little fogging in one spot but I dealt with this by using a little Vaseline which helps clear it a little. Overall, I was very happy the lens was in.
Next up, time for the rubber gasket. I knew this would be a tricky one but was sure to prep the 2mm silicone rubber as best possible. After cutting the shape I washed it thoroughly, then scuffed and scored certain areas to facilitate best chance of bonding.
I also scored the inside of the goggles heavily. You'll also notice I added some Apoxie Sculpt in the top corners of the lens to add support and fill a couple of small gaps.
Once again settled on Loctite 60Sec glue and, once again, worked in front of a blowing fan. Clamps - and many of them - were essential!
I left them to dry overnight and woke up to success!
Next job was to size up the goggle strap in readiness for gluing to the goggles themselves.
Following production reference very closely I stitched the straps to match, leaving a little extra webbing in place before final sizing, cutting and gluing.
Once I was happy that the strap sizing was correct it was time to affix to the goggles. For this task I wanted to use the same adhesive used during production - VIP PowerMix 2K.
I had it imported from the UK some time ago but didn't realise it needed an applicator gun! Thankfully I was able to use a couple of screwdrivers to improvise the plungers required to push this fast and hard drying black gloop. You have to work fast with this stuff as it pretty much sets in one minute!
With the PowerMix dry it was time to put the goggles on the helmet and to a quick sense check. I did end up trimming some of the gasket for a better finish.
And whilst the goggles were on I took the opportunity to do the necessary weathering of straps and buckles.
I then took the weathering outside to add the water droplets from the paint/water spray bottles. For the lens I used a dropper so not to get too much paint on them.
I also used this time to weather up the Yugo pouch a little.
It was all coming together so nicely.
-
1
-
-
The weathering pile continued to grow...
...and it felt like the end was in sight.
T move on to the next part of my build I was waiting on a delivery from Nic at Empire3D. These were hose nozzles for the respirator which were designed from production used assets but adapted to be slightly larger to fit Fletcher's respirator design. It was a simple task of prepping the nozzles with a prime and paint and then gluing them in to position. The production used nozzles were held in place using a 17mm circlip but I decided against this mod in favour of strong glue/attachment.
I trimmed off half of the rubber hose connectors to be more accurate then gave them a nice hot water bath to soften them in readiness to slide over the nozzles.
After a quick spritz with the paint/water spray bottles I then measured and trimmed the hoses to the desired length. I then used a hair dryer to warm the ends of the hose in order to fit them over the angled hose connectors on the back plate.
-
Next weathering job was going to be messy. I needed my boots to look as if they had just run across the grey, muddy fields of Mimban.
To achieve this I lined a tub with bin sacks, then filled with a slightly watered down version of my mud mix. With each of my very clean leather vintage Soviet Officer boots I took a number of big stamps into the bucket to get a good upward spray of paint.
As with all other gear, after the initial dark layer the boots received a covering of lighter mud mix followed by the obligatory sprat bottle treatment.
After the paint treatment I was sure to put shoe trees in to the boots to ensure they didn't dry up too hard or too small.
-
I mentioned earlier how I was waiting to work on a solution to keep the shins from moving around too much once slips dover the boots. Once again I turned to my old faithful magnets as the solution.
I glued triple stacked 18mm magnets on the inside of the shins in two strategic places.
I glued together double stacked magnets - slightly larger this time - and I use them inside the boot. I haven't glued them in place as they stay put very easily.
After gluing the shin magnets I took the opportunity to weather the shins.
-
Safe to say that weathering and breakdown are a CRUCIAL part of any Mudtrooper build. For me, weathering is a meticulous task, taking time to create the highlights and the lowlights that create definition. As mentioned earlier I was using tones of grey for my Mimban mud, always starting with a dark mix followed by a lighter mix - all made from paint, sand and Fuller's Earth. Once weathered, every piece of clothing and kit would get a spray from the paint/water bottles. To assist with creating a better droplet effect I would some times use a dropper, and compressed air cans to blow the droplets.
I recall one of the S:ASWS production team telling me "when you think you've added enough mud, add some more!" I was sure to take that advice onboard without going over the top.
What follows is a gallery of weathering pics from all parts of the kit and soft parts. Enjoy!
After a busy few days weathering it was time for a quick test fit and some down time.
You will see from this shot that my Plash Palatka was now connected my armour. Method of attachment was a straightforward decision for me - magnets! I stitched some inside strategic points of the Plash...
And then glued double stacked magnets inside the top of my front armour. The Plash connects/disconnects with ease and stays in place. The closure is remarkably strong.
Now, whilst I was enjoying my beer I was thinking about how to attach the grenade holder. I decided that I would repurpose the ties from the Plash Palatka, so cut them off, tied a loop through the grenade holder then supported from the shoulder strap. We know that for production the grenade holder went through the shoulder buckle but this was a good solution for me - not least as I didn't want to attempt cutting through the resin and creating a weak point.
-
With essential jobs getting done it was time to play around with one of the optional accessories - the stick grenade. This was printed by Empire3D based on a file by Jon Weger which I helped him design.
A pretty straightforward job of sand, spray putty, spot glaze and bondo, more putty, more sanding, then paint.
After a quick spritz of 433U (and drying time) I decided to work on the keypad, a separate piece that had been printed in resin.
First job was to mask off them apply a light brush of chrome to the buttons.
Once dry I masked the pad again and prepared to paint the large button using Toyota Super Red. I applied thin layers letting it dry between each.
Next I used dark aluminium to colour the other large button.
As the keypad tried I masked off the grenade end in readiness to give it a chrome finish.
Once the keypad was glued on it was job done! A quick and fulfilling day build.
But what is a grenade without a holder! So next job was to create a leather grenade holder fashioned on the screen references available. Using a dark brown leather 50mm strip as the base created a loop at the top, punched some holes and secured using Chicago screws. I then cut some slits through which I fed some 15mm leather straps.
I then added spas to the straps...
...and proceeded to weathering by using gun metal paint on the snaps and sandpaper to breakdown the leather.
Another job off the list.
-
A quick job for the back plate was installation of the PlastaZote foam 'wings'.
First job, measure and cut to shape.
Next, glue in place...
And job done!
-
As the build progressed a lot was getting ticked off the 'to-do' list, however, it felt like a high amount of little, yet essential, jobs were still piled up. One of the production accuracy builds I wanted to achieve for my kit was around the shoulder bells and biceps, and this was the focus of my next line of tasks.
I started off by making web plates that would inside the biceps and bells.
The upper snaps were to connect to the elastic from the shoulder tabs on the armour. The lower snaps were to connect the biceps to the shoulder bells.
Whilst the snap connection between bicep and bell is great in itself, production also used Framillon cord to connect the two together. The cord would be secured at the top of the bells and then pass down through the fish hooks on the bicep. I have been lucky enough to see first hand the Framillon used on the production made FOTK kits but, unfortunately, it has proved impossible find. The closest product I could find with similar strength is Stretch Magic in Clear 1.8mm, marginally thinner than the production used Framillon.
Having measured the length of cord I then attached to two web plates which I then glued in place at the top of the bells.
Between the elastic and the cord you can see how well the bicep and bell are connected and how well they hang.
At this stage I thought another quick suit up was in order to get a sense of how it was all coming together.
I'll admit, I was very happy, even if the pic doesn't show it
-
Back to the shins and time to attach the straps.I had decided to use a combination of web straps and snaps to form the closure for the shins. As I had done before, I started by cutting/sanding steps into the rubber straps to allow them to lay better behind the shins.
I then glued the straps into place using Loctite to bond the web to the inside of the shin.
As the webbing dried to the inside I glued snaps to the other end, ensuring that the rubber was scuffed and scored prior to gluing to promote better adhesion.
I then glued snap plates onto the back of the shins. Clamps really are your friend during this whole process.
And after sufficient gluing and drying time a test fit on the boots was in order.
Whilst happy with the overall fit I still wanted to add some stability to the shins so they didn't move around too much. I'll come back to this later.
-
My delivery from China arrived and once agin the team at The Imperial Factory had excelled. Their SLA resin prints are the best I've seen and require virtually no prep other than a good wash. The prints are from Fletcher Kinnear (NerdFord Designs). They are the closest to screen accurate on the market. With a few simple tweaks they could be 100%. I hope that one day he is open to a collaboration to refine them further.
A quick, simple job was to cut some black abs to provide the backing to the filters. A simple trace and cut.
Next I drilled out the centre of the filters to enable use of the production accurate M4 Hex bolt.
One of the glaring inaccuracies of the respirator design is the inclusion of strap holes on each side of the respirator. These were added for practicality - for people to add straps to go behind the head.
I filled mine in using Apoxie Sculpt and, once dr, applied a layer of 3M Spot Glaze and Putty.
With the glaze drying I moved on to priming and painting the filters - again in black.
It wasn't long before the respirator got a hit as well...
Once the paint had tried I then masked off the respirator mouth, which stays matte black, prior to hitting the respirator with VLG and a spritz of 433U..
I ended up with a little residue from the masking tape but I wasn't worried - there was plenty of weathering to come!
With the painting complete I then cut and shaped the respirator mesh and glued in place with hot glue. Importantly I was sure to double check the orientation of the mesh based on production reference. It's all about the detail!
With the respirator all but done I moved on to the goggles, and hit them up with black primer.
Once dry I attached the excellent resin nose tensioner replica from Guillermo Carbonell.
With each of my builds I always challenge myself to learn a new skill and for the Mudtrooper I had decided it would be airbrush painting. It was the perfect solution for the chrome goggles and respirator filters. It's a process I really enjoyed and adapted to very quickly.
First up was a couple of hits of Alclad Gloss Black.
Once dry it was on to the Alclad chrome...
Once the chrome had dried I went straight in to the weathering my coating both goggles and filters with black acrylic paint and then wiping away with a cloth.
Once wiped away you get a lovely grungy look to the chrome which leave it looking dirty and worn.
You'll notice I added the tension screwing the bridge. This was coloured using rub and buff. It's a simple thing but I see any Muddies forget to make the tensioner brass. It really stands out to me.In addition the filter outer ring and inner ring are different colours. The outer should be per the goggles - aged chrome - whereas the inner ring is more a gun metal colour.
With the filters complete I was keen to wrap up the respirator.
First of all I wanted to add the distinctive respirator buckles which I had tracked down in the UK. They came from the same vendor who supplied production. A true found part!
I was sure to give them a little sanding to give them an accurate look.
Next up was the threading of the buckle to the respirator. Again, the tan webbing is a found part and is an exact match to that used in production.
Many people glue the buckle to the respirator but, truth is, it simply rests on top once threaded correctly.
And once the strapping was done it was time to glue the filters in place to bring this baby home.
-
With the blaster fully dried it was time to do the weathering and breakdown. I love this part of any build. For this I chose to work with Vallejo paints using a mixture of Dark Aluminium, Gun Metal and Chrome. I use a combination of stipple sponge and brushes to get the aged effect. Weathering is all about layers and playing around with high and low lights. As I've learnt over the years it can be a case of less is more but I knew it would take a little more to get the right production look for the E-10.
And job done...
But of course it's important to weather the strap as well! Quickly achieved by stippling with the mud mix.
-
Having started weathering on the jacket it was time to tackle the pants. I had found heavy denim pants in a store so bout two pairs and had a local seamstress add the reinforced thigh patches for me.
Being store bought the pants did have rear pockets. Whilst they wouldn't be seen beneath the tunic and Plash I was still keen to remove them. Stitch picking ensued!
Next up I gave the pants a going over with the Greenland Wax followed by a blast from a heat gun.
I also sewed on buttons for the braces I had chosen to wear with the costume. I'd heard from an actor who played a Muddy that they wore braces on-set.
-
1
-
-
A couple of quick jobs occupied my next session.
With the helmet strapping complete, the TU screwed in place and the liner cut to size it was time to fix the liner in place. I didn't want to go hardcore with glue in case I ever needed to remove the liner so settled on using low profile body mount tape.
With the helmet done I moved on to another little job for my E-10. I wasn't happy with the taser braid supplied with my kit so tracked down some tin braid that looked much better.
I cut the braid to size and glued on the taser prod ends before using a little glue to ensure the braid wouldn't fray any more.
And with everything secure it was then case of gluing to the taser box on the E-10.
Another day done!
-
1
-
-
With the kit progressing nicely it was time to return to the shoulder tab brackets. I had determined how they would best fit to Jim's kit but there was a little work required.
First I needed to trim down the brackets. Easy done with my trusty tin snips.
Having trimmed them down I then checked how they would look in place prior to giving them a prime and paint.
I the used Apoxie Sculpt to build up a little bit of wall on the inside of the armour where the tabs would be affixed.
Once dry I used the Loctite Marine Epoxy to fix the brackets in place.
Once dry I hit it up with a little black to tidy things up.
Having cut a slit in the super strong bell elastic I threaded the tabs through...
And affixed in place using a Chicago screw...
Job done...
-
1
-
-
Having secured a pair of Highlander Spec Ops gloves a long time ago it was time to dig them out and rough 'em up to make them lived in. This was done various easily by putting them on and dragging them along rough walls.
I then gave the gloves a quick stipple with the mud mix.
And allowed with a splatter spray up using the production technique of paint mixed with water. I prepped bottles of grey, black and white.
-
1
-
-
Having weathered the helmet torch it was time to attach it to the TU. First I added the cable ties which are purely for aesthetic. During production they were used to attach the torch directly to the helmet.
Having cut the ends of the ties I then drilled a small hole through the aluminium casing, dropped a short bolt through, and glued it in place.
Once the screw had set in position I drilled a small hole in the bottom of the TU and glued the screw post in place. Job done!
-
Although I had the jacket beautifully tailor made I knew it was inevitable, and essential, that it needed to be bashed up. The first step was to give it a simple wash which loosened it up nicely.
Once dry I worked some Greenland Wax into the jacket, paying particular focus to the seams and edges.
I let the wax melt and dry in the hot sun - it didn't take long!
As the jacket dried I decided to hit up the armour with a touch up layer of VLG followed by the 433U spritz.
The main thing with the 433U is to spray from a distant and spray in short bursts. You don't need much to make an impact.
Next up, time to look at the Lower Web Belt and attached the boxes, both of which came from Paul Prentice.
First, I measured then masked the box positions...
I then marked out the screw holes...
And then screwed the boxes in place using countersunk washers to add some support around the screw heads.
I then finished off this session by creating the leather loop that would attach to the back plate and retain the belts.
-
1
-
-
At this stage of the wild I was waiting on some essential parts to arrive from China, namely the respirator and goggles which I had commissioned through The Imperial Factory. With little armour to work onI turned my attention back to my E-10 from 3DPropsNL which had been lying around half built since early 2019.
It is a fantastic kit which requires minimal finishing compared to some 3D blasters I've received in the past.
So after a few tweaks, some gluing of parts and a quick sand it was time for prime and paint.
As parts dried I turned my attention to the magazine covers. I had decided I would proceed without installing lights at this stage so simply used an old red plastic iPhone cover to create the red behind the mag windows.
I then attached the mag covers to the E-10 which was shaping up really nicely.
With the blaster on the table I decided to build the strap using the screen matched 1" webbing and buckles. Webbing was masked in place ready for sewing.
Really important for overall look and feel to weather details like the snap hooks. A little sandpaper goes a long way.
And whilst the webbing was out I ticked off another little job by adding the respirator neck cord loop on the back of the armour. A simple size, cut and glue in place.
I also took the opportunity to glue the shoulder straps in to place being careful to heavily score the underside of the rubber strap to promote adhesion and good bonding.
I also glued the strap on the inside of the back plate for extra strength. Oh, and added the snap plate for the leather belt loop too.
Once all was dry I could resist a quick test fitting of the upper armour.
-
1
-
-
With the shin straps now glued and dried it was time to hit them with some paint. Being rubber I decided to give them a generous coating of an adhesion promoter to aid the paint coating and drying successfully.
Once dry it was paint time.
It dried really nicely and cracking/peeling was very minimal.
As the sun shone I cracked on with more priming and painting. Next in line, the shins.
I really LOVE how the 433U gives an instant weathered and battled look and feel.
Painting continued as I gave the armour a hit of black primer and RustOleum flat black on the interior, and black primer on the exterior. You'll see in the pic where I taped off the webbing and snaps on the front chest, and the area I would glue the shoulder straps on the interior of the back. You can also see where the magnets are located for the shoulder strap connection on the chest.
Once dry I got to give the major armour pieces a hit of VLG.
-
1
-
-
One of the products I had to wait on was the Pantone 433U. It came from interstate and certainly took it's time.
Whilst I had chosen VLG over 350U as my primary colour I was keen to get the 433U to see how it worked as an overlay on the green. I wan't disappointed with the effect as I went to town on a few of the already painted pieces.
And whilst in painting mode I decided to tackle the Upper Belt Buckle which reference shows to be heavily distressed. Using liquid mask I got creative on the metal buckle supplied by Gian at PhiloProps.
After drying, and masking the leather belt it was time to paint.
Once the green had dried I did a very fine mist of 433U.
And then it was time for the very satisfying task of rubbing away the liquid mask.
One more little task to finish the day - cutting and attaching the Paracord to the helmet TU. Reference shows the Paracord to be knotted in a very particular way. After doing this I added a few drops of Loctite to keep the knot sealed.
I then simply stretched the cord over the TU and got it in to place.
-
1
-
-
Next up a little progression on the shins, adding the knee plates, a straightforward task made easier by the cool little plugs that Empire3D utilises that slot into the knee plate from the behind the shin.
Keeping focus on the shins I started work on the short straps and buckles provided by Paul Prentice.
In order to have them sit flatter I decided to cut/sand steps into the buckle and strap so they sit flush together.
After a good wash and dry it was Loctite time...
And as the short straps dried I went to work on the one straps, again cutting/sanding a step into the straps.
I then prepped the thick webbing that would glue the straps and buckle together, whilst still allowing for a little flex.
And then as the straps dried it was back to the shins to add the knuckles below the knee plate.
And once dry it was time to add another layer of spray putty.
-
1
-


")


JAFO'S MUDTROOPER BUILD (Jimmiroquai)
in Mudtroopers
Posted