Diet_Evil
-
Posts
35 -
Joined
-
Last visited
-
Days Won
3
Diet_Evil's Achievements
")


-
ISB Tactical Agent - CRL Discussion
Diet_Evil replied to IcyTrooper's topic in Imperial Security Bureau
Does anything need to be put in regarding the black stripe? -
ISB Tactical Agent - CRL Discussion
Diet_Evil replied to IcyTrooper's topic in Imperial Security Bureau
Was the breaking point seeing black? If so that could be the stipulation. If just seeing to much black I could see amount being appropriate. Alternatively since it seems it was intended to be no gap we could just chock gaps up to wardrobe errors and not account for them. -
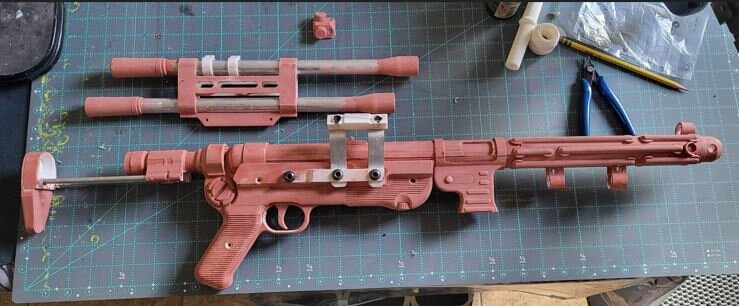
Paintings done, I think it's in a good place compared to what we see on screen. 3D with aluminum tube, bar, and bars, as well as hardware. Not sure if anyone's done some diving into what slings are being used, or if it's just the same web most of the imps use. I'll attach that once we do some digging and I start on soft bits. Looking forward to see what Deamos is able to do with more found and less printed parts.
-
Firstly, thanks. I was in love with this kit since we saw it in the teaser trailer. Its been a joy to be one the leading edge of making this. And yeah, I went aluminum bar for my struts so I could drill it without a press and bend it without having to use a blowtorch. I'll be looking into combining what we've cobbled together into a single file, as the MP 40 I used is far more complex than it needs to be for this build, and so I can model everything I've been drilling into it.
-
Here is one round of bondo and sanding, gonna give it a touch up in some rough areas add the remaining hardware and then start slinging paint. Need to figure out what kind of sling is used after that.

-
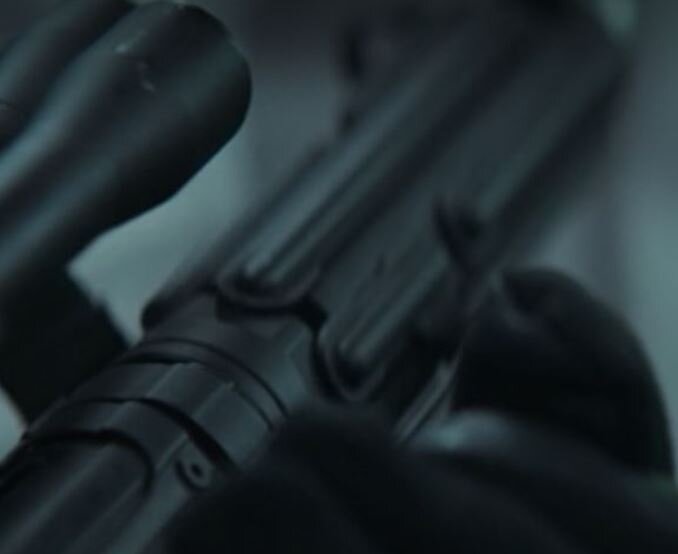
I see what you mean now. I still think its being kept of the main body by some struts, we can see those here But I think you're right that the top barrel is still using its mount hardware on a picatinny. This is what I think we are seeing, and I hate it as a way to mount a scope. Here's my mock up. Pink being the picatinny in question, right side pink is a more printed friendly version I'll likely use.
-
ISB Tactical Agent - CRL Discussion
Diet_Evil replied to IcyTrooper's topic in Imperial Security Bureau
IRL soldiers modify gear all the time, overseas the vest we got had kevlar necks, shoulders, crotch, we stripped them down to pretty much plate carries to make them more comfortable to wear all day. I'd imagine they are trying to show that this unit is highly specialized. -
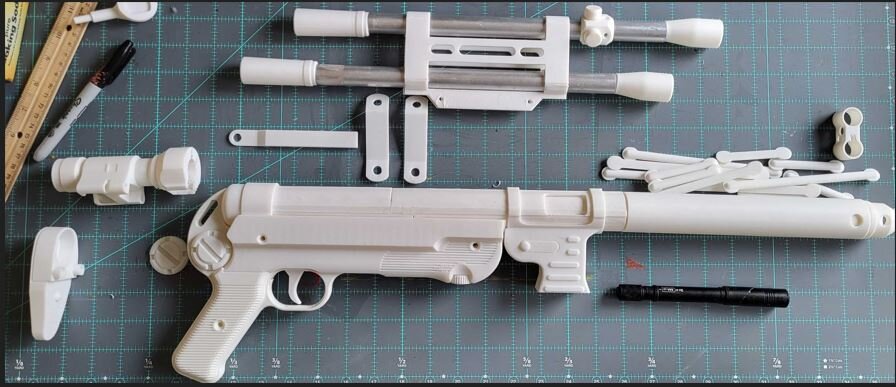
Good catch. For some reason my MP40 didn't have one so I've mocked one up real quick. Some other info I'm seeing new in this, the front holes behind the silver but look to have E11 style "C" greeblies on both sides. Looks like they reversed the MP40 sling attachment point on the front or at least have it in a similar place. The stock has the rear sling point. Im not sure that bit on the front of the scope is. You can see it on another before they enter, but it's clearly missing from others, and it's not on any of them in the hallway scenes. Maybe part of the stunt versions? I discovered that the side rails appear to be in three sizes. The front short rails are two long for the rear as I'm assembling (pics below, rear should in line with other rails), and closer inspection of earlier pictures in this thread seem to support it. I've got new shortened one's printing. (3rd post has links to all my files btw. barrel, rails and mounting brackets are about to be updated.)
-
Test fitting the scope mount I think the struts needs to be under not over the bracket (which makes more sense looking at it now) I'll more than likely replace the struts with metal once I have them figured out to avoid wobbly scopes. Over all here is what I have so far. For the extra long 4x20's I've used the SE14 files over on whitearmor.net to get the ends and the knobs and roughly 13cm (I'll verify this once I'm back at my table) of .75 inch aluminum pipe to extend it. On my hit list: -Need some metal rods for the stock -A pen light for the under barrel (the one in the picture doesn't look right). -Hardware for the mount and any open pin/screw holes on the print. I plan on having some bondo and sanding on it by Sunday.
-
ISB Tactical Agent - CRL Discussion
Diet_Evil replied to IcyTrooper's topic in Imperial Security Bureau
Fair enough, Im down for it. -
Working on the attachment point for the scopes looks like a strut attaching near the middle or upper middle of portion attaching the scopes together. I'm going to be using two struts. I wasn't able to catch a shot that shows more than one but given the thickness of them even made of metal I don't think one would be secure. As far as it attaching to the body of the blaster we can see a rail mounted to the side in line with the take down pins. I'll go ahead work on these next.
-
ISB Tactical Agent - CRL Discussion
Diet_Evil replied to IcyTrooper's topic in Imperial Security Bureau
Unless I'm mistaken googles and epic stash are the only unique ones. Everyone else is full armor and hat, chest rig and black stripe being the variation. This CRL is also stated to be the regular ISB Tactical Agent. That said I'm fine with optional hat goggles and right shoulder being included but we would likely want to word it so no hat must have chest rig and black stripe and that googles, and missing shoulder bell go together, as to avoid anachronistic combinations. -
ISB Tactical Agent - CRL Discussion
Diet_Evil replied to IcyTrooper's topic in Imperial Security Bureau
I noticed that as well but figured that was more of a character variant with him being the only one and also the only one with goggles. -
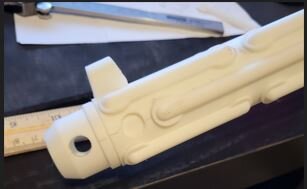
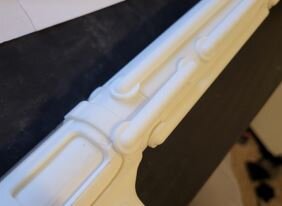
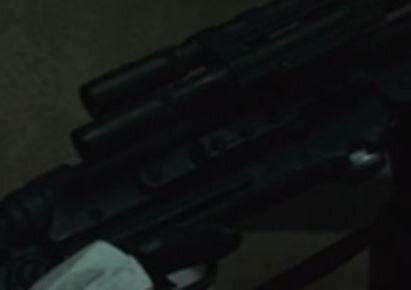
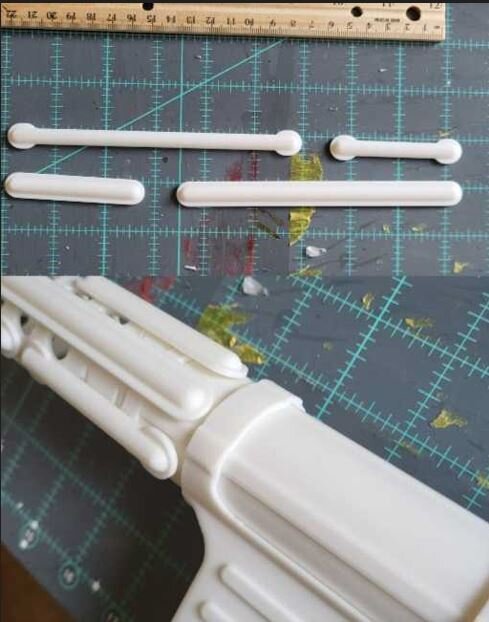
Here's what Ive come up with for rails. Initially I was going to have the rail "skirt" go the full length of the rail just like current imperial blasters, but from the above picture it seems to just be at the ends. Ive gone ahead and printed both and mocked both up for comparison. from the photos we have its looking like six rows with space on the top and bottom for the front site and mount for the flashlight respectively. After seeing them on the e10 barrel I think we can say with out a doubt its not e11 style. I've got a tube printing now with the one hole on the front we can see in the screen caps.
-
Honestly with this pic if it has holes it's not as many as the e11 if any. That said it gives us a very clear view of the rails. I'm going to fit them on the e10 barrel I have and if it looks off I'll go ahead and cover/fill/print without. Honestly I'm not sure which mp40 file I got, I tend to hoard stl's and forget to source them, we'll keep comparing notes. The tips one I made in CAD, DLT-20 is close but with what we see it's not what they used. I'll be providing links to all the bits I'm making (at least while we all figure this beast out) on thingiverse but I need to wait 24 hours before I can post as my accounts new.