DarthBerry
-
Posts
57 -
Joined
-
Last visited
-
Days Won
4
1 Follower

About DarthBerry
SpecOps Info

DarthBerry's Achievements
")


-
I'm up for whatever! My GML has a great camera and green screen so I can take some high quality photos.
-
Helmet bolts on! @RAIDER, do you have anymore edits you'd like to see?
-
New bolts came in from Imperial Surplus! Gotta paint them black and make the circle openings on the plastic into square openings.
-
Here are the V2 macrobinoculars printed at .2mm layer height. They look great! Any scratches or artifacts you see are just from the supports, I didn't do a perfect job. It has an inner and outer lip so you should be able to trim clear plastic and glue it on as a lens easy. Just let me know if you want this one and I can ship it out with the comlink.
-
I did a test print of the comlink - the V2 version was okay, but I adjusted a few things for V3 and reuploaded. It's available for free at the same link as before on Thingiverse. I'll print out the macros tonight, it would've been a 29 hour print with a .2mm nozzle so I've got to swap it to .4mm. I'm not going to do this costume but wanted to make sure the files print well, so if anyone is doing this costume you can shoot me a PM and I can send you the test print for V2 if you cover shipping. It's Bambu silk PLA filament on .2mm nozzle at like .14 layer height with 5% infill.
-
I tried another variation of the helmet bolts but I don't think my FDM 3D printed can do it justice, so I reached out to Imperial Surplus to get a set of the accurate bolts. For the boots, I added notches where the tread occurred on the boots, please let me know what you think (I'll clean up the grey overpaint soon): I also got a better suit up, I think it's looking pretty much there. I can do the belt and cod a little bit higher and the boxes a little bit wider next time.
-
How does this look (right old, left new)? I was also wondering what you were thinking for edits to the boot soles for L2. Should I fill in the middle portion of it and cut notches in there? Here's an old progress photo that shows the boot sole:
-
Sure thing, they're just 3D prints since I didn't want to spend $30 on a few bolts. 😂 I'll whip up a better design tonight and try it again.
-
Here's a bunch of photos to document strapping thickness:
-
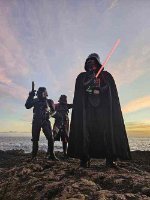
Here's a couple of awkward suit up pics I got as the sun was setting! The cummerbund & cod attach in a different way than my previous one so I'll need to dial in the attachment points before doing another round of photos.
-
New cummerbund came in! I gave it a paint job and compared it to the old (it is must larger). I should be ready for a suitup tomorrow.
-
You're building plenty of black armor these days! I just checked a recent buildthread on Pathfinders and they used the same clips you linked and it looks really good once they bent it. I'm just a RotJ Scout and working on a new SpecOps scout CRL so I'm not an expert on Shadow, but that looks good to me.
-
Well the suit didn't come in time and I didn't have enough time to finish it and do a suit up once it did! 😅 Test photos below and I'll be back from vacation to finish off the chest suit up hopefully with the cummerbund in about 3 weeks.
-
I made some L2 adjustments today and picked up all the materials for the jumpsuit that should be arriving tomorrow. For the boots, I changed the boot black strap to connect off the main seam but I still need to cut out the tread details. On the helmet, I started the groove filling process and swapped to some concave bolts. I also curved the bottom bicep corners for the extra detail. Hopefully I'll have time tomorrow to add the details on the jumpsuit and do a suit up, that should show how the helmet+tank stripes look together and if I should adjust them.
-
Tank rank stripes adjusted to be thinner, let me know what you guys think.