


Deamos
-
Posts
39 -
Joined
-
Last visited
-
Days Won
1
Content Type
Profiles
Forums
Events
Posts posted by Deamos
-
-
I'll hold off printing your barrel and bits to see how the sizing compares to using it on the AGM Airsoft base weapon I've used.
I'd say your scope mount sizing is pretty much there too and with a pair of 4x20's, one being cut down to only 5cm long added together should be about right.
Only query would be around the block i mentioned before - if it is a picatinny rail block on the side of the gun it kind of doubles up the mounts and if you leave the scopes original mounting points in place as it looks like they are in some of the photo's the part in your scope mount that joins both sides together (the joining bar with cutouts) and is on both sides gets in the way. So having it only on the front side of the mount would make it work.

-
Just looking at the mount from this top view we can see the original flip up sight is still in place half way down the body of the weapon. and what looks to be a block coming or attached the the side of the main body. Would you think is could be a picatinny rail mount?
-
Just a quickie for a real world castle nut this is the one i went for but any similar sized one fits nicely over the stock hole.
-
 1
1
-
-
That's a much clearer shot of the barrel than I've been able to grab and shows the front "nut" before the MP40 barrel would start is still in place there, with the new barrel tube/shroud applied past it.
I would say those long rails you've design also are like the ones i've added down the side of the main body above the rigger and handle area.
-
1
-
-
I've done a little colour correction on some of the gun photo's to get things brighter to see things better - one of these shows the stock is also filled in to make it solid and not open like the CYMA ones we can buy.
-
1
-
-
I'm puzzled over the barrel at the moment as while i initially thought it looked like an E11 barrel there looks to be a lack of any holes on it in one screengrab.
In this one in the reference forum post you can just make out what look to be "loops" that look to be about 2" long and spaced down the length of the barrel. The connection points appear to be slightly raised from the surface as well. I've taken a stab at them and will print out what i think i "may" be talking about for a better visual representation.
@Diet_Evil The barrel done does look good and if you have used the same 3d MP40 files their is a modded set which corrects the inaccurate front sight to one with the genuine more rounded shroud
-
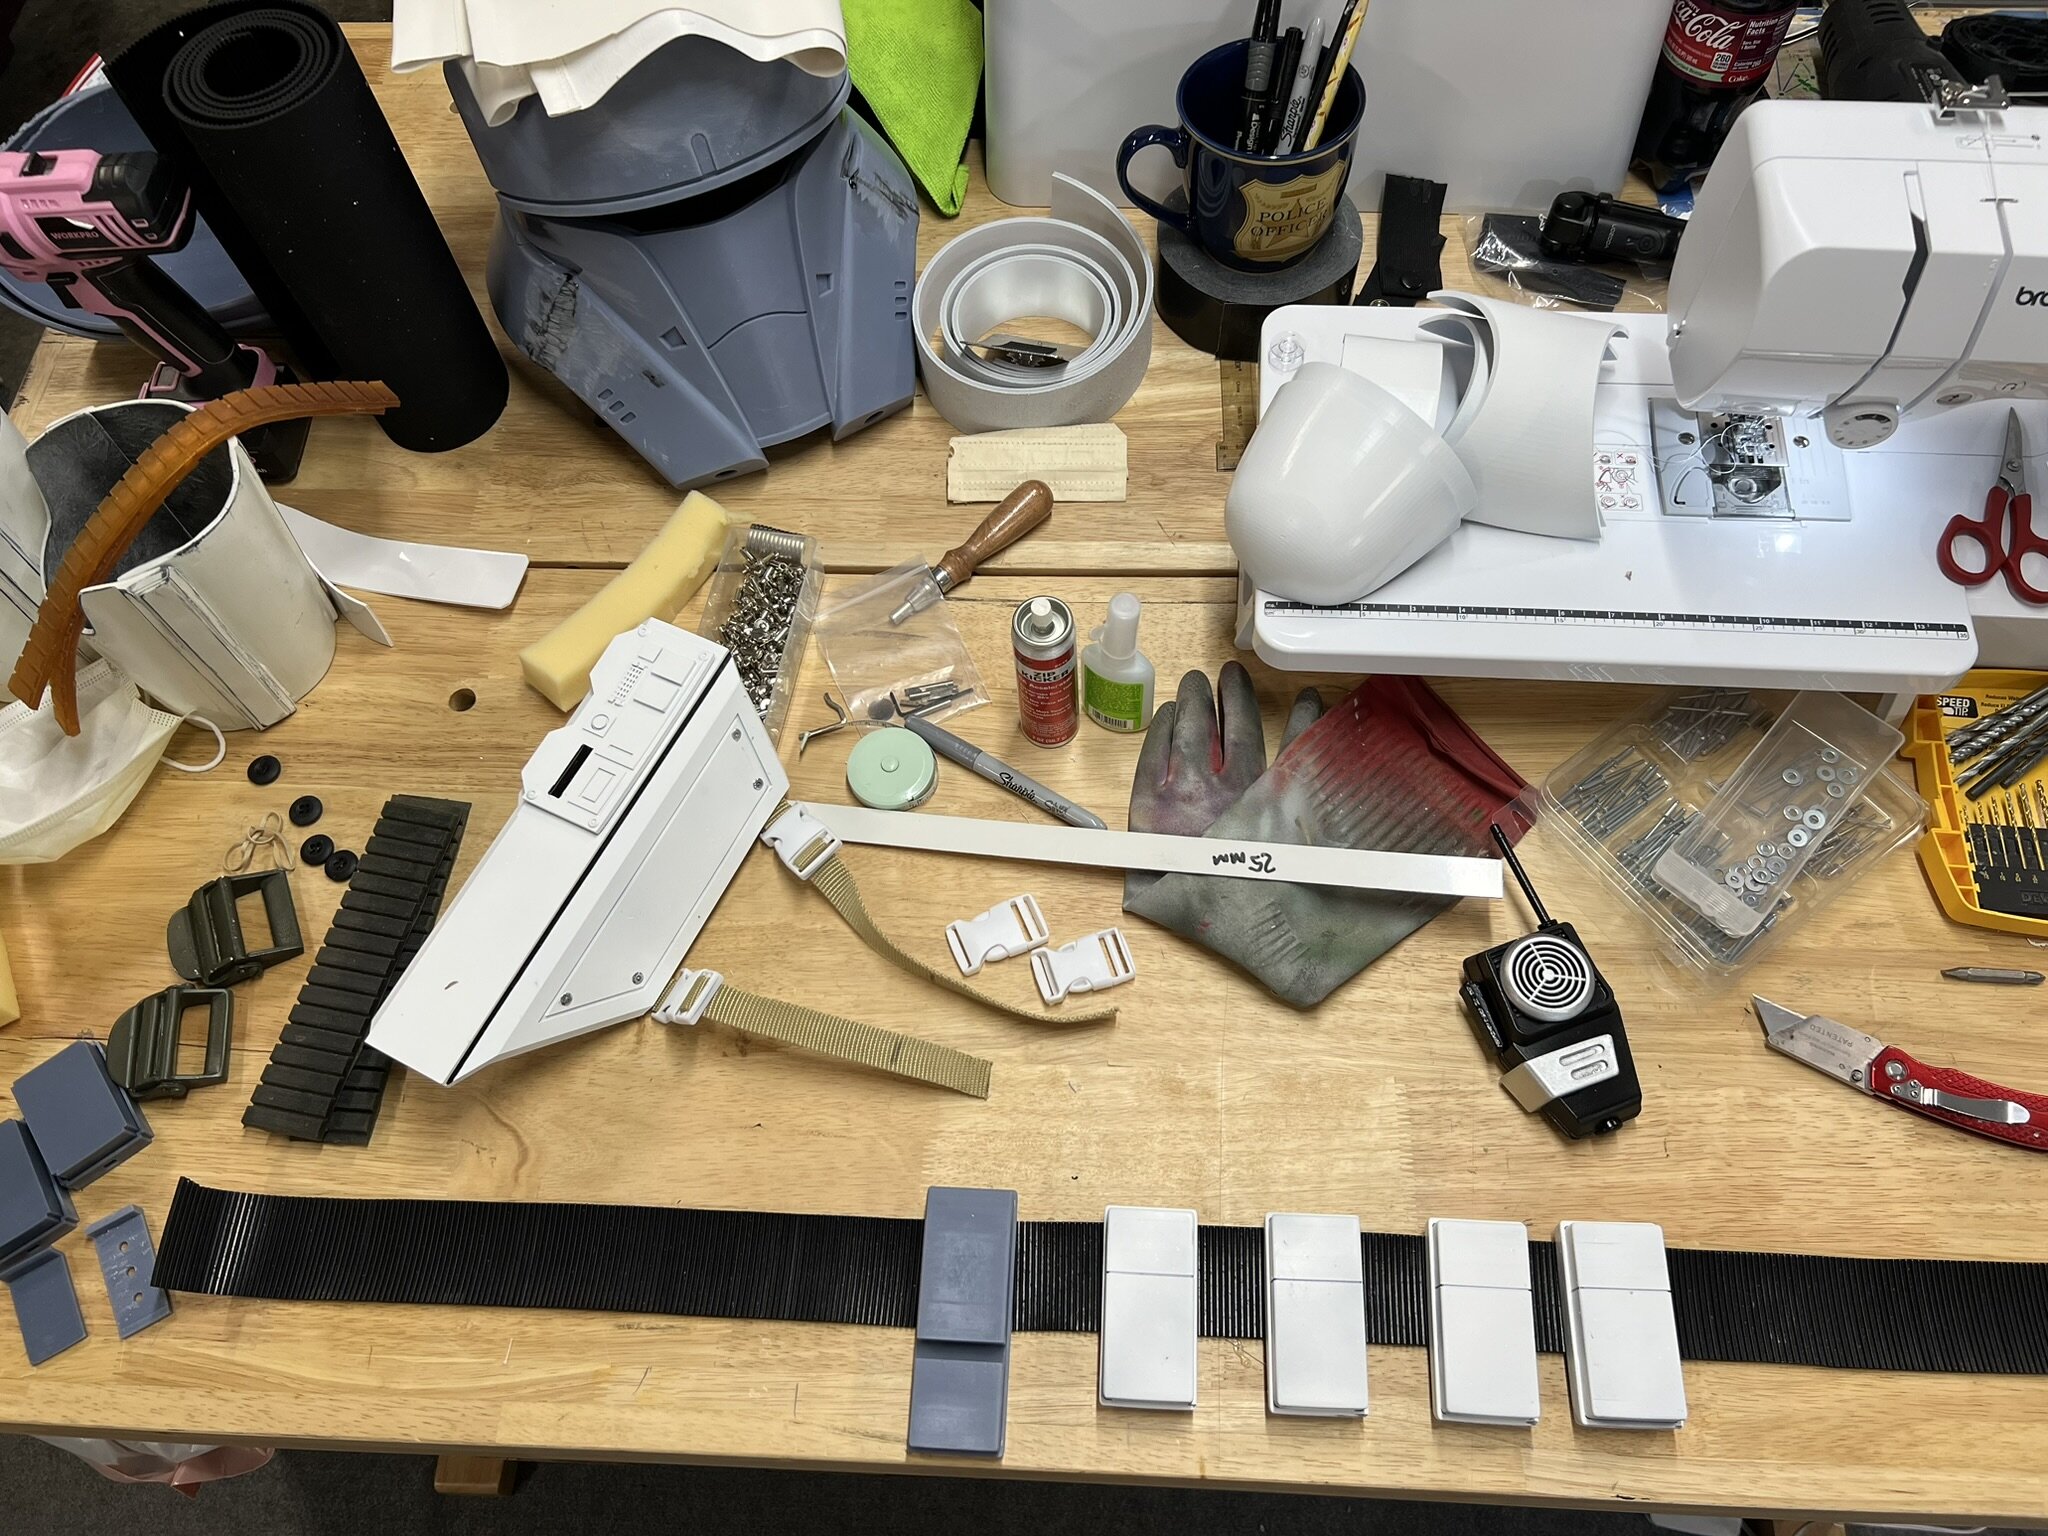
Small additions to the gun to try and match the blurry screengrabs.
Replacement Stock Cover:
1" Nuts bought off Amazon with a 3d printed larger screw sitting in the middle - one for either side.
Repainted Body release catch:
Pops out as silver on the pics so just removed and repainted.
Also the grooves that are normally above this on various shots are no longer there so look to have been filled in to distance it slightly more from the base weapon.
Scope Mount:
Knowing this was a complete custom part it tried out my VERY basic design skills to make one to fit older, vintage 20mm tubed scope. If the sizing is about right we'll need 28-32cm long scope so this fits nicely with scopes used on other blasters like the Original Model 7 4x20 - ones on order so as soon as it arrives I'll test fit it, the one in the pic is a cheap plastic one.
-
2
-
-
As far as my info's got the only real world parts are the body being the MP40 and the Stock being the CYMA PDW.
From the other information I've gleaned all extra parts were either cnc'd or printed as one offs.
So that's the barrel, scope mounts and all greeblies.
I've got most parts looking like the few reference shots so will post a pic tomorrow of my build so far - Posted some updates in my thread
-
I've had extra information that aside from the base MP40 the rest of the parts were all custom made either CNC'd or printed.
So time to try my crap design skills out at the dual scope mount 🙂
Adaptor was modified to fit the AEG airsoft model and threads added to allow the stock to be screwed in / removed as needed. This will be cnc'd hopefully to bolt on to the back.
-
1
-
-
Chest / back is now done and with the pauldrons and biceps attached.
Had a lovely time hitting them with a brick to get some good distressed damage to them so the weathering takes better 🙂
-
4
-
-
I think you may be right, it could do with a little less angle to it.
I'll get some strapping on it tomorrow and see what it looks like then.
-
13 hours ago, pyro said:
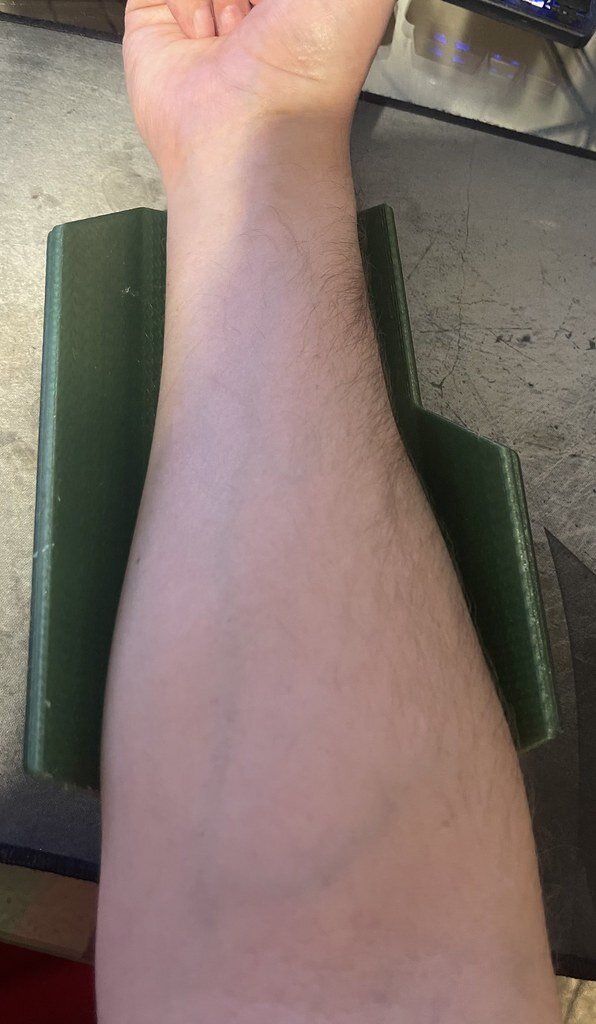
Got the right gauntlet printed but I am worried its to big?
Based on this last picture i'd possible say it's not long enough.
When looking at some of the reference pics when they have their arms holding weapons and in a "readiness" position the back is touching the bicep and wrist/hand plate. So they do look like they are covering the full forearm.
I'll try and get one printed and see on my arms - did you do yours at 100%?
-
17 hours ago, pyro said:
Dont know it this would work but you could try this, its a leathercutting tool to make belts.
https://www.amazon.com/BESTNULE-Leather-Cutter-Cutting-Adjustable/dp/B0BRH94KDT/ref=sr_1_3?crid=275ZUW6GM9YCM&dib=eyJ2IjoiMSJ9.9F-9EIpsmR83NYnLOVjyqfLoW58oC97UcTarMaOARDB3n3X--vlwt0QtSeaWM8gFT4coNhQDf2RLW_i0ytgQHNidsoDd0d3nLpcC6aUsclRucklcTapshFMWtt5pUewYMag_pYeKFsedAMU-_qxDUKvWFrzWGu2tfKBQW0890V0KXTsaGvYc8w_AUsuerH6_m2vid9o2c6EUpgoMJs3uKzwZsw5xcjwkg8ximO-sFKRhykw9u1onIGQGf0S8ZUrNlOrQlDjWE_8fCP1Bf003c3Hl89ffPDqZafjVA8Thk2o.cO5JPGvmKWXHEv5CKGLDb_C7KMdvv73_NROSfIelbsI&dib_tag=se&keywords=leather+belt+cutting+tool&qid=1749493481&sprefix=leather+belt+c%2Caps%2C164&sr=8-3I've got one of these for any leather work I do but the rubber was a bit "sticker" to pull it through and to keep the edge smooth and clean. I ended up using a fabric cutting wheel as that made a great groove and running it over it several passes went through in the end but needed the ally bar to act as a guide.
-
26 minutes ago, Blackwatch said:
oh, thats true!! i never thought about that. I know I can get a roll of it. Ill check with my local rubber house, they have a ton of stuff.
No worries - this first one was a little rough around the edges but I've now got a 2" wide section of aluminium bar to act as a cutting guide. Works perfectly.
-
2 hours ago, Blackwatch said:
Joe if you got a roll of that would you be willing to sell slabs of it to help a brother out (and recoup some of your cost)
TBH it looks just like what I used on my BSG knuckledragger costume for the vest.
More than happy to slice this large slab up, but bring over the pond it probably will cost more to get it to you than it’s worth 😢
-
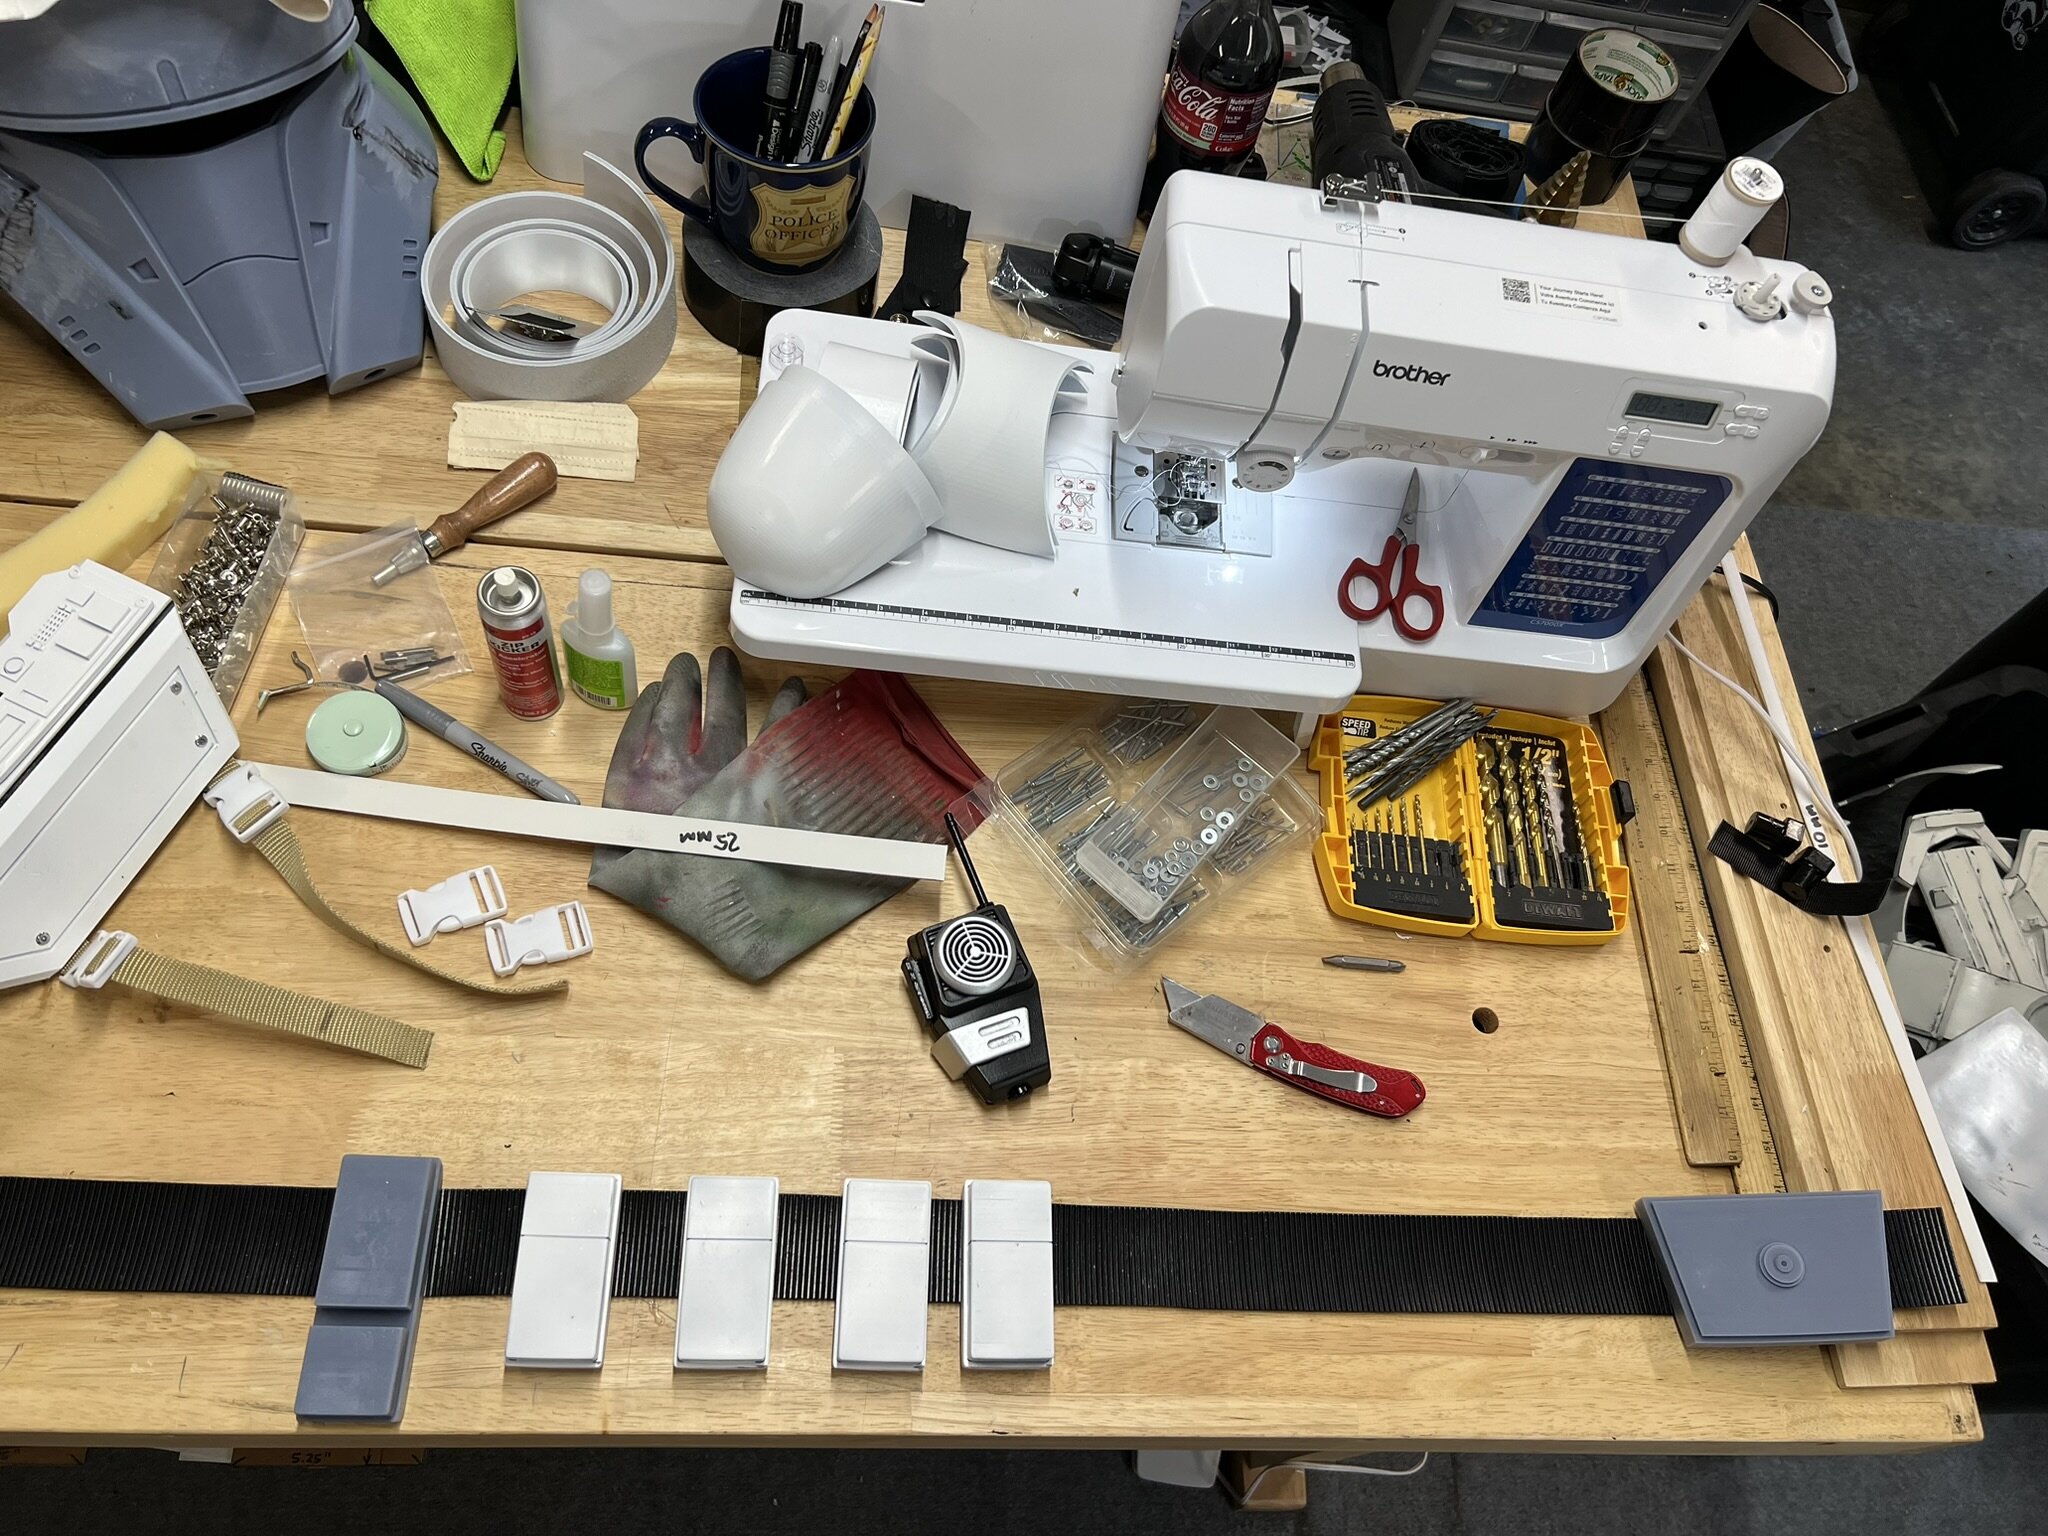
Rubber belts done and fits and hangs really nicely.
-
2
-
-
2 hours ago, Tarrif said:
I got some great material from Amazon. (Link: https://a.co/d/adajFKJ)
The rear portion of the ISB blaster is from the E-10D the Mudtrooper uses. Same stock, etc.
Yeah the Stock is a Cyma 416/AR15/M4 PDW Stock - there are similar ones but this looks the same as the mud one but also in the reference pics there is a distinct castle nut at the join to the main gun body. This one has that feature 🙂
-
1
-
-
Think I bought a bit too much rubber.... Got enough to test out creating 80 odd belts!!!!
-
2 hours ago, pyro said:
I’ve decided to use the Galactic Armory files for the black belt boxes, the back box, gauntlets and boot armour.
Are the belt boxes black? in a few shots they look like it but in this close up under the same lighting as the aluminium belt buckle they have the same sheen to them. So to me just look like normal R1 / Andor style boxes.
-
11 hours ago, Blackwatch said:
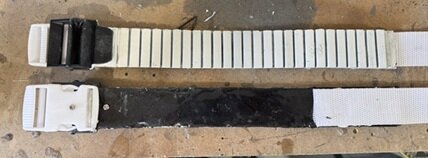
very very interesting, from struggling with my own I can see why wardrobe would want to put a regular white quick side release buckle on there. only weirdos like us would dare look at a boot!
Totally - from that shot alone it's also very hard to spot if they did the same to the top strap. But it does look like they did it too.
They only need to walk for like a few meters but guess even take after take you need to be able to have them functional more these days 😉
-
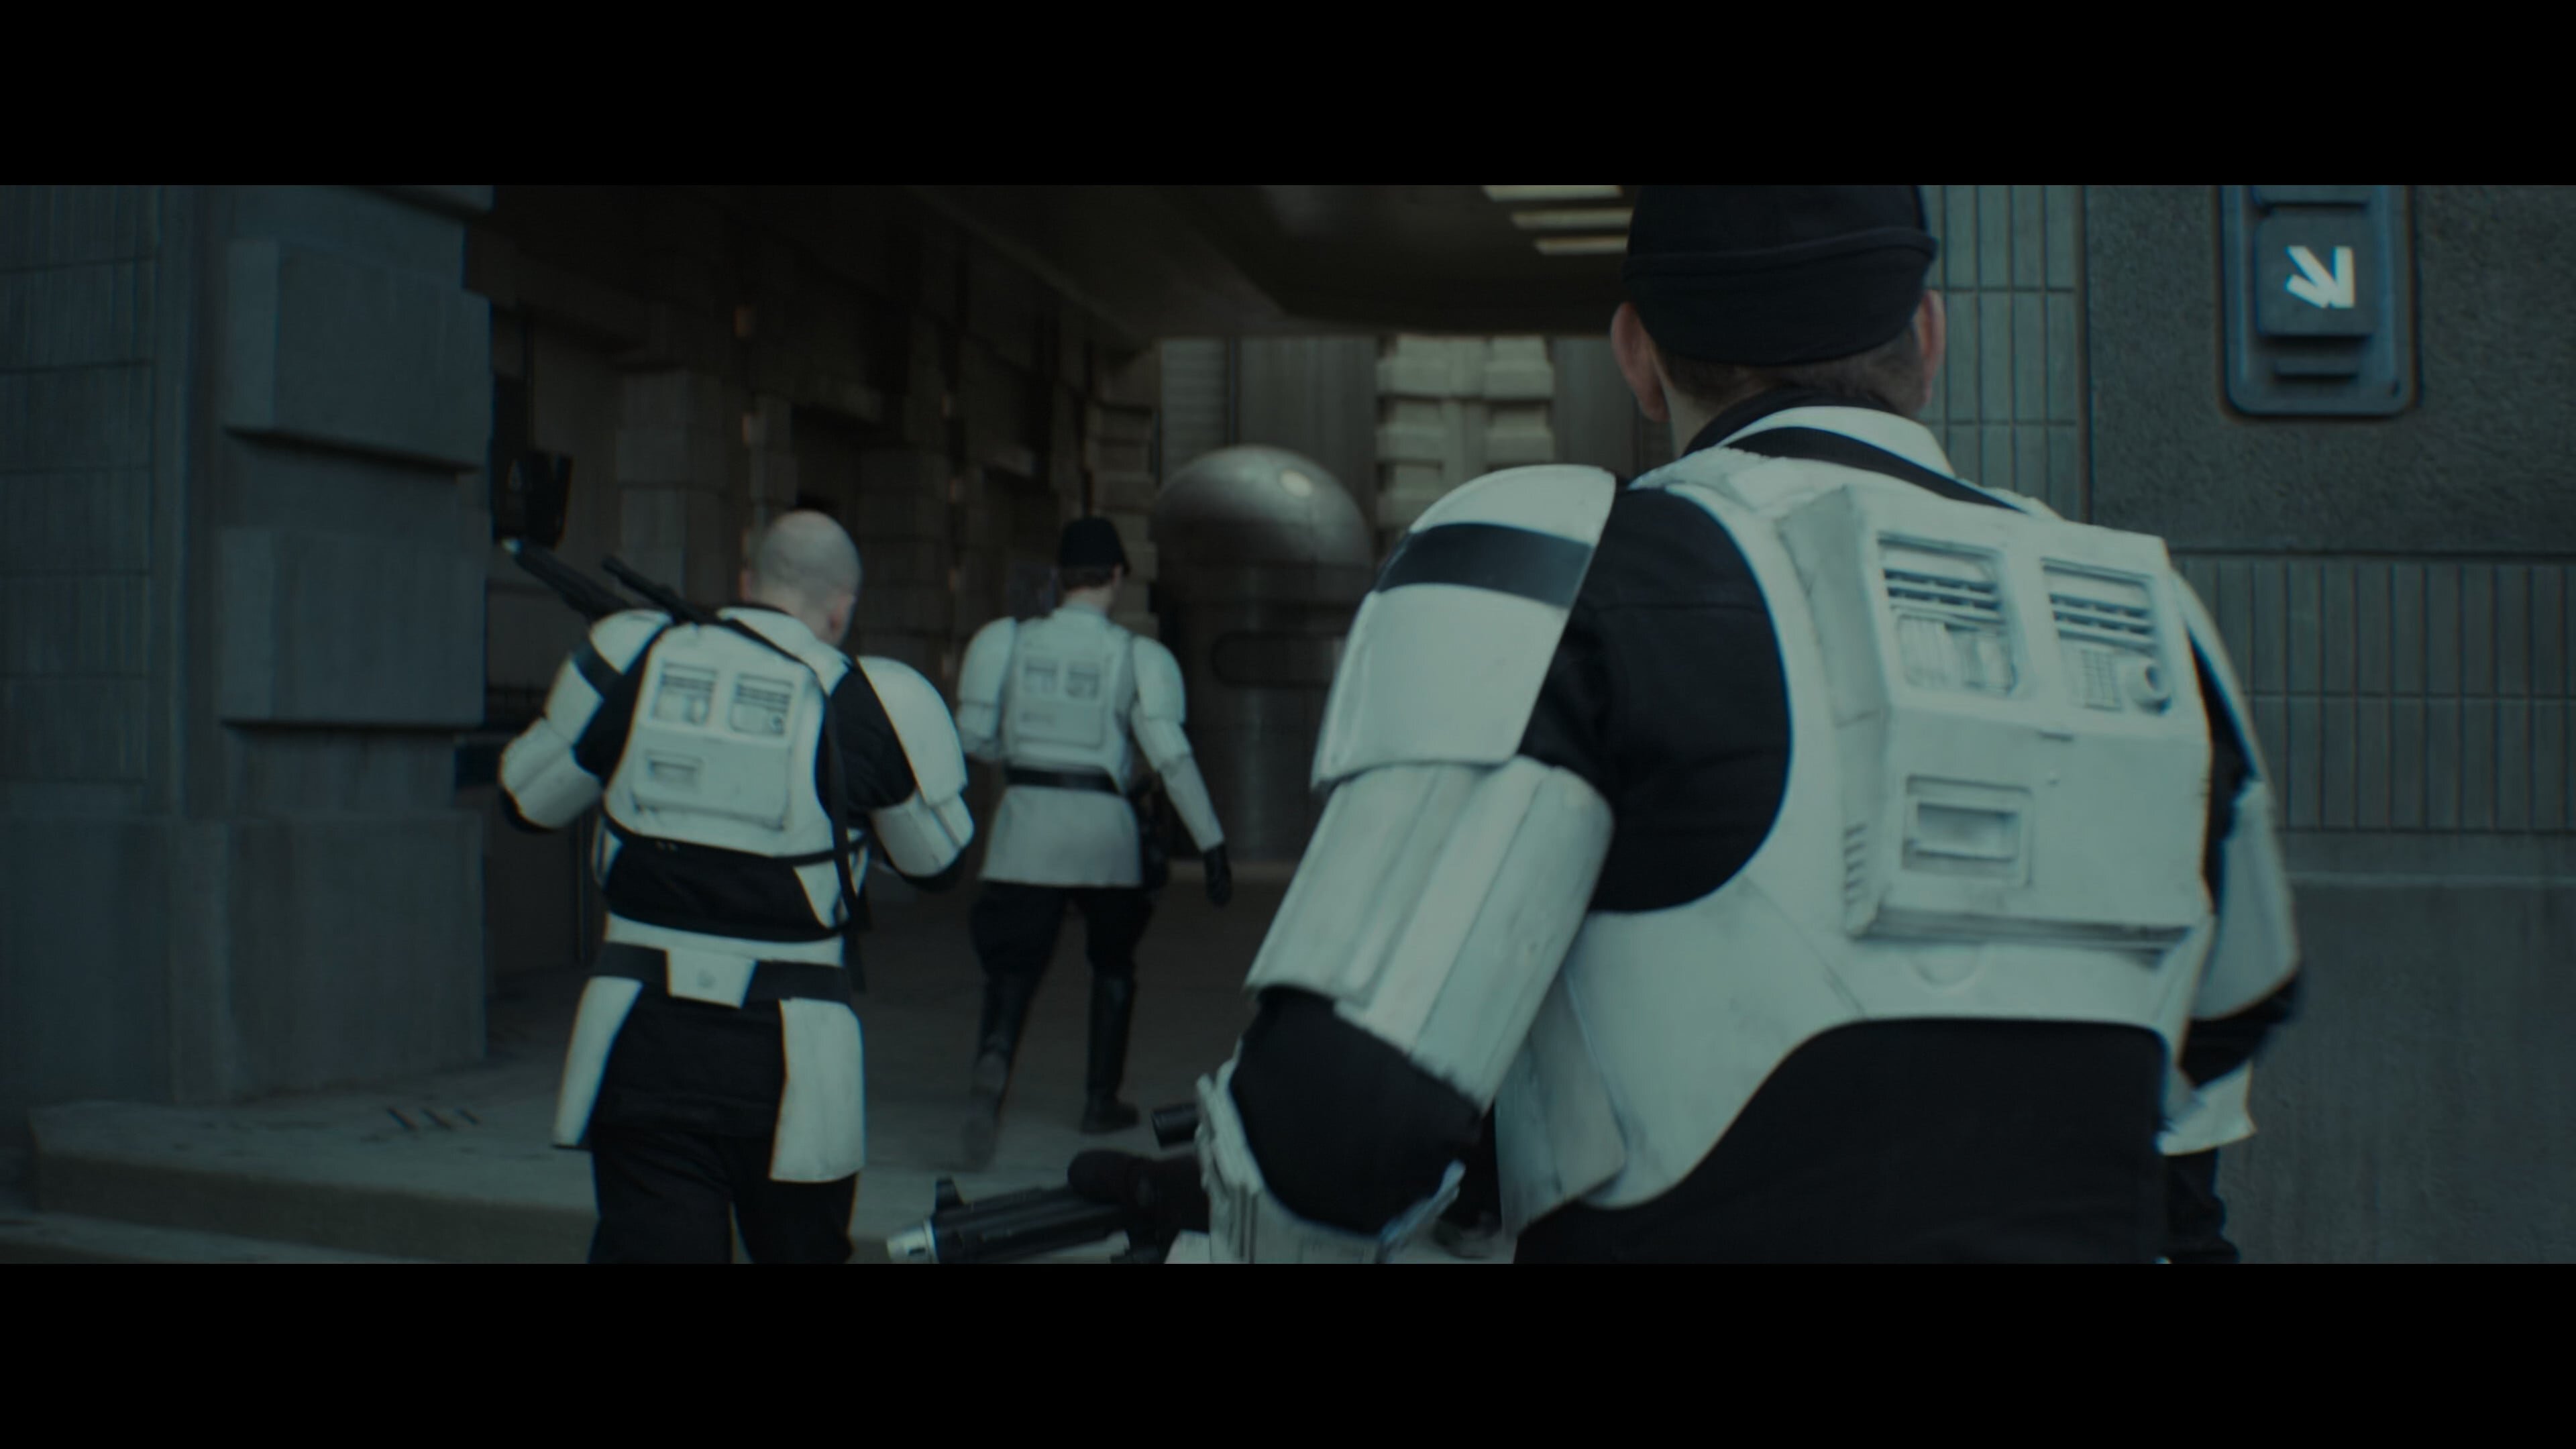
Just taking a look at this wide shot of K2 holding the blaster it looks a hell of a lot longer than the close up shot.
The red part is the magazine slot and then there is some barrel up to what I think was the nut before the e11 shroud starts. It does look a lot longer and thus probably a normal e11 shroud length.
So i'll try work out how to get the bit at the bottom mounted to it all.
This angle from the hospital show it more full length as well starting just after the webbing toggle:
For the scopes this is a better angle to show how they look really offset from the main body of the weapon - at least in this characters loadout.
-
1
-
-
17 hours ago, Diet_Evil said:
In regard to the blaster looks like they also moved the original barrel down flipped the front site post and used it as a brace to the shroud.
Im not sure how much faith we want to put in the black series figures blaster but it doesn't look like a standard sterling or e-11 shroud. A clear set pic of this would be a god send.
Are you using files or real world on the stock? I have files off my E-11D that just need the larger shoulder pad.Good shout on the barrel flip - i'll give it a try to see if i can get it to work.
On the stock I've goner real world using a CYMA PDW Stock for M4/AR-15 AEG with a printed adaptor on the back of the MP40 to screw it in to. Once my all metal airsoft turns up I'll try it on that too. One stunt and one hero is what I'm going for.
I've asked the prop maker on Insta if they have any info on the scope mount as that's what's baffling me at the moment.
-
1
-
-
13 minutes ago, Tarrif said:
You're right! I've never made an Imperial Belt before and just assumed it was stitching. I just ordered a leather grooving tool. Will probably use a pencil to lightly darken the groove once it's done to make it stand out. Thanks!
No worries! You probably see it'll be dark enough to stand out from the white leather without the pencil, but that's a good shout i never thought of to darken it up if needed.
-
1
-
-
Got one half of the leg straps sorted as well.
For the reference pictures looks two of the larger Shoretrooper straps on each calf.
The lower strap has a visible white buckle hidden behind the normal trooper buckle and then webbing attached to allow for quick suiting up.
The upper strap doesn't seem to be done in the same way so this could be more webbing hidden behind the strap and then Velcro used to secure it behind the shin plate. Still testing this one when I get more straps from Mr Paul Shoretrooper.


Diet Evils ISB Tactical
in Imperial Security Bureau
Posted
I bow to your modelling skills as to me that pretty much looks like what we are seeing - happy to test print if with you too