
merkava74
-
Posts
57 -
Joined
-
Last visited
-
Days Won
3
About merkava74
SpecOps Info
-

-
Costumes
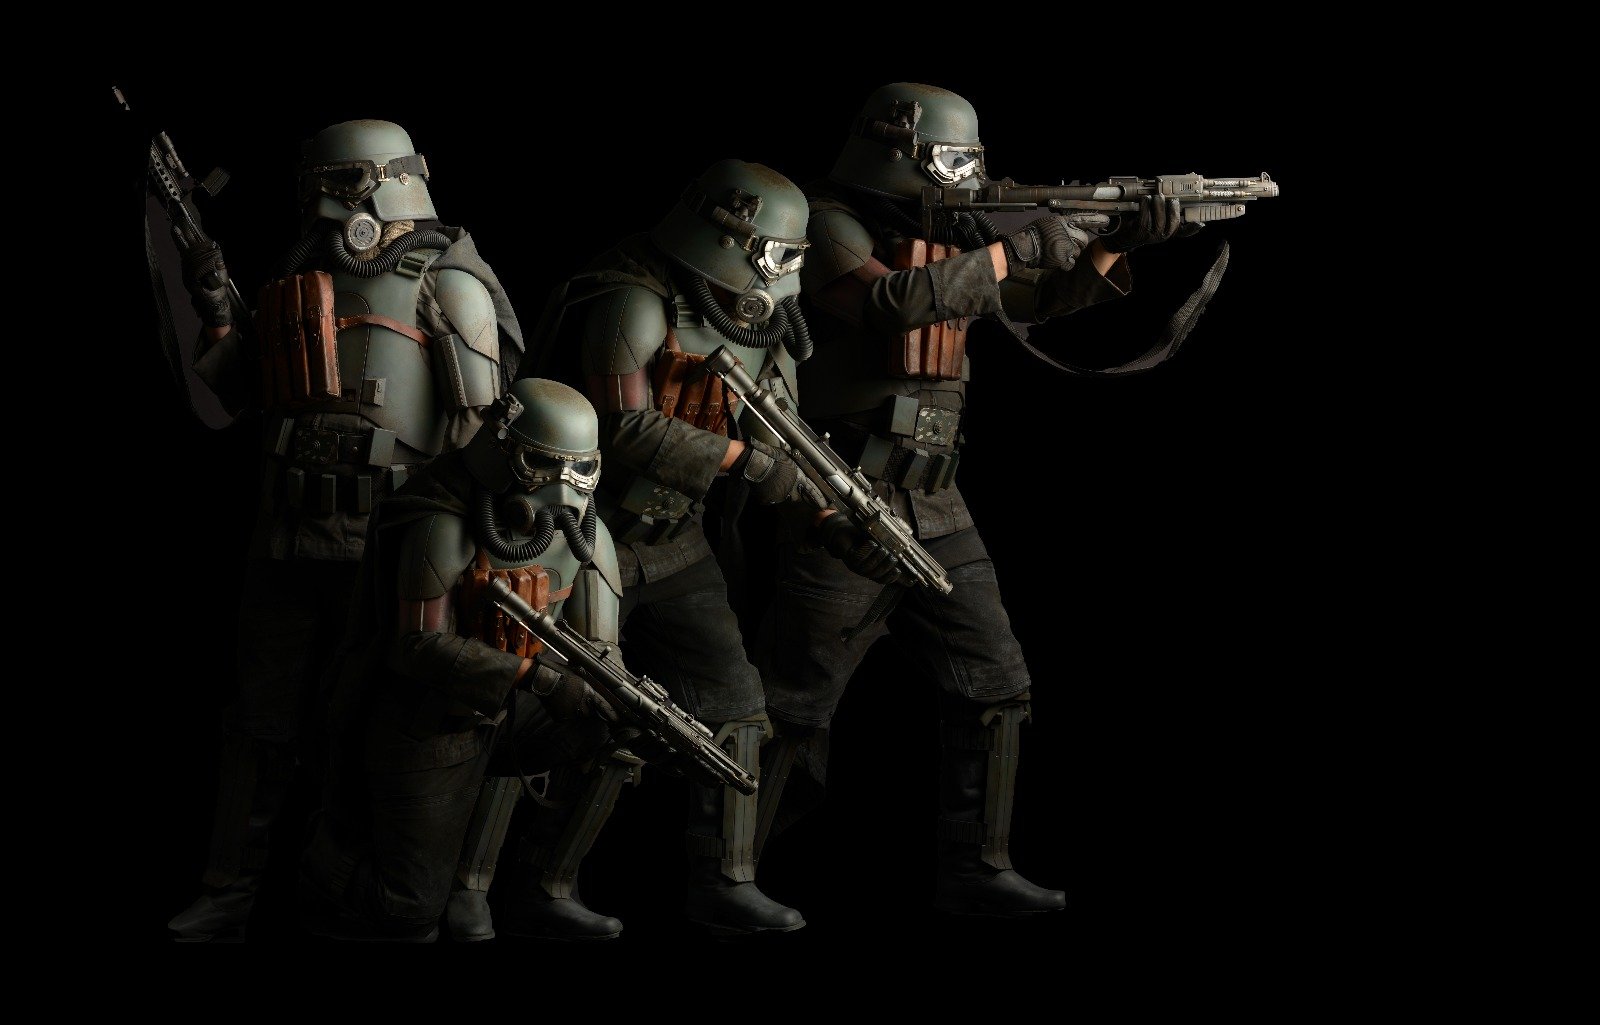
Mudtrooper
Recent Profile Visitors
147 profile views


.thumb.jpg.329cee120fd02f273f303ce8d71f9111.jpg)

merkava74's Achievements
")


-
So Photobucket has once again screwed my photos up. I'm migrating over to imgur, and will be reuploading all my photos again as I see some broken links. Give me a little time, thanks!
-
I wholeheartedly support the removal of bull denim. On the colours bit, I would like to raise the point that when names of colours are dropped, they are generally from a particular part of the world where it is readily available to be procured. For example, Montana Gold Yellow Cab. Not so easy to source in other parts of the world, and even more challenging to import aerosol cans by air. But I agree that it is good to stay true to the actual screen used paint since it is found. If I can suggest, adding the words “similar in shade to <actual colour>“ might provide some much needed allowance for those who do not have easy access to them, while staying true to the documentation of what was actually used. For consideration, thanks.
-
Sounds ok, except for the typo on image. Thanks!
-
Hi Darren, for the medic bicep, should there also be mention of the red insignia in addition to the 3 stripes? Seem to be missing.
-
 merkava74 started following PROPOSAL - MUDTROOPER CRL UPDATES (Complete)
 -
That would be my honour, David! Please feel free!
-
And I’m approved! First muddie in Singapore! Thanks to the Spec Ops team here (@Raider and gang) for your patience and time! Will try for Specialist once my bull denim material arrives.
-
FINISHED PHOTOS So I'm calling this build complete, and here's sharing the photos of my finished parts.
-
Thanks! your build is looking awesome! Love your large format printer!
-
87ninefiveone’s Mudtrooper Build (Sean Fields - 3D Printed)
merkava74 replied to 87ninefiveone's topic in Mudtroopers
Bottom one looks about right as a base. You might also want to consider using a black primer. This green will give it more depth over black compared to white or light grey primer. With weathering, and finally grey misting, it will look the part. Don't fret over getting 350U. Not worth the hunt, and you won't see it as a consistent colour in the end anyway as this is weathered armour, unlike a Magma for example where a particular shade of red makes all the difference. -
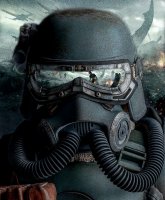
HELMET The helmet is pretty straightforward. Here's what I did from the photo below: At the back, the 1 big and 2 small magnets are to hold the goggles strap in place. The 2 holes at the side are for the Disc greeblies, and at the same time for the chin strap on the inside. The 2 stacks of magnets nearer the front are for the clips of the resp to hold the resp up. I used 3 x 20mm N35 rare earth magnets. Holds like there's no tomorrow! Drilled 2 corresponding holes on the helmet where the TU will be. And here's the TU in place for test fitting with the goggles and ear disc. Helmet was then primed black, and the "rubber trim" masked so I can spray the green. Remember to cut the trim at the rear to simulate the "break" in the trim. The helmet lining was taken off a skateboarding helmet, but the foam was still too thick and could not fit into the helmet. Trimmed it down, and added 3M VHB tape where I thought it would come in contact with the helmet and pressed it down. The completed helmet test fitted with the goggles and respirator.
-
RESPIRATOR With the completed discs (earlier post), I moved on to the resp. First, I cut 2 slots on each side for the straps to go in. I didn't want to glue it to the resp as I think this part is going to take a lot of weight from the hoses. If this comes apart during a troop, that's pretty much the end. Here's how it looks with the correct strap and buckles. Snug, slots are hidden, and really strong. This is how it looks on the inside. I then proceeded to shave the entire rim of the resp down to 2mm, in order to be able to receive the rubber trim around it. NOTE: After I did that, painted the whole resp, and attached the trim, I was told that there was going to be a CRL update that will make it inaccurate! THERE IS NO RUBBER TRIM ON THE RESPIRATOR. It was a painful thing for me as I have to build up the whole rim again with epoxy putty, and repaint the whole resp. Nevertheless, I'll show you my process WITH the trim, and then show you how I reworked it. Here's the comparison of the rim after I shaved it down to 2mm. The right photo is the original. Here's the resp test fitted with the trim. If it wasn't shaved down, the trim wouldn't fit around the rim. Resp base coated with black primer, shaded with Tamiya Field Grey. With the Discs glued down, rubber trim added and the whole piece weathered. This is how I attach the hoses inside the resp. Squeeze them through by folding them in half, then expand them inside again. It already holds its place very well, but I decided to go one step further and skewered rods into the hose to prevent them from ever falling out. And they are easy to remove too. Hoses attached, and resp misted with grey. This was where it was supposed to be complete, I posted the photo online, and received the news that the rubber trim was not going to be in the CRL. So: Used a 2-part epoxy putty and kneaded the rim back. Since I was re-doing it, I decided to remove the discs and refine it to sit better on the resp. Here's the parts repainted again. And this is finally how it looks completed (again).
-
87ninefiveone’s Mudtrooper Build (Sean Fields - 3D Printed)
merkava74 replied to 87ninefiveone's topic in Mudtroopers
Nice progress! Looking sharp! Remember to cut out the 2 larger rectangles at the bottom of the goggles. -
FABRICS The tunic and pants came from Jim's kit, while the cape is the Plash Palatka. Let me start with the cape. I wanted to make sure that the cape would be consistently worn every single time I trooped, in the same flow and shape, and easy to attach and detach. So here's my method: From the diagram above, first I lay the poncho on the floor, and I wanted the . bottom corner to be slightly off centre. The 2 orange circles are where I will sew magnets into the poncho. First, I find the right height to fold my neck line down (1). Then, I measure my shoulder width, enough for the poncho to reach to my chest plate to have the magnets stick under it. I marked the 2 positions, and sewed on the magnets. Note that at this point, (1) is folded back up. Then, at the same neck line, I folded the left side (2), and sew at strategic points so that the folds draping down are natural, while still hidden after I finally fol (1) down at the end. I do the same for the right side (2). And finally, let 1 drop down naturally, covering the hidden sew lines, but kept the whole cape in 1 consistent shape. Here you can see the magnets sewed to the corners where it will go under my chest armour. Here's the cape laid on the floor weathered. The shape stays no matter what. And here it is on my mannequin. Again, same folds stay in shape. The tunic and pants went through the same weathering, which is basically acrylic browns and greys applied using a rough sponge. The Imperial Cogs sewed on. Finally, a shot with the armour to check that the weathering blends. See how the cape sits nice on the shoulders. I get this every single time I put it on. Same spot, same folds.
-
PAINTING ARMOUR Here, I will be doing the 2 shoulder bells, biceps, chest and back armour. I added 3 snaps to each shoulder bell. 1 at the top, slightly forward for connecting to the chest armour, and 2 at the bottom for attaching to the biceps. The biceps had 2 corresponding snaps which I do not have photos for. I masked up all the snaps, and sprayed 2 layers of Plasti-dip on all the items. I made sure that I had glued everything on the inside first before Plasti-dip, as I heard horror stories of the rubber peeling off together with the snaps. Here's everything Plasti-dipped. After priming them black, I shaded with Tamiya Field Grey and Tamiya Red for the right bicep. Edit: I did in the end get my auto paint guy to mix the Toyota Red 3E5 and Montana Gold Yellow Cab for the right bicep as required for Specialist approval. But you don't need to get the exact colour code as long as it resembles the same colours. Same with the chest and back armour. Next, they were weathered with blacks, greys, raw umber, burnt sienna. The biceps yellow stripes were also added, and the biceps weathered too. The whole set: The chest weathered too. I was careful to make sure it was more weathered at the bottom than at the top. All the armour parts weathered till this stage. The final step to the weathering was to mist it with a grey, to simulate the Mimban mud dust. It knocks back the weathering a little, and ties everything together very well. Here you can see the effect, that they are lighter. Then they were sealed with a matte clear coat. Added the 5mm foam to the 2 sides of the back armour. Could not resist putting it together on my mannequin to see how it all looks.
-
RESPIRATOR DISCS Or filters. Whatever they're called. Jim's kit was not the level of accuracy that I wanted, so I cut out the existing discs, and got a friend of mine to fabricate 2 aluminium ones using the 3D files available. And here it is cut out. The diameter is 80mm. And here are the fabricated discs. The circular lines you see are not uneven. They're just reflection of the different grains used during the cut. It's smooth. Here they are primed with gloss black, ready for Alclad Mirror Chrome on the outer rim. Alclad Mirror Chrome applied. I then masked around the chrome, sprayed the center black, and then shaded with Gun Metal, and then weathered the whole thing with... again raw umber and burnt sienna, attached the isopon wire mesh below, and then added a piece of black foam below that so that it pops and cannot see through, and then finally secure the M4 hex bolt and nut. Done!

