Jeditid
-
Posts
92 -
Joined
-
Last visited
-
Days Won
2
Content Type
Profiles
Forums
Events
Everything posted by Jeditid
-
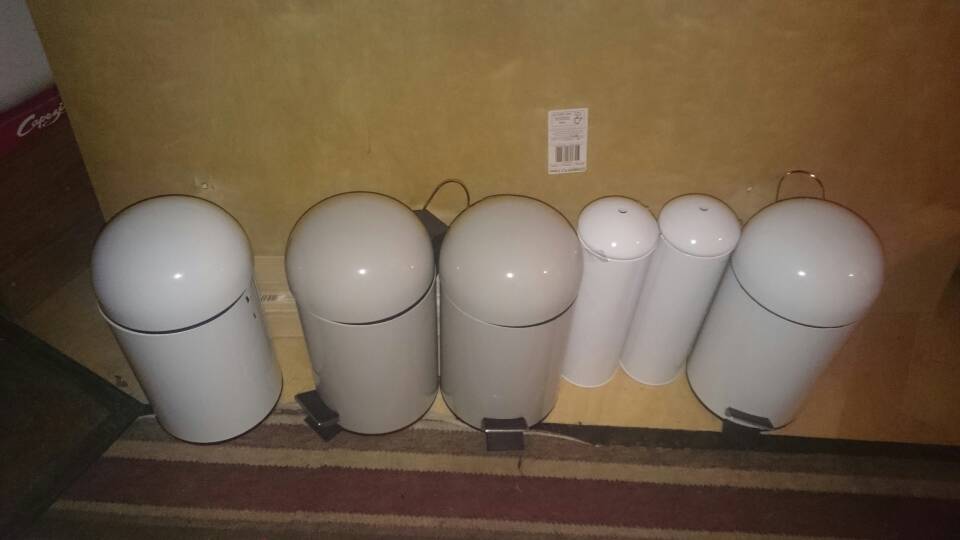
I'll check the overall length tonight for you. Each tank is 2 waste bins on top of each other. Joined in the middle. I think real tanks will be really heavy, I Scuba dive and there's no way I'd costume with those on my back. Sent from my D5803 using Tapatalk
-
So best get some other bits too, tanks are moving along nicely. Will post some more pics at weekend. Sent from my D5803 using Tapatalk
-
Sent from my D5803 using Tapatalk
-

Nick Havard - FlameTrooper - Many Questions for Build
Jeditid replied to nickorossa's topic in First Order Flametrooper
does anyone know of a small smoke machine or how to make one ?? as smoke combined with orange LED's would be ooooooooooooooo so nice -
Every day a step closer Sent from my D5803 using Tapatalk
-
Are you able to provide them in an stl file. Btw I have no idea what this means, just what he asked for lol Sent from my D5803 using Tapatalk
-
Hey Kevin what's the scale with these files. My buddy who's going to print it says they look tiny? Sent from my D5803 using Tapatalk
-
Hey guys Met an actor called Phoenix James at the weekend- he was a TFA stormtrooper and although not a Flametrooper he did try on the costume. So I took the chance to ask some questions about how the tanks attach to the armour. His memory wasnt the best mind ! but what he did say was this : 1) the tanks we separate and attached to the frame 2) the backpanel of the armour had a specific backplate fitted inside it so that the tanks could be attached and removed. 3) he could remember having shoulder straps with webbing as we'd originally all thought 4) He believed the frame / backplate was attached to the armour and the tanks attached to this (as we all thought) so the end result was that we thought the frame attached to the armour via the backplate within the armour, probably with pins and split pins to hold in place. Gives a different thought on how this holds together and means that the tubular frame and how this is made is quite key to the build and that the tanks all "clip" on to this. I'm at a few more conventions trooping this year so will keep an eye open for Flametrooper actors to dig a bit deeper.
-
No not seen these. Mind you I'm going to order Christopher Zuks flamethrower next month :-) Sent from my D5803 using Tapatalk
-
Interesting that there are no black screws showing on the cylinders on this version. All.other photos show them Sent from my D5803 using Tapatalk
-
Awesome Sent from my D5803 using Tapatalk
-
Not yet as I need to fix the back pack bars. Once that is done I'll be able to test Sent from my D5803 using Tapatalk
-
Time for another update All Tanks are primed, next job is to spray all tanks, complete and spray the central and begin putting them and the central band fully together and make permanent. Have to get some Red perspex or something for the red lights on the tanks and I've left spaces so I can add electronics later if I want. Then its on to the rear tubing to create the "backpack". Then its on to the tubing underneath and working out what exactly is going on behind the main tanks. IMG_20160316_203539 by jeditid1973, on Flickr IMG_20160316_203429 by jeditid1973, on Flickr IMG_20160316_203344 by jeditid1973, on Flickr IMG_20160316_203314 by jeditid1973, on Flickr
-
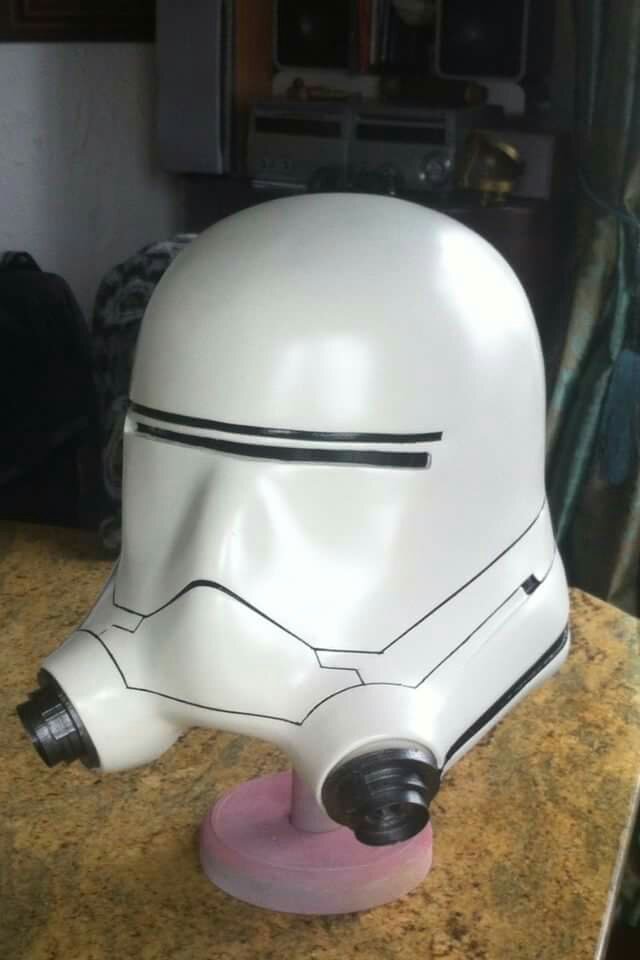
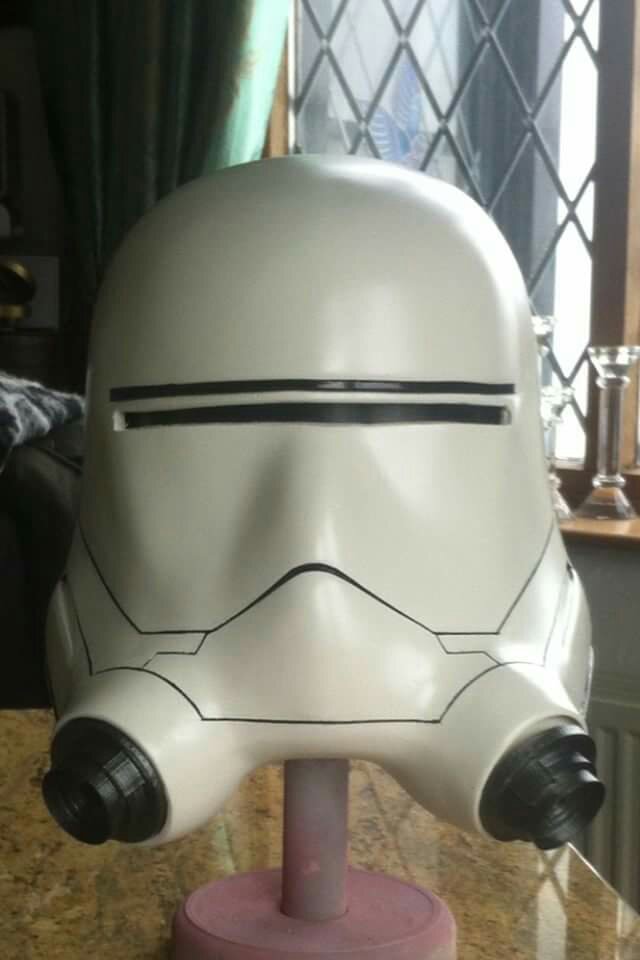
So just some boring updates, filling, sanding, filling, sanding, but have got the dome ready for fibreglassing for the small tube. Sent from my D5803 using Tapatalk

-
Would love you see what's going on behind that backpack, and underneath with the tubes etc haven't seen a clear picture yet. Sent from my D5803 using Tapatalk
-
Haha, thanks the bins were a good find. It's also great as the bin liners themselves are the perfect to make black "gasket" arrangement on the tops of the tanks too ! i think the funny thing with his build is that I suspect I wont be able to fix the central band properly until lots of other things are completed. It provides access to the bins and their attachments and will end up hiding a lot of the joins, bolts etc. I'm going to also get some 1" tubing later as I think I can fit the tube within the central band frame, making it even more secure. The only time I've seen the rear of the whole pack is on the 12" figure I have. So that looks like there's even more stuff going on behind the pack, none too taxing though as I think Plywood can do most of it. onward and upward !
-
Tanks are fixed in place now need to start sculpting the central band properly and think about lids Sent from my D5803 using Tapatalk
-
So tanks are now able to be fixed in place. Proportions seem right. Need to finish off edging and sculpting on central band then I can start thinking about lids/tops. Sent from my D5803 using Tapatalk
-
So needs all lining up and now gotta work out how to fix the tanks to the central band to stop them moving. But generally pretty pleased and looks OK. Sent from my D5803 using Tapatalk
-
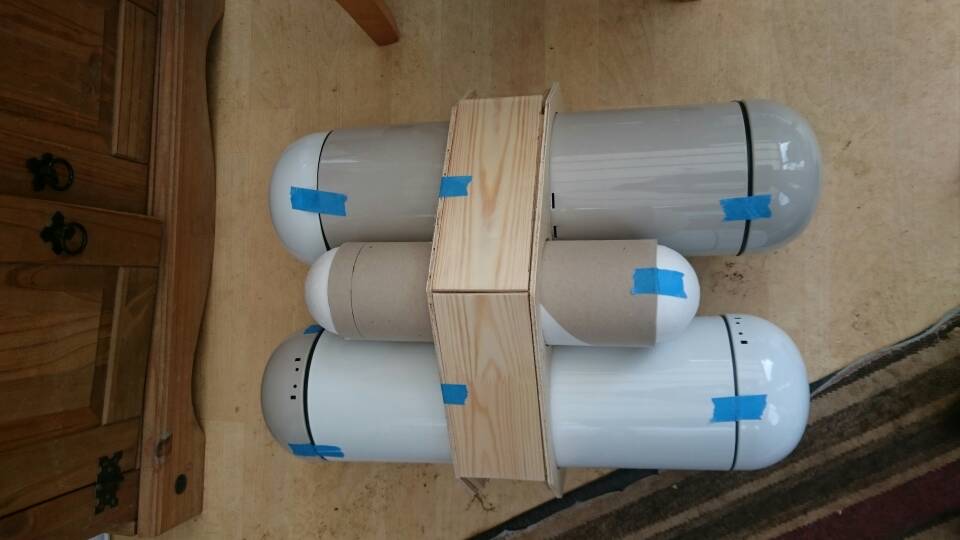
So started this weekend on trying a first build on the tanks. Sent from my D5803 using Tapatalk
-
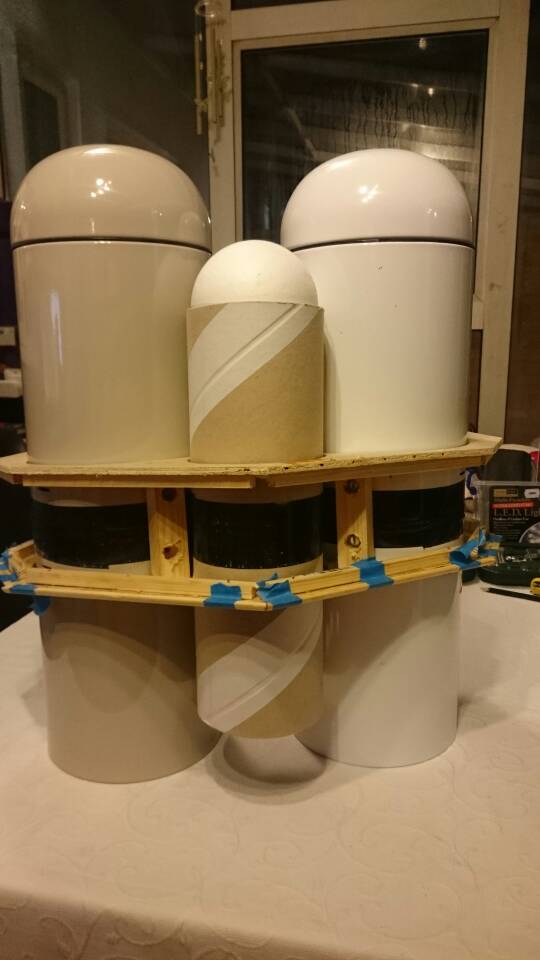
So just quickly mocked up how the tanks and central band will look. Dimensions seem about right, now have to figure put securing the tanks in place and getting it all fitted together. Sent from my D5803 using Tapatalk
-
Sent from my D5803 using Tapatalk
-
I'm agree with these, if you look at the hot toys photos the top of the tanks is allowed to pivot away from the back by the attachment at the waist band. I reckon the tanks are bolted to the backplate of the armour and then the bolts at the shoulders hold webbing which goes over the shoulders and connect to the waist band. Look at how a divers bcd or wing works thats what I think it's similar to. Sent from my D5803 using Tapatalk
-
Marking the template for the central band Sent from my D5803 using Tapatalk
-
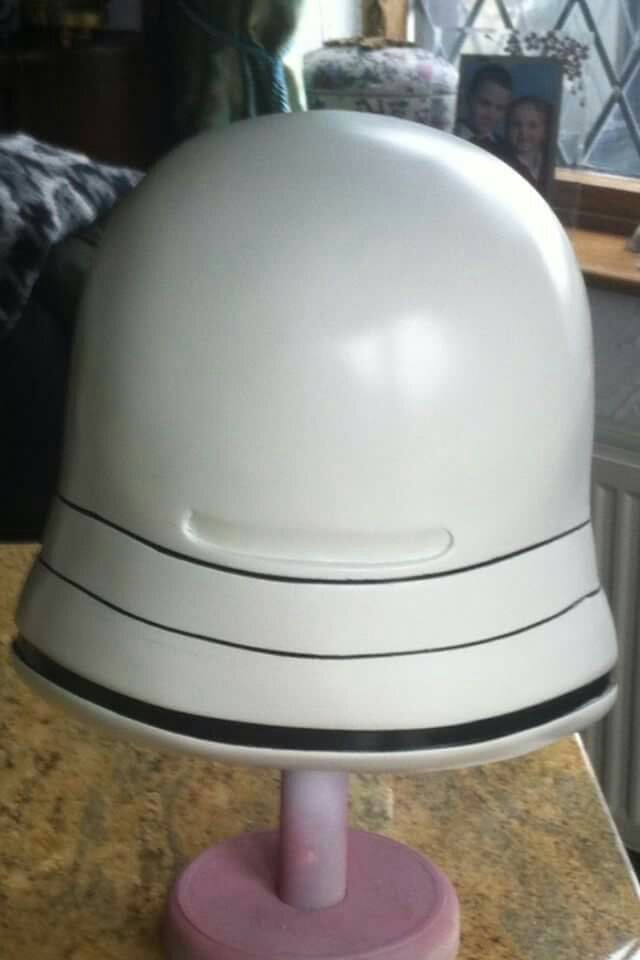
And here's my lid Sent from my D5803 using Tapatalk