PaulM
-
Posts
51 -
Joined
-
Last visited
-
Days Won
3
Content Type
Profiles
Forums
Events
Everything posted by PaulM
-
I’m completely redoing my audio system. I have a Ukswraths system and was thinking of adding a iComm voice modulation to it. I was wondering if anyone has done this or not. I’m keeping the amp and changing out the speakers to a different style. The DT chatter from the MP3 player is getting changed to a finger trigger system. So just curious on what everyone thinks.
-
I haven’t been on in a while. I would have to say you’re doing a great job keep it up.Your blaster is most impressive. ?
-
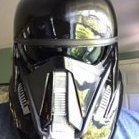
Finally after 2 1/2 years with a lot of ups and downs I can finally say TX-83111 reporting for duty. ?
-
Funny you say that. That’s in my top three. ?
-
Thanks I will ?
-
Thanks, You will get there ?
-
Its been a long road but I finally submitted my pictures. It's been a great journey on this build with lots of ups and downs. I will defiantly take on another project like this. Thanks to everyone on and off this forum it's been a trip. https://imgur.com/17IMgrd
-
Thank You ?
-
https://imgur.com/a/QgHdpr1 One more piece to the puzzle.
-
I’ll most likely shape the front of the spat to the boot and then secure it better so that it won’t move around.
-
Yes that’s what I had to do. The problem was is that I couldn’t get them to close around my ankles with the boots on. I might down the road 3D print some new ones.
-
Hi, Jim’s kit is pretty easy to work on. It’s all trimmed and easy to sand if you cut to much off it’s easy to fix. Most of the trimming I had to do I used a dremel. The only real issue I had was the shins. I had to mod them to get a better fit. The paint I used was Rustoleum appliance paint. It went on easy and I didn’t have to clear coat it. Hope this helps you. If you have any more questions feel free to ask I’ll try to help you anyway I can.
-
One more. I inserted a piece of a coat hanger on the front of the covers so it would form to the boot better. Also incorporated the laces and velco to hold it better to the boot. Hopefully it won’t shift around to much.
-
-
-
So let’s try this again. Let me know if the pictures show up. This is all new to me not very tech savvy
-
I'm trying to load more photos but it won't let me. Any suggestions.
-
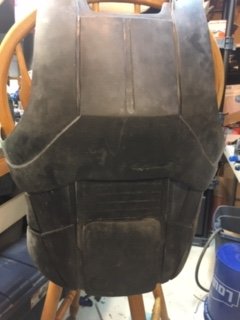
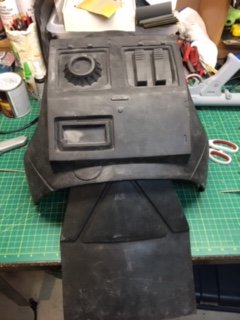
So it's been a while but this is where I'm at. Just have some final fitting to do.

-
Sorry didn't get back to you I haven't been on for some time now. All I did was I used a scratch putty compound to fill holes. Then just sand , prime , repeat until the holes were gone. Very time consuming.
-
Thanks Zac, It defiantly took some time to get it right. A lot of practice pieces before I cut into the good stuff.
-
This is the top I put together kind of did the same thing I did with the pants. I found a T-shirt pattern and modified it for all the different patterns. It took some time to get it so I wouldn't sew myself into a corner. It defiantly had to be sewn a certain way. The only thing I have to do to it is sew the hems which I will do when I get all the armor in place.
-
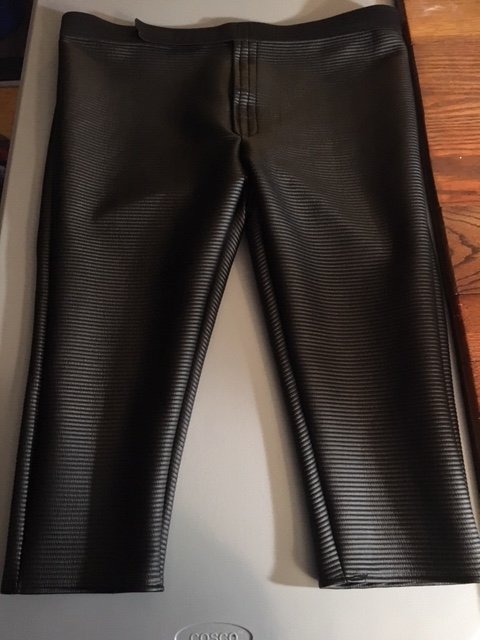
So I'm finally back at it and decided to make my own undersuit. I used a pair of pajama bottoms for the basic patterns and just kept tweaking them until I got the right fit. I'll use a pair of suspenders to help with holding them up as the fabric I'm using is a little slippery. Overall they fit good.
-
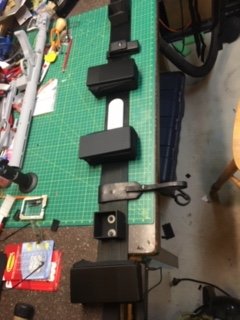
Got some work done on my belt. I went with a 1 1/2" nylon belt on the back side of the rubber belt to help hold everything together. I used chicago scews to hold the pouches and holster to the nylon belt. This way nothing is really hanging on the rubber belt. I also wanted to use the nylon belt with parachute buckles on the ends so that I can get the belt tight on me. Then I'll just use some velco in certain places to hold the rubber belt in place. Hopefully I can get the rest of this thing fitted this weekend and finally get some paint on it.
-
Thanks I appreciate that. ?
-
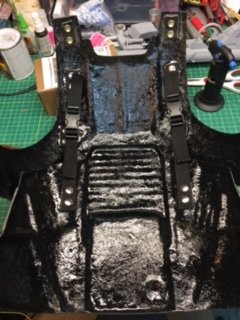
Some more strapping on the front and back.


.JPG.a4b68f45daa4f420407969e08a312eaf.JPG)