merkava74
-
Posts
57 -
Joined
-
Last visited
-
Days Won
3
Content Type
Profiles
Forums
Events
Everything posted by merkava74
-
GLOVES Next up were the Highland gloves. This will be a simple weathering. I find that many costumers forget this, resulting in the whole outfit just not looking very natural. Here you can see the original pair, before weathering. To weather it was a simple airbrush shading of the areas that are commonly in contact through handling which will generally get exposed to mud and dirt. The colour I use for the shading is Tamiya Acrylics Flat Earth, XF52. Here you can see the difference before and after. They were then lightly drybrushed with Tamiya Buff XF57. Here is the completed weathered gloves. I might further weather it with sky grey to tie it together with the rest of the fabrics and armour. Will get to that when I do the rest.
-
AMMO POUCH So this came in, so it will be the first item that I tackle. I will not be using the oiler, since it is also optional in the CRL. The pouch is vintage, the leather has hardened and the pouch has been flattened quite badly. So I made some Balsa wood blocks to act as inserts. 12mm x 24mm x 240mm was the size I went for. Shoved them in, and the pouch began to take shape. Next up, generous amounts of leather conditioner to soften up the pouch and let the inserts reform the shape. The conditioner also has the effect of darkening the leather slightly, which is exactly what I wanted. Finally, I velcro-ed the pouch tightly together, and will be leaving it as such for the next couple of days for the conditioner to work into the leather, and then decide if I need to condition it more. Edit: After 2 days, it is holding its new shape well. I would say this is a good start and I like what I'm seeing. Cheers!
-
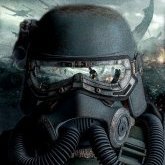
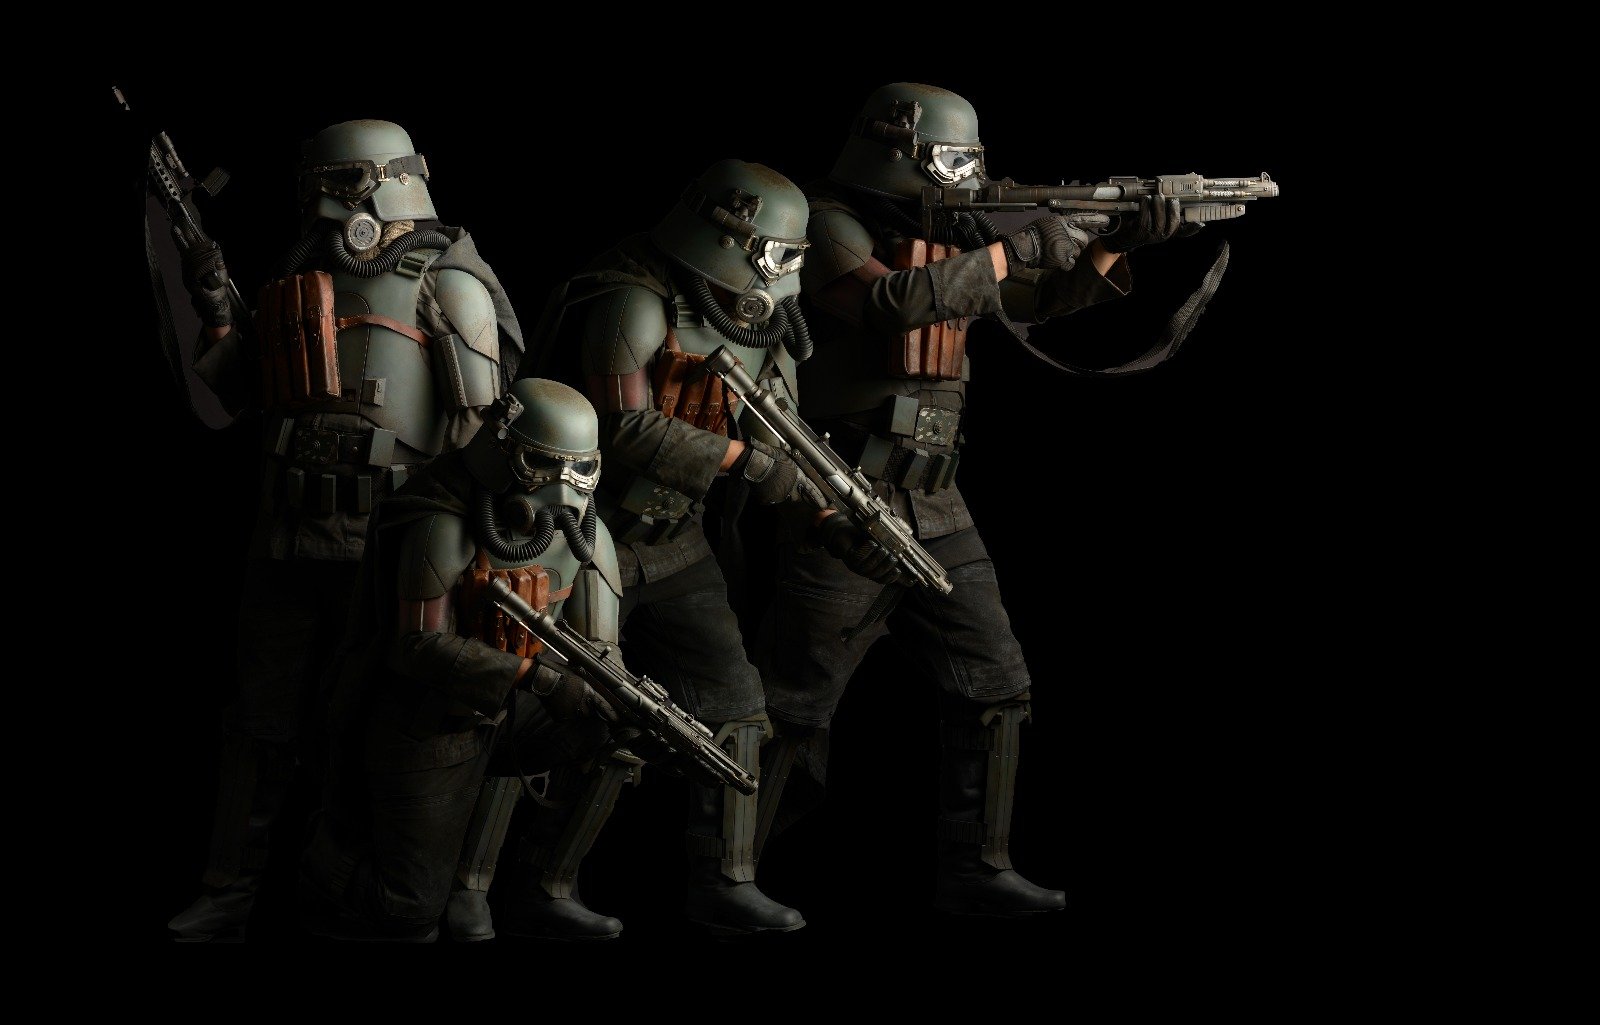
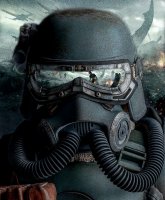
Hi guys, my first post here, and I would like to share my build. I hail from Singapore, and Jasper's the name. I'll be building Jimmiroquai's awesome kit, and I'm pretty much following Ricky's awesome build, but with slight differences to what I feel works for me. This is going to be a speed build, as I intend (hope, pray, beseech the powers that be) to have it approved by May 4th! Special thanks goes out to Darren @JAFO, who came through with a lot of parts and advice! Here are my major parts list. There will be sub-parts that I will get from other sellers, and I will provide more details during the build. Armour (yes that's how we spell it in this part of the world) - Jim Scarf - Darren Poncho - Plash Palatka (Courtesy of yet again Darren who pre-dyed it for me) Tunic and Pants - Jim Gloves - Highland Imperial Belt - Gian Filippo Zamboni Lower Belt - Paul Prentice Boots - Soviet Officer Boots (sovietboots.com) Ammo Pouch - Yugo M56 (Darren again) Grenade - 3D printed and modified off Jon Weger's files E10 Blaster - 3D-PropsNL So I have ordered almost everything, and some 2 times, and they are coming in drips and draps. In order to try to make my very tight timeline, I will work on whatever comes in through the mail, in no particular order. So here goes, and comments are most welcome! Here are the links to parts of my build for easy reference: HELMET AND RESPIRATOR PARTS Helmet Torch Helmet Telemetry Unit Goggles Respirator Discs Respirator Helmet SOFT PARTS Ammo Pouch Gloves Belts Shin Armour and Boots Tunic, Pants and Cape WEAPONS E-10 Blaster ARMOUR Chest and Back Painting Armour COMPLETED PHOTOS