
JoeShoe
-
Posts
64 -
Joined
-
Last visited
Content Type
Profiles
Forums
Events
Everything posted by JoeShoe
-
 Lets keep the momentum going. Ive added some more details to the whole section - please let me know your thoughts. thanks
 -
gotcha. my mistake. The text wasnt clear to me, but after reading it a little more closely, i see it now. All good here for me
-
that seems absolutely reasonable, and i have no objections. my only question is the section about the 15 raised sections on the ring. Is that not the lowest ring? shouldnt that be defined?
-
Gorget (Collar) - One piece that goes under the cuirass to form the neckline of the armor Finished in a high gloss deep red that matches the colors of the entire costume 3 rings that are steps Fits closely to the Neck Seal, and appears to be part of the cuirass If there is a seam, it is as unnoticeable as possible 15 raised sections on the step closest to the armor that start and end at the shoulders One centre raised section that matches the width of the opening of lower part of the cuirass opening at the front 7 smaller and evenly spaced raised sections that extend towards the shoulder Segments 1-5 (from the center) and 7 are 1" Segment 6 (from the center) is 2" OPTIONAL (Level 2) Gorget is constructed from a flexible material Gorget is seamless
-
yeah my bad. for some reason i thought the assembly guide showed that center section and the neck as one piece. The Center plate is actually a much later piece that the the 'wings' of the cuirass form around

-
I wanna echo what @Raider mentioned earlier and thank everyone for adding their input into this discussion. As helpful as Facebook groups can be, for Formal CRL development, Its best to have the discussion in an easily traceable and accountable format. Here's what Im proposing with the Gorget Gorget (Collar) - One piece that goes under the cuirass to form the neckline of the armor Finished in a high gloss deep red that matches the colors of the entire costume 3 rings that are steps Fits closely to the Neck Seal, and appears to be part of the cuirass's center recess If there is a seam, it is minimal/only visible upon close inspection (not sure of the verbage here) 15 raised sections on the step closest to the armor that start and end at the shoulders One centre raised section that matches the width of the opening of lower part of the cuirass opening at the front 7 smaller and evenly spaced raised sections that extend towards the shoulder Segments 1-5 (from the center) and 7 are 1" Segment 6 (from the center) is 2" OPTIONAL (Level 2) Gorget is constructed from a flexible material Gorget is seamless The center 'recess' of the cuirass is part of the gorget, forming a single piece that is worn around the neck and over the chest. (Idk if this should be part of a "L3", or part of L2
-
I put out a call for opinions and feedback on the facebook build group. If there's an RPF build thread/group, It'd be helpful to have input from that side as well.
-
Measurements of grooves might be a bit much.. but the number of grooves should stay the same. If you're sizing up proportionally, it'll happen in one of two ways - a) for a 3d model, you'll literally just scale the print up. Number of grooves will be the same, but measurements might be slightly larger. Much of the shimming for this kit can fortunately be hidden by the backplate/det/plate, but there will be some individuals who might have to scale up the front of the abs in order to make it look proportional to their build b) For a cast/vaccuform, the master mold or individual pieces will just have to be resculpted to scale proportionately if someone is much larger than the intended fit. Like the 3d prints, much of the shimming can be hidden, but in order to maintain proportions, the front details might have to be scaled up in order to wrap from one side of the abs to the other. Both methods will allow you to keep the number of grooves, and unless you're literally scaling up by 200%, it shouldnt change the appearance of the grooves drastically. (a 200% scale up would be a massive undertaking either way)
-
a) I believe it would be. If we're taking L2 to be as accurate as we can possibly be, There should be a requirement for it to be the same material and build as the actual prop. We know the methodology, and we know it can be done. Whether it's ideal or not, isnt really what L2 asks for. b)The split at the shoulder is more likely to be visible/cause sagging problems from an imbalance. Our troopers are mostly viewed from the front (Its always standard practice for me to place my back against a wall/another trooper while on patrol) c)Introducing a cover strip/piece would be more noticeable. Either it'll look raised (like the other parts of the gorget), or will just introduce another two 'seams' onto the profile of the gorget.
-
I'd like to keep the momentum going on this CRL. Can we get some input so far as how a decision will be made regarding seam/seamless gorget?
-
its 7. They are all not the same size - the 6th from the front is a larger raised section that is a little smaller than shoulder width.
-
complete Sithtrooper Cod - CRL Development Discussion
JoeShoe replied to nanotek's topic in CRL Discussion Archive
I was able to DM one of the Sithtroopers who was present at the London Premiere. He confirmed to me that there were no straps connecting the cod to the posterior - they just hang freely from the belt assembly. With that information, we should be complete for both of those pieces. -
Think that good arguments have been made for both sides. I suppose the question now is how we move forward with a decision? For me, I think the seamless, flexible material requirement should be L2. The real costume, being a cast production piece, was designed for limited wear and usage, is designed to fit a very specific body type and proportions, and worn for a few weeks of shooting - no considerations for long term wear and tear or individuals outside of their casting requirements were made. To make this piece of the costume so restrictive at L1 is going to make it very hard to approach this costume for all but the most dedicated or 'ideal' troopers. just my 2 cents.
-
complete Sithtrooper Helmet - Draft CRL Development Discussion
JoeShoe replied to nanotek's topic in CRL Discussion Archive
works for me. I'm happy with this section of the CRL now. -
agreed. just figured I'd start the work and let us hammer out the details with input from as many as possible. We can include measurements for the narrowest and widest points of the strips? The more we look at this costume, the more I'm convinced almost every section will need a detailed breakdown picture, similar to what's on the First Order Snowtrooper CRL. There, we can have specific markups for the measurements. Do we define the amount of lines, like we have for other parts? I'm not quite sure if adjusting the abdomen section for costumers of varying height/body type will change what that looks like.
-
complete Sithtrooper Belt - CRL Development Discussion
JoeShoe replied to nanotek's topic in CRL Discussion Archive
No problem with that at all. -
complete Sithtrooper Helmet - Draft CRL Development Discussion
JoeShoe replied to nanotek's topic in CRL Discussion Archive
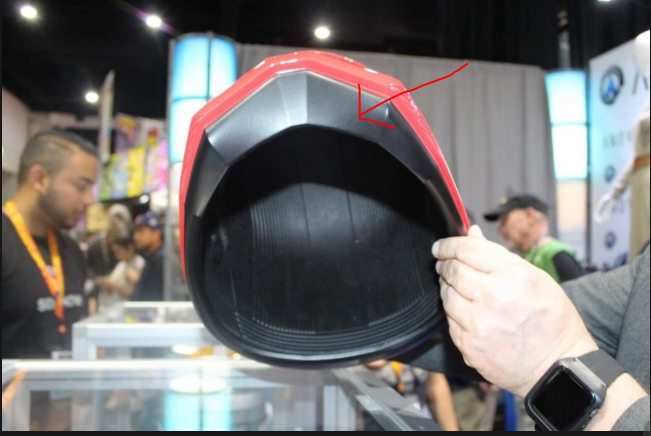
This particular part. I dont see anything in the Phasma Helmet CRL referring to such a piece? Unless its this, which isn't inherently clear to me. (I'm not super familiar with the Phasma costume, tbh) The bottom of the helmet flares slightly outward and is horizontal and flat on the bottom
-
complete Sithtrooper Belt - CRL Development Discussion
JoeShoe replied to nanotek's topic in CRL Discussion Archive
Is specifying the material for the belt ideal? Once again, this is similar to the gorget - I think mandating a rubber belt is going to cause more problems. So long as the material has the appearance of matching the rest of the armor, i wouldnt go as far as to say it has to be rubber(or rubber like). There are a large variety of different types of clone belts available, out there, from vaccuformed ABS, to silicone, to foam. Granted, this is for a costume that existed purely in CGI, but it allowed for troopers of varying needs to have belts that suited their forms/builds best. -
Great! Thanks for contributing the counts - I wrote most of these while sitting in the lab waiting for my experiments to finish.
-
complete Sithtrooper Shins - Draft CRL Development Discussion
JoeShoe replied to nanotek's topic in CRL Discussion Archive
Looks good for basic. for L2, im suggesting we add the details to the boxes on the left leg? -
Boot Section looks good. Perhaps we make glossy boots L2? Not sure how hard this'll be to do - im experimenting this weekend on some practice pieces of leather to see what i can do.
-
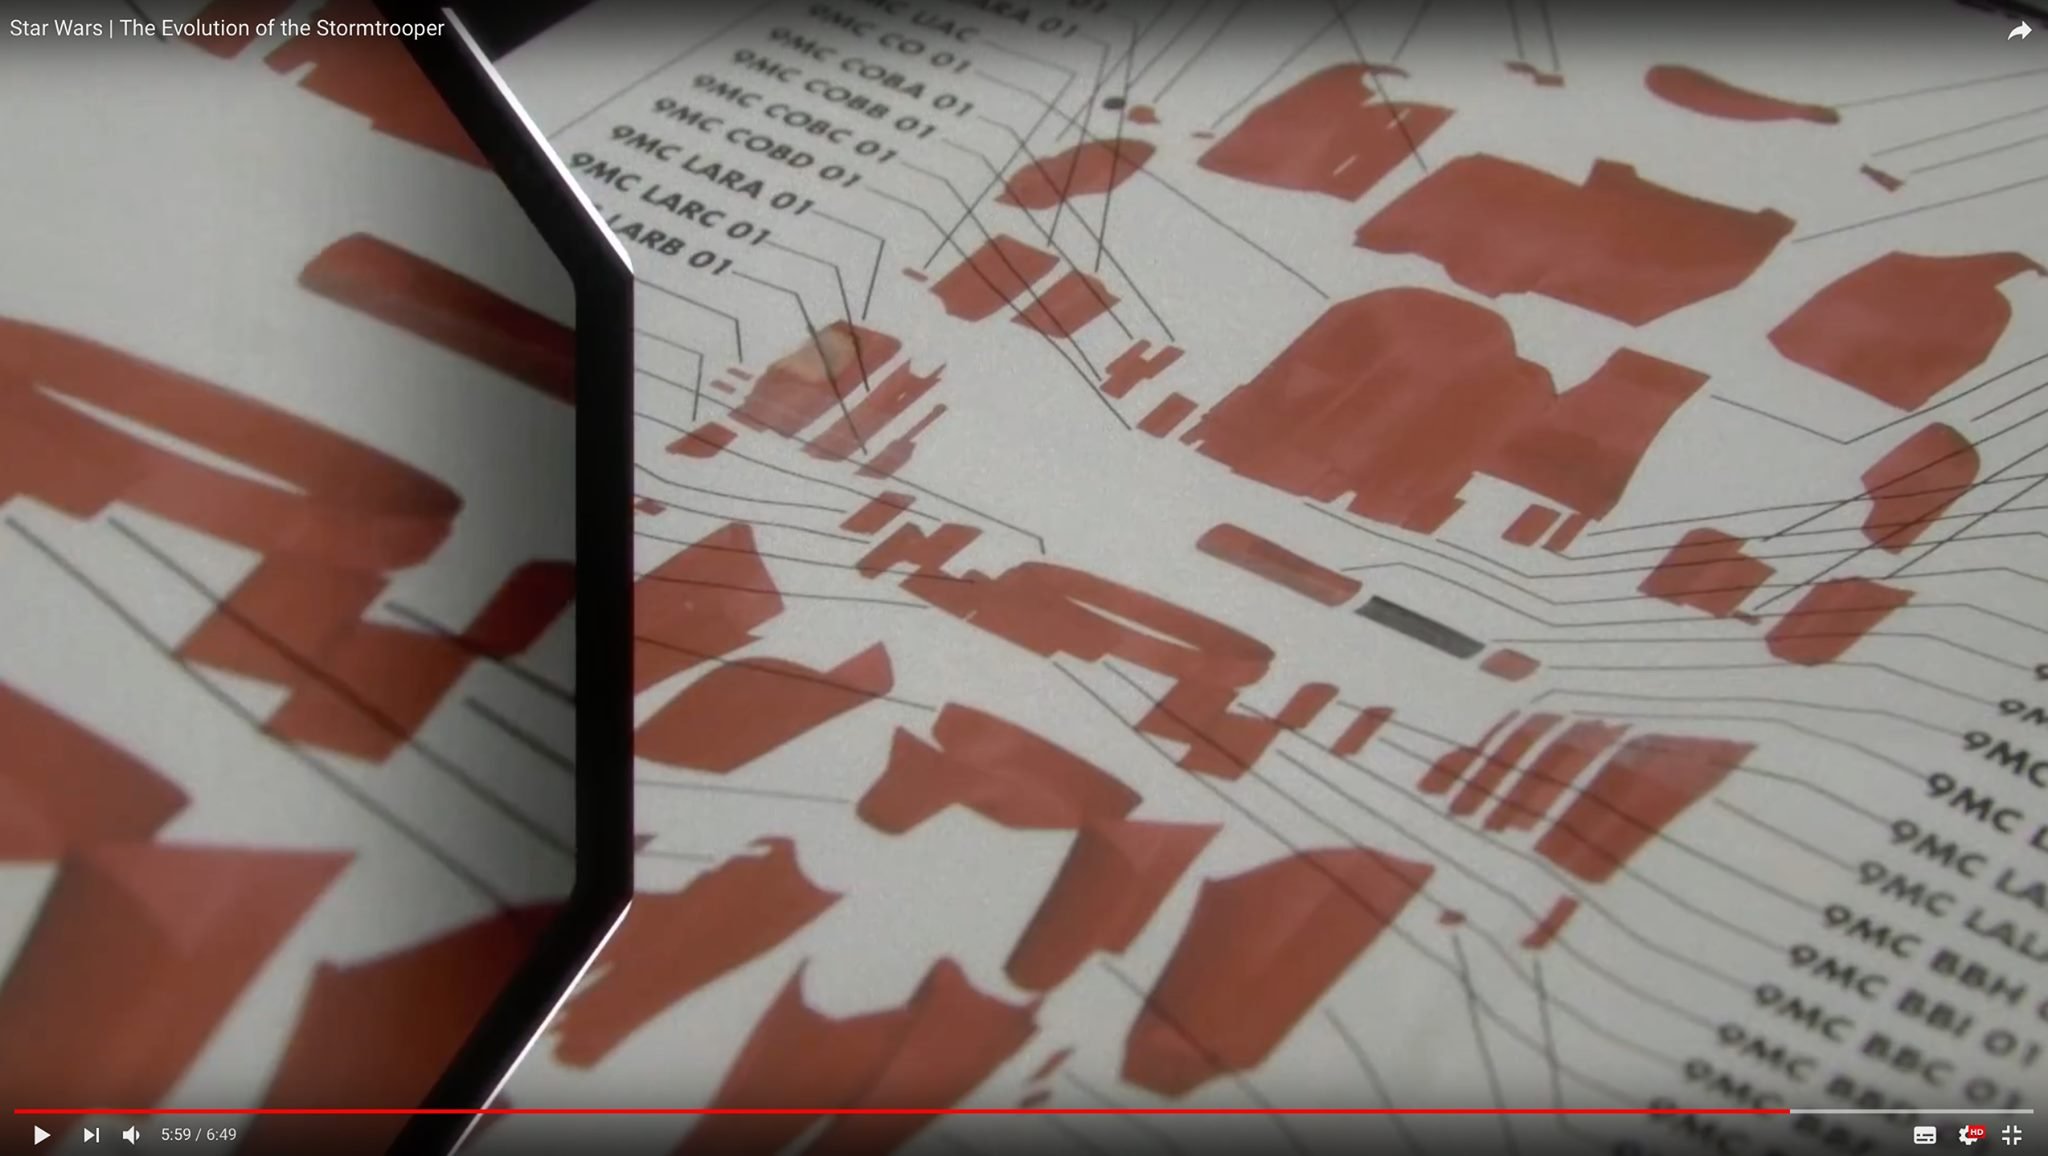
I'm honestly not sure how to phrase the verbage for the lines/grooves on this part of the armor. Can we just cheat, and do as the deathtrooper CRL Does, saying it should match the photos? Im happy to include number of lines, etc, but beyond that... lol. Perhaps we should have a detailed breakdown linked from the crl for these pieces. they're easily one of the most detailed parts of the armor. Forearms Finished in a high gloss deep red that matches the colors of the entire costume Left forearm Panel on the side of the forearm is more raised than the right arm Forearm shall have have ridged rail, similar to a picatinny rail, embedded on the inside of the forearm. The rail runs from the top edge of the inside panel face to the edge of the sloped box Forearms shall have a box on the bottom the wrist end, covering the bottom third of the 'rail' detail. The box has a sloped edge running from the rail surface to the box 'face'. The box shall have a single black square in the lower left corner. box includes black rectangle on small edge perpendicular and closest to wrist. Outside face of the wrist has a recessed rectangular detail, with a deeper black recess on the outside edge of the detail Top of the outside face has a rounded triangular recess aligned to the edge of the armor Ribbed details are present in a pattern matching the photo Right Forearm two (measurement here) grooves run horizontally above the rail detail Forearm shall have have ridged rail, similar to a picatinny rail, embedded on the inside of the forearm. The rail runs from just below the groove details of the inside panel face to the edge of the sloped box Forearms shall have a box on the bottom the wrist end, covering the bottom third of the 'rail' detail. The box has a sloped edge running from the rail surface to the box 'face'. The box shall have a single black square in the lower left corner. box includes black rectangle on small edge perpendicular and closest to wrist. Right forearm contains a trapezoidal assembly on the outside panel. structure should align with what is seen in the photo On the 'front' face edge of the assembly, there is a pill shaped recess painted black, with a further circular recess within A pair of clip greeblies are mounted on the 'front facing' surface, near the wrist Ribbed details and line details are present in a pattern matching the photo
-
complete Sithtrooper Shoulder Bells - Draft CRL Discussion
JoeShoe replied to nanotek's topic in CRL Discussion Archive
do we want to detail what's needed on the 'atmospheric sensor' greeblie? -
Abdomen Section The abdomen section must wrap around the wearer's body without a visible seam. The abdomen has 8 boxes attached that matches the order and placement shown and sit flush against the armor. The large box has a small black recessed square to on the lower left to the wearer. The rest of the boxes identical in size to each other the box 2nd from the right has ribbed detailing on the entire surface, running in the same pattern as abdomen armor beneath The abdomen has 4 raised 'strips' along the front half of the abdomen the two right strips are smaller, (measurements here) the two left strips are larger, (measurements here) with a recessed channel just slightly off center to the right Ribbed details run from the inside edge of the outermost 'strips' to a point just above the 4th abdomen box from the right There is a recessed rectangle above the 4th abdomen box from the left, on the plain section of the armor,
-
Thermal Detonator Finished in a high gloss deep red that matches the colors of the entire costume The control panel is black. the right hand cap has a recessed detail around the circumference The left hand end cap extends from the detonator assembly There should be no visible seams. Mounting Plate Finished in a high gloss deep red that matches the colors of the entire costume Should sit beneath the back plate and above the belt The mounting plate is a long trapezoidal shape, divided into 4 sections by recessed lines. The thermal detonator is mounted on the wider end of the plate The right and left sections are have ribbed details, running from the outside edge to the left and right faces of the bottom trapezoid.