
Ensi
-
Posts
41 -
Joined
-
Last visited
Content Type
Profiles
Forums
Events
Everything posted by Ensi
-
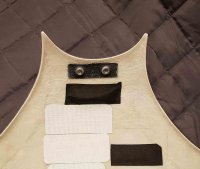
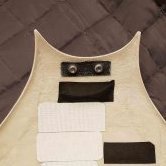
Nice! Might have to to that very same thing to my Yugo pouch. It's soo flat.
-
Nothing's better than BBB day!! Time to get to work First Order of business is sanding the insides of the armor with 120 then 180 grit to get rid of stray fibers. Then lightly sand the outside with 240/320. Then give it a proper wash
-
So I had my first experience with FedEx and well, I got a text saying it was gonna be delivered today (on friday). Overjoyed I refresh the tracking every 2 minutes and look out the window. Then suddenly "Customer not home, returning to hub". Well, nothing! Oh well, going to have it on Monday. Been hard at work with the modelling, still learning, this is kind of fun Next post will be BBB day
-
Hey all, this was originally posted over on the FISD forums. And I thought as most of the costumes here are super black, many would probably learn at least a thing from it being posted here as well! If this tutorial helped make your parts shinier, post a pic! I wanna see! Hello all! I've seen a lot of confusion about wetsanding and polishing with the goal of increasing the shine. Lots of people mixing up terms and using the wrong methods/products at the wrong time/place. So I decided to put up a little tutorial to clear (hehe) things up. DISCLAIMER: I am not a professional, I do auto detailing in my spare time and have some experience with paint correction. This will be a pretty long tutorial but stick with me and hopefully we'll learn something 1. What is shine? To be brief: when something is really really flat, it will reflect a lot of light directly into your eyes, making it appear shiny. Below is an illustration of perfect paint reflecting light, this would look like glass: (Illustrations are not to scale, just there to give you an idea). But that's a show-car-130-hours-polishing-lunatic-finish. Most of us use spray cans, and spray cans suck. They spit out paint unevenly and most of it is propellant anyway. And we do it in conditions that are not optimal, so we end up with very uneven paint full of orange peel. For this tutorial i've prepared a plate of ABS plastic which has been painted black (easier to demonstrate) and clear coated. See this pic below? See that wrinkly, orange'y look to it? That's orange peel. Image 1: If we want to go the extra mile to get rid of this, we need to do.. 2. Sanding - Levelling the paint Using sandpaper is ABRASIVE. From Merriam-Webster: abrasive 1: causing damage, wear, or removal of surface material by grinding or rubbing Focus here being "removal of surface material". Every time you swipe that sandpaper it removes some material. What we are trying to achieve here is a flat surface, we are trying to flatten out those "peaks and valleys" by removing/flattening the clear coat. A sandpaper's "grit" determines if it's coarse or fine. A higher number means it's more fine, and will remove less material. A lower number means it's more coarse and will remove more material. You need to have enough clear coat on your piece to be able to do this correction. Or else you might sand into the basecoat or even the primer. Which sucks because that means a re-paint.. Here is a list of my PERSONAL sandpaper grits: 40 - Super coarse for doing an Alderaan on whatever you are working on, I never use this 80 - Very coarse, for removing material quickly. I use this on woodworking projects 120 - Quick removal of material while still being in control 180 - I use this to knock down 3D-print lines and filler 240 - Smoothing filler if i'm feeling a bit scared 320 - This is what I sand my parts with before primer 600 - For wetsanding my primer 800-1000 - Anything from color-coat/clear-coat fixes to wetsanding hard clear coat 1200 - For knocking down tough orange peel 1500 - For knocking down orange peel 2000 - For removing 1500 scratches 3000 - For removing 2000 scratches For this test piece I started with 1500 grit to knock down the orange peel as the clear coat I used is kind of soft. Keep in mind every sanding step in this tutorial is done wet/wetsanding. As you can see here i've flattened out the peel on most of the piece but I missed a spot. I went over it again and made sure the entire surface was equally "dull". After this I went over it with 2000 grit. This is a finer sandpaper and my goal here is to eliminate the scratches from the 1500 job. Notice the sanding marks going the opposite direction this time. This is a good way to gauge if you've successfully sanded away the marks from the previous steps. And finally I went over it with 3000 grit in the opposite direction to remove the 2000 grit marks. At this point you should start seeing some shine My camera really struggled to focus taking these pictures. And we're done with sanding! Dry off your parts and move on to.. 3. Polishing - Levelling the paint again, just very very little From Merriam-Webster: polished; polishing; polishes transitive verb 1 : to make smooth and glossy usually by friction : burnish 2 : to smooth, soften, or refine in manners or condition 3 : to bring to a highly developed, finished, or refined state : perfect This is were it gets confusing. Some people "put polish" on their car, but they really mean wax. Some people "polish in the wax". I mean, it's been used so much in so many different ways I know it seems confusing. For simplicitys sake: Polishing is the last step in paint correction. In the auto detailing world, if you would let's say fix orange peel on a car, you'd go through all the steps above then.. 1. Use a RUBBING COMPOUND with a machine to knock down the 3000 grit scratches, paint should look like ANH Vader at this point 2. Use a POLISH with a machine to further level the paint from the faint marks the COMPOUND may have left, at this point the paint will be as clear as an ESB Vader 3 Apply a WAX/SEALANT/COATING on top of the newly corrected and flawless paint, to protect it (and also add a tiny bit more shine). Wax/sealant/coatings will fill in tiny tiny scratches making the paint appear more shiny, but the effect will diminish as the wax deteriorates. Rubbing compound and Polishes are ABRASIVE, they will REMOVE clear coat, just like sandpaper, only much much finer. Think of them like liquid 30000 grit and 80000 grit sandpaper After drying off my newly 3000 grit sanded piece, I found a foam polishing pad, and primed it with some rubbing compound. Priming is basically just "feeding" the working area of your pad with polish so there are no dry spots. All my compounding/polishing was done by hand. I then applied some more compound to the pad, a pea sized drop and went to town in small, circular motions. Follow the instructions on your product. After finishing I wiped off with a microfibre cloth aaaand... BAM! Shine!! The compound I used was Menzerna FG-400. It's a really good compound, it finishes super fine and you could just leave it as it is right there! You can also use Meguiars M105 for this step. Or any "rubbing compound", as long as it doesn't have fillers/wax in it which will trick you and lie to you. You can also just straight up use a polish, but you might have to work a bit longer to achieve the same effect. Now on to the polishing, for this I did the exact same thing with a finer foam pad and Menzerna SF-3500 (Meguiars equivalent M205). Honestly it didn't make much of a difference since the FG-400 finished out so nicely. If you're using other products you may have to do this step if you see "haze" from the compounding step. I tried my best getting an in focus picture but my camera got so confused because of the shine 4. Wax/Sealant/Coating - Protective Layer A wax is a protective layer, it is NOT abrasive. At this stage you can add wax if you want, it'll protect the paint a bit and also give it a tiny bit more shine. It's the prep-work and COMPOUNDING/POLISHING that really makes it shine. I didn't bother adding wax to my polished test piece as it was already as good as it gets. I did however tape off the piece before polishing, so I had one side which was 3000 grit sanded, and one side that was polished. I tried adding wax to the sanded side: After buffing it off with a microfibre and removing tape: And that's it Hope you learned something! Any questions feel free to post them here and i'll do my best to answer. After closely inspecting the piece I can see some orange peel left, but that's from when I put my color coat on, which is under the clear coat.. oh well.. Spray cans suck!!
- 1 reply
-
- 3
-

-
How do you manage to bend a half inch bit and lose the chuck key at the same time ?
-
Got some work done on my E-10. Decided to go with a 22mm pipe down the entire barrel for strength. Was lucky enough to find an off-cut of a brass pipe in the back at work. And hey it was exactly 22mm! Really gives the blaster some weight, makes it feel like an actual rifle. But it's mainly for the structural strength. After fitting I found things I need to edit on the files, that's why it's important to test! Some progress on the updated files: And an endcap i've modelled from the ground up. This is my first self-modelled piece Kit ETA is next friday!
-
Prepped and painted the grenade and also my printed TU unit. Grenade still has to be hand-painted on the pad details and also needs weathering. Color is the Montana Black Storm. Man these cans spray like ass. Still experimenting on getting the best results. So far a really good long shaking along with a different nozzle and spraying close has provided the best results. I didn't shake long enough, and switched between nozzles on this grenade so it produced a rather rugged finish. Which kinda worked out pretty nicely, got that military-esque texture to it. Chrome endcap is Belton Molotow Chrome Effect spray. Chipping effect achieved by putting polishing compound for cars (yes..) on the black layer before painting the green. Worked real nice! TU unit was printed on 0.08 layer height, given 2-3 coats of spray putty, then painted black.
-
Ah so that's what it is Been wondering about that..
-
The Plash gods are in my favor!! 3x washes at 90c 1x wash at 40c with a Dylon Intense Black pod 1x wash at 40c with detergent to remove excess dye Further revision to the rangefinder. Made the rectangles thinner+taller, the outline smaller, moved the button more forward, and added a recessed line instead of the "step-down" on the front. Still to be updated.. And got my HK416C stock, this thing is gonna feel so good on the blaster! My armor is ready to be shipped, just waiting on the uniform from the tailor now!
-
I've been hit with a severe case of the man-flu this week, so not much progress on anything. But slowly getting better so i'll start working on my E-10 mods further and maybe also my grenade, which I didn't show in the first post Also going to get the measurements for my jacket+pants today. Grenade printed on Flashforge Finder, standard 0.18 layer height. In hindsight I would've modded them and added a registration pin to the lower shaft. Prototype of my modified Rangefinder (is this what this piece is called?). Need to do further work to it, though, screw holes need to be further in for example. And for the sticks I found some old christmas light adapters and chopped off the threaded rubber/plastic ends to get these covers i'm planning to use. Along with the metal sheathing. You will find a close sheathing if you search for Tinned Copper Braid. Why mess up on your kit when you can mess up on pieces that doesn't matter that much? And yeah, the parts list I think everyone should have. Helps other to know where to get different stuff! Currently i'm only missing the armor and softparts + the blaster Oh man.. Sanding...Spraying.. Sanding.. Brings me back to the FOTK build haha. Thanks! Oh believe me i'll post my failures too, if not for showing other people what not to do, it can at least be of comedic value These goggles were actually printed by a friend of mine, but it's had several rounds of sanding and filling. I believe it is the standard setting of 0.18 layer height. Right after he printed me these I got my own printer (the same one) It's a Flashforge Finder V1. The Molotow is cool yeah, I have the Liquid Chrome pen from them too and even though that looks amazing it goes dull just by breathing on it This was what they had at the Montana shop and I grabbed one as I had some standing credit with them left.
-
Hey all New guy here, name's Daniel (from Hoth) and I have 2 TK's (TFA and ANH) which i've built and detailed in my build threads over on the FISD. I think it is a great thing to do a build thread as it helps the person building to get advice, and also it helps new builders so they know what to do or what not to do. I've read so many build threads when doing my 2 previous costumes I wanted to keep the tradition and make one for my Mudtrooper. Yesterday I fired off the deposit to Jim Tripon for my kit. Full deal with armor/helmet/softparts/hoses/belt+hanger, along with an extra bicep for the medic config Reason for going with Jim is that my TFA TK is from him, and I just LOVE the sharp "pulls". That and the price is fair + he does the uniform too, why not get everything there. For the blaster i'm going with an E-10. My current plan is to get a DoopyDoo's E-11 kit and print the E-10 specific parts from Sean Fields. I've recently started dabbling around with 3D Modelling, and I have modified a few of his files to be more accurate. I can share them but only when I am "happy" with them and if Sean gives me his permission For the buttstock i'm buying a HK416C airsoft stock from eBay later. Before firing off the equivalent cost of my car to the Phillipines, I have been amassing lots of muddy goodness (it costs less when you buy a lot of small things over time ?). PARTS Armor: Jim Tripon (Jimmiroquai) Ordered Helmet: Jim Tripon (Jimmiroquai) Ordered Tunic+Jacket: Jim Tripon (Jimmiroquai) Ordered Plash Palatka: eBay (with leather grommets) Boots: eBay (Genuine Soviet Officer Boots) PVC Tunic Patches: Jim Lau Aluminium Helmet Disk Greeblies: TheAluminiumFalcon Helmet Seal Trim: sealsdirect.co.uk (Model: U46) Halcyon Nose Bridge Adjuster Resin Cast: Guillermo Carbonell Gloves: @JAFO (Highlander Special Ops #GL033-BK) Mask Buckles (Yugo+Black Ones): @JAFO 19mm Tan Mask Webbing: @JAFO Cheapo Helmet Torch: @JAFO Bimini Rifle Sling Snap Hook: @JAFO Sling Mount: eBay 25mm Black Polypropylene Rifle Sling Webbing: eBay 2mm Neoprene Rubber Mask Sheet: eBay British Army Coolmax T-Shirt (Brown): eBay 25mm Serrated Helmet Buckles (Vogue Star): eBay SureFire M300A Ripoff (with KX1A markings): eBay Various buckles/triglides/etc: eBay Ultimately i'm trying for level 2, but as of now I know Jims fabric is not the bull denim. Eventually! First posts without pictures are not good first posts, so here are some pics Palatka after 90c wash which warped the grommets a bit..: Mud Supply Haul: Some of my E-10 Mods from Sean Fields files: A mask I got printed up to test different paints/weathering techniques. Mask has been prepped and painted with Belton Molotow Chome Effect spray, not really chrome but a pretty convincing metal/aluminium. Best spray i've seen (that is kind of durable) that isn't airbrushed Alclad. Might have to get an airbrush and some alclad later.. And finally a paint test I did. I am going to go with Montana Black Storm for the main color of my armor. I do not have a paint gun or the funds for custom mixed paint, I think it is pretty close EDIT MAY: I decided to go with Fosco English Green instead. The Montana Black Series paint does not dry well at all and the color isn't that correct either. That's all for now
-
Ricky's Mudtrooper Build aka Mad Mud Mods (Photo Heavy)
Ensi replied to rickyboyblue's topic in Mudtroopers
Oh man, coming from 2 super shiny TK's, all these dirty parts makes my cover strips tingle! -
Ricky's Mudtrooper Build aka Mad Mud Mods (Photo Heavy)
Ensi replied to rickyboyblue's topic in Mudtroopers
Thanks for doing this build thread! Looking good

