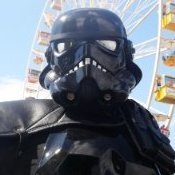
Instvogel[TX] Posted August 23, 2016 Share Posted August 23, 2016 Hi Guys! Today i got my AM 2.0 Kit. After unwrapping a ton of stuff I am ready to get started on the helmet part. Unfortunately I can't find any instructions with the package and only guides for 2 part Helmet (mine is 3part). Maybe you guys can help? This is an experimental build, since I am probably one of the biggest troopers there are (better hopefully will be) . Hopefully i can bend and work everything to the 501st standards. Update1: After some starting Problems helmet has been assembled. Pics to follow. Maybe some one can send me some front, side and back picks of his bucket. The armor will be a huge challenge, due to probably a lot of shimming. Here a few pics with a first fitting try. The Full AM 2.0 Kit: Front: Side 1 and 2 Back: 3 pcs Helmet unassembled: As you can see on those pics, the gaps at the sides are rather big. Do the front and the backside have to connect around the waist for approval? On the Shoulders, I will have enough room to work with since the shoulder straps are quite long. A little bit of bending might be usefull. Ideas, suggestions and so on are very welcome. But pls keep in mind that this is the first fitting with gaps and placement errors due to a lack of knowledge and a desire to breathe regular. Thanks guys 1 Link to comment
Griffin-X[501st] Posted August 25, 2016 Share Posted August 25, 2016 Welcome to Spec Ops Chris! It looks like you have a nice set of armor there. To fit your frame, you will need to adjust the armor and add some shims to fill in the gaps a bit. The sides will need to come together some and be at least 2-3" or so apart. The chest and back portion should be fine as it fits more like a "clam shell" over the top. Did the kit come with spare ABS plastic? Link to comment
Instvogel[TX] Posted August 25, 2016 Author Share Posted August 25, 2016 Yes, I have 8 Strips of spare material. 1 is already cut down for shimming one leg. How does the shimming work best? Attach leveled and glue extra underneath or glue the shimmig directly to the parts? Link to comment
Griffin-X[501st] Posted August 25, 2016 Share Posted August 25, 2016 For the leg shims, typically on top. For the sides, it'll work best underneath. I think the chest/back will be fine provided the top joins are not too far apart. Link to comment
chwillis[501st] Posted August 25, 2016 Share Posted August 25, 2016 Looking good brother, your in the right place. Link to comment
keeleon[501st] Posted August 25, 2016 Share Posted August 25, 2016 I'm gonna be following this thread closely. I'm also just now starting on my Anovos kit, and we seem to have similar body sizes. I'm especially interested in your shimming solutions. Do you know what material you will be using for shims? I sent a message to "scootch", but haven't heard back. Cheers! Link to comment
Instvogel[TX] Posted August 25, 2016 Author Share Posted August 25, 2016 @Keeleon I had 8 extra stripes of the kit material with the package. I chose this kit because of the sizing. Anovos should turn out a little smaller, i guess. How big and tall are you? Link to comment
Darth Emphatic[CMD-DWM] Posted August 26, 2016 Share Posted August 26, 2016 Welcome. Did you get what you needed for the helmet assemble? Link to comment
Instvogel[TX] Posted August 26, 2016 Author Share Posted August 26, 2016 Instructions would have been nice! Otherwise I have all the screws, a basic Inlay from what I guess might be a construction helmet and Grey Lenses! I still have some issues with the earpieces not fully closing. So thats why I asked for some close up Pics Link to comment
Instvogel[TX] Posted August 26, 2016 Author Share Posted August 26, 2016 And ABS Glue! Link to comment
Griffin-X[501st] Posted August 26, 2016 Share Posted August 26, 2016 And ABS Glue! I'd pass on that glue. Pick up some E-6000 and some super glue like Gorilla Glue. ABS glue is no bueno. Link to comment
Instvogel[TX] Posted August 28, 2016 Author Share Posted August 28, 2016 #######SOLVED########## Helmet issues (I think) As you can see in the following Pictures the lip one one side is differently shaped and sized than the other. That cause a rather big gap on the one side. I know that Trooper helmet aren't symetrical but that seems to me a bit off. Is this a production problem (I haven't trimmed anything yet) or am I just plain untalented? Good side! Bad Side: The gap on the god side will be about this big: The bad side: ############################################# SOLUTION The gap existed because I did leave room under the top lip about 1 cm (less then 1/3 inch). After rechecking the gallery of those specialists and the crl i figured out that there is no leftover space. After readjusting the gap appears way smaller. I will put it together again tomorrow. Still wondering about those different lips in the ear area...... Link to comment
Instvogel[TX] Posted August 30, 2016 Author Share Posted August 30, 2016 E-6000 arrived! Slow and steady! At the weekend I hopefully can present the mounted Helmet with grey lenses. Mirrored ones will be ordered. 1 Link to comment
Griffin-X[501st] Posted August 31, 2016 Share Posted August 31, 2016 Great update, post up some pics when you can! Link to comment
Instvogel[TX] Posted August 31, 2016 Author Share Posted August 31, 2016 Griffin, I want to have the helmet done by the weekend. Later NEXT month I'll be on a builders party and hopefully make a huge leap there. BTW. Under Armour Leggins are ordered and maybe I'll get mirrored lenses from ISD. But since my Football Team is still in the season, I'll have to do more work there, then on my armor. 1 Link to comment
chwillis[501st] Posted August 31, 2016 Share Posted August 31, 2016 All in time brother dont rush it. 2 Link to comment
Instvogel[TX] Posted August 31, 2016 Author Share Posted August 31, 2016 Oh Hi Chris! I know that patience is a virtue but i'd be rather done yesterday! Link to comment
Instvogel[TX] Posted September 2, 2016 Author Share Posted September 2, 2016 Checklist of Things to buy/acquire: Kit: Done Undersuit 50% Pauldron: Done Neckseal: Done Belt: Done Helmet Accessories (Frownguard, Helmet Padding, Voice, Cooling) 20% Holster: Done Mirrored Lenses: Ordered Balaclava: Was ordered will be shipped additionally from Trooperbay Gloves: still to get Shoes: still to get Paint for the Frown: still to get Leather paint for the shoes: still to get anything i have forgotten? 1 Link to comment
Griffin-X[501st] Posted September 3, 2016 Share Posted September 3, 2016 Optional, but an Aker 10w amp and mic along with an iComm unit would top it off. Link to comment
Instvogel[TX] Posted September 4, 2016 Author Share Posted September 4, 2016 Today I worked a little bit on the Helmet. Unfortunately it seems I am not to good at handy work so I am not completed with it. Those aerators are killing me! But at least everything else seems to fit so far.... Right side: left side: And a big smile for all those guys reading this! I am really looking forward to that builder party...... 1 Link to comment
Griffin-X[501st] Posted September 6, 2016 Share Posted September 6, 2016 Looking really good! 1 Link to comment
Instvogel[TX] Posted October 7, 2016 Author Share Posted October 7, 2016 Its been a few days of w/o progress but today and with the help of a friend I got some stuff done..... FINALLY a bit of progress!!! Today we fitted and cut the biceps and forearm armor. Also we started glueing those parts together! Holy Crap, who ever came up with this should burn in Hell. We also made some button fittings for the strappings and glued them im place. Shoulder Bell, Chest and Back are now equipped with buttons for the straps. I also glued some mesh into the helmet and cut the mirrored lense to fit. Tomorrow I will glue it in place. Here a few Pics of the Progress so far: The Mesh looks awesome! Chest Shoulder Bells Back Arm Pieces Thats it for today! Hopefully the next update is closer in time then the last. Link to comment
Darth Emphatic[CMD-DWM] Posted October 8, 2016 Share Posted October 8, 2016 Great progress! I love the snap plates. That is exactly how my armor is setup. Link to comment

Recommended Posts
Create an account or sign in to comment
You need to be a member in order to leave a comment
Create an account
Sign up for a new account in our community. It's easy!
Register a new accountSign in
Already have an account? Sign in here.
Sign In Now