Jedi_Outcast77[TX] Posted June 17, 2017 Share Posted June 17, 2017 What could be better than building one Death Trooper? Building two of them!!! Thanks to my sister and brother-in-law who purchased one set of armor for him and one for me, there will be two shiny new DT's in our garrison soon. We got the armor a couple of months ago and are finally getting around to working on it now. So far all we have is an armor kit from 850 Armor Works (no helmet yet). Going to try and work on something every day when my schedule allows for it, but at least a few times a week. First thing I noticed when working with the armor is that it's made with a thicker plastic than I've seen used on other armor kits. The downside to this is the pulls are kinda soft and developed stretching or webbing in some areas. I'm going to mod the parts to try and smooth out those areas and give them a more screen accurate look. I started by working on the kidney plate. I didn't like the flatness of the plate this kit came with so I decided to make my own. I wish the triangle was a little shorter/wider but regardless, I'm still happy with the result. Moving up from there I started on the back plate. The greeblies are nice but when I put them into place on the back plate I was kind of surprised to see they didn't really fit. My first step was to mask-off the recessed areas on the back plate. Also decided to make them wider to better fit the greeblies. After cutting the recessed areas out I took some plastic sheet and cut a piece to fit inside, traced out the new openings, and marked out where to cut for the "frame" window. The greeblies fit much better now! I also modded the box in the lower-left corner of the back plate. Even cut thin strips to raise up the inner notched section of this detail. Then I cut out the recessed half-circle detail and backed it. Lastly was to make a more noticible gap between the back and sides so I cut and shim them here. I still need to make a couple more mods to this but I've been tinkering with this all day and need some sleep. Also drilled out the recess on the chest plate and backed that too. I made it a little wider than I wanted to so I'll have to remember that when I do this to the other chest plate. 1 Link to comment
Darth Emphatic[CMD-DWM] Posted June 17, 2017 Share Posted June 17, 2017 Welcome, Mike! This is awesome news. Can't wait to see your guys build. Link to comment
Chaos[CMD-DCA] Posted July 13, 2017 Share Posted July 13, 2017 Mike, how goes your progress. There are quite a few folks who are buying the 850 armor. Any more modifications to the initial armor? Link to comment
Jedi_Outcast77[TX] Posted July 22, 2017 Author Share Posted July 22, 2017 Mike, how goes your progress. There are quite a few folks who are buying the 850 armor. Any more modifications to the initial armor? Progress has been slow. I haven't had much time to work on anything beyond what's posted above. I've got a little more work to do on the backplate then will be moving onto the ab plate. Link to comment
Jedi_Outcast77[TX] Posted October 7, 2017 Author Share Posted October 7, 2017 Things are getting back on track for this build and we're in overdrive at this point trying to finish before a convention next month. We haven't done a lot over the last couple of months in terms of build progress but we did spend that time purchasing the rest of the parts we needed to complete the costume. We got the helmet and undersuit from Jim Tripon and they are amazing! The undersuit fits great and is super comfortable. Got the eyes cut out of the helmet and sprayed some plasi-dip on the inside to seal over the fiberglass. Going to sand and prep this for paint over the weekend. Oh and we got our gloves from Endor Finders. I like them so much I'm thinking of getting a pair to wear during the winter! Minus the velcro of course. Also finished all of our mods to the backplate. Cut out the side detail and replaced it with a new piece. Going to back this with some mesh after it's painted. Just have to finish trimming above the shoulders and match it up to the chest plate. Another change we made was to replace the biceps and forearms with a new set from KB Props. The original forearm was much shorter and had raised areas molded into them where the rubber straps go. The biceps were also cast together along the bottom edge, so cutting them apart would have left them looking a bit off. (850 on the left and KB on the right) (850 on the left and KB on the right) Next up was to mod the shoulder bells. My sister added two layers of worbla to the center strip in order to raise some of the detail there. All of the pieces for the thighs have been trimmed and glued on. Next up will be to fill the seams on those flaps so it looks like one part. Unfortunately one of the inner shin parts was sent with a chunk missing so I've got to shim a new piece behind it and fill the gap. Link to comment
Jedi_Outcast77[TX] Posted October 10, 2017 Author Share Posted October 10, 2017 Got more done on these over the weekend. The details on the ab plate were flat so I took some black ABS a friend gave me and added some new slats with the notches, then added a rail piece down each side, and finally topped that off with a clean plate and center disk. The top image is the original ab plate, the bottom image is the modified version. I have some cleanup to do but overall am pleased with the end result! 1 Link to comment
Jedi_Outcast77[TX] Posted October 18, 2017 Author Share Posted October 18, 2017 More progress tonight. A friend of mine gave us the idea of using flat black and covering that with a glossy clear coat. Said he did this on his Vader armor and having seen it in person we agreed to give it a try with our armor. We got all of the shoulders and biceps, the ab / cod / butt plates, and all of the belt pouch covers painted with a 1st coat. Also sanded the helmets down so we can spot fill a few areas and start painting them next. Oh and we filled in the seams between the extension pieces that glue onto the thighs. Last week we pulled out all of the resin bits that came with our kits and weren't too happy with the forearm rockets (among other things). The molds didn't line up so all of the rockets look like this and half of them were squished. Didn't take long to decide it was time for an upgrade. 1 Link to comment
Jedi_Outcast77[TX] Posted October 23, 2017 Author Share Posted October 23, 2017 A second coat has been sprayed on all the stuff I mentioned in the last post. Wet sanded with 320 grit before painting. Going to spray the glossy clear coat tomorrow night. (left is 1st coat / right after wet sand and 2nd coat) Like I mentioned above, the resin parts were kinda rough. The thermal detonator is a solid resin cast and virtually a boat anchor. So a friend offered to print me new parts if I could supply the files. Did that and he printed them as offered. This was my second attempt at modeling parts and I'm happy with the results! All of the thigh/shin pieces were in various shapes and thickness and some had busted corners. I modeled replacements for them too so all of the parts were of equal quality and size. I am especially happy with the shin greeblies. They are smaller but look better on the shins. (left are new 3D printed greeblies / right is original resin casts) My sister had an epiphany this weekend. She realized that we have modified or replaced everything that came with our 850 Armory kits except the cod and butt plates. Sent from my SM-G955U using Tapatalk Link to comment
Jedi_Outcast77[TX] Posted October 24, 2017 Author Share Posted October 24, 2017 Finally got around to fitting the chest and back. Added some plastic to the shoulder and created a bridge, added velcro to hold the together. Doing the same on the sides too. Still have more painting to do but it felt good to put these on! The mods to our handplatescame out great! More sanding and painting to do but very happy with these. Started to apply the glossy clear coat to some parts. Never worked with it before and learned the hard way to take this part slow and steady. Here's one of the belt boxes after a light coating. Sent from my SM-G955U using Tapatalk Link to comment
Chaos[CMD-DCA] Posted October 24, 2017 Share Posted October 24, 2017 Paint, Wet Sand, Wait, Paint, Wet sand, Wait, etc etc etc., Ahhhhh the joys of getting things shiney! You've put a lot of work into making the 850 set look much better! I've got Jim's complete kit. One word of advice about his undershirt, if you can, tailor it to fit you or use shirt stays (https://undershirtguy.com/shirt-stays/ ). The ribbing is so thick it has a tendency to bunch up under your sides. I made the modification and it stays perfect. Same thing with the bicep areas of the shirt, if the sleeve is not form fitting it will bunch out from under the bicep armor. Good luck with the build. 1 Link to comment
Jedi_Outcast77[TX] Posted October 24, 2017 Author Share Posted October 24, 2017 Thanks! One thing we both noticed are the shirts fit well, but almost too well. Just have to make sure we don't put on any more weight. 😉 Sent from my SM-G955U using Tapatalk 1 Link to comment
Jedi_Outcast77[TX] Posted November 3, 2017 Author Share Posted November 3, 2017 It's crunch time and we're in the final week before the event we hope to wear these to. We lost four days to some family events and a power outage. 😑 Still lots of things to do but we are hopeful it will all come together. Finally got to see the thighs with paint after making the bridge piece seamless. So glad we went this route! Worked on my E-11d too. Just have to attach the barrel and start painting. Sent from my SM-G955U using Tapatalk Link to comment
Jedi_Outcast77[TX] Posted November 6, 2017 Author Share Posted November 6, 2017 More progress. Fitted the chest and back with velcro and glued strapping to hang the ab and kidney plates. I had a few setbacks with my helmet. First was the chunk I ripped out while drilling out the vents. Then a crater appeared in on of the tubes. After fixing that I laid down a coat of aluminum. Then masked that off to apply the black. Lined up and made holes to attach the arm rockets. All of the stuff we applied gloss clear coat to came out great! Attached the hand plates to the gloves. My brother-in-law decided to go with the DLT-19. I went with the E-11d for a blaster. Painting on the thighs went well, including the new greeblies we ordered. Laced up the boots with the covers. Sent from my SM-G955U using Tapatalk Link to comment
feliz[TX] Posted November 6, 2017 Share Posted November 6, 2017 Dude! Looking great! Definitely looking forward to seeing you both at RICC this weekend! Sent from my iPhone using Tapatalk 1 Link to comment
Jedi_Outcast77[TX] Posted November 8, 2017 Author Share Posted November 8, 2017 Coming down to the wire! We got a new belt buckle to replace the resin buckle that came with our kits. My sister made our pouches last night. Sent from my SM-G955U using Tapatalk Link to comment
Jedi_Outcast77[TX] Posted November 9, 2017 Author Share Posted November 9, 2017 The last couple of days have been rough. Lots of parts started to peel after laying down the clear coat. 😠seems like with every step forward we end up taking two steps back. Still managed to finish the helmets and blasters. Sent from my SM-G955U using Tapatalk 1 Link to comment
Darth Emphatic[CMD-DWM] Posted November 9, 2017 Share Posted November 9, 2017 Stick with it - you'll get there! Link to comment
nanotek[501st] Posted November 9, 2017 Share Posted November 9, 2017 You're doing a fantastic job. Really love the scorching on that E-11D, how did you achieve that? The curing time between coats is a bitch to predict. If you're like me and create uneven layering you'll get the pesky patches of uncured paint. That really got me down but just keep going. You got this! Link to comment
Jedi_Outcast77[TX] Posted November 10, 2017 Author Share Posted November 10, 2017 Thanks guys! My sister saved the day and fixed all of the parts that had some peeling. There are still a few small rough spots but it will do for this weekend. We've already been talking about repainting everything in the spring. So we will have fun with it as is over the winter. You're doing a fantastic job. Really love the scorching on that E-11D, how did you achieve that? My sister did that too. 😠She just used a mix of acrylic paints and dabbled the colors on, with a mix of smearing using a paper towel. Anyway, we put in another all-nighter and finished everything up. Tomorrow (I mean later on today 😣 we will just have to glue a few things down and this project is done. Sent from my SM-G955U using Tapatalk Link to comment
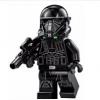
Jedi_Outcast77[TX] Posted November 12, 2017 Author Share Posted November 12, 2017 Today was the big reveal and we had a blast!! Still have some things to tweak and fix but are so excited to have worn this today. Thanks to Nick (aka: feliz) for making the trek up and hanging out with Frank and I today!! Sent from my SM-G955U using Tapatalk Link to comment

Recommended Posts
Create an account or sign in to comment
You need to be a member in order to leave a comment
Create an account
Sign up for a new account in our community. It's easy!
Register a new accountSign in
Already have an account? Sign in here.
Sign In Now