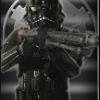
ground pounder[501st] Posted February 7, 2011 Share Posted February 7, 2011 Got my TX armor in today from tupperwareTK. Black, ABS, AM. Already trimmed arms and biceps. No pictures but not much to see since they are wrapped in tape and have clamps all over them. Trimmed the back and chest, using my TE2 for reference. My link My link Here are the side views My link My link Also trimmed the shoulder bells. Again used my TE2 as reference My link My link Also got my black Bass boots in today. Not just waiting on the helmet. Orderd a CAP helmet. The helmet in the kit (AM) I don't like at all. If the CAP doesn't look good, I'll go with an AP or another TE2. Looking forward to finishing this and getting shiny and deployed! Link to comment
Darth Agnon[501st] Posted February 8, 2011 Share Posted February 8, 2011 Awesome! Keep us posted. Link to comment
izzi[TX] Posted February 8, 2011 Share Posted February 8, 2011 Very cool. It'll be interesting to see where this leads! -iz Link to comment
troopre[TX] Posted February 8, 2011 Share Posted February 8, 2011 OOOOOH! I LIKE the glossy!!!! Link to comment
ground pounder[501st] Posted February 13, 2011 Author Share Posted February 13, 2011 Been working on and off, as time allows. All the pieces on arms and legs are trimmed and at least half glued. I am glad I have my TD as reference. There is a lot of trimming on the AM to get wearable. Here is a picture of the top of the shins - left one is cut the right one isn't, showing how much I trimmed My link Used my TE2 shins as reference and cut the AM to match. Here is a picture showing the trimmed shin on the left and untrimmed on the right. My link Got my CAP helmet in. So will start on that while working on everything else. Link to comment
Darth Emphatic[CMD-DWM] Posted February 13, 2011 Share Posted February 13, 2011 Take some progress pics, we love pics! Link to comment
ground pounder[501st] Posted February 20, 2011 Author Share Posted February 20, 2011 No new pics. I always get to wrapped up assembling and forget to take pictures as I go. Got the knee plate attached this morning and worked on the helmet a little today. Bought all my snaps and velcro and elastic today. So should be able to start piecing it all together soon. Link to comment
ground pounder[501st] Posted February 21, 2011 Author Share Posted February 21, 2011 Worked most of today since I have time off work. Have to go out and get more elastic for straps tomorrow. Progress today: both arms complete butt and back plates strapped together ab and chest plates strapped together ab buttons painted shoulder straps attached and drying tonight velcro added to shins painted rivets on shin Hopefully if the weather is good tomorrow I will be able to paint the helmet and let that dry. Really hoping top be able to get it all on tomorrow (minus the helmet and belt). Speaking of the belt, anyone know of a good palce to get shiny black material for the belt? Haven't ad any luck with fabric stores around here. Link to comment
izzi[TX] Posted February 21, 2011 Share Posted February 21, 2011 I use leather from Tandy that I dye and sheen up to a nice shine. Plus, it can hold the weight of a holster and blaster without a problem. -iz Link to comment
ground pounder[501st] Posted February 22, 2011 Author Share Posted February 22, 2011 Worked a little more first thing this morning. I think I am at a stopping point until the E6000 fully dries. The shoulder straps are just not sticking very well, even after sitting all night. Re-applied more E6000 to them and added more clamps - I hope that works! AB buttons are in, also added E6000 to the underside of them to keep them steady. Glued the last shims on the backs of both calves. Since it is a nice morning I took the CAP helmet out and painted it: My link That needs to sit a day or two as well. Not sure if that will need a second coat yet. Ordered some black PVC material for the belt last night. Belt should be rather easy. Thermal detonator should be easy as well. Any suggestions on attaching it to the belt? Seen a couple different ways just not sure what I want to do there. Link to comment
Rotccole Posted February 22, 2011 Share Posted February 22, 2011 The TD is actually the easiest part, in attaching it you can get some aluminum and bend it to fit over the belt or you can look up money clips and make those work. Really its all a matter of preference. Nice work with the build can't wait to see more. Link to comment
izzi[TX] Posted February 22, 2011 Share Posted February 22, 2011 The shoulder straps are just not sticking very well, even after sitting all night. I've never tried gluing the straps right to the bells. If they don't stick you may want to try a snap system with them. -iz Link to comment
ground pounder[501st] Posted February 23, 2011 Author Share Posted February 23, 2011 Did a test fit this morning: It felt very 'boxy' compared to my TE2. Made lots of noise just walking to get the picture. The knee plate kept catching on the lower left thigh, so I will trim a lot of this: My link Hoping that once the belt is done that will compress it all a little more and get rid of the plastic sound when walking. Also trimmed a little off thefront of the cod piece because that was rubbing against the tops of the thighs. Also...the boots..ugh. Don't like them at all. They are too wide at the top opening, thus there is a lot of bunching trying to get them into the shins. Then the top popped out of the shin just walking to get the picture. Thinking I might sew the elastic on the sides of the boot to make the top opening smaller. Already sewed some elsatic into the top of the boot tongues - it has velcro on it and I put velcro on the inside of the shins. Hoping that would keep the boot tops in the shins. That didn't work obviously. Going to have to do some creativness to make those boots work. Link to comment
Darth Agnon[501st] Posted February 23, 2011 Share Posted February 23, 2011 Almost there. If you have an issue with your shins turning, you can take a strip of air conditioner weather stripping and and put a line of it done the inside of the shins. Should help keep them from moving. I did that to keep mine from riding up over my boot tops. Link to comment
Darth Emphatic[CMD-DWM] Posted February 23, 2011 Share Posted February 23, 2011 I use leather from Tandy that I dye and sheen up to a nice shine. Plus, it can hold the weight of a holster and blaster without a problem. -iz Izzi, what specific item did you use from Tandy. I need to make another officer belt so I might as well make this upgrade at the same time. Link to comment
izzi[TX] Posted February 23, 2011 Share Posted February 23, 2011 I just grab one of the $30 hide pieces and trace the plastic panels on it to make a leather version. Been thinking of a way to make something nicer, but been too lazy. I'll be buying more soon, for the Magma and AM Blackhole/Nova build, so I'll probably make a little tutorial in my build thread. -iz Link to comment
ground pounder[501st] Posted February 23, 2011 Author Share Posted February 23, 2011 Trimmed knee: Old New That should relieve the thig plastic catching Link to comment
Darth Emphatic[CMD-DWM] Posted February 24, 2011 Share Posted February 24, 2011 Looking good in that test fitting. You can see the common issue of the bottom of the thigh pieces leaving a gap on the inside of the knee (logically, because it rest along the outside of your thighs). What I did to resolve this and make a little cleaner look from the front was put some foam on the inside of the thigh pieces close to wear it hits the inside of the knee. This will keep it out and make those pieces look more centered. Link to comment
ptbenz Posted February 24, 2011 Share Posted February 24, 2011 Perfect idea on trimming the knee plate! I have the same problem with my suit. I am going to trim the knee plate and see how it works! Link to comment
ground pounder[501st] Posted February 24, 2011 Author Share Posted February 24, 2011 Everything is done, except the helmet and TD. Finished the belt a little while ago. Used black canvas and then covered it with black PVC fabric. Glued the buttons on the belt - it is drying now. Decided to modify the boots. Here is what I did: Took in about a quarter inch on both sides of the elastic and sewed them down tight. Here is what the boots now look like: The tabs on the tongues have velcro sewn in to attach to teh inside of the shins. Wore them with the shins and thighs and no problems. Boots didn't pop out Put the rest of the armor on and looked at what was making the plastic clicking noise when I moved. It was the butt piece, so I trimmed that down - cut about inch and half off both sides. Once the belt is put on it will pull the back/butt/ab tight and stop anymore clicks. Link to comment
ground pounder[501st] Posted February 25, 2011 Author Share Posted February 25, 2011 Everything dried overnight. Put on the armor again with belt this time: Pulled out the hand plates and of course ran out of velcro. Seems that is the way this build has gone, nothing ever seems to go exactly as planned! Link to comment
Darth Emphatic[CMD-DWM] Posted February 25, 2011 Share Posted February 25, 2011 Put the rest of the armor on and looked at what was making the plastic clicking noise when I moved. It was the butt piece, so I trimmed that down - cut about inch and half off both sides. Once the belt is put on it will pull the back/butt/ab tight and stop anymore clicks. Everything looks good...but, no clicking? How can you be a trooper without clicking? It goes with the territory Link to comment
izzi[TX] Posted February 26, 2011 Share Posted February 26, 2011 That and squeaking when you sit in a vinyl chair... It's awesome. -iz Link to comment
Darth Emphatic[CMD-DWM] Posted February 26, 2011 Share Posted February 26, 2011 Do you have side straps for the chest armor? Link to comment
ground pounder[501st] Posted February 26, 2011 Author Share Posted February 26, 2011 Do you have side straps for the chest armor? You mean straps from the chest to the back? No. Just shoulder straps and straps attaching the chest to the ab. Link to comment

Recommended Posts
Create an account or sign in to comment
You need to be a member in order to leave a comment
Create an account
Sign up for a new account in our community. It's easy!
Register a new accountSign in
Already have an account? Sign in here.
Sign In Now