TookBreaker[TX] Posted January 23, 2023 Author Share Posted January 23, 2023 It has been a while that I was able to carve out some time for my DT (was busy with Count Dooku AOTC, Fennec Shand), but here I go. I decided to make the armor wearable first before starting any paint job on it. I was able to plan out how the strapping should be done, have it done for these parts: Harness approach for lower armor parts to give some mobility. Chest/Back will be connected with Paul's Shoretrooper solutions on the shoulder Belt almost done. Thighs planning to connect with a belt to the pants, not decided yet. I had to do some trimming of thighs, shins, and forearms as they are a bit too long (an inch for the thighs). As I went through the trimming and sanding of the shins and forearms, I ran into a question how to create a proper adhesion surface for those using the clamshell approach. The issue I see is that shins and forearms connection area are not level and needed sanding to create a straight surface. The issue I see is: Sanding loosens the fiber (see picture) The connection point is a curved area not providing sufficient adhesion surface Any recommendations? Photos: Not leveled connection areas that I sanded afterwards: With the result that some areas of Fiber create gaps: Missing proper adhesion surface because of curved surface: Link to comment
Chaos[CMD-DCA] Posted January 23, 2023 Share Posted January 23, 2023 @TookBreaker I had the same issue, I used a lot of Devcon Plastic Weld 2 part epoxy. Rough up the two surfaces you want to join, clamp/secure them in position and together. Then begin to put the epoxy into the gaps. You can use hot glue or duct tape to close off the opposing side so the epoxy stays in place. I also used the epoxy to fill the gap on the tops and only used a little auto body bondo to smooth out the seams. 1 Link to comment
TookBreaker[TX] Posted January 23, 2023 Author Share Posted January 23, 2023 3 minutes ago, Chaos said: @TookBreaker I had the same issue, I used a lot of Devcon Plastic Weld 2 part epoxy. Rough up the two surfaces you want to join, clamp/secure them in position and together. Then begin to put the epoxy into the gaps. You can use hot glue or duct tape to close off the opposing side so the epoxy stays in place. I also used the epoxy to fill the gap on the tops and only used a little auto body bondo to smooth out the seams. Superb! I was considering Epoxy as well as it seems the best suited option for this, but was curious what all others did. Thank you @Chaos 1 Link to comment
Chaos[CMD-DCA] Posted January 23, 2023 Share Posted January 23, 2023 @TookBreaker Anytime! Just make sure when you fill the seams/gaps that you use a toothpick or skewer to push the epoxy inside the gap to eliminate most of the air pockets. 1 Link to comment
TookBreaker[TX] Posted January 23, 2023 Author Share Posted January 23, 2023 1 minute ago, Chaos said: @TookBreaker Anytime! Just make sure when you fill the seams/gaps that you use a toothpick or skewer to push the epoxy inside the gap to eliminate most of the air pockets. Good idea! Link to comment
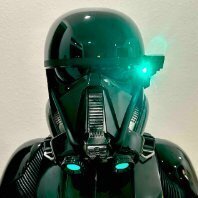
TookBreaker[TX] Posted February 24, 2023 Author Share Posted February 24, 2023 Time for another round of updates. Making slowly progress as I have to get the painting started soon. There were a lot of good insights in the forums and most recently following @DoggyDoc build, which is in the same stages as mine. Current progress: Trimmed pretty much all parts to fit me. Most challenging were forearms and the shins. Anything else fits me pretty much out of the box. Used all suggestions from @Chaos to use Plastic Weld (JB and Devcon). What a powerful adhesive! Was able to close many big gaps, but still used Bondo to smooth it out. Prepared the chest and back armor to be connected with Paul's Shoretrooper's strapping and brackets. Primed chest, back, and abdomen armor parts and used PlastiDip for all parts. I did this after the strapping was set to ensure proper adhesion as PlastiDip may not provide enough grip. For areas I did not prepare the strapping, I left those spots out for later. Thanks for the side straps STL file, @Chaos! Have to get to a tailor to get the undersuit fitted better as it has a lot of excess. Debating how to diffuse the helmet hovi tip lights - either by adding a diffuser paper in front of those or use EL Panel: https://elwirecraft.co.uk/product/6cm-or-10cm-diameter-round-el-panel/ A few photos below: Shoulder straps front buckle triangle hook had to be sanded down a bit to fit flush with the buckles, painted all triangle hooks, clear coated, and used JP Plastic weld to glue them to the buckles, straps are also glued to the buckle. Will attach them with glue and screw to the chest armor once done. PlastiDip time: Taped the edges to avoid PlastiDip on areas that need to be painted. 5 Link to comment
DoggyDoc[CMD-DCA] Posted February 25, 2023 Share Posted February 25, 2023 looking good. Link to comment
Chaos[CMD-DCA] Posted February 25, 2023 Share Posted February 25, 2023 On 2/24/2023 at 7:37 AM, TookBreaker said: Thanks for the side straps STL file, @Chaos! Have to get to a tailor to get the undersuit fitted better as it has a lot of excess. Debating how to diffuse the helmet hovi tip lights - either by adding a diffuser paper in front of those or use EL Panel: https://elwirecraft.co.uk/product/6cm-or-10cm-diameter-round-el-panel/ You are more than welcome. I'd go with the EL panels. I wish I had, they look so much better. If not, you can lightly sand the tips of the LEDs to reduce the focal point and use diffuser paper or white parchment paper. If you are going with having your undersuit tailored, I might have something you'd be interested in. I modified my Jimmi undersuit after I decided to use the corset design for my abdomen and lower back armor. It basically puts the zipper in the back so that it doesn't show in the front and is more like the screen used undersuits. Its really easy to put on by yourself and zips up much like a wetsuit. I had mentioned putting the shirt zipper in the back to Jimmi, not sure how his new suits come. If you aren't going with the corset set up and want to keep the abdominal gasket as part of the undersuit this will still work. Looking awesome! Here is the mod I made to Jimmi's undersuit. Undersuit Redo.pdf 2 Link to comment
TookBreaker[TX] Posted February 25, 2023 Author Share Posted February 25, 2023 11 hours ago, Chaos said: You are more than welcome. I'd go with the EL panels. I wish I had, they look so much better. If not, you can lightly sand the tips of the LEDs to reduce the focal point and use diffuser paper or white parchment paper. If you are going with having your undersuit tailored, I might have something you'd be interested in. I modified my Jimmi undersuit after I decided to use the corset design for my abdomen and lower back armor. It basically puts the zipper in the back so that it doesn't show in the front and is more like the screen used undersuits. Its really easy to put on by yourself and zips up much like a wetsuit. I had mentioned putting the shirt zipper in the back to Jimmi, not sure how his new suits come. If you aren't going with the corset set up and want to keep the abdominal gasket as part of the undersuit this will still work. Looking awesome! Here is the mod I made to Jimmi's undersuit. Undersuit Redo.pdf 2.28 MB · 3 downloads Interesting idea and makes me thinking now. 🙂 I used a harness style for the lower body armor so I the chest/back plate have more movement option. Let me check and appreciate the idea and the documentation! Link to comment
TookBreaker[TX] Posted May 8, 2023 Author Share Posted May 8, 2023 Long due update... 🙂 It has been a while and I was able to make some progress on strapping, trimming, and getting ready for some paint work (through a friend). I will post strapping photos, once I have all complete as some of it are prepared, but wanted to wait till paint work is done. Painting preparation and paint: After my friend looked at the parts, we could clearly see many scratches and uneven spots including air bubbles that are not coverable by primer, meaning all parts had to be treated with Bondo first to ensure a smooth surface (after wet sanding it). Some parts needed Bondo twice before primer was applied. See below pictures. Primer and Paint used: Primer: Krylon COLORmaxx Flat Gray Spray Paint and Primer In One Paint #1: Rust-Oleum 7578838-6PK Professional High Performance Enamel Spray Paint Paint #2: Tamiya Metallic Black TS40 Clear Coat: Spray max USC 2k High Gloss Clearcoat Aerosol Applying Bondo - First batch: Priming and Painting: After clear-coating: Now to more Bondo, wet-sanding, and priming... 🙂 3 Link to comment
TookBreaker[TX] Posted May 22, 2023 Author Share Posted May 22, 2023 Next small steps as the sanding and painting of the other armor parts are ongoing. Worked a bit on the chest/back armor connection brackets from Paul's Shoretrooper. Used the following approach: Pre-drilled a hole on the back armor shoulder for one Chicago screw on each side that goes through the bracket and gets fixated from the inside. In order to eliminate the need to glue to keep it in position, I decided to use velcro, which should keep it in place alongside the Chicago screw. Installed snaps on the front side of the bracket through velcro to create the anchoring point for the chest armor. The velcro is glued with E6000. Covered the underside of the front bracket with self-adhesive velvet fabric to not only hide the aluminum bracket, but also create a softer surface. Next step it to connect the chest armor to test it out in order to determine if further trimming is needed. Photos: Chicago screw attached to back armor shoulder for bracket mounting: Gluing velcro, installing snaps for chest armor attachment: 2 Link to comment
TookBreaker[TX] Posted July 14, 2023 Author Share Posted July 14, 2023 Question to the group: Does the inner part of the neck (of the back armor) has to be gloss painted? As you know, the Jimmy Trippon kit is fiber resin and not smooth on the inside. I did not see anything specifically called out in the CRL, hence the question here. The Reference photo in the CRL is glossy, but the armor is a different vendor. Can it just stay plain matte black? Does it have to be smooth as the outside? Link to comment
TookBreaker[TX] Posted July 15, 2023 Author Share Posted July 15, 2023 A few more updates and learned a bunch from @DoggyDocBuild, who was also kind to share with me his 3D STL files for the Belt Pouch Plates, Magazines for the chest rig, and the Thermal Detonator brackets. Everything is painted and clear coated except helmet, forearms, biceps, bells, and pouch plates, which is in progress. Here are some insights how I glued smaller parts on the thighs, but also strapping and any other optimizations for ideal fitting. Legs: Right thigh: Filled this part with JB Weld, then a piece of black ABS with a Chicago Screw glued on it as there is not much adhesion surface. Left thigh: Filled the small three boxes with foam. Primed: Painted: Shoulder straps As mentioned before, I used Paul Shoretrooper's brackets and shoulder straps. I needed to shorten these to fit better and leave enough length to slide in the back and be secured. I decided to screw the buckles to the chest armor with one screw. For this, I used similarly to @DoggyDocsuggestion a self-tapping screw, in this case into the belt buckle. Being paranoid about scratches, I added a little felt to the front. This way any scratching or noise should be eliminated. The screw holds really well and is strong. At the sliding end, I had to sand the rubber down so it can slide easily to the back armor and again used a bit of felt so the rubber strap is not visible from the side. Initially, I planned to use strong magnets for the loose end so they can snap to the back armor once slid in, however I forgot about the angle on the back and it did not work out. Changed from magnet to Velcro. Once slid in, they are velcroed and stay in place. Experiment with Magnet (definitely a no go): Velcro is the better option and the shoulder strap sits really flat. Overlapping Armor Parts: This applies to Chest/Back armor overlapping with abdomen and back, but also bells on bicep armor pieces. In order to avoid scratches on the paint as well as potential squeaks or other noises that overlapping armor parts could create while in motion, I tried out felt lining. I did not like it as it did not sit well, difficult to get a smooth surface, and requires gluing. I changed to FlexSeal rubber paint, which was easy to use and really created a soft surface. Felt lining: FlexSeal painted: Other photos of my build: Harness-based lower body armor pieces: Belt boxes I printed based on an online available 3D STL file, where the lid can be secured with a magnet: Next steps: Get the rest painted Have to find a better 3D STL file for the NSM range finder. The one that came with Jim Trippon's kit is not ideal. Undersuit pants are with tailor because of too much excess. Side buckles to be attached to chest armor. Strapping of thighs, velcro for shins (clamshell). Try on to test body armor and legs to check fitting. And there are for sure still some more work items. (I know this was a long post, but wanted to get it out there). 2 Link to comment
Chaos[CMD-DCA] Posted July 15, 2023 Share Posted July 15, 2023 20 hours ago, TookBreaker said: Question to the group: Does the inner part of the neck (of the back armor) has to be gloss painted? As you know, the Jimmy Trippon kit is fiber resin and not smooth on the inside. I did not see anything specifically called out in the CRL, hence the question here. The Reference photo in the CRL is glossy, but the armor is a different vendor. Can it just stay plain matte black? Does it have to be smooth as the outside? Most of us who have Jm's kit have put bondo or some kind of "smoothing" material on the inside of the collar tusks and since they are visible, painted them gloss back at least to the point where the neck seal hides the inside of the collar. The screen suit's inside collar is gloss black. By default, if the CRL states "armor is gloss black" "except where annotated" then any visible armor needs to be gloss black. The raise area you see on the inside of my collar is where I installed a tab that slides under the chest piece to keep my collar tusks flush against the front armor. 2 Link to comment
TookBreaker[TX] Posted July 19, 2023 Author Share Posted July 19, 2023 Question regarding the side buckles: There is supposed to be a triangle at the upper end of the rubber piece. Does it have to be lower than the other 4 rectangles? I saw both versions, but mostly it looks like it is lower. Any advice? Link to comment
Chaos[CMD-DCA] Posted July 20, 2023 Share Posted July 20, 2023 From the CRL: "D-ring is attached to a shorter strap, similar in appearance and size to the shoulder straps with a smooth trapezoid shape at the top end." Here is what it should look like, if yours is anywhere close you are good to go. If you are asking about the height of the rectangle's surface in relationship to the surface of the triangle, they are the same level across all. 1 Link to comment
TookBreaker[TX] Posted July 20, 2023 Author Share Posted July 20, 2023 Thank you very much, @Chaos! 1 Link to comment
TookBreaker[TX] Posted July 21, 2023 Author Share Posted July 21, 2023 Question to the group: I have my shins ready, left a paintless stripe to have better adhesion for the Velcro in order to close the shins as a clamshell. Here is the challenge I see: Wearing the boots, the panel to cover it all, the closing becomes pretty tight, especially with the foam around the ankles of the boot itself. I could close it perfectly well with all underneath, but I am pretty sure, once you walk, the velcro will not hold well. Picture from CRL: Did you just keep the shins at the lower end wider (I trimmed it with booth and underarmor, but it may be tight now) or have other tricks to keep it closed and in place? I was thinking to remove the foam from the ankles of the booth, maybe even cut off the pull tab on the heel. Any ideas? Link to comment
DoggyDoc[CMD-DCA] Posted July 21, 2023 Share Posted July 21, 2023 Mine are pretty wide at the bottom to fit everything in there. I did extend them however as they would not have even come close to fitting otherwise 1 Link to comment
DoggyDoc[CMD-DCA] Posted July 21, 2023 Share Posted July 21, 2023 Mine are pretty wide at the bottom to fit everything in there. I did extend them however as they would not have even come close to fitting otherwise 1 Link to comment
Chaos[CMD-DCA] Posted July 22, 2023 Share Posted July 22, 2023 14 hours ago, TookBreaker said: I was thinking to remove the foam from the ankles of the booth, maybe even cut off the pull tab on the heel. Any ideas? This is exactly what I did, I had originally sized my shins to wear with my Talib's. When I got my Jared's, they were too tight. I cut the inside leather about 1 1/2" and just pulled the foam out from all the panels. It doesn't keep you from achieving Level 2. Keep the pull tab as that is a L2 requirement. 1 Link to comment
TookBreaker[TX] Posted August 20, 2023 Author Share Posted August 20, 2023 After a pause from building, thanks to a friend, I finished the arm armor pieces (bell, biceps, and forearms). Now, as it relates to the forearm pieces, I have to sand down/PlastiDip the part where the rubber bands have to attach, but am looking for ideas on how to attach them so it looks as one. Any ideas? I did cut off the clip portion of the rubber band to make it fit. Also, I will probably use black JB Plastic Weld to ensure that the band attaches correctly and long term as I used the clamshell method to wear these, meaning the rest has to be loose so I can put it on. Thanks Link to comment
Chaos[CMD-DCA] Posted August 22, 2023 Share Posted August 22, 2023 Someone asked the same question sometime back so I had this in one of my folders. Let me know if you have any questions. 1 Link to comment
TookBreaker[TX] Posted August 22, 2023 Author Share Posted August 22, 2023 Thank you and I wanted to use the same approach to glue them on those marked points to give flexibility to slide my hand through. What I cannot see on the pictures, how did make the rubber bands sit flush with that greeblie already on the armor? Did you cut the front edges thinner so it blends in? Link to comment
Chaos[CMD-DCA] Posted August 23, 2023 Share Posted August 23, 2023 I cut the ends at an angle so they sit flush against the greeblie, I'll look for a photo 1 Link to comment

Recommended Posts
Create an account or sign in to comment
You need to be a member in order to leave a comment
Create an account
Sign up for a new account in our community. It's easy!
Register a new accountSign in
Already have an account? Sign in here.
Sign In Now