Leaderboard


Popular Content
Showing content with the highest reputation since 08/12/2025 in Posts
-
4 points
-
Tomorrow is the big day for me! I am heading to an armor party for a suit up and to get help taking my pictures for approval. Got a checklist of everything I need and inventoried all of my stuff. I should be good to go! My next post should be the pictures I submitted for approval, and hopefully I hear back soon/quickly!4 points
-
I've sent for approval! Cheers and thanks to all that helped out in this WIP thread! @RAIDER @IcyTrooper @Chaos @Blackwatch @Dropkick4 points
-
I will also send my Binoc photos, on the outside they look great, I believe the width needs enlarged some.3 points
-
Greetings! Try to send them an email by here: iocpublicrelations@gmail.com or write a DM to their Facebook page, they will hundred percent reply to you a d solve your problem quickly! Good Luck!3 points
-
Face fully assembled and looking lovely! Filler primer on the dome is drying now.3 points
-
Why not just have the light up part optional like the lvl2 of the TIE pilot stating it cannot be opperational. "Red and blue buttons may light up but preference for accuracy is no lighting" or something.3 points
-
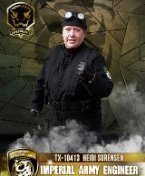
APPROVED! TX-17241! Now to do all of the fun access stuff on all of the forums.3 points
-
another simple solution is a free google account just for club use.I have one, my personal email is already over 100 emails a day with all the trash that comes in, i have club emails for all he important club notifications that come in.2 points
-
Thanks for the assistance, it has been fixed now2 points
-
I will send you what I got, the communication head is different from the one needed. Give me a few to find my photos. Also Hondo has a good image in the forums build section.2 points
-
Looks good! Thanks for making those available, especially since you're not doing one yourself? Just in the process of modifying my coveralls to get the arm pockets, but once I have that done I'll post pictures with my comlink and electrobinoculars when I do mu approval pics.2 points
-
Okay…so my bucket is…complete. Unfortunately the paint job didn’t turn out quite as good as I had hoped, and as I was finishing the final details and assembly, made a couple blemishes, but my hope is I can fix it in weathering. Anyway here are some shots of the “clean” bucket.2 points
-
I’m using this for the trim on my bucket. Use the longer side on the inside of the helmet and the shorter side sits perfectly around the edge.2 points
-
I posted this information out on a Facebook group post. Thought it would be good to share here to help with the CRL To give a bit more insight about the ISB Skirt, it is originally made of 4mill leather. The boarder detail is about 1/2” inward and the diagonal detail starts approximately 4-5 inches inward from bottom corner and angles upwards towards the outside and stops exactly at the detail border and at the bottom of the white leather belt. Also most importantly the Skirt is leather and the detail la are V grooves. Not stitching. Theirs also supposed to be a long narrow dart in the center to help taper the skirt to fit around the hips better. This center dart is folded forward therefore making them a Left or Right side. The trapezoid rear box is were the black rubber belt is adjustable and the distance gap between the the skirt and that rear box will change. What does stay the same is the front gap of the skirts is approximately 10 inches.2 points
-
once i am painting, i will post it up, want to ensure its valid and viable2 points
-
just an update for everyone, i am knee deep in printing all the pieces, my pants and my shirt have arrived. Its coming together quite nicely, i am almost at painting stage for my kit as well I ended up going the automotive route with the paint, so would it be something people want for me to post up the formula for the white colur i use? that way, no matter where people are in the world, an auto store can mix it up as paint for them. i think most auto stores can mix them into spray cans as well, even thogh i prefer the air brush route2 points
-
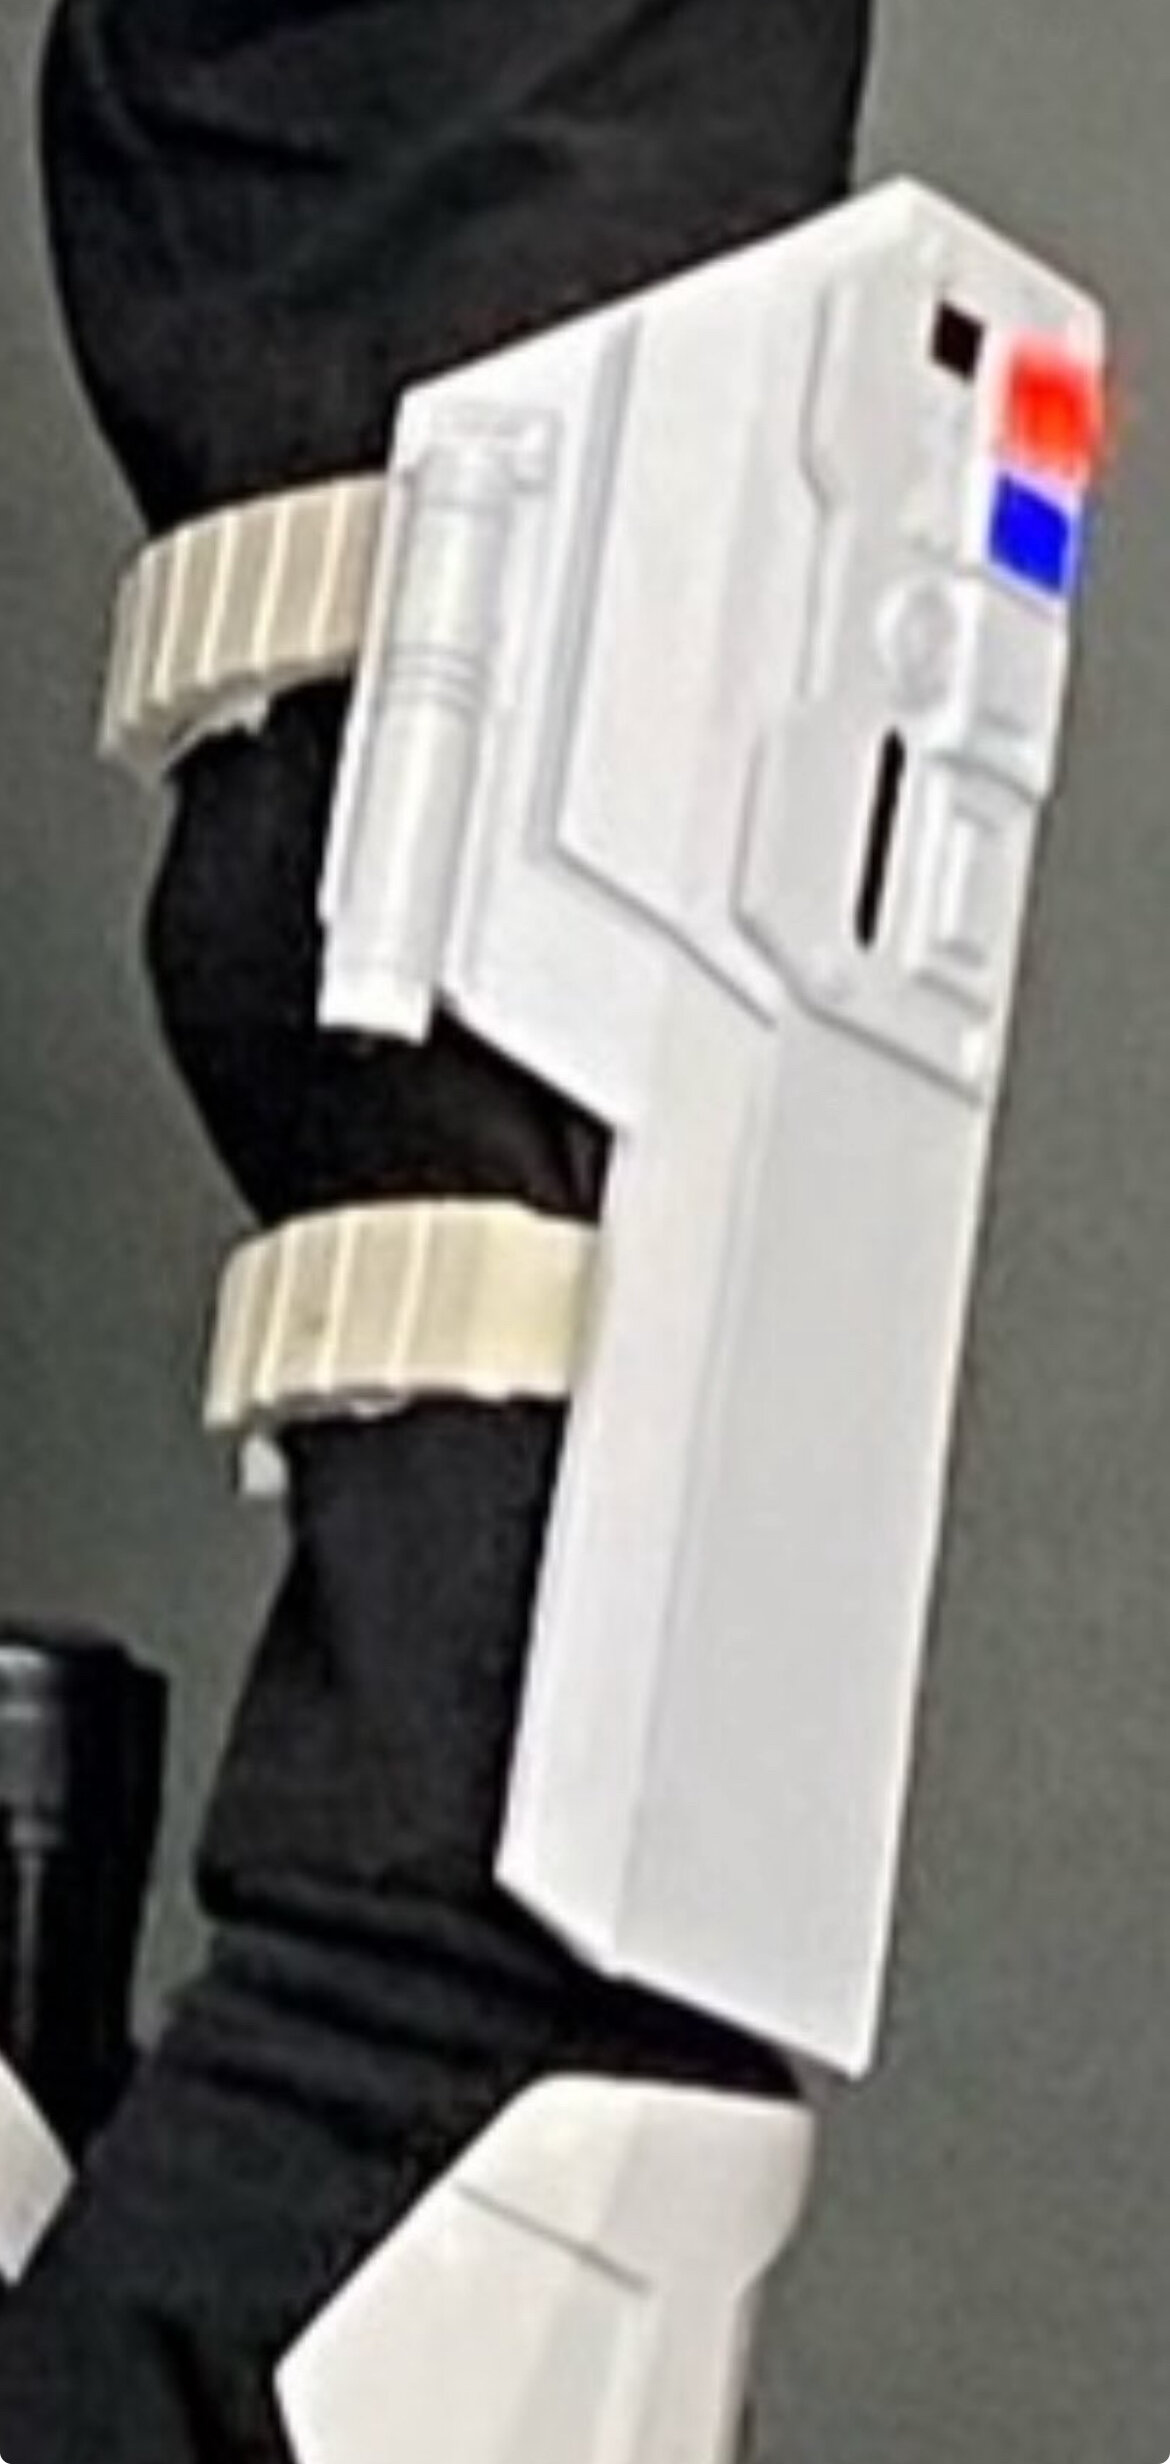
I cant verify anywhere that the red and blue lights were ever actually turned on, i cant see them in the dark lit scenes. Do we have anything that shows them working? id like to include it but like all lights we need to see them working, like on Vader or Fett. Lets call this change log 2.0 Forearms may be present on both arms and consist of flat angled plates with facets joined at an angle at the outermost part of the arm. If the right shoulder and bicep are not present, the forearm is not present. The left forearm may also be missing. Forearms are symmetrical and mirrored left to right. Four allen-head screws are present on the lower longer trapezoid shape area on the forearm. A commpad featuring various depressions and shapes is mounted to the left forearm. One red and one blue acrylic rectangle approximately 3/4" (19 mm) x 1" (25mm) are present on the lower side of the commpad. These are not lighted. The Com-pad has 4 low profile button head screws with centered flat slots. Flexible straps with a tannish or white color, similar to the lower leg straps design, are fixed to the forearm white strapping, and closes with a white side release buckle with square opening on the side. The rest of the strap is white textile webbing. The receiving end of the side release clip is fixed to the longer trapezoid side. A white cylindrical torch approximately 3/4" (19mm) x 4" (100mm) is present on the inner edge of the left forearm. Inside of the forearm should be padded so it does not fit tightly to the arm. Forearms and straps are weathered to match the rest of the armor.2 points
-
I've had this build happening for 2+ years, and I'm trying to wrap it up. I also have a Shadow Trooper that is 90% done, just need to do the strapping. I'm trying to get these teo done and out of the way so I can get R1TK started and have room in my work shop for when my Vader parts start arriving.2 points
-
Got around to painting the grooves on the backpack today. @Chaos, how did I do on the weathered silver? I also noted as I was checking the color scheme chart that my pill on the chest was still gloss black so I repainted that with some flat black.2 points
-
For your audio, are you looking for a pre-built solution, or are you willing to go homemade? If you're willing to go homemade, Adafruit has a sound FX board that can be pre-loaded with phrases and then triggered via 10 different pins. Each pin can support up to 10 different audio files that will play sequentially (first press first sound, second press second sound, etc.). They have a model that has a standard stereo jack output and another that has a small 2W amplifier built in.2 points
-
Done the easy part of printing all the bits. Just the endless sanding to do.now
 2 points
 -
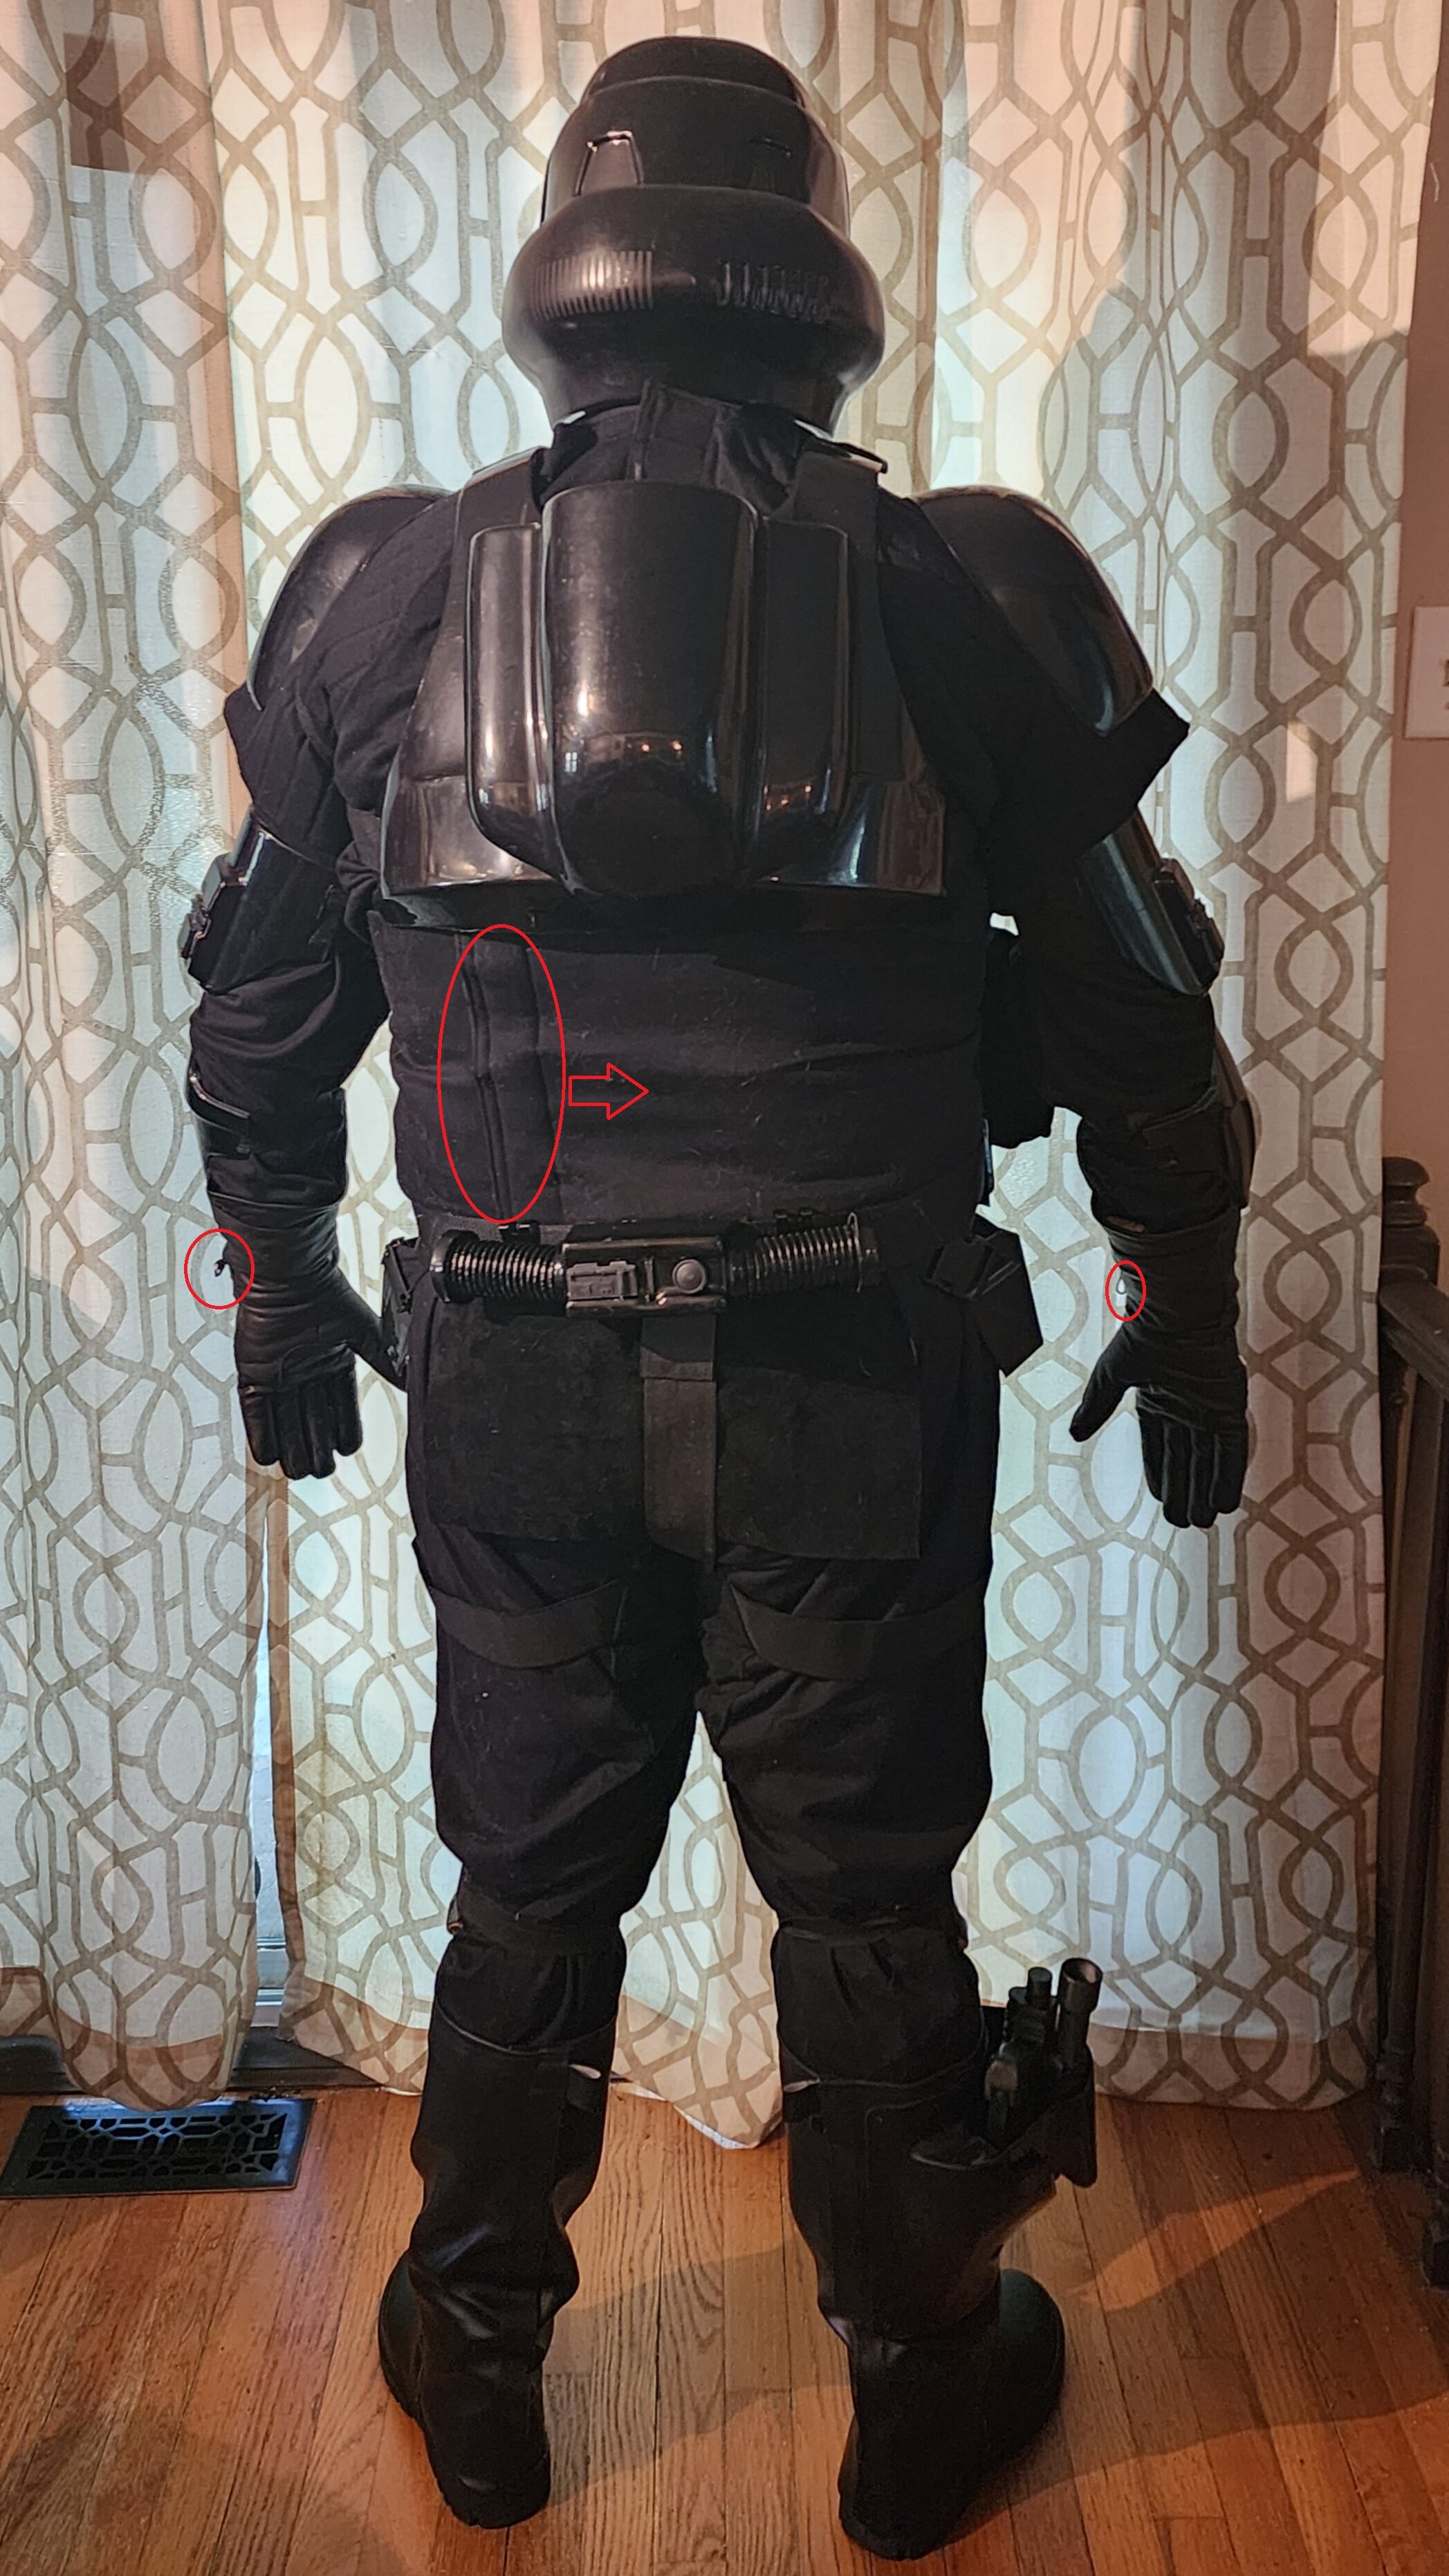
My pauldron came in! I just need to get together with some others to do a final suit up and take pictures. I am ready to go! One thing I did notice on my pauldron is that is should be good for basic, but I don't know that it's good enough for Level 2. There seems to be some extra stitch lines on the 4th stitch starting from the leather on both sides, the leather doesn't have the black banding (not sure what to call it) on the outside of the collar (only the inside), and the leather parts are on top of instead of on the bottom. Someone else feel free to correct me though. I may provide comments back to the seller to help them improve their product if people agree with my assessment.2 points
-
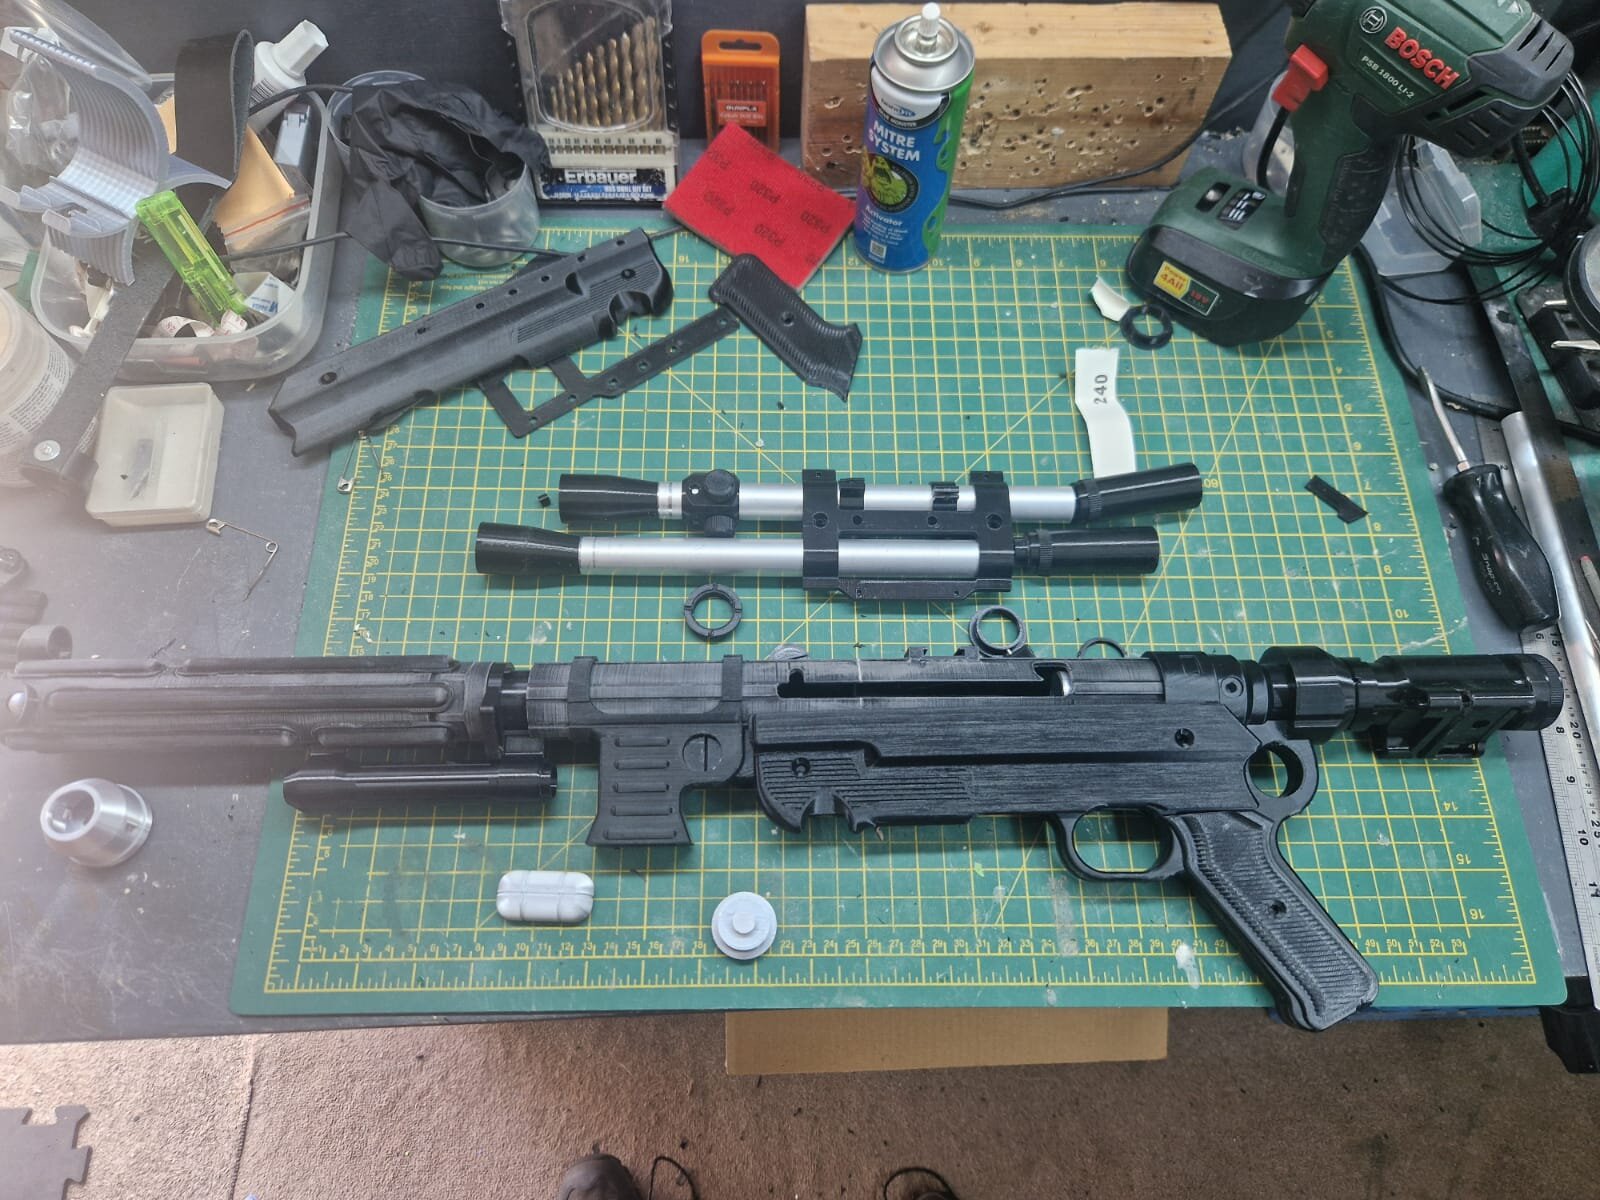
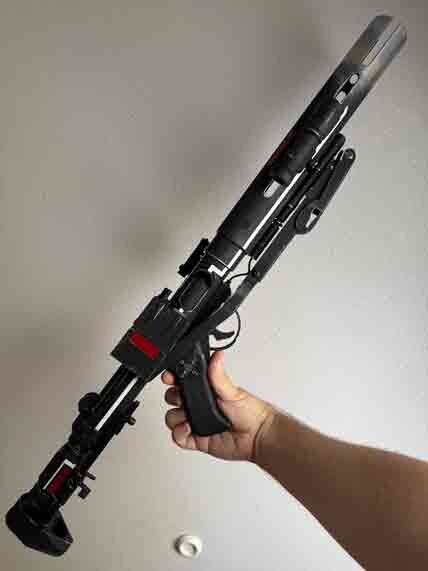
Going to call this one done 🙂 AGM base with 90% I'd say made from CNC's Ally - so quite happy with my first attempt at a "hero" weapon2 points
-
Hey @lonnolan, Can you PM me your email address & IOC forums username? I can ask the IOC DL to look at your questions. Thanks1 point
-
Received the leather pouch and holster from Darman's Props. And also, a new assistant has arrived. Tom Petty said it best...the waiting is the hardest part.1 point
-
If you haven't already, join this Facebook group and post your issue there: https://www.facebook.com/groups/iocofficersmess It's a frequent enough issue I see posted, so you should get help pretty quick.1 point
-
Here are the V2 macrobinoculars printed at .2mm layer height. They look great! Any scratches or artifacts you see are just from the supports, I didn't do a perfect job. It has an inner and outer lip so you should be able to trim clear plastic and glue it on as a lens easy. Just let me know if you want this one and I can ship it out with the comlink.1 point
-
I reached out to Jintalol about two weeks ago, and he said the kit would still take about another month. I expect another update or shipping info around September 15th.1 point
-
Another small update on the face peices: Did some more weathering on the “weathered silver” parts to get them closer to references as they were still too shiny. Assembling the tusks, I used the same lens material as the visor, sanded the back side for some diffusion, and placed some aluminum foil behind them for a little extra reflectiveness, as I don't plan to install lights for now. Also glued in little mesh grills under the side vents.1 point
-
1 can of Duplicolor, but I ended up buying 2 cans of 2K Clearcoat because I messed up and had to redo it, which required sanding it off. I just chalked it up to a learning experience.1 point
-
I tried another variation of the helmet bolts but I don't think my FDM 3D printed can do it justice, so I reached out to Imperial Surplus to get a set of the accurate bolts. For the boots, I added notches where the tread occurred on the boots, please let me know what you think (I'll clean up the grey overpaint soon): I also got a better suit up, I think it's looking pretty much there. I can do the belt and cod a little bit higher and the boxes a little bit wider next time.1 point
-
Anything that would mount the TD to the belt would work. Paul's mount might need to be modified so that the mount itself sits flush against the curvature of the DT TD. Just don't use zip-ties wrapped around the TD 😄1 point
-
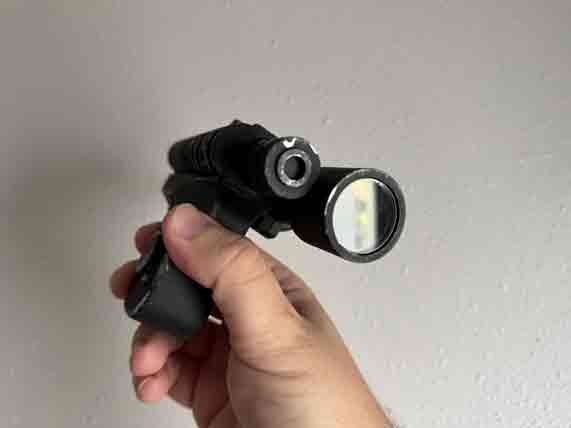
The blue and red rectangles on the com-pad are made of a translucent material. As I mentioned before they were intended to light up but last minute they were not illuminated for the show. But they are still transparent not a solid red or blue. Here is an image of it with the lights on.
1 point
-
Decided to take a gamble on their BOGO combo. I used the contact form on the site to ask about current time frame, and got an actual reply from Trevor within a few minutes saying 8-10 weeks. That seemed to be an “ok” sign. Also, the price was already reduced, and was able to get an additional 20% off for the Labor Day sale. So my total was $452 with free delivery. Even if it’s 12 weeks, I doubt I’ll be anywhere near finished my armor by that time.1 point
-
Your list is solid. My kit is a Jimmi kit. I have made a lot of upgrades over the years. You will find his parts are slightly heavier than an ABS kit. I like that about Jim's material because ABS wouldn't stand up to the abuse I have put my armor thru. Let me know if you have any questions about anything. Looking forward to seeing your progress.1 point
-
Yeah, you should! If I were residing in North America, Imperial Arms would be good. But in the EU, I think I have to find somewhere else if the customs fee is crazy. Also, if you are planning for E-11D level 2 approval, Imperial Arms Blaster doesn't support that. I guess I will have to find the maker of this in the future.1 point
-
Yeah, it took longer than expected, but I heard some people got them 10 months later, so... I guess I am lucky The pictures I got from the maker looked great, and he even gave me an additional blaster(small EC-17 with scope). Now all I have to do is wait for the courier. Hopefully, it arrives safely in Germany with little customs fees...
1 point
-
@DarthBerry Very nice! This is gonna look great once the fit is situated. Looking back at your helmet pic…I would suggest looking into a different helmet bolt. Here is a pic of a more accurate “concave” look (the one you have is too thick I think and the concave area is more like a hole rather than a subtle slope).
1 point
-
Any update on your order? Looking at the same BOGO option myself.1 point
-
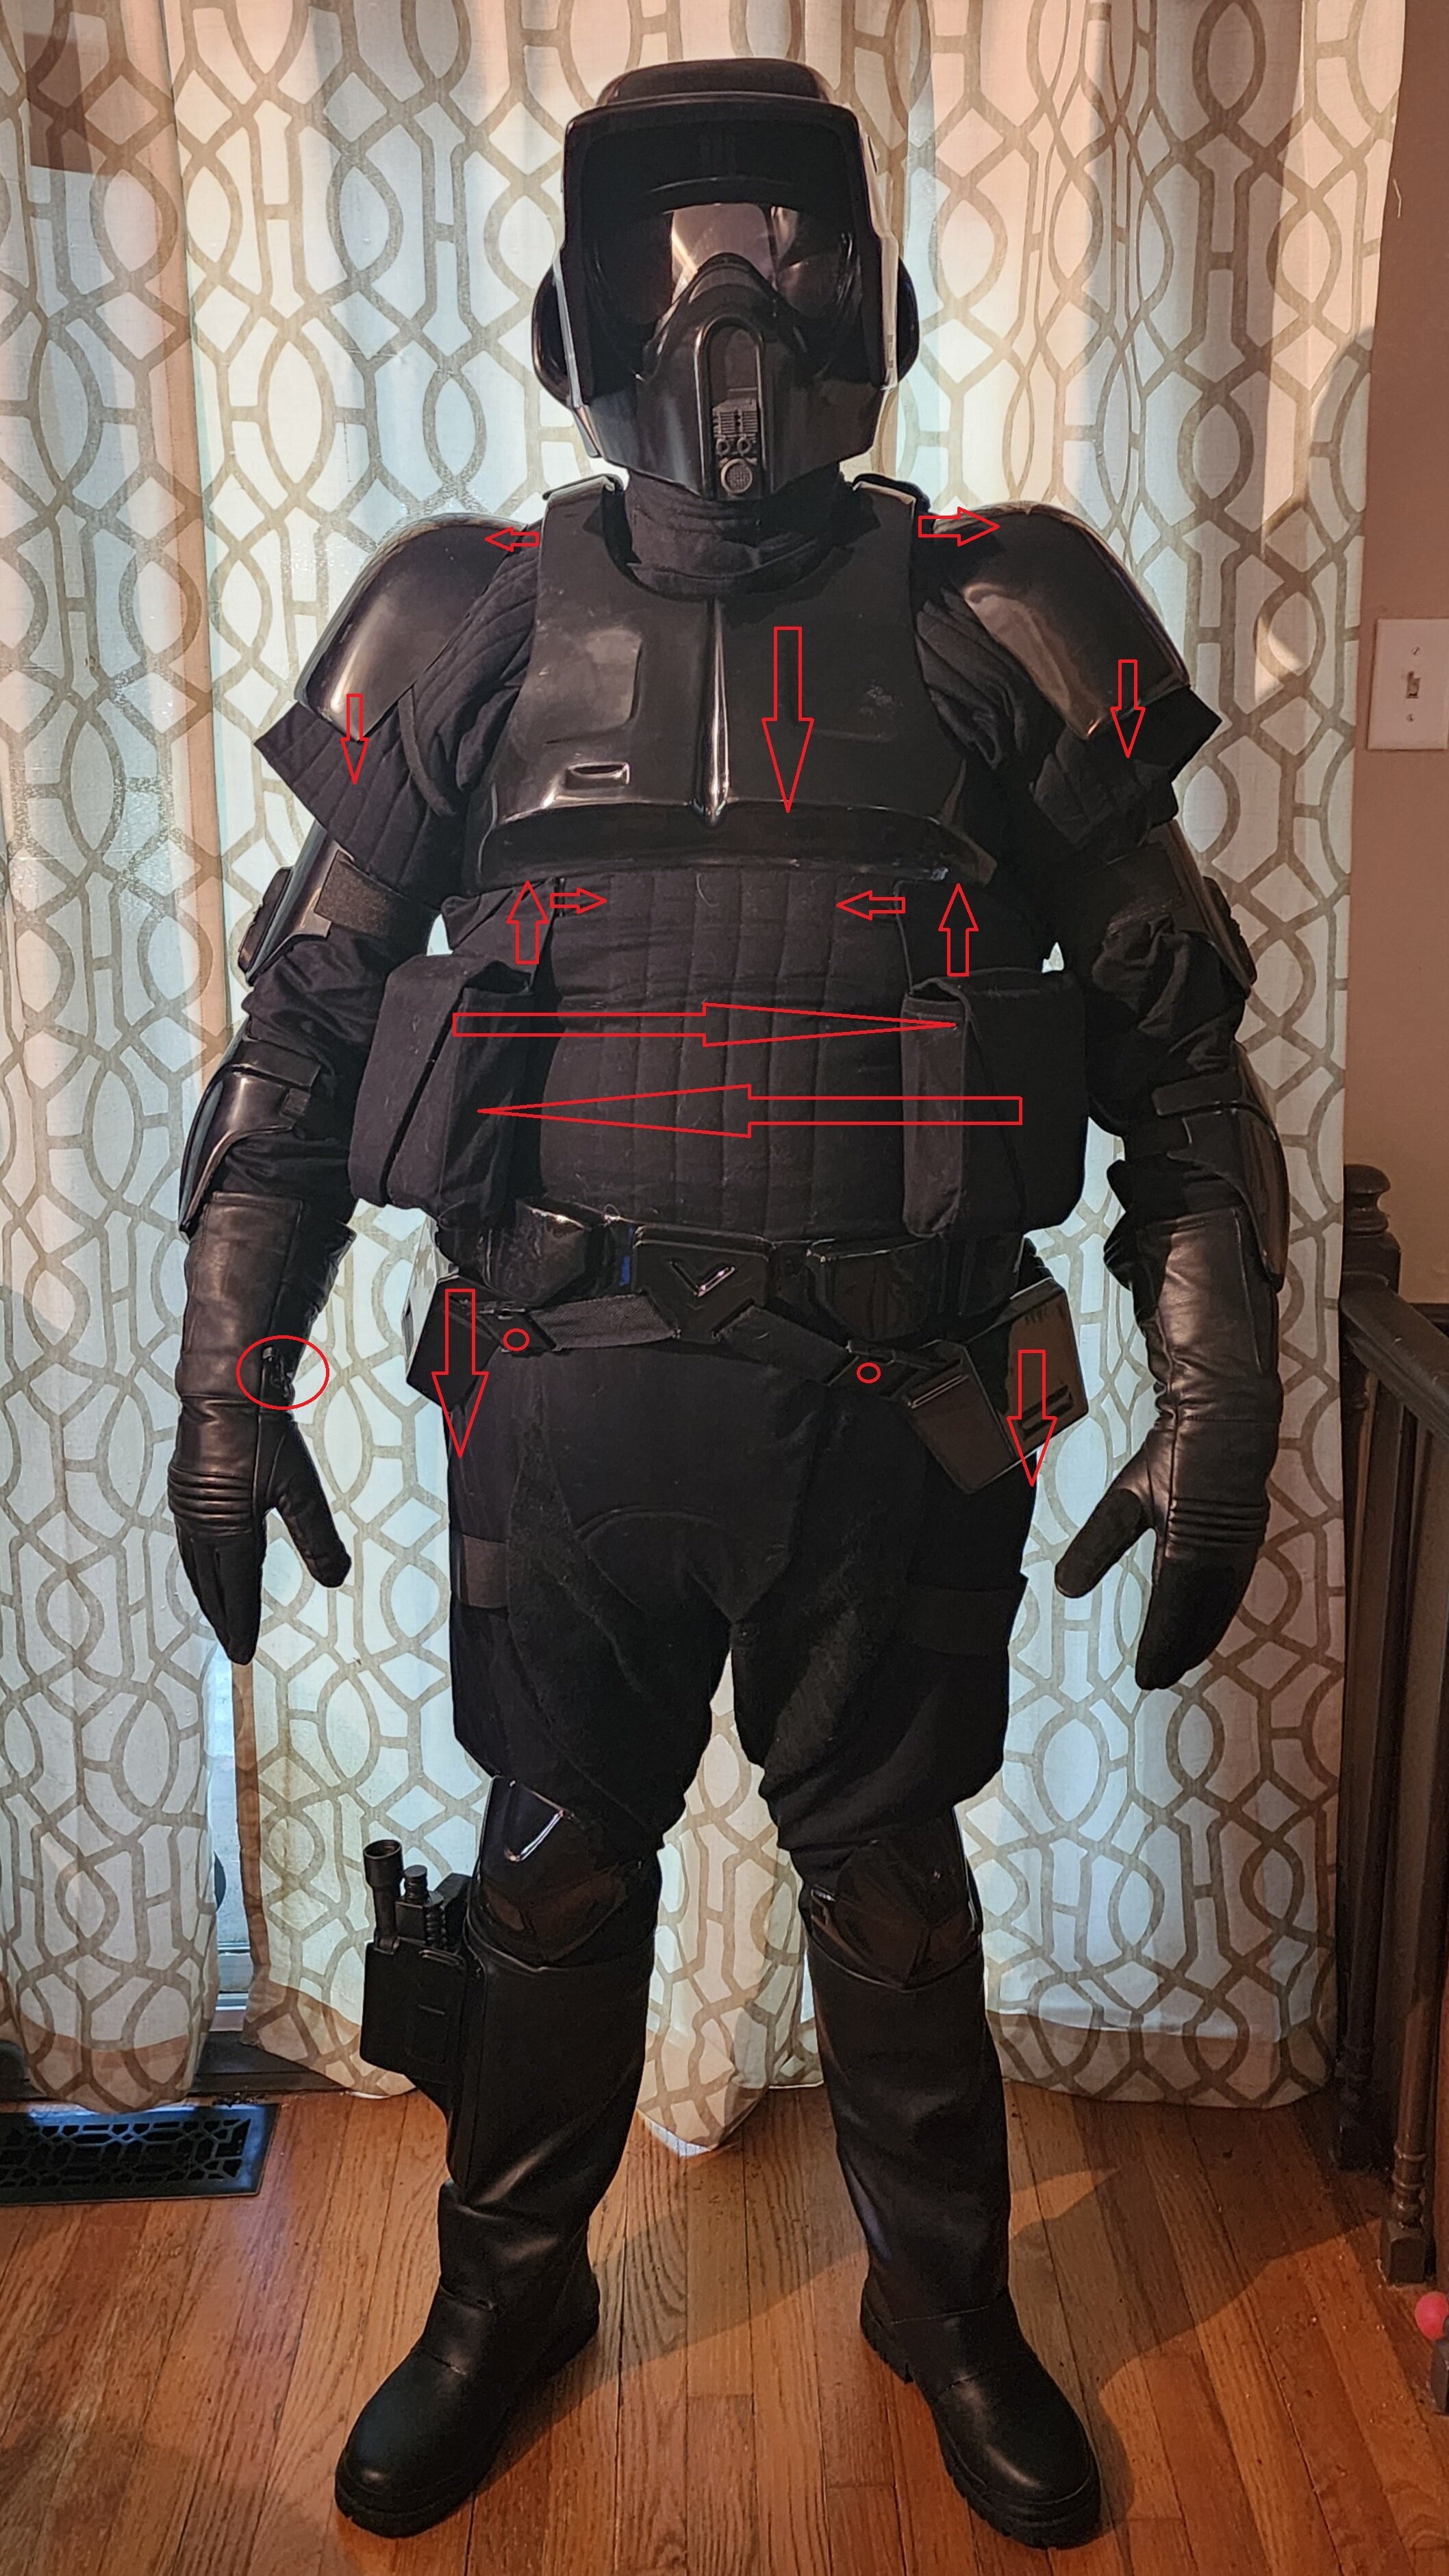
Nice to see, that you haven´t given up on this one 😊 I will try to give you some comments but it is really hard to see the details on your pictures, it would help if you take them in a better light. If you could take pictures of each part in good lighting also, that would help a lot. I have a couple of things that I noticed right away, and that you will need to correct : If possible could you lower your chest plate a bit ? the chest and back armor do not need to touch under the fabric bridge - you can extend it with velcro and then make the bridge fabric a bit longer. This will also make it more comfortable for you. Your shoulder bells sits to high, they need to sit on the edge of your shoulder, the correct position will also help so your flakvest sleeves do not look to long. Your pouches on the cummerbund needs to change sides - easy fix - but they also needs to be higher up so the top of the pouches sits under the edge of your chest armor and moved more towards the ribs in front without covering them. We shouldn´t be able to see the flap that they are hanging from. The closure on the cummerbund in the bask should sit in the middle, that will need to be changed. Your dropboxes needs to be lowered a bit too, the straps are to tight and its hard to see if your clips on the straps are put on the right way. The clips on your gloves will need to be cut of. The bolts on the helmet will need to be painted black. With better pics, I can give you more feedback on the rest, that I can´t see in full. Please also take a look at the model in the CRL for references : Costuming:TX shadow scout - 501st Legion Databank Keep going, you´re almost there 😉
1 point
-
So I'm so close to a full suit up, finally. I only have one more piece I need. Where do you get the belt clips for the TD?1 point
-
I've also been working on and off on patterns for the trooper, the pants are simple, a straight legged jean, using double stitching throughout all seams with specifically the back of the pants being laid over the front on the side seams, with a panel about 1/2" away from the in and out seam of the leg and around 11", based on what I've seen, long. I wish you luck on your journey!1 point
-
helmet as it is presented on the website is approvable1 point
-
Ive had limited internet access and now that Im back in the forum and seeing this , I am in agreement. I see no changes to be made.1 point
-
Yup they now up on Cults3d. Looks like one amazing design so will be harvesting the scope mount for sure.1 point
-
yes we are still waiting. my day here is pretty doggone crazy and ive been offline for a week. can someone round up the proposals and consolidate them in the next post? we ahve been all over the place since 2023 on this, and we need focus.1 point
-
Matt Tarriff linked it in onoe of his other replies , i have a topic on the forum probably in the Agent thread, and he replied. Its on Thingverse.1 point
-
i think thats the easiest and most practical solution. I know from scaling a bunch of (actually 30 of them) pirate hook STLs for my CO I had to make a bunch of adapter rings and I had to keep playing with the percentage until I got something like 87.7% size to where it would actually FIT the thing1 point
-
Next small steps as the sanding and painting of the other armor parts are ongoing. Worked a bit on the chest/back armor connection brackets from Paul's Shoretrooper. Used the following approach: Pre-drilled a hole on the back armor shoulder for one Chicago screw on each side that goes through the bracket and gets fixated from the inside. In order to eliminate the need to glue to keep it in position, I decided to use velcro, which should keep it in place alongside the Chicago screw. Installed snaps on the front side of the bracket through velcro to create the anchoring point for the chest armor. The velcro is glued with E6000. Covered the underside of the front bracket with self-adhesive velvet fabric to not only hide the aluminum bracket, but also create a softer surface. Next step it to connect the chest armor to test it out in order to determine if further trimming is needed. Photos: Chicago screw attached to back armor shoulder for bracket mounting: Gluing velcro, installing snaps for chest armor attachment:1 point


.thumb.jpg.4b7f118dc6c023f5a5030ef2f1a3fe15.jpg)


.thumb.jpg.9ace4deed9956274e6fc6411fb99b06d.jpg)