

ukswrath
-
Posts
504 -
Joined
-
Last visited
-
Days Won
13
Content Type
Profiles
Forums
Events
Everything posted by ukswrath
-
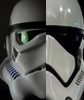
Ukswrath's Anovos Shadow Stormtrooper Build
ukswrath replied to ukswrath's topic in Shadow Stormtrooper
Yea it's a shame they didn't apply the updates to the TX we (the FISD staff) suggested for the OTTK. Gen2 had only a couple updates, the waist belt material, the pulls appeared cleaner and the material thickness more consistent. That's about it Boots are Imperials -
Ukswrath's Anovos Shadow Stormtrooper Build
ukswrath replied to ukswrath's topic in Shadow Stormtrooper
They're latex from just Joseph on the FISD. I'll gloss them up before application -
Very nice
-
Ukswrath's Anovos Shadow Stormtrooper Build
ukswrath replied to ukswrath's topic in Shadow Stormtrooper
Yea kinda anxious to get started. It appears Anovos kept the same standard as gen 1 OT TK. I recently built a gen 2 for ANOVOS, for a charitable cause. The new cloth belt were much better, unfortunately the belt that comes with this is gen 1 is junk so it will have to go. As you said it's too bad about the hand guards also, but it didn't surprise me really, these are entry approval level suits so I didn't expect anything new except for the belt. Well, hopefully I make the Special Ops detachment proud. -
Hey All, first time posting a build thread on Spec Ops. Looking forward to contributing to this group finally. I'll be building the newly released Anovos Shadowtrooper. Though the kit appears to have all the necessary components for 501st basic approval I'll be changing a few things to make it "Specialist" (L2) level acceptable. NOTE: I'll be building this armor similar to that of OTTK screen accurate. Though it's overkill even by "Specialist" L2 standards I want to give it that extra edge. I will note along the way what is required and what is not, giving those following this build more the one option, yet staying true to the "Specialist" level CRL. If I miss something or some part of the assembly is inaccurate feel free to correct me. 1/30/17 UPDATE - After the initial trimming I've reluctantly decided to not use connecting brackets as originally planned. This particular set of armor feels extremely thin in areas it needs to be thick and strong in, bummer. To avoid the risk of cracking in the future I'm going to have to go with snaps Areas that will be changed from the Anovos originally designed assembly: NOTE: These changes are NOT required for 501st basic approval or "Specialist" A. The Anovos kit includes velcro connection strapping however, I'll be using snaps instead as explained above. B. The kit includes black elastic for the chest to back connection, but in my opinion it's too short to connect properly so I'll be using more elastic which I'll need to provide. C. The kit includes velcro to connect the shoulder bell strap to the chest to back strap. I'll be using a Dritz #10 sew in snaps, line 24 snaps will also work. Either are accepted at all levels of approval. D. The kit includes philips head screws used to attach the metal clips to the O2 canister, I'll be replacing them slotted pan head screws. Accepted at all levels of approval. E. The kit includes ABS hand guards which will be switched out for Latex style, a Specialist requirement F. Waist belt accuracy modifications - I'll be replacing the less than accurate Anovos belt with a belt more desirable, a (Tim Kittle) belt> I'll also be installing Popper snaps, correct elastic to drop box connection and glue drop box elastic to belt. G. I'll be replacing the Anovos supplied line 24 snaps on the ab for Popper snaps like that on the waist belt. Just preference H. I'll be replacing the Anovos supplied pan head ear screws for slotted "V" screws I. I'll be replacing the Hovi tip screens for something more accurate. It's my opinion the Anovos mesh is too fine. Also, If anyone wants to jump ahead this armor (except for a few minor details) is exactly like the white OTTK. If you're interested feel free to take a look at that build thread on the FISD. http://www.whitearmo...k-build/page-1. If you have any questions regarding any differences between the two don't hesitate to post it here. Tools: Pencil Exacto knives, large & small Scissors Steel straight ruler (metric) Dremel with sanding wheel or sand paper. Small carbide bit for helmet teeth or small file. 3M scotch brite pad (any color, gradient) Drill 5/32" & 1/8" drill bits Hammer Screwdriver (blade) Spring clamps (set or 12 or more in various sizes) Earth magnets 1/2" x 1/8" (12.7mm x 3.1mm), Earth magnets 1/2" x 1/4" (very strong) Painters tape PPE (Personal Protective Equipment): I can't stress enough how important it is to wear PPE, especially when working with some of the tools listed above. Wear it! Safety glasses - Hardware store Cut resistant gloves - Hardware store 1/2 Respirator. Sanding releases small carcinogens into the air. Protect your lungs. - Hardware store or http://www.amazon.co...ailpage_o05_s00 Materials: E6000- two to three+ 2oz tubes, or two+ 3oz tubes Zap-A-Gap & Zip Kicker Elastic(Chest to Back plate)- Black 2" x 2' in length recommended) Elastic(Drop Boxes)- Black 3/4" x 20" Elastic(Bells to Shoulder Strapping)- Black 1" x 12", ANOVOS supplied Elastic(Bicep to Bicep around arm)- Black 1" x 20" Elastic(Bicep to Forearm)- Black, 2" x 6", ANOVOS supplied Elastic(Thigh to waist belt)- Black, 3" x 24" Elastic(Kidney to Ab right side) - Black, 1" x 8" Elastic(Posterior to Cod) - Black, 1" x 12" Nylon Webbing(Kidney to Ab, left side 6 rivets)- 1" x 6",ANOVOS supplied Pop rivets(Waist belt drop boxes) 1/8" x 1/8" Aluminum pop rivets. Paint: Flat black: Testors # 1149 Internal Strapping: Option A. C.Snaps: 1)Ab- "S" snaps "poppers" (Used on the following locations: Ab to belt, Ab to Kidney right side, Cod to Posterior, Shoulder to Back plate strapping right/front) 15mm, (bag of 15 is the smallest)- http://www.ebay.com/...=STRK:MEBIDX:IT 2) Ab- "S" Snap die punch and set tool15-17mm, (1x) - http://www.ebay.com/...=item5413a405e2 NOTE: For the "S" snaps and set tool kit you may need to contact the seller who is in the UK and have him set up a auction with US shipping. The original sales did not have a ship to US option at the time I purchased the items. 3) Thigh Ammo Belt- Double Cap Rivets - Joseph - http://www.whitearmo...-sets-for-sale/ 4) ThighAmmo Belt- Double Cap rivet tool(1x) - http://www.ebay.com/...=item463922315d, or http://www.whitearmo...vel-rivet-sets/, or Hobby/Craft store 5) Ab/Kidney- Split rivets(bag) - ANOVOS supplied 7) Inner strapping - Line 24 snaps, nickle, 100ct (recommended), Tandy - https://www.tandylea...ts/1263-12.aspx. Fasnap - http://fasteners.fas...nap-fasteners? 7a) Inner strapping (canon brackets) Not illustrated in this build. For informational purposes only - http://www.whitearmo...-now-available/ ? Shoulder to Bicep- Dritz Sew in Snaps, Nickle, Size #10 -http://www.amazon.co...YH1DNAAPPP1R3H1 9) COD split rivet- ANOVOS supplied Option B. Internal Strapping Brackets (Chest to back, back to kidney, kidney to posterior only) - http://www.whitearmo...-now-available/. Alternative lock nuts to replace the nuts that come with the bracket kit - http://www.amazon.co...duct/B000NBKLOQ Option C. ANOVOS supplied Other strapping or closure. Calf 1) Elastic- http://www.amazon.co..." white elastic 2) Bra hooks- http://www.amazon.co...dritz bra hooks 3) Velcro - ANOVOS supplied Other items: Required for basic 501st Approval (but not Anovos supplied) indicated with a asterisk (A) Required for "Specialist" (A/S) (A) Gloves (ANOVOS supplied) or - https://trooperbay.c...k-or-plain.html (A) Boots - Totally killer Boots - http://www.tkboots.com/, Imperial Boots - http://www.imperialboots.com/ (A) Undersuit (ANOVOS supplied) or - http://www.whitearmo...uit-shirtpants/ (A/S) Waist Belt - ANOVOS supplied or replaced with Kittle http://www.whitearmo...e-canvas-belts/ (A/S) Rubber hand guards (Joseph) - http://www.whitearmo...on-level-anh/ Thigh Garter belt - http://www.whitearmo...-garter-system/ ANOVOS assembly instructions (if anyone wants them) - https://cdn.shopify....450603693831912 UKS Assembly instructions PDF - https://drive.google...Wx6ZHRjbFE/view Sections, Navigation & Check List: 1. Forearms: 1a. Trimming part 1 1b. Forearm trimming Part 2 and pre assembly 1c. Assembly Part 1 1d. Assembly Part 2 1e. Forearm to Bicep connection - Refer to "Strapping" section, "Bicep to Bell and Forearm" 2. Biceps: 2a. Bicep trimming 2b. Assembly 2c. Bicep to Forearm connection - Refer to "Strapping" section, "Bicep to Bell and Forearm" 3. Shins/Calves: 3a. Shin trimming 3b. Shin final trimming and pre-assembly 3c. Assembly 3d. Sniper Knee trimming and assembly 3e. Rear Closure (velcro) 4. Thighs: 4a. Thigh Trimming 4b. Thigh Ammo Pack trimming 4c. Thigh Pre-assembly 4d. Assembly Part 1 (front) 4e. Assembly Part 2 (rear) 4f. Thigh Ammo Pack installation 4g. Thigh Support System - Refer to "Strapping" section, "Thigh support" 5. Shoulder Bells: 5a. Bell Trimming 5b. Bell strapping (Bell to shoulder strap) - Refer to "Strapping" section, "Bell to Shoulder" 5c. Bell strapping (Bell around Bicep strap) - Refer to "Strapping" section, "Bell to Bicep" 6. Chest Plate and Shoulders 6a. Chest and Shoulder Cover Trimming 6b. Chest to cover plate assembly 6c. Chest to Back connection - Refer to "Strapping" section, "Back to Chest" 6d. Chest to Ab connection - Refer to "Strapping" section, "Chest to Ab" 7. Back Plate 7a. Back plate trimming 7b. Back plate to Chest plate connection - Refer to "Strapping" section, "Back to Chest" 7c. Back to Kidney connection - Refer to "Strapping" section, "Back to Kidney" 7d. Back plate modification (How water bath upper connecting tabs) 8. Ab/Kidney plates 8a. Ab/Kidney trimming 8b. Ab buttons 8c. Ab waist belt connection - Refer to "Waist belt" section, "Belt assembly and installation Part 2" 8d. Ab to Kidney right side connection - Refer to "Strapping" section, "Ab to kidney strapping right side" 8c. Ab to Kidney left side connection - Refer to "Strapping" section, "Ab to kidney strapping left side" 8d. Kidney to back plate connection - Refer to "Strapping" section, "Back to Kidney"" 8e. Kidney to Posterior connection - Refer to "Strapping" section, "Kidney to Posterior" 9. Posterior Plate 9a. Posterior trimming 9b. Posterior to Cod Connection - Refer to "Strapping" section, "Posterior to Cod" 9c. Posterior to Kidney connection - Refer to "Strapping" section, "Kidney to Posterior" 10. Waist belt (preassembled from Anovos) Accuracy Modifications 10a. Disassembly 10b. Belt assembly and installation Part 1 (installing cloth belt) 10c. Belt assembly and installation Part 2 (Install ab to belt mounting snaps) 10d. Belt assembly (Holster modification and install) 10e. Belt assembly (Drop box modification and install) 11. Thermal Detonator 11a. Trimming (TD Parts pre trimmed) 11b. Painting 11c. Assembly with Screw accuracy update 12. Hand Guards: 12a. Hand Guard trimming 12b. Hand Guard, Specialist 12c. Hand Guard basic approval 13. Helmet Accuracy modifications: 13a. Helmet Modifications (Tube stripes and Ear Screws) 13b. Helmet Modifications (Hovi Tip screen update) 13c. Hovi Tip Mod 14. Strapping: 14a. Snap mounts 14b Snap mounts continued: Ab, Cod and Posterior 14c. Nylon straps and snaps: Chest to Ab, Back to Kidney, Kidney to Posterior 14d. Elastic straps and snaps: Chest to Back 14e. Ab to kidney connection: split rivets 14f. Cod and Posterior connection: Snap and Split rivet mounts and connection strap 14g. Shoulder Bell to Chest/Back connecting strap 14h. Bicep to Bell and Forearm strapping 14i. Thigh Support 14j. Shoulder cover retainer 16. Fitment Alterations (if any): N/A 17. Final Pictures: 17a. 501st Submission pictures 18. Helmet Accessories: 18a. Hard Hat insert/suspension 18b. Installation of Ukswrath's Hovi Audio system, SHA (hearing assist) and Cooling system Out of the box
-
Received mine yesterday also. Prepping the shop for another build thread Sent from my SAMSUNG-SM-G935A using Tapatalk
-
Rogue One Death Trooper Research/Build Thread
ukswrath replied to mitcheg1's topic in Imperial Death Trooper
Looking forward to a full kit -
Rock it Derrek!!!
-
Congrats Ivan
-
wow Steve lol
-
Wow those guys must have crappy builds lol. We have a couple Anovos Centurions in our garrison and their armor looks spectacular. It's not TM, RS or ATA but it looks better than other vetted armor. At the introductory offer it was a steal.
-
Congrats and good luck
-
Actually it would have been nicer if Anovos had made them correctly the first time. Better late then never I guess.
-
The 501st CRL for the FISD is very comprehensive mainly due to the armor being screen used. As Steve mentioned the Shadowtrooper is based off the the comic series so standards aren't as stringent. It's the same for other comic or game based characters. In my opinion the "Specialist" level is a nice addition as it brings non-screen armor to a higher standard.
-
Allan, we're spoiled on whitearmor . How things are run here are pretty much standard on most detachments. Great job btw Steve
-
NICE!
-
Flimsy belt, that's an understatement lol. Thanks for the update Allan.
-
SWEET!!!!
-
Man I love the armor so menacing
-
-
-
Shower, no not really because it generally only heats up a specific area instead of the entire section. Go to your local hardware store and buy a couple 5 gallon buckets. Put them in a sink or tub. Use as many pots as possible to heat as much water as needed to keep all the water hot, close to boiling.
-
Thanks for the creds First off, test some scrap first to see how it reacts. Armor can be different thicknesses and this needs to be taken into account when dipping. I've found 1+mm thickness can be pliable for 30-60 seconds after removing depending on ambient temps. I generally have hot and cold water containers side by side. Once I pull a piece out of the hot water I hold it in the shape I desire (wearing the correct PPE of course) then I immediately dip it into the cold water still holding the shape. 30-60 seconds in cold water and the plastic should retain its shape. In some cases you may have to re-do a couple times. NOTE: Whatever you use to hold the shape, hand or other, make sure you spread out the surface contact so you don't indent a specific spot from too much pressure.
-
I use the hot water bath technique for almost everything that doesn't fit the way I'd like. Here's a couple brief tutorials regarding hot water bathing. http://www.whitearmor.net/forum/topic/35086-ukswraths-anovos-tk-build/?p=465835 http://www.whitearmor.net/forum/topic/29684-anh-stunt-ata-re-build-part-2/?p=378651
-
Yea I was tempted to do install a bracket system on the TX, still might, but if not, snaps are the only alternative IMO..
