
Devolver
-
Posts
231 -
Joined
-
Last visited
-
Days Won
8
Content Type
Profiles
Forums
Events
Everything posted by Devolver
-
This is looking so great.
-
When you're done, post up the finished results. I really want to see it!
-

Mudtrooper / Mimban Officer Build - I think it's possible!
Devolver replied to xAlpha's topic in Mudtroopers
That really sucks about the hoses, man. And it's pretty ridiculous. As far as armor goes, three dealers come to mind: Plastic Arms Dealer, Jim Tripon and Dan Laws. I have PAD fiberglass Death Trooper armor and it is super, super sturdy. It has sharp details, but it's pretty heavy. Fiberglass. Jim Tripon also makes fiberglass armor and I think it runs slightly smaller than PAD. It looks great, but I believe it requires more finishing that PAD. Dan Laws' armor looks amazing and is super accurate. ABS plastic. -
Oh man, I hope this kit gets renamed. Crimson Stormtrooper or Royal Stormtrooper sounds so much cooler and we know it's not really a "Magma Trooper" since Battlefront came out.
-
Just my opinion, but you should definitely sand these print lines down. Hit it with some filler primer and paint gloss black. This is an awesome idea and they look awesome!
-
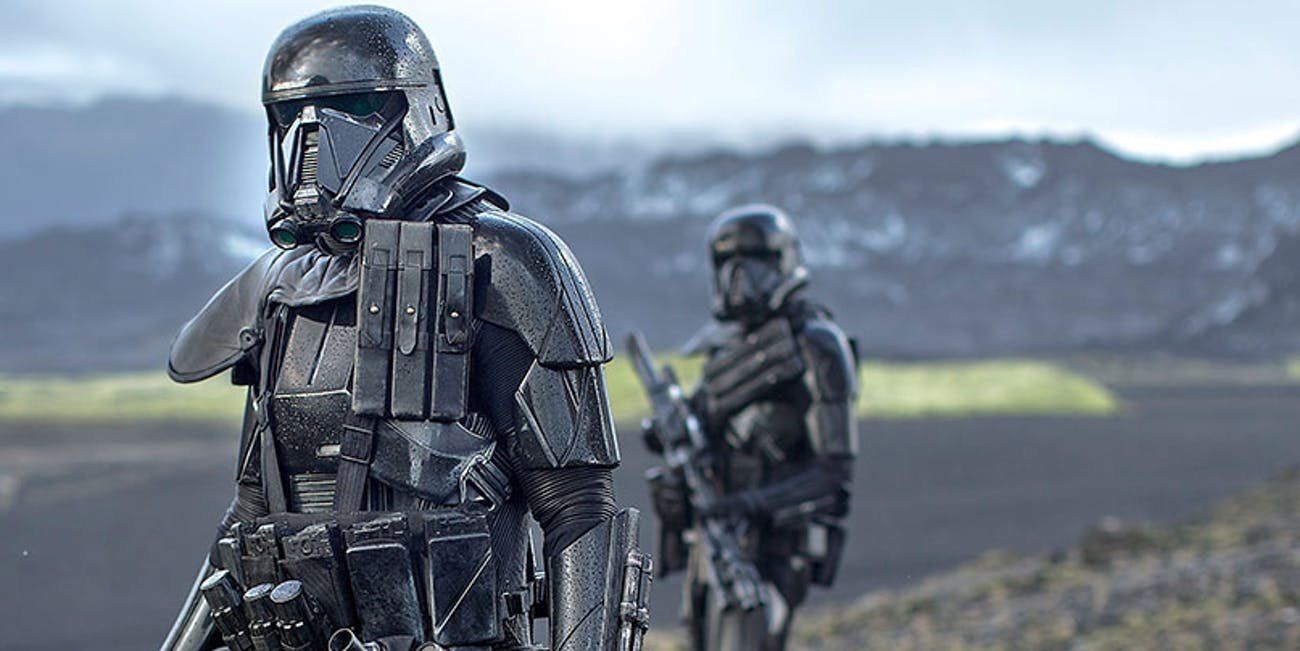
I already told you this on Facebook, but I’ll say it again: This is one of the best, if not the, best looking Death Troopers I’ve seen. It looks “off the set”. Incredible work you’ve done, and I can’t wait to see your take on the Specialist.
-
Wow man, that is great work on that undersuit, especially considering you made your own pattern!
-
You may find it would be much, much easier to buy a Return of the Jedi TK kit from Troopermaster or CFO than converting an entire kit. The Battlefront troopers are ROTJ kits and the BF Shadowtrooper is essentially a black ROTJ with a few changes to minor parts. I'm nearly positive CFO does black ROTJ TK kits from time to time.
-
Welcome to the Spec Ops forums Chris! Looking forward to seeing your Magma complete and approved. It's an impressive looking Trooper.
-
Well, third time is the charm they say. Hopefully everything goes well on this build. Looking forward to watching this thread!
-
Looks like you’ve got a great start on your build. I’ll be following this thread to see how you tackle your kit. I hope to build an IAT in the future for the same reasons you stated: Full armor kits don’t travel long distances well.
-
That bucket is coming along very nicely! Not much left to do now.
-
Wow man! I had no idea how much was involved with a Flametrooper build until I started reading your thread. You're doing an amazing job on your kit. I'm following your progress and I can't wait to see what it will look like when you're finished.
-
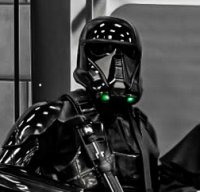
Last night, I finished a small addition to my helmet. Unfortunately, I didn't take many pictures during the process but I'll try to give a decent description. ? The ArmoryShop MK4 helmet comes with a Neuro-Saav Macro Motion Monitor aka "the thing on the side of the helmet", but it has no green light installed as is seen in some of the Death Trooper promotional material. I decided, although it's never seen illuminated in the movie, I'd like to have a usable green LED installed for the cool factor. And at any rate, the screen used helmets still had a visible bulb. The best part? It set me back about $7 for a pack of green LEDs. Preparation I had to carefully drill out the inside of the scanner with a Dremel engraving bit to build a small pocket for the electronics. I also had to measure the circumference of the LED and drill a hole into the front of the scanner. The scanner itself is made of resin, so it makes quite a mess when it is drilled or cut. I would highly recommend doing this part outside or in a place you can clean easily. Also, make sure to wear and mask and googles. You definitely don't want this junk in your lungs. Installation After carving adequate space into the scanner, I scavenged a small battery compartment and an on/off switch from a portable reading light. I removed the white LED that was already soldered into the circuit and soldered my own green LED in its place. The scavenged battery compartment holds 3 LR41 batteries (1.5 volts each), but the LED is 3.2 volts max. Using small pliers, I managed to extend the spring inside the battery holder to only hold 2 batteries, so it’s running a total of 3-ish volts. I’m not an electrician by any means, but i believe that should allow me to run the current without a capacitor in the circuit... I think. I’ll know soon if it explodes. ? It ain't pretty, but it works: Everything fits down in the pocket I made. The LED is maybe a little too bright! The finished product:
-
That’s incredible! Amazing work.
-
I have seen some pretty good 850 builds here on the forums for sure. Just take a look around and they are relatively easy to find. I would also recommend joining the Death Troopers Build Group on Facebook if you are on that platform. A mixture of this forum and that group will put you on the right path for sure.
-
Welcome to the boards! I'm looking forward to seeing your build progress. We always need more Death Troopers! Nice call on getting the Dark Side Closet and Endor Finders parts, you can't go wrong with either.
-
As Nanotek said in the previous reply, Imperial Boots sells a model called 'KIller' that are the boots along with the spats that are required for them. You can also track down the screen accurate Doc Marten model called 'Jered' , although they are out of production and can be hard to find. When they are found, they fetch a hefty price. I currently use the Doc Marten model called 'Talib' which are very close to the 'Jered' model, however, they are also out of production. On the bright side, they are easier to find then Jereds.
-
I love the work you’ve done to your DT. It really looks like it came right off the set! As far as Legion standards, I don’t think you have anything to worry about at all. Your armor looks like many of the screen used armors, even the “tidy” suits seen in promo shots.
-
Copied from my build thread: It was around this time I also began to attach the external strapping, at least the snaps and/or anchors for such parts. I decided to thread the shoulder straps from Paul Prentice through the back plate and hold them to the chest with snaps that are punched through the chest plate. This actually worked very well and keeps them in place reliably. Female line-24 snap placed through the chest plate and fiberglassed for extra support: Male line-24 snap epoxied to the back of the strap: Velcro holds the straps in place just inside the cut points: Everything lines up and snaps together: I also want to add that I put Velcro above the snaps as well, just to keep everything lined up and also as an extra bit of contingency if the snap failed.
-
Yes, that's correct. My suspender rig for the thighs is more complex and heavy duty than what you would probably need to make for a 3D printed kit like yours. My kit is fiberglass and needed a lot more support for durability and comfort. You should probably still use 2" for your thighs in my opinion. The only place I used 1" was the shoulder bell to bicep connection.
-
To my knowledge, it should sit flush. Here are a couple of photos from the Celebration screen used suit. There's not a lot of close up reference of the armor at these plates. It's hard to see, but I have circled the area:
-
Like so: Nylon folded over itself for extra thickness and durability at the points where the snap is set.
-
Option A. I swear by it. It's better to be safe than sorry on a troop!
-
You could probably use that kit from Trooperbay but I would highly recommend using a two snap system instead, that is to say two snaps per side of your nylon or elastic. A LOT of unexpected stuff will happen when you troop and a double snap system will prevent armor failures when someone bumps into you or a little kid pulls on a piece of your armor. A single snap system like the one from Trooperbay would be adequate for your shoulder bell to bicep connection though. I would go with Tandy Line 24 snaps. They are very durable and very reliable when they are set correctly. I have never had a snap pull loose without a lot of effort.

