areilly
-
Posts
90 -
Joined
-
Last visited
-
Days Won
4
Content Type
Profiles
Forums
Events
Everything posted by areilly
-
I really like this filament. They don't list the exact composition, but most PLA+/PLA Pro etc. from various places seem to be some blend of PLA and TPU. It's a little bit more flexible than regular PLA, and prints 20C hotter. Did a few strength tests and its got some flex and it's pretty strong, the glue joints cracked before the material did, and the regular pieces took enough force to break that it would take a hit hard enough to actually hurt me anyways. Really good layer adhesion as well - that does make supports a bit sticky sometimes. The temp limit is the weakness, but not regular warm day hot - it would need to be mid summer and standing in the sun kinda hot before anything would happen, or left in the car, and for me in FL, no way am I wearing this stuff in July. I was originally going to do this in PETG, but for reliable prints there I need a different print bed and better heater - mine really struggles to get to the 60-70C needed for PETG.
-
Spent some time priming and sanding over the weekend. Ideally it's a light coat and agressive sanding, a medium coat and medium sanding, then a light coat and fine sanding to finish things off. (all wet sanding, dry sanding this stuff leads to insanity) The chest took a couple more coats since there were more glue lines and a section that didn't print quite smoothly. I see some people really scared of this process, and some that make things SO much harder on themselves by hurrying the print, ending up with bad print quality, and spending more time hand finishing when a little extra care up front makes your life much easier. after the 3rd round of priming + sanding - smooth and ready for the topcoat. Dyed the ammo bandolier with some regular Rit dye. Strap remained the same color, but it looks like it remained green in the originals as well Dyeing the Plash went OK. Didn’t have anything big enough to do a hot dye soak, so I went with a long cold soak instead. Started with a hot wash, hot dry (just a guess, but I figured if it was really dry the fabric would soak up the dye solution better) then in a tub with 4 bottles of regular Rit dye, salt, detergent per instructions, and left to soak for 2 days. Rinse and regular warm wash. Tempted to do another dye bath if I have time to darken it further, but I think it will do as is. A nice side effect of all the hot wash and dry cycles is that it's beat up the fabric a bit and given it some nice weathering. Also on a side note regarding the Plash - I've seen a few pics of people with theirs dragging on the ground. There's actually a built-in design feature to avoid this - the bottom has a toggle where you can fold up the bottom so that it clears the ground. I've seen a few shots that show this was used at least sometimes on-set, so that's the way I'll be rigging things.
-
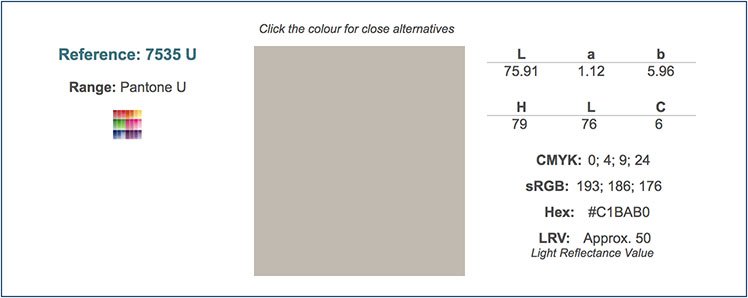
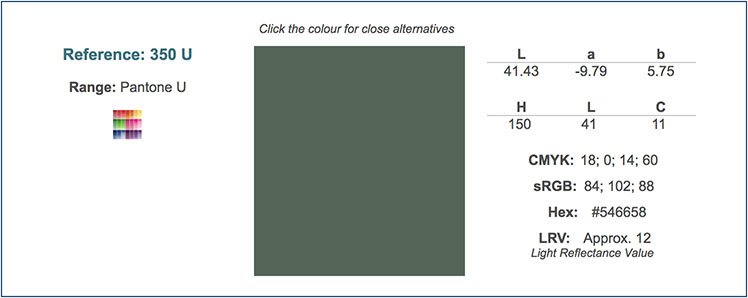
Spent most of the last week or so organizing parts and printing the big armor pieces. Slathered the M56 pouch with Lexol conditioner, stuffed it, and taped it up to reshape it, since I don't really like the smashed pouch look. Also tested a small spot with brown show polish and it darkened it up nicely, I may give that a once over later. I posted the STLs for the M56 and bandolier stuffers on Thingiverse: https://www.thingiverse.com/thing:3489698 Harvested parts from a couple Yugo backpacks - dumped them all in oil and I still need to scrub some rust off. Most of the bluing is still intact. The printer has been running constantly for over a week. Finally feel like I'm making progress when I did the initial assembly on the armor. Next up is some priming and sanding. For paint I got some custom mixed acrylics from Sherwin-Williams for the screen-accurate Pantone 350U green and 433U gray colors. I'll be airbrushing them on top of the primer - 350U for the base coat and the 433U for the topcoat. Will probably use the 433U as a weathering wash as well, going to try thickening it with baking soda for a mud effect.
-
This is the week of long prints - the chest armor. Had one miss - printing two halves and incorrectly scaled one of them. These will be the finishing/painting test pieces, so not a complete loss. otherwise trying to print as large as possible while avoiding needing support. Meanwhile in soft parts - printed some fillers for the ammo pouch and bandolier. Initially tried foam for the bandolier but it just didn't look or feel right. Made one of them hollow to serve as a cellphone holder. Later learned that the props dept. used MDF blocks for this in production. Also found some good cheap gray acrylic to use for weathering/mud wash.
-
First bits of armor printed. I decided to use AmazonBasics "Premium PLA" for this. They don't say exactly what the modifiers are, but I'm guessing its PLA with some TPU blended in. It prints about 20C hotter than regular PLA, and is a little bit more flexible. Beforehand I did a couple test prints and it's really strong, so I have zero worries about the durability. Going to be printing everything with at least 1.2mm walls and 0.2mm layer height to minimize the sanding and finishing needed.
-
I had originally planned to start this build months ago, but life intervened. I'm back in earnest and on a mad dash to get this done in time for Celebration. Luckily I've been collecting the parts for a while, so I've got a solid start there. Pictures being updated as I go: Image album Parts List Acquired: Plash: original, with leather grommets - eBay Gloves: original Highlander spec ops - eBay Buckles, D-rings, etc: original Yugo backpack - Coleman's Surplus Undershirt: original coolmax - eBay Generic webbing, hardware, velcro: Strapworks Button snaps/poppers: Sailrite Helmet edge trim: X8R U-channel edge trim, Amazon Blaster tac light: SureFire M300A clone - eBay Helmet tac light: generic 9-led light - eBay Boots: Crowprops Shoulder patches: screen used replica, Anovos Shoulder/shin straps/buckles: cast urethane - Paul Prentice Secondary belt boxes: cast urethane - Paul Prentice Disc greeblies: Etsy, PhiloProps Imp belt buckle: Etsy, Philoprops Imp belt boxes: Etsy, Philoprops Imp belt: 2" leather w/grooves - Etsy, SWExpress Tunic fabric: Olive bull denim, Big Duck Canvas Ammo pouch: original Yugo M56 - eBay Ammo Bandolier: original US issue - eBay Brown/Black Leather: Amazon Goggle elastic - Amazon Pants: Dickes heavy cotton work pants (plus one donor for extra panels) Mask buckles: originals, Imperial Trading Co/Darren Vaughan Paint: Sherwin-Williams acrylic, custom mix for 350U and 433U Helmet: Printed, custom design Helmet TU: The unoffocially official Facebook group STL Shoulders: Printed, Sean Fields Biceps: Printed, Custom design Chest/Back: Printed, Sean Fields Shins: Printed, Sean Fields Tunic: custom
-
@jimmiroquai might be able to help with at least some of the parts - he had a pretty complete kit, but I don't know if he needs to make any adjustments for the current CRL draft. I think he also built/modeled the kit for the new Mimban TK CRL that just went live. @amcclary May be able to get some pics of his kit as well
-
I'm just referring to the level 2 option for the screen-accurate patch. They are "3D embossed vinyl", as opposed to PVC, granted I don't imagine anyone will validate the exact material past "it's plastic". The embossed/textured part is worth mentioning to avoid confusion with the flat printed vinyl patches like on the OT TIE pilot, since they switched to this style of cog patch with R1 & Solo. The cog design itself is different in geometry from the old ones as well.
-
On second thought, scratch my edits to the power cylinders. Looking at the location of the second central pin/cylinder on the shoretrooper, it wouldn’t be visible in the MT shots we have, and all other indications are that it would be the same or very similar to the R1 parts.
-
Read through it and my suggestions are below: I would change this to “aligned with the rim” - the bottom edge appears to be right on or very slightly below the top of the rim. “Features a beige or red square” - Han is seen with a red one “Imperial cog patches are textured vinyl material” - the Anovos ones are labeled as vinyl, and mentioning texture to differentiate between the flat printed vinyl patches used on some of the OT uniforms. an addition to the grenade section to mention the attachment location and strap: ”Grenade is attached via a strap looped through or attached to the right shoulder buckle. Strap is attached to either side of the grenade’s center greeblie with loops around the shaft of the grenade and closed with snap buttons.” Next two in the E-10 section Change to left side I’m not seeing the central cylinders in any of the images, just the outer two with one off center pin in the middle area, so leave off the 2 smaller central cylinder.
-
Few things on the E-10 Light is mounted on the left The buttstock would be more accurately described as a collapsible or adjustable stock. That would avoid any confusion from the fact that most of the Sterling style folding stock also remains folded forward under the barrel. The folding foregrip appears to be an extra casing around or replacing the original sterling folding stock’s buttplate, and mounted directly to the barrel, but I couldn’t say for sure. Foregrip is somewhat rectangular in shape and has grooves cut into it. Being able to rotate it vertical might be a L2 item, it’s mostly just Han that is using it in that configuration. I have a hunch the foregrip is wood (or at least brown) but the only clear shots I have are from hot toys fig so that isn’t terribly reliable. this might be more detail than needed, but the Art of Solo book mentions that the unit on the right side of the blaster is a taser, that was originally intended to slide forward on a rail, so the protrusions would probably be described as electrodes or probes.
-
This is mostly from the Shoretrooper, and in particular the under the abdomen bit isn’t right. also we can’t say for sure that they’re using snaps since the attachment points seem to be tucked away, although they might be. Overall it’s slung from the right shoulder to the left side of the chest around the left armpit, so perhaps worded like this: Upper strap goes over the right shoulder, and the lower strap goes across to the left side of the chest under the left arm. Also a mention of the Oiler pouch, which is seen on some troopers, but not all: Oiler pouch may optionally be worn on upper strap of pouch.
-
Yes, its the the long-term availability since it's not a common type. I plan on using all screen accurate buckles/hardware as well, but maybe a plain metallic buckle could be reasonable for level 1since those are fairly common, and in a pinch you can make one yourself out of some metal wire/rod. Overall seems like a small enough detail that it would be ok as a level 2 item.
-
I was thinking the same. Some may have a difficult time finding those in the future or might need to substitute for a regular slide buckle without the serrations, which would look pretty close from a regular viewing distance.
-
They’re used by troopers in the background so we don’t have any real clear shots, but general consensus is its likely the SureFire M300 (or a cheap Chinese clone), same one used since R1 on the blasters as weapon lights. On a side note, the Solo book labels the weapon light as “Mist-cutting chemical glow rod”
-
A minor point - maybe make the helmet liner material a level 2 item. It’s not a visible item, so doesn’t affect appearance. Having it optional at level 1 would allow people to use an easier method of lining the helmet similar to other helmets, like soft foam, instead of trying to fit/modify an off the shelf EPS liner. Also I’d bet that any custom liners would have actually been made of urethane foam which is what most prop shops use, so specifically listing polystyrene may be too restrictive - perhaps just “rigid foam liner similar to bike or skate helmet”.
-
I haven’t seen any photos showing anything hexagonal, it appears to be perforated expanded mesh, that results in a four-sided diamond pattern.
-
This sounds like a good approach - we decide on a minimal baseline standard trooper kit, and the rest is options.
-
Just adding a new reference image. This is the clearest side view of the helmet and TU I was able to get from the 4K release.
-
Overall this kit seems unique in the number of options/accoutrements it involves, like we would need a footer to the CRL that lists the various configurations possible, and/or a list of the bits that can be combined, e.g. the bandolier, the lower belt, the shoulder-slung grenade, red goggle buckle accent, etc. Seems like Han could just be listed under these configurations/options instead of a separate CRL, e.g. chestplate, main belt, and jacket only with shoulder cog emblems. All the base elements are the same so a separate CRL seems like more work than needed.
-
That sounds better to me, alternatively could also say places symmetrically about the center, but that's six of one, half a dozen on the other really. Another alternate wording could be "Approximately centered above each rectangular cutout/greeblie" - they appear to be centered above each half, or in other words at 25% and 75%, or centered in each half And potentially level 2 items could be: The hose fittings are angled forward, and approximately the same size as the hoses I took a couple screen grabs to show that and the centering:
-
Here’s two - left is the Val promo shot, right is from the Solo Offical Guide, p. 43
-
My 2 cents in red above. Regarding the boots, there might need to be some disambiguation here to avoid confusion with riding boots style of Imperial officer's boots, although I'd think that for level 1, riding boots could be acceptable? There seems to be enough evidence that at least some of the boots had top adjustment straps, so they should be listed as an optional item. Otherwise that style is pretty generic so I think there a wide range of possible matches. For the gloves, I'm not sure what you meant by the oval detail? Also for level 1, maybe we could loosen it up a bit to just black gloves with leather palms and optional leather on the thumbs/fingers? Browsing through random "tactical" and mechanics gloves online, there are more that have a cloth back and leather palms, so it might make it easier for people to source them if they have difficulty sourcing the Highlander brand gloves, while still looking reasonably close to reference from a distance. Then level 2 will be the screen-used model or a close copy. While they're not difficult to get now, they might not be in the future. (Edit: I was typing this up as Raider added his reply, So I was going by the previous post - I think my only additional comment is that "exact replica of soviet officers boots" might be a little too specific, and that knee-high jackboots should be as specific as needed)
-
Sebastian posted a message on the WTF FB group saying he's back and working on the backlogged orders
-
One thing to be careful with regarding PMS color codes is the suffix, in this case the armor green is 350 U - C* series colors will appear as a brighter shade and indicate glossy finishes, where U series are flatter and duller and indicate matte finishes. If you're ordering custom mix paints or looking for similar matches this detail can be important.