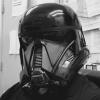
lancer[TX] Posted July 9, 2017 Share Posted July 9, 2017 Well the time has finally come! I have received the vast majority of what I need in order to build my Death Trooper suit. I will be documenting the build here in as high level of detail as I am able to. This is my first time building anything like this, so much of this will be a new learning experience for myself as well. I will try and put detailed information as well as step by step instructions up as I work, as a resource for those like myself who are new to this, and for anyone else who may find the information of interest. On to the build... The helmet I'll be using is made by Anovos. I am planning to use a NSM Monitor that I was able to get from Jim Tripon. I was worried how it might line up on the Anovos bucket, but as you can see from the picture it's pretty spot on. It will require a bit of shaping on the inside to get it to sit flush against the helmet. Jim has also opted to cast the LED right into the unit itself. I will be most likely drilling this out and putting an actual LED in it's place. I have not yet thought of how I will be mounting it, as I want to be able to remove it without showing any signs that it has been there. Easier said than done I'm sure. The full armor kit is from Jim Tripon. This particular kit is Jim's "tall" kit, which features slightly elongated leg and arm pieces. Measured from the bottom of my boots to the top of my helmet I stand roughly 6'4". I am highly impressed with the quality of the work that he has done on this kit, as well as the flexibility that the pieces have. He was also able to supply me with a few extra parts that don't come with his usual armor kit, including the armor covers for the specialist pouches, as well as the belt material. You can find Jim's entire build thread here: http://forum.501stsp...-and-armor-wip/ The quick-draw pistol strap and the leather pouch on the belt were purchased from Kerry Allan Rowntree, whom you can get in contact with on the Death Troopers builders group on Facebook. Below is all of the pieces included with Jim's kit (as well as the other leather goods I've acquired): The undersuit is also from Jim Tripon. I can't say enough about the quality of work that Jim puts out. The undersuit is a thing of beauty, though I'm sweating even just looking at it right now. Not the most comfortable thing in the world to wear, but nobody can deny that it looks absolutely fantastic. Again, a link to Jim's build is above. At this time I am currently awaiting delivery of a pair of anthology gloves and killer boots that have been ordered from Imperial Boots. The gloves can be found here: https://www.imperial...-shore-trooper/ The boots can be found here: https://www.imperial...t/killer-boots/ Jim has included the boot gaskets with his undersuit kit. While the killer boots from imperialboots.com include the gasket as a part of the boots, I may swap these out for Jim's pieces, as they obviously match more closely with the rest of my undersuit gaskets. I plan on starting prep work on all of the armor pieces this week to get them ready for paint and assembly. There does not seem to be much finishing work to do, so hopefully this stage does not linger on too long. This comes as a bonus as well with my work schedule. Can't say I'd be thrilled to come home after a 10-12 hour day to find myself cutting out pieces of vacuform plastic. I am also looking into options for covering the inside of the armor pieces in something more comfortable (and less itchy) than raw fiberglass. More updates to come.... 2 Link to comment
nanotek[501st] Posted July 10, 2017 Share Posted July 10, 2017 Nice. Looking forward to seeing how this progresses. Link to comment
lancer[TX] Posted July 11, 2017 Author Share Posted July 11, 2017 Started sanding and priming some pieces today. This southern california weather is making things exceptionally difficult at the moment. The piece on the bottom right was sprayed at about 5 this afternoon when it was about 98 degrees outside. Thought the paint was crap at first but it seems as though it was so hot it was literally drying as it left the nozzle and settled on the piece like dust, leaving it with an ultra rough texture. I could brush off accumulated paint specks with my finger. The other two pieces were painted after the sun went down and temps dropped into the low 80s. Much more like what I was anticipating. Needless to say the first test piece will have to be sanded back down and repainted. Unfortunately this also means I can't paint at all during daylight hours when the weather is like this. That will definitely slow things down.. I've also not committed to using the belt buckle that came with my kit. I'm not thrilled with the idea of trying to paint a convincing aluminum finish onto the piece, and I may swap it out for a phoenix props piece instead. Worst case scenario I don't use it and it becomes the test panel for the rest of my painting process. Link to comment
Chaos[CMD-DCA] Posted July 11, 2017 Share Posted July 11, 2017 If you prime Jim's buckle with flat black Rustoleum auto primer. 2 light coats. Let it cure for 24-36 hours then hit it with Rustoleum chrome. 2 light coats. Let that cure for 24 hours. Then wet sand it with 600 grit just enough to evenly knock down the chrome shine you will have a very nice faux brushed aluminum finish. 2 Link to comment
lancer[TX] Posted July 11, 2017 Author Share Posted July 11, 2017 Thanks for the tip. I'm all for making it work, and was going to give it a go no matter what. I'll definitely give that a try and see how it turns out. Link to comment
Chaos[CMD-DCA] Posted July 11, 2017 Share Posted July 11, 2017 here's a quick photo I took last night. 1 Link to comment
lancer[TX] Posted July 16, 2017 Author Share Posted July 16, 2017 Small update. I went ahead and finished the belt buckle. and I'm quite happy with the way it turned out. I went with the paint choices that Chaos recommended as this was more or less the direction I had been leaning on with the rest of my build: Rustoleum black automotive primer, and Rustoleum Aluminum #7715 metallic finish enamel. A quick tip on the Rustoleum primer. This stuff is finicky. Forget what the can says, if you don't shake it up for about 10 minutes before trying to apply you just aren't going to get very good results. You must also shake the can frequently while using to keep it from going on too dry. The buckle was first prepped by sanding with 150 grit, followed by 400 grit sandpaper. Two light coats of primer were applied. The primer coat was then wet sanded with some Tamiya 2000 grit sandpaper that I had laying around that left me with a brilliantly smooth finish. Two coats of the aluminum enamel over the top and I am exceptionally pleased with the way it has turned out. Hard to tell from the picture but there is almost no orange peel or texture to the finish at all, but maintains a subtle variation of color across it. Has just the right amount of shine as well. I also have spent the last few days getting the rest of my belt assembled. I wanted to post a quick step by step on how I mounted the two ammo boxes to the belt. 1. I purchased some 3/16in. x 3/4in. chicago screws and cut the tops of the posts off, so that all I was left with is a threaded tube. If you go this route be careful when doing this as I found out the hard way the piece can get very hot very quickly from the friction of a dremel. If you use something to clamp the post while you cut it make sure you don't overtighten it or you can deform it, making it so the screw no longer fits inside properly. 2. Drill holes into the back of your ammo box. Start with a small bit and work your way up until you have a hole just large enough to push the screws into. I ended up using a 13/64 inch drill bit. For the time being I have decided to use two bolts at the top of the box. This prevents the box from wobbling side to side, but allows for a little flexibility as my hips and legs move up and down. If i find this not to be adequate I will possibly add additional screws to keep the box in place. 3. I used some JB weld to mount the posts into the holes, leaving them protruding out of the back about a quarter of an inch to allow it to be attached to the belt. I had previously used JB weld to attach all of the hardware to my fiberglass Boba Fett bucket and I was quite happy with the results, and I plan to do the same for this build. Now that the posts are in place the boxes can be attached to the belt in the same manner the belt buckle is. Punch holes in the belt material where you would like the box to be mounted, and attach it with the screws! Link to comment
lancer[TX] Posted July 17, 2017 Author Share Posted July 17, 2017 Another quick update. I have my first finished pieces painted, and boy am I impressed with how they turned out. The final paint is Rustoleum gloss black automotive enamel. I went to a lot of effort to get the pieces prepped correctly to get as smooth of a paint job as possible. I will be doing a test next week after one of these first pieces has had time to properly cure on a buffing/polishing. While I don't plan on walking around in brand new shiny looking armor, I strongly believe to achieve a convincing weathering effect on something that was once new and shiny, you have to begin with something that's new and shiny. The plan is to do a wet sand with 2000 grit sandpaper, and then a polish. I can then knock the shine down pretty easily to get the effect I want, as well as more closely match the finish on the Anovos helmet. For reference, the two pieces in the photo below are before and after prep. The piece on the left is the raw piece that comes in Jim's kit. The piece on the right is after thorough cleaning with mineral spirits and a two stage sanding. Initial sanding was done with 150 grit sandpaper to remove larger scratches and imperfections, followed by 400 grit to get an even, consistent surface. All parts were then given 2 coats of primer, and a final light wet sanding with 400 grit sandpaper again to get them ready for final painting. Seems like a lot of work, and the pile of parts still needing to get prepped seems a bit daunting but I think the results are more than motivating to continue doing it this way. More to come.... 1 Link to comment
nanotek[501st] Posted July 17, 2017 Share Posted July 17, 2017 Really loving your work. It's the attention to detail and taking the time to do it right that will yield a great result. How does the gloss black look against the Anovos bucket? I'm doing the Anovos bucket with 3D printed parts so am looking at the colour matching with great interest Link to comment
ukswrath[TX] Posted July 17, 2017 Share Posted July 17, 2017 Nice work Lance, looking good. You talk about extreme weather painting I'm 5hrs north of you, @ 106 this weekend it was a joy painting lol Link to comment
lancer[TX] Posted July 17, 2017 Author Share Posted July 17, 2017 How does the gloss black look against the Anovos bucket? So far so good. I can take some pictures of how the two compare when I get home from work later. It looked pretty good to me. Only real difference was in the reflectivity of both. My reflection in the Anovos helmet was obviously much more defined than in the piece I painted. But again, I suspect that can be resolved with some polishing. Once they're weathered together it should be pretty seamless. 1 Link to comment
Chaos[CMD-DCA] Posted July 17, 2017 Share Posted July 17, 2017 Excellent work Lance. I'm glad you tried my suggestion. Can't wait to see how the rest of your build turns out. Link to comment
Stonewall[501st] Posted July 20, 2017 Share Posted July 20, 2017 Hi Lance. How do you paint your armor, with a spray or paint gun in the cabin? Thanks Link to comment
lancer[TX] Posted July 20, 2017 Author Share Posted July 20, 2017 Everything so far has been rattle can. A little trial and error on how to get good results. Number of coats, prep work, how thick to apply. I've gotten better results than I was expecting. 1 Link to comment
Stonewall[501st] Posted July 21, 2017 Share Posted July 21, 2017 Rattle can! Wouahh! good job Lance Link to comment
lancer[TX] Posted July 21, 2017 Author Share Posted July 21, 2017 I definitely don't recommend it though if you have a better setup available. Its too difficult to get good results consistently. I have already re sprayed a few parts after having to sand down what I felt were poor results. 1 Link to comment
lancer[TX] Posted July 28, 2017 Author Share Posted July 28, 2017 Now that I have my paint process more or less sorted out I have moved on to the strapping and assembly of the kit. I have been testing a few different methods to see what works, and what doesn't, as well as what gives me the most mobility. So far I'm fairly happy with the results. I have begun to put together the individual components of the suit (shins, forearms, chest/back rig) and thought I would post a few details on assembling the shins. So far this was the least sort of "snap together" part of Jim's kit, and is the only parts so far I have had to do any sort of trimming and bondo use. The actual assembly of the shins is pretty straight forward. Jim designed the kit so that the two halves overlap on each side beneath a cover strip that is molded in. The only problem with this I have found is that the connecting edges are not as neat as the rest of the kit, and in my case required a fair amount of sanding and shaping to get them to line up properly with each other. The most pronounced area that this was a problem is at the top of the shin, where the two crowning edges of the shin meet. They simply don't fit together correctly, and if attached as such sit unevenly, with a pretty ugly gap. I opted to sand down the overlapping edge from the inside, as it seemed to be the piece was just simply too thick. It was not perfect, but allowed me to knock it down enough that only a small amount of filler would be needed to get a clean result. Once I was happy with the shaping I had done, I attached the two halves together along the front edge only using Zap-a-Gap and some Zip Kicker. At the other end of the shin there was a fair bit of overhang that also needed to be taken care of. After the two pieces had been attached I took my dremel to this bottom edge until it sat flush with the bottom edge of the coverstrip. I tried as best I could to mimic the shape of the original curve. I put on a light layer of bondo onto the areas that needed to be filled in. I had to rebuild some of the shapes near the top front of the shin because of the poor fitment of the two parts. Once this was dried I was able to sand it back and do final shaping. You almost can't tell the two pieces had been separate at one point now. Finally, the two greeblies for the left shin were attached with Zap-A-Gap. These pieces caused me a fair amount of headaches as I could not for the life of me figure out where the hell they were supposed to go when i did my initial parts inventory. A thin amount of bondo was used to fill in all the edges, so that they appear to be one solid piece, instead of separate pieces stuck onto the top of the shin. The shins still need a bit of prep work before priming and painting but they are fully assembled. I am still working out how I am going to wear them. They stay on by themselves because of their shape, but do not fit snugly the way I would like them too. I am tempted to just stick a piece of velcro along the back seam to keep them closed and call it done, but I am trying not to use any velcro on the suit at all, as I'm looking for a more elegant and reliable solution. I may end up installing some hooks or snaps with elastic to keep them closed, but at the same time allow for flexibility as I move. Link to comment
lancer[TX] Posted July 29, 2017 Author Share Posted July 29, 2017 Work in progress on my strapping system. I've never built a TK before so this is all more or less new to me. I was able to find a few good resources online that I've been using as a guide, while at the same time trying out different things to see what works and what doesn't. I have been using velcro to quickly attach new snaps and straps to different areas as a test, and refine the position of everything before it is permanently secured in place. As far as the abdomen is concerned I'm trying to put a system in place that keeps it under vertical tension in both directions at all times, so that it flexes and moves with my body. I plan on putting something elastic on the bottom edge that will secure it to my waist, which I'm hoping will keep the entire chest in the right position. This will require a little trial and error before all is said and done. I will post a full tutorial on the entire strapping system once the entire suit has been completed. 1 Link to comment
lancer[TX] Posted August 8, 2017 Author Share Posted August 8, 2017 Progress is slow and steady. The majority of the suit is wearable at this point. I have a few of the arm and leg pieces in paint so I didn't put them on but you can get an idea of the fitment. Once I sorted out the way everything was supposed to go together I have really gotten into the engineering of it all. The suit at this point is quite comfortable to wear, moves quite well, and needs only minor tweeking here and there to look proper. I need to do a small bit of trimming on the forearms and the thighs to make them fit correctly and I should at that point be done with assembly, and move onto painting! Picture of my test fit below, note I chose not to wear the undershirt at this point because it's hot as dirt in LA today... Hopefully my first troop happens in the winter 3 Link to comment
lancer[TX] Posted August 16, 2017 Author Share Posted August 16, 2017 Small update. Finally got my boots and gloves from Imperialboots. The gloves are a perfect fit. The boots I went up in a half a size, and this has allowed me enough space to throw in a pretty decent insole to get me an extra bit of height. My one gripe about them is that the laces that they are supplied with were waaay to short, and I have had to order a set that's about 6 inches longer just to be able to tie them. Overall I am very pleased with both. The only parts I have left to get are my weapons which I plan to order from Tom Campbell sometime this week. Now that the boots are here I can finish fitting the shins. I have been working on a million different things at once on the suit and taking pictures as I go. I'll be posting up a few step-by-steps on some of the areas that have given me the most trouble hopefully within the next few days. 2 Link to comment
lancer[TX] Posted August 18, 2017 Author Share Posted August 18, 2017 I have finally moved on from the construction/fitting stage to the painting. While I'd already painted a few bits from start to finish to refine my process I've moved onto the rest of the kit. Lots of sanding, lots of primer, and then more sanding. There are a few pin holes throughout the kit that will be filled with bondo. I'm on vacation from work through Tuesday so I'm hoping I can get the majority of the suit primed and painted before I go back. I also have an appointment to meet with a tailor tomorrow morning to make some adjustments to my undersuit. It fits much looser than I would like it to, and I am finding it is getting bunched up in the armor on the legs and forearms. I will have them tighten the whole thing up to still be comfortable, but remove some of the unnecessary excess. 2 Link to comment
nanotek[501st] Posted August 20, 2017 Share Posted August 20, 2017 Great work! Yes the under suit needs to fit like a wetsuit, otherwise bunching occurs. I am doing the same for my pants at the moment. Loving the progress on your build and thanks for the response regarding colour matching. Link to comment
Chaos[CMD-DCA] Posted August 21, 2017 Share Posted August 21, 2017 Agreed on he bunching. Some people have turned their shirts inside out and sew a seam along the existing seam to tighten up the fit. Looking good! Link to comment

Recommended Posts
Create an account or sign in to comment
You need to be a member in order to leave a comment
Create an account
Sign up for a new account in our community. It's easy!
Register a new accountSign in
Already have an account? Sign in here.
Sign In Now