BigJasoni[TX] Posted January 5, 2024 Share Posted January 5, 2024 I'm really not sure why I didn't do this sooner, but I'm about to wrap up this build and wanted to capture what I've done so far so it's a fast transition once we finish up the CRL. Additionally, this gives me an opportunity to better spell out some of the things we've discussed in the build thread without adding an additional couple pages to an already long thread. Please be sure and follow the CRL discussion here: WARNING: MASSIVE POST/ PIC DUMP COMING UP So, here we go: Armor: Chest/ Back/ Shoulders- Empire3d/ Bozzy1979/ (Starbug Props on Thingiverse) Armor currently not available on Thingiverse. This was a fun selection. Chris (Bozzy) and I began discussing the subtle changes from the Mudtrooper/ ICAT design back in February 2023. It started with a couple design changes for the shape of the chest, but following the release of pics from Andor, we started noticing additional changes from previous iterations that truly made this armor set unique. Here's some pictures that started the conversation: So, these are pictures of the Armor worn on Aldhani, but we learned in making that CRL that the same pieces were shared between the scenes. When this pic first popped up in the lead-up to Andor, I kind of dismissed it knowing that Diego Luna is a lot more lean than most actors/ troopers. The overall shape of the armor seemed to be identical to the Muddy, but when other pics started popping up, we agreed that an armor update was necessary. Here's the confirmation pic: I'm pretty sure everyone's seen these pics, but it's still important to note a couple things. First, take a look at the shape of the bottom of the armor where the chest and back meet. As I stated, I initially dismissed the changes as a "one-off," but by the time Rix Road aired, changes started getting discussed from head to toe. The other thing that's always fun about changing armor designs is that once you focus on something, you start noticing it in other places as well. Here's a picture of the same armor worn by the ICAT drivers in the Mandalorian, which we know were reused Muddy pieces from Solo: So these curved bottom armor pieces have been around for a while, they've just been overlooked until now. For the Security Trooper discussion, we wanted to make sure it was captured. The verbiage we agreed on in the draft is: The join between the chest and back armor are created by an angled sweep starting at the bottom of the chest armor and finishing at the bottom of the back armor. This doesn't mean that the curves need to be identical to this picture, it simply means that the connection isn't a "straight shot." The other thing that needed to be accounted for is that this design is not the same as a Shoretrooper, which doesn't "swoop" down. Here's the final design Chris came up with: So, I started printing: I'll get to the helmet, goggles and arm pieces in a couple minutes: This was all done in IEMAI Carbon Fiber filament. If you've never worked with the stuff, it's great, but very susceptible to stringing. You can get it in Carbon Fiber PLA, PETG and ABS, but even the PLA is extraordinary. Typically I avoid any variation of PLA, but I've tested it in temperatures exceeding 120f. and haven't seen any of the adverse effects of typical PLA prints. Also, as you can see from the above finished chest, the stringing is simple to wipe off, even while it's still attached to the build plate. Finally, the stuff prints smooth and can be sanded even smoother without melting the plastic which is common with PLA. I started filling sanding and primer and this is what the results looked like: Center details Right side details Left back box greeblies Right back box greeblies After sanding, smoothing, and painting, this is what I was left with: The chest looks satin in this picture, but I think it's because of the lighting. I cast this buckle in resin, but also cast one using some leftover urethane. Both turned out identical and are equally functional. However, while both are resilient, the urethane buckle is nearly indestructible. As long as it takes paint good, that may be how I proceed. Back Box closeup Slanted hose connectors Ok. So here's where I had to get a little tricky. There are a few small corrections that need to be made for an Andor set. First, the rectangular hole up towards the collar needed to be filled. This is definitely visible, with the little loop, on Mudtroopers, but it's nonexistent on the Aldhani or Ferrix kit. A little 5 minute epoxy worked just fine. However, with the little detail piece at the bottom left of the back armor, the file "slants" the detail down towards the medial line of the back. I don't know how else to say that, but see if you can tell from these pics: I know it's tough to see, but essentially, the "rim" of that "stepped" rectangular greeblie should be approximately 5mm tall all the way around. In actuality, it's about 5mm on the left "stepped" side and flush on the right. I'm sure a steady sculpting hand and some Miliput would have worked, but I just went onto Fusion 360 and created a new piece fairly quickly. With that set, I busted out the Dremel and got to work. After cutting, filling, sanding, primer and paint, I was left with this: This picture also clearly shows the stepped bottom ledge of the backpack and the five vents on the side Shoulders- Empire3d Chris and I spoke about the shoulders briefly because in the Aldhani discussion there was some brief conversation about the top being deliberately angled instead of following a gentle curve. Ultimately we decided against that, but Chris still adjusted the detail stripes and overall shape to appear more consistent with what we saw on screen. Ultimately, I couldn't be happier with the design. This was some great work and they printed almost flawlessly in the CF Filament: Raw print Side by side with the old design Sanded, filled, primed, coated, and ready for paint: Finished. Again, the lighting is playing tricks on the finish, but I assure you, this is not satin. Biceps- MrPaulShoretrooperBuild Not much to say here except that the biceps were discussed at length in the CRL thread. We see pictures of troopers wearing just the outer shell of the biceps (see Casian picture above), but this appears to be mostly for "stunt" purposes. I opted to go with the MrPaul set for their accuracy and for how well they work with the new Empire 3D shoulder design. Also, since I didn't do rank bars on my Aldhani armor, I can get away with swapping sets between the two costumes. Here's the pics: Flexible filament (framilon/ TPU) holding the shells closed Suspended with framilon from Empire3d shoulders Finished Shins: Armor: MrPaulShoretrooperBuild It seems like every new costume is using shoretrooper shins, so I went with the most accurate ones out there. Here's my complete set... And two reference photos. In putting together the Aldhani CRL, we were told that they opted not to go with shin armor because it all got broke during the Rix Road scene. That may be true, but in this second pic, we can still see that they used shins with a pretty distinct structural design underneath. Though I've used the Empire 3d ones in the past for my Muddy and ICAT, I didn't want to ignore this design (though nobody would ever look). I circled the "ribs" in red above and you can see in the below picture what this looks like on the MrPaul files: Honestly, it doesn't really matter, but I do like how these shins feel. You can barely see it in this pic, but the pyramid greeblies underneath the knee armor has a very distinct shape; they're not symetrical. Again, it's nothing anyone's going to bust out calipers to check, but I might as well incorporate this if I can. Notice the weathering of the boots and shin armor. I'll get to that in a second. Also, of note: the rough texture was done deliberately after I noticed how all the boots and shin armor in the Rix Road scenes are moderately to heavily weathered with grey "mud." I'll get to this later, but this texture adds to the effect and looks great. Buckles: Molded from original Martin Baker ejection harness buckles and my strap design. Cast in shore 90 urethane. Originally I cast these in resin, but didn't like how they sat unnaturally against my shin. With the urethane, I'm able to bend the small strap section around my boots and attach to the inside of the shin armor. I'll put more pictures up after I cast the final shin straps. Here's my shin straps ready to be cast in urethane similar to the shoulder straps on the left. Helmet: Fletchasketch3 I've had these helmet and goggle files for a while now and was excited to make another one for this costume. Also, unlike the Mudtrooper in which I put a bicycle helmet to meet the Specialist requirement, this suspension system seemed a lot more simple, but required some sleuth work to figure out what they did on set. The Fletcher files have been covered by others in the forum before, so I'll just show how this all played out. I printed upside down because I haven't done it in a while. I also knew that I was going to spray a layer of truck bed liner over it when I was finished in order to give the bucket a textured "kevlar" look, so I wasn't too concerned with the support remnants. However, if anyone ever considers doing this for something else, I'd say it doesn't really have any benefit other than leaving you with a clean helmet interior. This looks bad, but the Rustoleum bed liner almost levels itself out. This pic was taken about 2 minutes later and you can already see how it's not as nasty as it was before. So, Rustoleum bed liner is great for filling in layer lines, but if you want a textured look, go with Gorilla brand. For the goggles and TU, I opted to use Siraya Tech fast, but I had some extra transparent green stuff lying around. There's not much to say about this other than it looks cool when you're curing it. Also, if I were to do it again, I'd probably use Siraya Tech Blu or Siraya Tech Build. Blu is impact resistant, so dropping it isn't an issue, and build has similar properties, but can also be drilled and tapped. See, it looks cool. 😆 Here's a good pic of those support remnants I was talking about earlier. Again, after sanding and bed liner, they're invisible, but it's still worth showing what a person's up against if they print helmets on their dome. Now, with the easy stuff taken care of, it was time to turn my attention towards strapping this stuff on. We looked at a lot of pictures while discussing the Aldhani costume, but ultimately didn't include the helmet in the CRL. However, this first picture really gives us a good look at buckles and the chin strap. Initially I wanted to do everything the same as my Mudtrooper kit, but it became apparent that this was much different. The buckles were the big giveaway, but there were a few other things that kept popping up, i.e. goggles permanently attached to the helmet. Regardless, a few of us started hunting stuff down and this is what we came up with. Big thanks to @NoZoupForYou for identifying the serated buckles and getting me a set as well as a chin cup. Notice the green lenses in this pic. I'll get to that later. These side buckles were a little more difficult to find, but still manageable. However, notice how different actors have their buckles threaded differently. This second guy above has a tighter loop, while the Aldhani trooper I put up first has the ends kind of dangling. Regardless, I did the dangling thing and came up with this: I also put the gunmetal buckles on here, but I'm going to change them out for the chrome ones. Honestly, I just ordered gunmetal by accident. I'm still waiting on some black line snaps, but they should be here today. Also, we decided to go with the olive drap 3/4" webbing for the strap. This most closely replicates what's seen on screen. Gunmetal vs. Chrome Helmet padding. Thank God the costume department didn't shove another skateboarding helmet inside the trooper bucket. This time they opted to do some kind of 3" strapping system as seen here: However, they also opted to do a 3" padding system as shown below. What's kind of funny is that when you look at the two examples, both have a ring of webbing/ padding going around the crown of the helmet (pressing against the forehead), but the webbing in the first pic shows a cross piece extending across the top, basically from ear to ear, while the second picture shows this padding extending over the top of the head from forehead to rear. I decided to hone in on the second example and emulate what I see. Additionally, the padding seems a lot more functional than the webbing or whatever that is in the first pic. Also, while I'm on this picture, notice how the goggles definitely aren't permanently attached to the helmet, and take note of how the rubber trim around the goggles has a little thickness to it. This shows up a couple times throughout the Rix Road scenes and it seems like each time the rubber is different. Apparently, QC on these goggles wasn't as heavily regulated as typical. Regardless, here's my final padding choice: So, going back to the goggles, I cut out my silicone rim as I usually do, but then mounted that to a piece of 3mm EVA to give the trim a little more structure. I really like this and am thinking about doing the same thing to my Muddy costume. By the way... gluing anything to silicone is tricky, but it can be done. And here it is complete. As soon as my black snaps come in, I'll finish the chin strap. I'll be a little quicker with the remaining items because there's not much to tell. Belt: I did the leatherwork and used my Wampawear buckle. However, I switched out the code disc for one without grooves from BaileyBuildDesigns. Belt Boxes: Empire3d Chris took the dimensions straight from the CRL discussion and made thes boxes. I added the clips and the end result was the absolute best belt box I've ever used for any costume. I like this so much I'm likely going to make molds and cast a set out of either resin or urethane this weekend. The addition of the heavy duty clips is something I'm moving to with all my costume belts. Soft Parts: I'm making my own and will post additional pictures later. Big thing is that per our discussion in the CRL development thread, I'm using waxed canvas and getting everything down perfect. This is a good look. 😆 And with sleeves. Anyways, I'll post more as I finish this up. Thanks for the interest. 5 Link to comment
Blackwatch[CMD-DCA] Posted January 31, 2024 Share Posted January 31, 2024 love this thread, thanks Jason! Ive been using the Siriyatech Blue, it prints great with test prints but the supports just rip off the model. I still dont have my settings right, but its TOUGH. Link to comment
NoZoupForYou[501st] Posted February 2, 2024 Share Posted February 2, 2024 Found another random photo where it appears there are two "flaps" for the baton holder. I'll post it when I get a chance. Link to comment
Blackwatch[CMD-DCA] Posted February 28, 2024 Share Posted February 28, 2024 any chance you posted the flaps for the baton holster? Link to comment
TampaTrooper Posted July 15, 2024 Share Posted July 15, 2024 This is fantastic! I am building an Aldhani Trooper as well. I was wondering where you got the files for the shoulders and biceps? Looking and can't find one that fits exactly what you have here. Any help would be greatly appreciated! Thanks in advance! Link to comment
BigJasoni[TX] Posted July 18, 2024 Author Share Posted July 18, 2024 On 2/2/2024 at 7:34 AM, NoZoupForYou said: Found another random photo where it appears there are two "flaps" for the baton holder. I'll post it when I get a chance. Sean, do you have this pic? Per my response to David's comment below, I don't have anything definitive to work with. On 2/28/2024 at 8:38 AM, Blackwatch said: any chance you posted the flaps for the baton holster? David, I didn't. The reason why is because though we discussed it at length, I just couldn't find anything definitive to work with. Additionally, since I opted to go with a fixed baton rather than attempt to engineer something that could be extended, I won't be hanging it from my belt. However, I have a lot of leather sitting around here from a Mando project and if I have to make something, I can. On 7/15/2024 at 1:26 PM, TampaTrooper said: This is fantastic! I am building an Aldhani Trooper as well. I was wondering where you got the files for the shoulders and biceps? Looking and can't find one that fits exactly what you have here. Any help would be greatly appreciated! Thanks in advance! Andrew, Sorry for the slow response, I was on vacation. Plus, I haven't updated this thread in forever, so I was coming over to check on it. Anyways, @Bozzy got the Mudtrooper site up and running again and you can access the files via this link: http://mudtrooper.co.uk/ A lot of research and work went into this remix of the original Sean Fields files. Chris and I went through the scenes almost frame-by-frame, bouncing ideas off each other until he was able to produce something outstanding. When I went back through our conversation, it all started with him simply wanting to fix the slope of his already outstanding remixed chest piece, but as we were working on the Aldhani CRL, more and more kept coming up. Ultimately, you'll like this armor set and as you likely saw in my pictures, you'll find it easy to print. I've finished this kit and will post pictures/ update the build thread soon. Link to comment
BigJasoni[TX] Posted July 18, 2024 Author Share Posted July 18, 2024 On 7/15/2024 at 1:26 PM, TampaTrooper said: files for the shoulders and biceps Ugh... I got ahead of myself. If it's only the shoulders and biceps you're after, you can get the shoulders from the mudtrooper site, but for the biceps, I used the ones available from the Mr. Paul's Shoretrooper Build kit. The ones Chris created are fine, but anytime I need this style bicep armor, I opt for Pauls. Chris's are a one piece bicep which is perfectly acceptable; nothing was annotated in the Aldhani CRL indicating that they're a clam shell style. However, for the Rix Road armor, we have several scenes in which it's apparent that it's a two-piece construction. So, for level 2, "Biceps are a two piece design with the halves held together with hidden flexible cord and shall remain flexible" was added. Hope this helps 1 Link to comment
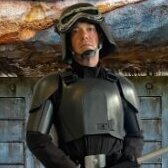
TampaTrooper Posted July 18, 2024 Share Posted July 18, 2024 1 hour ago, BigJasoni said: Ugh... I got ahead of myself. If it's only the shoulders and biceps you're after, you can get the shoulders from the mudtrooper site, but for the biceps, I used the ones available from the Mr. Paul's Shoretrooper Build kit. The ones Chris created are fine, but anytime I need this style bicep armor, I opt for Pauls. Chris's are a one piece bicep which is perfectly acceptable; nothing was annotated in the Aldhani CRL indicating that they're a clam shell style. However, for the Rix Road armor, we have several scenes in which it's apparent that it's a two-piece construction. So, for level 2, "Biceps are a two piece design with the halves held together with hidden flexible cord and shall remain flexible" was added. Hope this helps Ah I understand! No worries on the delay. Thank you for the link and the information! very much appreciated. So I went to the mudtrooper website and printed one of the biceps off. Unfortunately I'm not sure if my settings are off or something but it came out very flimsy. My printer settings had a 1.6mm wall thickness (4 walls) with 15% infill. Not sure what I did wrong. If you have any insight that would be greatly appreciated! Thanks in advance! Link to comment
BigJasoni[TX] Posted July 18, 2024 Author Share Posted July 18, 2024 I really can't tell from the picture. It looks good, but I may need you to define "flimsy." My guess would be that your infill percentage is too low, but I really can't tell without knowing what you did. It looks like the last time I printed the one-piece biceps, I did them at 20% infill. That was with PETG. 1 Link to comment
Blackwatch[CMD-DCA] Posted July 24, 2024 Share Posted July 24, 2024 just following up here, a 1.6mm wall is four times larger than what I print in generally (.4). That should be heavy as a boulder and solid with that much mateiral being laid down at four walls plus infil. I have my CR10 and N3 max set to 06 and I can run 3 walls with 9or 10% gyroid , its heavy and very stiff. PETG. 1 Link to comment
TampaTrooper Posted July 27, 2024 Share Posted July 27, 2024 Ah, I see. Unfortunately, I cannot recall all of the settings, but I'm quite sure I ran the print with a 1.6mm wall thickness (4 walls) and 15% infill. Would any other setting cause the finished product to feel lightweight and easily crack able? I'm using esun PLA+, maybe this print just needs PETG to really feel durable? As for the strength of the print, I have included some photos below to better clarify how it came out. Maybe I'm being too critical, considering how thin and wide the file itself is. As it is, I don't have anything else to compare it to. In the print, I'm seeing what almost looks like perforations throughout the walls. The top has already cracked near the "J" area, and the top edge has a visible space between the "outside" and the "inside" of the two walls, whereas the bottom of the print is completely solid. Like I said, this is my first run at this, so I'm hoping I can dial in the printer. I have the soft goods coming from KeepTrooping and would love to get this build going. Thanks in advance for the help! https://imgur.com/a/UiaUZAR Link to comment
Blackwatch[CMD-DCA] Posted August 8, 2024 Share Posted August 8, 2024 I dont want to hijack Jasons build topic but PLA+ is not as strong or durable as PETG. I dont use it anymore. The pics of the holes look like a printer issue rather than a file issue. 1 Link to comment
TampaTrooper Posted August 21, 2024 Share Posted August 21, 2024 On 8/8/2024 at 6:49 AM, Blackwatch said: I dont want to hijack Jasons build topic but PLA+ is not as strong or durable as PETG. I dont use it anymore. The pics of the holes look like a printer issue rather than a file issue. Yes! So I was able to fix the issue. I bellied up and bought a bambu p1s and smooth sailing now. Will be posting a WIP shortly. Thanks! 1 Link to comment
Blackwatch[CMD-DCA] Posted September 19, 2024 Share Posted September 19, 2024 got me one too. To fit in wth the other 6 😄 Link to comment

Recommended Posts
Create an account or sign in to comment
You need to be a member in order to leave a comment
Create an account
Sign up for a new account in our community. It's easy!
Register a new accountSign in
Already have an account? Sign in here.
Sign In Now