

Fivezero
-
Posts
1,259 -
Joined
-
Last visited
-
Days Won
70
Content Type
Profiles
Forums
Events
Everything posted by Fivezero
-
Thanks for the comments everyone!! Toddo and I are currently getting the CRL worked out, so be on the lookout very soon for that.
-
Looks great Toddo!!! I kept mine glossy to keep it like our other troopers, that and I used my base armor from my others so had no choice but to keep it glossy. That matte looks awesome though! Good choice on the pauldron too! Same thoughts as you on that. Now a silver pauldron.... Fivezero
-
The one coming from the tube under the chestbox? It goes directly into the left side of the ab plate (just above where the belt sits). I have a couple slits cut into my ab plate and the hose and ran a zip tie through to connect them together. There's also a little circular greeblie on the right side about the same spot where the hose is just on the other side. Here's some pics! Left side (as you're wearing it). And right side. I'll be getting the CRL finished on this soon (I hope!), and throwing a little how-to thing for all the small details on the EVO (things like how I attached the hose to the ab). If you need anything else though, just ask away!! Fivezero
-
Here's a link, click me, to a thread where we have a list of good sources for things! Let us know if you need anything else!! Fivezero
-
Well it's been awhile since I've posted. Been working my butt off the last few weeks on the EVO helmet to get it ready again. Basically with my last mold, the helmets kept coming out warped and had pock marks all over the surface. The back of the helmets had a huge ugly dent. Made it a pain to work on for each helmet. Also there were a lot of other things that didn't come out as clean as I would have wanted, so I busted out the Bondo and sand paper and got to work. I did a test helmet this morning, unfortunately it came out horribly warped, but all the things I was really worried about looked MUCH better. The surface had no pock marks, the ear/cheek trenches (as I call them) are much cleaner, though there is still a little bit of excess resin in spots, but that should sand down/clean up easily. So I'm going to work on getting a new mother mold made this weekend (I think that's where the warping is coming from) and hopefully have everything ready by next week to get some EVO helmets out the door. Here are some comparison pics between the old and revised helmets. Warped Chin vs. Corrected/Cleaned Up Chin Ear/Cheek Trench - OLD helmet Ear/Cheek Trench - NEW helmet (ignore that it's a badly warped casting). Also note that there are no little pock marks! Side by Side of the helmets New 3D printed chin ball as well, to replace my old hand sculpted one based on a very low res model. The old chin ball was a pain in the butt too, took so much effort to make it look decent and fit right.... Overall I'm very pleased with how things have turned with EVO helmet V2. I'll get working on the new mother mold to correct those warping issues and hopefully get some helmets cranked out soon, so we can have more EVOs!!! Fivezero
-
My dad collects military vehicles. They are all vehicles he drove when he was in (he served in Desert Storm). We also have an M998 HMMWV, M108 Crane Truck, M925 5-ton, 2x M151 MUTTs (that he's restoring slowly) and my M1009 CUCV that I drive when I'm not driving the Chevelle. They're fun to take to shows, kids can climb in them and get pictures taken, etc. unlike most other regular cars.
-
Just for you DE! Our new barn makes a great backdrop!!
-
Luckily Bavery, I had to rip the pouches off this morning to take some more photos (my GML didn't like my other ones........), so I took some quick pics to show you my setup. I simply use electrical tape (a couple layers of it) across the loops on the pouches. Then using more tape I attach to the chest just under the shoulder straps. Cheap, easy to do and it's a bit adjustable if it isn't quite right. They are also "somewhat permanent" since I can cut it off any time for other troopers or I can leave it on for a long time (it'll last about a year surprisingly). I used to have them attached to my pack straps, but they slid around too much and I haven't worn my pack in a long time so needed something different. Anyway here's some pics to show it! As for the Silver Nova, my GML didn't like my first set of pics and asked if I could retake them. Luckily it's my day off so I got some new ones taken just now, hopefully he likes these..... Fivezero
-
Well got the pictures sent to my GML!! Hopefully all goes well now!!
-
Well major update time (lots of pics ) Semi-together Backplate... Right Shoulder (still needs a little more curve) Left Shoulder pieces (needs bondo on the smaller piece) Bicep (just need to glue the strips on, hence why it's all misaligned) Right Forearm, still missing the hump on the edge (left one is cut out too, just need to put it together) Finally what I've been working on lately, the Shins. I'm using some old FX shins (they are perfect for the Shocktrooper) as the base and of course making the ridges myself. This is coming along quite smoothly, no major snags yet. Just need to sit down and throw it all together. I still have to cut out the boot armor, some of the extra plating on some pieces, belt still needs to be made and then the helmet. I'll probably start on the helmet once everything is all cut out and assembled and that will end up being an EVA foam helmet that'll get plasticized and bondoed. Fivezero
-
Also worked on the Chevelle a bit! Got a new grille and turn signal lenses for my birthday. I put them on once the weather got nice to paint and the front end looks much better now. Oh and got all of the electrical bugs I had with it sorted out (40+ year old wiring = lots of shorts and blown fuses )
-
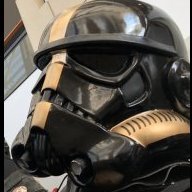
Well no news yet, but here's a pic from a con a couple weeks ago... Trooped with my Elite as well (hence why the pouches are still on, they're somewhat permanently attached...) People were definitely digging the silver, also confused fellow troopers too (they were used to my gold stripes).
-
Been awhile but picked this project back up the last couple days. Been experimenting with some sintra and was able to get the shoulders, biceps, one forearms and the back plate made up. Still have the other forearm, handplates, boot armor, belt, thigh belt and shin mods made up (but all the pieces are ready to cut, just need to cut them and glue them ) Going pretty quick, I'll try to get some pics taken tomorrow of my progress. I also plan on using regular TK style shins and thighs and doing a couple small modifications to them to suit the Shocktrooper. But this should be a fairly quick build apart from the helmet. Fivezero
-
Thanks!!! Unfortunately no pics yet, between work and being sick, haven't felt like putting any armor on (let alone one with wires going everywhere). Hopefully I'll feel a bit better next week and can try to get something done and get it approved. Fivezero
-
Hey guys, sorry for the wait... Been way too busy with work lately. Had some managers wuss out of their shifts so I've had to pick up their slack... Between closing and opening the store and being sick the last couple weeks, I have been really exhausted so haven't had much progress on anything. I'll send another message to my GML soon since it appears he might have missed them... Sorry to keep you guys waiting!! Fivezero
-
Hey Scubacat, you can technically cut the tape, but you have to attach new connections between the pieces, here's a TRON costume thread on the RPF that has some more info (there's a lot of pages, I think the info on EL tape cutting is around 180ish, can't remember.....) ALSO everything is FINALLY done... Just a couple little things to tidy up, probably get some pics tonight or tomorrow?!? Fivezero
-
A week after I started putting it together, it's done! Now to send it in for approval!! Fivezero
-
Hit a snag as I prepared the shoulders for lighting... The EL panels/strips aren't quite big enough and don't quite cover the area needed. There's also a small seam I can't get rid of as the EL stuff doesn't quite light up the whole width of the panel/strip. The strips also don't really like to bend a lot, and trying to match the curvature of a shoulder bell doesn't work so well... Finally the stupid things start getting dimmer as they stay on longer (not the battery, I can literally unplug the battery and plug it back it in to light it up, then it starts to die). So after frustration after frustration, they are being removed from the equation. Here's my idea using LEDs instead. Basically I'll cut out the shape of the area to be lighted out of one shoulder bell. Then I'll take another shoulder bell underneath and sandwich an LED strip between them, to get a similar effect. Here's a quick pic showing a mock up of what's to come. The paper cutout is where the shoulder bell will get cut. I'll wrap the LED strip around the edge and place it on the other shoulder for the light to shine onto. Ordered the LEDs, so now onto cutting up some shoulders while I wait! After this.....it's.....DONE!! Fivezero
-
-
Thanks Scubacat!! Well Batman is pretty much done (just some tweaks to make). So that means next week is TFU Shadow Week!!! I should be able to get everything finished up for it and maybe get some pictures taken for approval (finally!). Just one forearm and two shoulder bells left to rig up with lights! Fivezero
-
I agree with everyone else, I would avoid this set of armor. Too many red flags for me. No belt (the one that goes around your waist), crappy trimming (ATA is trimmed much better), Thermal Detonator endcaps look very soft (same thing with the back like ELP mentioned) and there also appears to be what looks like half of an AM thermal detonator (the back half). All tells it me it is probably recast and not a true ATA kit. Stick to those sellers I sent you a while ago!! Fivezero
-
Were can I find a kit so I can start building?
Fivezero replied to LastZamWesell's topic in Shadow Stormtrooper
Welcome aboard Zara!! If you need anything, feel free to ask!!! Fivezero Oh and check your PM! -
*cough* I don't really have 255 projects *cough* Man this is a nasty cough....
-
The beginning of the end
-
Woot!!!! My crazy idea worked! "Demolded" it last night, unfortunately the plastic signs didn't survive . Oh well, it made a nice $5 mold. On to pictures! Fresh out! A little sanding (left the other pec alone, to show the difference). Pretty much where it's at right now (plus some sanding). Oh camera flash, always showing me that I'm not done... Need to give it some heat to reshape it too. It kinda flattened while I applied the resin. Really digging this way of using pepakura, much better than sanding fiberglass/bondo/cardstock. Much stronger and lighter too!! I don't think I'm stopping until that entire unapproved section is gone........ Master - Yes I'm doing the kama-coattails! Got no choice (plus they're one of the things that make this guy!!). Dizzy - Yes! I converted it!! I have a feeling this is going to be a very fun and satisfying build. Fivezero And, DE, this is armor project number 5, total project number 255. Ended up packing up the Sith Acolyte for awhile, Darth Malgus is kinda packed up (not on the shelf yet though), TFU Shadow is almost there and the Swamp Helmet might need a reboot. Not going to work on the Chevelle for a few months and the MGs will get built.....someday......when I have $600 to get a dummy receiver. I think that's it....