Chaos[CMD-DCA] Posted July 31, 2019 Share Posted July 31, 2019 LMAO, oh yeah you do don't you! Sorry man, I'm getting old! After you put the decals on, a light misting of a matte or semi gloss (which ever matches your paint finish will help protect the decals and keep them from getting peeled off. 1 Link to comment
wook1138[TX] Posted August 6, 2019 Author Share Posted August 6, 2019 Finishing the helmet. Well, it started with the helmet and it's going to end with the helmet. I bailed on this a while ago because I had an issue with the resin bubbling. I've shown this before, but here was my dilemma. I used bondo to fill the cavity and touched it up with some filler primer. I was able to paint the top black again and clear coat. Then I masked and added the metallic black and then the metallic/silver parts to the tube stripes area. While painting the aluminum colour, the tape let go in a spot and I got aluminum overspray over part of my helmet. Boo. So I had to repaint a few parts glossy black and clear coat again. Then I was ready to mask for the matte black. I masked the front of the helmet but decided to free hand the back details. Because of my recent issue with tape coming loose, I really taped this guy up for painting to avoid the possibility of overspray again. Well, it worked - no over spray. But I ended up with marks in the paint from the tape. I tried to use rubbing alcohol to clean it up, but it appeared I was making more of a mess. I left it alone for a few days - when I came back the "damage" was much less noticeable and I was able to buff it out with Tamiya polishing compound (fine and finishing). By the way, I am using tamiya synthetic lacquers (TS spray paint) for all my painting needs - love the stuff and the polishing compound works wonders. Then I brush painted the rest of the matte black recesses. Glued in the bits with a combination of CA glue and E6000 Forgot to paint behind the right hand snout piece - will have to do that later. Then it was time for the tusks and lights. I'm using EL panels instead of the LEDs that I got from ArmoryShop. The first set I got were white in colour but the shape of them made it difficult to fit into the tusk. So I ordered some green ones that had a different shape to them. The white ones look pink in the picture. I picked up a driver that is powered by two AA batteries. And cut the panels to shape using a template. I sanded the back of the green lenses with 1000 grit sandpaper to diffuse the light a bit. The one on the left is not sanded, the one of the right is. Glued on the lights with CA glue and E6000. Kind of a precarious connection with these - I don't know how durable they will be in the long run. Not a lot of contact for glued surfaces. Done except for the visor and mesh for the tube stripes. I have Ukswrath's voice system and I also have fans on order from trooperbay. 3 Link to comment
Chaos[CMD-DCA] Posted August 7, 2019 Share Posted August 7, 2019 Looking awesome Greg. He have you played the DT clips in Tony's sound system yet? If so and you have those TK clicks after each one let me know. I redid the sound files a while back without the clicks and forgot to send Tony the new files. 1 Link to comment
wook1138[TX] Posted August 12, 2019 Author Share Posted August 12, 2019 On 8/7/2019 at 4:22 AM, Chaos said: Looking awesome Greg. He have you played the DT clips in Tony's sound system yet? If so and you have those TK clicks after each one let me know. I redid the sound files a while back without the clicks and forgot to send Tony the new files. Thanks! I didn't notice the clicks. Link to comment
wook1138[TX] Posted August 12, 2019 Author Share Posted August 12, 2019 So, while adding padding and a hard liner to my bucket I realized that one should wait to attach the lights to the very end. While handling the helmet one of the lights made a cracking noise and became loose. I tried to add a bunch of E6000 to the backside next to the tube - hopefully that helps. Link to comment
wook1138[TX] Posted August 12, 2019 Author Share Posted August 12, 2019 Working on the E-11D. I modified the sling swivels - I cut away the 3D printed swivel and drilled holes for an actual swivel mount. I also added a mount for a real flashlight. I cut out some ABS to match the shape of the barrel vents and attached to the back of the mount for extra stability and just glued the piece on - it seems pretty sturdy but time will tell. Then I broke out the air brush to do the "burnt metal" weathering. Oh, I should mention that I painted the blaster with tamiya TS spray paints and the weathering was done with vallejo acrylics. For the main part of the blaster I paint a thick layer of gloss black and let it dry. Then I paint a few thin layers of gloss aluminum and a dusting of gun metal followed by a gloss clear finish (TS-13). I let it cure for a few days then I painted on a mixture of semi gloss black and matte black (I didn't have enough of one kind so I used both). within about a half hour, I take a soft rag with paint thinner and carefully wipe away the black in areas where one might expect weathering. Every now and then I go through the aluminum and expose the underlying primer, but a bit of dry brushing later can fix that. Anyway - I airbrushed the burnt metal with vallejo Air metal colours. My airbrush crapped out on me - the the effect was not exactly what I wanted - but I managed to get it looking ok anyways. I'll wait a few more days for all the paint to cure really well, then I can add the decals. 1 Link to comment
RAIDER[COTG] Posted August 25, 2019 Share Posted August 25, 2019 Looking good @wook1138!!! 1 Link to comment
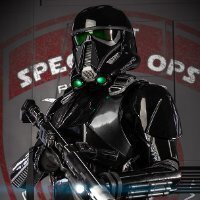
wook1138[TX] Posted August 28, 2019 Author Share Posted August 28, 2019 First full kitting up. Still need to add helmet fans and my voice system. There will be some required adjustments for a better fit (may need to trim a bit off the bottom of the shins... and maybe lower the biceps, tweak shoulder bells). Anyway, approval pics sent to GML and... approved! 1 Link to comment
IcyTrooper[CMD-DL] Posted August 29, 2019 Share Posted August 29, 2019 Congrats on the approval! Looks awesome!!! 1 Link to comment
BLACKFOX[PR-CMD] Posted August 31, 2019 Share Posted August 31, 2019 Looking great Wook!! 1 Link to comment
wook1138[TX] Posted November 8, 2019 Author Share Posted November 8, 2019 So, I just wanted to add a little update. My helmet is a Mk3 from Denis at Armoryshop. Although it is a fine helmet, it was really big on me. I have a big head, so that part was fine, but the helmet looked too big on my frame. So I decided to get a Mk4 regular size helmet from Denis. Wow, what a difference. My head is nearly at the recommend limit for the medium (my head is 59 cm in circumference) but there seems to be ample room for padding and electronics still. I picked up the finished bucket and my first impressions are very good. Here are some picks. The Mk3 (self finished) is on the left and Denis's Mk4 is on the right. the Mk4 My Mk3 on my mannequin. Head looks a bit big. Mk4 on the mannequin. Lens still has protective backing on it. I find this size suits the size of my armor much better. 2 Link to comment
RAIDER[COTG] Posted February 16, 2020 Share Posted February 16, 2020 On 11/7/2019 at 9:23 PM, wook1138 said: So, I just wanted to add a little update. My helmet is a Mk3 from Denis at Armoryshop. Although it is a fine helmet, it was really big on me. I have a big head, so that part was fine, but the helmet looked too big on my frame. So I decided to get a Mk4 regular size helmet from Denis. Wow, what a difference. My head is nearly at the recommend limit for the medium (my head is 59 cm in circumference) but there seems to be ample room for padding and electronics still. I picked up the finished bucket and my first impressions are very good. Here are some picks. The Mk3 (self finished) is on the left and Denis's Mk4 is on the right. the Mk4 My Mk3 on my mannequin. Head looks a bit big. Mk4 on the mannequin. Lens still has protective backing on it. I find this size suits the size of my armor much better. @wook1138 I skimmed your thread a bit...but didnt see this...what is your height/weight? I see your head circumference here which is helpful. Thanks! Link to comment
wook1138[TX] Posted February 18, 2020 Author Share Posted February 18, 2020 On 2/16/2020 at 4:35 PM, Raider said: @wook1138 I skimmed your thread a bit...but didnt see this...what is your height/weight? I see your head circumference here which is helpful. Thanks! I'm 5"10" and 160 lbs. 1 Link to comment
RAIDER[COTG] Posted February 18, 2020 Share Posted February 18, 2020 22 minutes ago, wook1138 said: I'm 5"10" and 160 lbs. ah close to me (im a weeeeee bit heavier dont judge lol) do u use lifts in your boots? the mk4 bucket from denis is more proportional it seems. that was a speciali request? Link to comment
Devolver[501st] Posted February 18, 2020 Share Posted February 18, 2020 1 hour ago, Raider said: ah close to me (im a weeeeee bit heavier dont judge lol) do u use lifts in your boots? the mk4 bucket from denis is more proportional it seems. that was a speciali request? The MK4 is his standard DT bucket now and comes in 4 sizes. It’s a GREAT helmet. 1 Link to comment
Devolver[501st] Posted February 18, 2020 Share Posted February 18, 2020 2 hours ago, Raider said: ah close to me (im a weeeeee bit heavier dont judge lol) do u use lifts in your boots? the mk4 bucket from denis is more proportional it seems. that was a speciali request? @Raider, I forgot in my original reply: I’m also 5’10 185 standing flat. In my DT, I’m 6’3”. I personally use lifts inside the boots, 1 inch. With padding in the top of the helmet (this also elongates the appearance of your neck like the screen troopers), internal boot lifts and the boots themselves, you can look pretty tall. On my first DT troop, no one knew who I was... Guys I troop with on a regular basis, mind you, who didn’t see me armor up that day. I’m not lanky like the guys on screen, but the height and the armor definitely sell the look. Link to comment
wook1138[TX] Posted February 18, 2020 Author Share Posted February 18, 2020 Oh yeah. I have lifts. I try to steal every inch I can. Lol I ordered the regular sized mk4. Link to comment
Printimus Posted March 8, 2020 Share Posted March 8, 2020 Where did you get such tiny EL panels for the tusks? Link to comment
wook1138[TX] Posted April 14, 2020 Author Share Posted April 14, 2020 On 3/8/2020 at 11:16 AM, Printimus said: Where did you get such tiny EL panels for the tusks? Sorry, I responded to this a while back, but I see it didn't save. https://elwirecraft.co.uk/ Link to comment
wook1138[TX] Posted April 14, 2020 Author Share Posted April 14, 2020 I never did do all the re-sizing and fixes I wanted to do after my first troop a few months back - so I though I would do it. Mostly this involves a bunch of trimming here and there, but I also wanted to redo the ab and kidney pieces. They were originally separate and attached to the chest and back pieces. I've decided to make a corset out of them (I used the extra ribbed rubber material that came with the kit). It appears that most of the new generation trooper costumes use this system instead of hanging pieces from the chest and back. Reference So I added rubber matting to connect the kidney to the ab. They are connected with snaps with the rubber parts over lapping and being attached with Chicago screws at the back. I just have to add some suspenders and integrate them into the "poncho" part of the undersuit. examples of the corset from other costumes. i will also add tabs to the bottom so I have more thing to connect the belt to. I also trimmed my shins and will be reshaping the tops of my thighs. The thighs appear to be flat across the top. So I will reshape mine a bit. The taped part will go (more or less). 1 Link to comment
TheAstroBot Posted April 14, 2020 Share Posted April 14, 2020 That corset looks great, man. Out of curiosity, where did you find good sized matting for the sides? Link to comment
wook1138[TX] Posted April 15, 2020 Author Share Posted April 15, 2020 5 hours ago, TheAstroBot said: That corset looks great, man. Out of curiosity, where did you find good sized matting for the sides? Thanks. The extra matting was in the kit. 850 sent me 4 pieces. I only used 2 for the thighs. Worked out pretty good - I guess it pays to be small sometimes. Link to comment
wook1138[TX] Posted April 15, 2020 Author Share Posted April 15, 2020 Corset done. I also added some Velcro tabs to hang down to help keep the belt from sagging (not shown, glue still setting) best part is that it hides the love handles. Lol. The corset does a great job of holding everything in place. Plus, I love the way it feels. The chest piece floats nicely and seems to allow for better movement. 2 Link to comment
IcyTrooper[CMD-DL] Posted April 15, 2020 Share Posted April 15, 2020 Nice job on the corset piece. That is pretty much the setup I use for imperial combat assault tank driver / AT-ACT driver. I like to call the midsection the "barrel" because that is what it feels like. 1 Link to comment
wook1138[TX] Posted April 15, 2020 Author Share Posted April 15, 2020 1 hour ago, IcyTrooper said: Nice job on the corset piece. That is pretty much the setup I use for imperial combat assault tank driver / AT-ACT driver. I like to call the midsection the "barrel" because that is what it feels like. Thanks! Here is the test drive. lol - yeah, barrel sums it up. 1 Link to comment

Recommended Posts
Create an account or sign in to comment
You need to be a member in order to leave a comment
Create an account
Sign up for a new account in our community. It's easy!
Register a new accountSign in
Already have an account? Sign in here.
Sign In Now