TK 21814[TX] Posted September 6, 2022 Share Posted September 6, 2022 This post is to catalogue my build of the Purge Trooper Electrostaff Variant. This character proved difficult in Jedi Fallen Order and I am drawn to bringing it to life. I am a Centurion Level ANH Stunt TK and this is my first 'Clone' build. I will gladly accept any hints, advice, or links to other posts to guide me in building a proper Clone. My Build was originally posted on the Clone Trooper Detachment but will now be hosted here. My build goal is to correct errors in the current CRL and build the finest Electrostall Purge Trooper possible. Below are my Parts List: Armor: 850 Armorworks Handplates and Knee clips: Imperial Surplus Boots: Crowprops Helmet: Galactic Armory Helmet Vovoder: Calvin Kam file, scaled to fit GA Bucket Undersuit: Custom Build Ammo Boxes: Ruthar's files from Clone Detachment Gloves: Amazon Red Visor: Kalevala Suspenders: Amazon Belt for Thigh Straps: Amazon Visor light: Amazon Clear shield: Amazon Helmet padding: Amazon Pauldron: Christopher Speer Fans: ukswrath's Cooling Fan Kit from whitearmor.net My pictures from the Clone Detachment that contains the reference pictures from the game have been moved to this forum. Cheers, Brad 3 Link to comment
TK 21814[TX] Posted September 6, 2022 Author Share Posted September 6, 2022 To begin my Electrostaff, I grabbed some screen shots, and other pics I found online. Thankfully folks are taking some good shots of this trooper! Below are some of the images I am using to build my Electrostaff. With some scaling and tracing, I created a CAD file for basic layout and sizing, so I could go shopping in my local Plumbing Supply shop for parts. My staff will be close to this, but the sizing of available fittings and parts will dictate the ultimate length and details, so don't take what's below as 100% accurate. 2 Link to comment
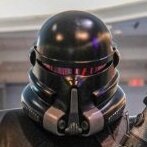
TK 21814[TX] Posted September 6, 2022 Author Share Posted September 6, 2022 Below is a mock-up of the staff. Not all the elements are there, so this is just a dry fit check. 2 Link to comment
TK 21814[TX] Posted September 6, 2022 Author Share Posted September 6, 2022 Deciding the route of electricity. Got to finalize the route before painting & weathering can be completed. Yes, I plan to have lighted purple-electricity! Electrostaff is nearing completion. Only wiring is left. I also have to determine a transportation case. It breaks down into 3 pieces. The ends are 1/2" thick rubber instead of an accurate material and size (which would have been 1/8" steel/aluminum). I did this to allow me to set the staff on the ground or lean it or hit something without damaging something, or injuring someone should the end ever come into contact with someone. #consafety 2 Link to comment
TK 21814[TX] Posted September 6, 2022 Author Share Posted September 6, 2022 I originally had a 3D printed helmet from Calvin Kam, however it needed to be printed at 110% sizing to pit my head. It ended up looking way too big, so I switched to files from Galactic Armory. Unboxing of the BBB ... 850 Armor Works Realistic Clone kit in Black ABS with Black Rubber Belt. I will begin some general shaping, trimming, and edge softening while My undersuit comes together. 1 Link to comment
TK 21814[TX] Posted September 6, 2022 Author Share Posted September 6, 2022 For an easy start, I'm bringing the shoulder bells into spec. Bell on the left is as supplied. Bell on the right is trimmed (oversized) and sanded, ready for primer. I'll trim it down to final once I have more complete. The tailored shoulder bell shape is missing from the CRL. Completing some surface work on the abs armor, as every piece has imperfections. The satin black paint will show ripples, indents, bumps, etc, so I'm looking to get all the individual parts smooth before joining them together. I can't do that until my under suit is done. 1 Link to comment
TK 21814[TX] Posted September 6, 2022 Author Share Posted September 6, 2022 Also, working on the bucket. Smoothing 3D printed items is a onerous task, but I am getting very close to paint now. I found this drywall patch screen that is perfect for reinforcing the joint in by helmet (printed in 2 pieces). It's now bondo's, smoothed, and plasti-dipped black. Visor mounts are also installed. Here's a picture of the drywall repair patch before all the interior helmet finish work. Here's a side by side of my two buckets. On the left is the Galactic Armory printed at 100%. On the right is the Calvin Kam printed at 110%. I will finish both, but will only be installing helmet fans etc in the GA bucket, as I will be wearing that one. The GA bucket is ready for it's first coat of paint. The CK bucket needs finish sanding. 3 Link to comment
TK 21814[TX] Posted September 6, 2022 Author Share Posted September 6, 2022 Below is the basis for my undersuit design. A few of us compiled our thoughts over on the Clone Detachment to finalize this one 2 Link to comment
TK 21814[TX] Posted September 6, 2022 Author Share Posted September 6, 2022 Here's the undersuit at 80% complete. Once I've sized my armor, I can then go back and cut in mesh where it will not be seen. The bottom edge of the shirt is currently not finished, so I'll have to finalize the length as well. I may have to bring the shoulders of the bib in too, but I'll have to see how the armor interacts with it. It's comfortable and not being pleather, it's not brutally hot either. Time to trim some ABS and suit up with some painters tape! 2 Link to comment
TK 21814[TX] Posted September 6, 2022 Author Share Posted September 6, 2022 Here are the wonderful boots I got from Crowprops. I will be wearing 1" lifts in them. Soles painted to match the game. The black stripes on the soles are missing from the CRL. 2 Link to comment
TK 21814[TX] Posted September 6, 2022 Author Share Posted September 6, 2022 I ordered in a buckle which I have started to build towards the in-game model. Some more fussing to do, but this is the start. 1.5" Brass Centre Bar Buckle Remove the prong Rough cut of aluminum for the small panel on the buckle My buckle is almost finished. Some silver paint and some black felt (so it doesn't scuff on my armor) and it will be done. This was harder to create than it looks. The buckle is missing from the CRL. 2 Link to comment
TK 21814[TX] Posted September 6, 2022 Author Share Posted September 6, 2022 I've got about half of the armor joined together and once all done, I'll post a tape up fill kit to see where I stand. For now, I'll temp you with the fine details of a Purge Trooper knee plate. The knee plate is not a standard realistic clone piece, as it differs from inner leg to outer leg. The outer leg side has straight edges from the central rib, and the plate does not extend towards the back of the knee where the clip attaches. Note where the clip attaches, that the knee plate is a straight cut up-and-down. The bottom edge features a "high-arc" cut in it. I mention this because the inner leg side is different. The CRL is missing the details of the knee plates. The inner leg side of the knee plate has a curved top edge (vs the outer's straight), and the plate protrudes further back towards the back of the leg. This side of the knee plate is actually longer than the outside. Note that where the clip connects, there is a gentle curve in the plate. Also note the "low-arc" cut at the bottom of the knee plate. The top-down view below illustrates the differing lengths between the inner leg side vs the outer leg side. The inner side is definitely longer, which confirms that the outer side has that straight cut where the clip attaches, effectively lopping off the portion of the knee plate that would have extended back towards the back of the knee per a standard trooper. Image below shows the standard knee plate rough trimmed on the left, and a purge trooper on the right. This view highlights the details of the inner leg side. Image below shows the standard knee plate rough trimmed on the left, and a purge trooper on the right. This view highlights the details of the outer leg side. Image below shows the standard knee plate rough trimmed on the left, and a purge trooper on the right. This view highlights the different lengths of the inner and outer sides of the knee. The longer side is the inner, the shorter side is the outer. Note the locations where the clips will attach. The inner has the gentle curve. The outer has the straight cut. 2 Link to comment
TK 21814[TX] Posted September 6, 2022 Author Share Posted September 6, 2022 Sketch showing the difference between a standard TK Pauldron and a Purge Trooper one. Prototype incoming. 2 Link to comment
TK 21814[TX] Posted September 6, 2022 Author Share Posted September 6, 2022 It's all about the details. A Purge Trooper's compad is slightly different than standard. Reference pic and my forearm (in primer) shown below. Rubber compads are great for their flexibility, but a pain to finish. Mine, at 80%. Still messing with that small groove. The addition to the side of the compad is missing from the CRL. 2 Link to comment
tipperaryred[CMD-DCA] Posted September 6, 2022 Share Posted September 6, 2022 Brilliant to see another hugely detailed build thread up, thanks a million Brad. This will be a huge help for any necessary CRL revisions, and in inspiring other builders. I'll also be curious to see the evolution to the P2 Purge Trooper and see how your's and Chris' work informs that CRL. Looking forward to seeing the rest of it! 1 Link to comment
Blackwatch[CMD-DCA] Posted September 7, 2022 Share Posted September 7, 2022 Great thread! Im glad we got to see your scaling efforts, you are using Armorsmith? I will remember that mesh trick for when I start assembling a helmet I am printing. The two helmet files are clearly different, both in original size and how they are laid out, I have to see, I prefer the GA file over the enlarged CK file, just from the look of it. Link to comment
TK 21814[TX] Posted November 29, 2022 Author Share Posted November 29, 2022 Prior to the weather turning I got everything painted. Below are some pics showing my chevron masking. The tape is long to show my visual placement vs the images from the in-game model. Also, the CRL references light grey chevons. I believe they are actually white. In the pictures below they look grey'ish due to the photo mode with a digital spotlight. Thigh. The inner end of the chevons appear to align with a projected point from the knee triangle. Back of the thigh. Link to comment
TK 21814[TX] Posted November 29, 2022 Author Share Posted November 29, 2022 Chevrons on right forearm. Note, the stripes are above the compad and do not overlap. Also note the elbow end of the forearm has been "flattened" to match the in-game model. The stripes stop at the triangular shape in the armor. The painted chevrons in the CRL are incorrectly placed. 1 Link to comment
TK 21814[TX] Posted November 29, 2022 Author Share Posted November 29, 2022 Left forearm. Again, the chevrons stop at the triangular shape. Elbow end of the armor has been flattened. Getting closer. 1 Link to comment
IcyTrooper[CMD-DWM] Posted December 22, 2022 Share Posted December 22, 2022 Nice progress, paint is on point! Link to comment
TK 21814[TX] Posted January 1, 2023 Author Share Posted January 1, 2023 Bucket is getting closer. Helmet padding and some interior finishing to be completed. Fans are installed. Visor does light up, but I'm not satisfied with the output so I might rebuild the visor. Pics... Note the squared off detail at the base of the helmet dome is a different tone of satin black. This is missing from the CRL. Here's a ref pic with a strong light to illustrate the difference in blacks. Red blocks missing from CRL Note, the "fins" on the vocoder are missing from the CRL. I'm really happy how this 3D printed helmet came out. 2 1 Link to comment
IcyTrooper[CMD-DWM] Posted January 2, 2023 Share Posted January 2, 2023 Very interesting on the details, as you know, we inherited this costume from CTD and all CRLs are living and breathing documents. I'd be happy to start the process of a possible CRL update with any new-found/discovered details that would further enhance the costume! 1 Link to comment
TK 21814[TX] Posted January 20, 2023 Author Share Posted January 20, 2023 Shoulder Bell Paint Masking Results Once weather is applied, the small imperfections will disappear. Link to comment
TK 21814[TX] Posted January 20, 2023 Author Share Posted January 20, 2023 Belt Clip & Kama Straps Ref Pic from in-game Mine The straps are free to slide in the belt clip. They won't come off as the leather strap prevents them from moving far enough. I added a hinge to the drop bracket to add some flexibility to setup. The hinge will be hidden behind the belt and (I hope) will reduce possible wear on the cod armor while improving my overall mobility/flexibility. CRL Items: The straps in the game appear to be leather The Belt Clip in the CRL is incorrect. Belt Kama clips have beveled edges. Link to comment

Recommended Posts
Create an account or sign in to comment
You need to be a member in order to leave a comment
Create an account
Sign up for a new account in our community. It's easy!
Register a new accountSign in
Already have an account? Sign in here.
Sign In Now