TookBreaker[TX] Posted December 13, 2023 Share Posted December 13, 2023 Got it. As the inside of the armor is not smooth and covered with fiber, I do not think it will come off easily. My experience is with flat surfaces sprayed with PlastiDip, you can just peel it off. With this one, if you have only one layer, I assume you could just sand it and it will adhere well enough. Also, I used E6000 for many areas, but if you need really good adhesion, I would use stronger glue than E6000. Link to comment
Mal86 Posted December 14, 2023 Author Share Posted December 14, 2023 Can anyone help me understand what the level 2 for the shins are referencing (and let me know if Jim Tripon's kit requires any modification to meet this)? OPTIONAL Level two certification (if applicable): There is a raised strip that begins at the rear vertical cover strip angled up and around the left outside shin and joins the front vertical cover strip. The top edge of the raised strip is angled and aligned as if it is an extension of the raised angular extension or flap just above the inside ankle. There is an indented groove approximately 1/2" (12mm) wide that runs along the inside bottom of both shins from the rear center to the beginning of the front boot arc. This detail is partially covered by the triangular closure flap. Looking at the shins I got from Jim, they seem consistent with the pictures. Is there anything that needs to be modified on his shins to get to level 2? Thanks. Link to comment
DoggyDoc[CMD-DCA] Posted December 14, 2023 Share Posted December 14, 2023 Here is the little groove you need to add for this part for level 2 There is an indented groove approximately 1/2" (12mm) wide that runs along the inside bottom of both shins from the rear center to the beginning of the front boot arc. This detail is partially covered by the triangular closure flap. 1 Link to comment
Mal86 Posted December 14, 2023 Author Share Posted December 14, 2023 12 hours ago, DoggyDoc said: Here is the little groove you need to add for this part for level 2 There is an indented groove approximately 1/2" (12mm) wide that runs along the inside bottom of both shins from the rear center to the beginning of the front boot arc. This detail is partially covered by the triangular closure flap. Thanks for the explanation! It looks like I just need to cut a thin indentation in for that. 2 Link to comment
Mal86 Posted December 15, 2023 Author Share Posted December 15, 2023 Is masking tape a good option for edges and areas I don't want plastidip or is there a better option? This will be my first time using plastidip. Any tips or advice would be appreciated. Link to comment
Chaos[CMD-DCA] Posted December 15, 2023 Share Posted December 15, 2023 So I have discovered something new in my life. Its called UV printer resin and it is amazing. I originally painted the inside of my Tripon kit with a substance like Plasti-Dip and it worked awesome at eliminating the fiberglass shards. Over the years that wears off and has to be recoated which is no big deal. However I tried brushing on a thin layer of UV printer resin and hitting it with a UV light. It cures almost instantly and seals in the fiberglass. It is AMAZING ! LOL wish I had figured this out the last time I upgraded/modified/repaired my armor. One more thing you might want to consider to help preserve the paint on your kit in the areas where the pieces overlap is epoxying some type of medium thick black felt on the inside of the overlapping pieces. Not only does it prevent the paint from getting "rub marks" but it quiets the armor rattle some what. 2 Link to comment
Chaos[CMD-DCA] Posted December 15, 2023 Share Posted December 15, 2023 7 hours ago, Mal86 said: Is masking tape a good option for edges and areas I don't want plastidip or is there a better option? This will be my first time using plastidip. Any tips or advice would be appreciated. I use Frog painter's tape to mask off areas when I apply paints etc. Blue painter's tape works as well, I just prefer the pretty lime green color of the Frog tape. 1 Link to comment
Mal86 Posted December 16, 2023 Author Share Posted December 16, 2023 On 12/15/2023 at 6:02 AM, Chaos said: So I have discovered something new in my life. Its called UV printer resin and it is amazing. I originally painted the inside of my Tripon kit with a substance like Plasti-Dip and it worked awesome at eliminating the fiberglass shards. Over the years that wears off and has to be recoated which is no big deal. However I tried brushing on a thin layer of UV printer resin and hitting it with a UV light. It cures almost instantly and seals in the fiberglass. It is AMAZING ! LOL wish I had figured this out the last time I upgraded/modified/repaired my armor. One more thing you might want to consider to help preserve the paint on your kit in the areas where the pieces overlap is epoxying some type of medium thick black felt on the inside of the overlapping pieces. Not only does it prevent the paint from getting "rub marks" but it quiets the armor rattle some what. I may give this a try. Any tips or tricks to be aware of? 1 Link to comment
DoggyDoc[CMD-DCA] Posted December 16, 2023 Share Posted December 16, 2023 I actually used UV resin to smooth out the outer pieces. It fills defects well and sands very easily. Careful with the fumes as they can be quite noxious. I use sirayatech resin as it has low fumes and does not smell bad. There are also water soluble resins that are a bit easier to clean up rather than the normal ones that need alcohol to clean. just apply thin layers then cure and slowly build it up. I used UV resin to make the raised details on my shins after I extended them. The white areas are UV resin. 3 Link to comment
Mal86 Posted December 16, 2023 Author Share Posted December 16, 2023 @DoggyDoc @ChaosCan you glue parts on to the resin for strapping, etc? Link to comment
Mal86 Posted December 24, 2023 Author Share Posted December 24, 2023 A few quick updates: 3 Pouches sewn: Working on printing side d-ring straps in TPU. Finish is not exactly what I want, so I'm going to try some calibration on the filament settings and see how it comes out. New to TPU printing (and really, new to printing in general): Inspired by @Chaos' belt holder, I'm working on one as well: Still need to pick up some resin, brush, UV light, and respirator to move on to coating the insides of the armor. 2 Link to comment
Mal86 Posted December 27, 2023 Author Share Posted December 27, 2023 @Chaos @DoggyDoc How much resin do you think I need to do the light coating on the inside of everything? Also, do I need a particular kind to be able to continue to flex/bend pieces until I get everything fitted? Lastly, given that I'm not printing and don't need quality for printing, is there a good cheap brand that will do the job? Thanks! Link to comment
DoggyDoc[CMD-DCA] Posted December 27, 2023 Share Posted December 27, 2023 My wife bought me a 500 ml bottle from crazy bins for $1. That is what I have used and you barely go through any of it as it is applied very thin. I coated most of my armour and a 4 foot sono tube that I used for my blaster case and still have not gone through 1/4 of the bottle. Just look for something inexpensive and I would lean to one that is water washable so you don’t need to wipe it down with isopropyl alcohol. Here is what I use Link to comment
Chaos[CMD-DCA] Posted December 28, 2023 Share Posted December 28, 2023 5 hours ago, Mal86 said: @Chaos @DoggyDoc How much resin do you think I need to do the light coating on the inside of everything? I used this 1000g bottle and have cover a lot of suff. a 500g bottle if used right, should be enough to coat a complete kit inside and out. Also, do I need a particular kind to be able to continue to flex/bend pieces until I get everything fitted? The resin is thin enough that it will flex with the armor. I agree with Gerald, water washable is the way to go. I used alcohol wash resin at first and it was a real pain in the ass. Lastly, given that I'm not printing and don't need quality for printing, is there a good cheap brand that will do the job? https://www.amazon.com/gp/product/B084J71JL6?th=1 5 hours ago, Mal86 said: Thanks! Link to comment
Mal86 Posted December 28, 2023 Author Share Posted December 28, 2023 This is my resin shopping list: https://www.amazon.com/gp/product/B08YJ1SWGZ/ref=ewc_pr_img_4?smid=A1ATU7Y86J8NTM&th=1 https://www.amazon.com/gp/product/B07XJZK4R6/ref=ewc_pr_img_5?smid=A3SNVVMEXOSKIB&psc=1 https://www.amazon.com/gp/product/B00IF7RCU6/ref=ewc_pr_img_3?smid=ATVPDKIKX0DER&psc=1 https://www.amazon.com/gp/product/B009POHLRC/ref=ewc_pr_img_2?smid=AO66QNXKFK6OP&psc=1 https://www.amazon.com/gp/product/B00467C7AE/ref=ewc_pr_img_1?smid=ATVPDKIKX0DER&psc=1 I have some foam brushes I can use. Am I missing anything or any feedback on what I have? 1 Link to comment
DoggyDoc[CMD-DCA] Posted December 29, 2023 Share Posted December 29, 2023 Looks good. I haven’t tried the foam brush. I just used an inexpensive bristle brush that is about 1/2”. The water soluble resin washes up really easily. Link to comment
Mal86 Posted December 29, 2023 Author Share Posted December 29, 2023 1 hour ago, DoggyDoc said: Looks good. I haven’t tried the foam brush. I just used an inexpensive bristle brush that is about 1/2”. The water soluble resin washes up really easily. I saw someone using a foam brush on a youtube video, but that was for a 3D print. The foam might not be the best for the fiberglass side. I'm sure I've got a bristled brush I can use, or I'll add it to the list. Thanks for the time to give me feedback on it! 1 Link to comment
Mal86 Posted January 7 Author Share Posted January 7 @Chaos,@DoggyDoc, or anyone else... I started brushing the inside of the armor with the water washable resin this evening and then hitting it with the UV light to cure. Then I rubbed the insides with a wet paper towel, then I let them sit for a little bit, then I dried with a dry paper towel. Once I cleaned up and took my gloves off, I realized that I've ended up with some tacky sections. Is this an error in my process or is there an additional step I need to take now to address this? Also, I put a small crack in a piece of the thigh armor. What is the best way to address that? Thanks in advance. Link to comment
Chaos[CMD-DCA] Posted January 7 Share Posted January 7 sounds like a "curing" issue to me. Go back and hit the tacky areas with the UV light again. If that doesn't fix it, put another layer over the top of the tacky areas and hit it with the UV light again. Make sure you are exposing the resin for the recommended time. You might also want to check and see what UV spectrum the resin requires for proper curing. Some resins require a specific UV wave spectrum to cure properly. Not all UV lights are the same spectrum. As far as the crack, put some superglue in the crack, before it cures sprinkle some baking soda on the crack and glue inside and outside. it will cure instantly, then put another thin layer of glue on top of that and sprinkle again with baking soda, sand smooth the outside and repaint. leave the inside built up as this will strengthen the filled in crack. 1 1 Link to comment
Mal86 Posted January 7 Author Share Posted January 7 8 hours ago, Chaos said: sounds like a "curing" issue to me. Go back and hit the tacky areas with the UV light again. If that doesn't fix it, put another layer over the top of the tacky areas and hit it with the UV light again. Make sure you are exposing the resin for the recommended time. You might also want to check and see what UV spectrum the resin requires for proper curing. Some resins require a specific UV wave spectrum to cure properly. Not all UV lights are the same spectrum. As far as the crack, put some superglue in the crack, before it cures sprinkle some baking soda on the crack and glue inside and outside. it will cure instantly, then put another thin layer of glue on top of that and sprinkle again with baking soda, sand smooth the outside and repaint. leave the inside built up as this will strengthen the filled in crack. Chris, Thanks for the feedback. For clarity, the tackiness is very minimal. It's barely there. I couldn't tell it was tacky with the gloves on. I did check the uv wavelength before buying and it is correct. It is overcast today, but I put everything outside to see if that helps. On the crack, I'll give it a try. Thanks again! 2 Link to comment
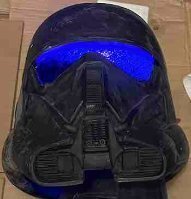
Mal86 Posted January 14 Author Share Posted January 14 I've coated the interior of all of the armor pieces with the 3d printer resin. It's curing in the sun, except the helmet, which I'm curing in a home made curing box (cardboard box, aluminum foil, and a UV light). Most pieces are no longer tacky. I've still got a couple of pieces curing that have some areas of tackiness. I've rotated those areas to be in the sun. I'm struggling a little bit with curing the interior of the thighs and the helmet. My current process is to keep rotating them (either in the sun or curing box). Any suggestions from anyone on better ways to manage? 1 Link to comment
DoggyDoc[CMD-DCA] Posted January 15 Share Posted January 15 Wish it was sunny here. We have major snow and wind and it is freezing cold. for the thighs, you may just need to use the small up light. Maybe prop the thigh up and put the light pointing up inside of it? Link to comment
IcyTrooper[CMD-DL] Posted January 15 Share Posted January 15 Depending on the UV light source you may be able to suspend it from something over the armor piece as well. Link to comment
Mal86 Posted January 15 Author Share Posted January 15 Thank you both. I've basically had the light in a thigh or the bucket since this afternoon, repositioning every 30 minutes. This seems to be the most effective way. Then I feel around to feel what doesn't seem fully cured and continue on. For the overnight, the thigh is on its side with the bucket at the end, so the light is going through the thigh and in to the bucket. I installed elastic band holders in my forearms tonight as well, but I set it up so the elastic was on the inner portion of the forearm. Later I found one of @Chaos' recommendations to someone to glue the inner seam and leave the outer one as the one that stretches open. Is there a reason to do it one way or the other? Link to comment

Recommended Posts
Create an account or sign in to comment
You need to be a member in order to leave a comment
Create an account
Sign up for a new account in our community. It's easy!
Register a new accountSign in
Already have an account? Sign in here.
Sign In Now