Leaderboard

.thumb.jpg.9f1c38be7d684bade26a2c3cbbebbb81.jpg)
Popular Content
Showing content with the highest reputation since 10/27/2025 in all areas
-
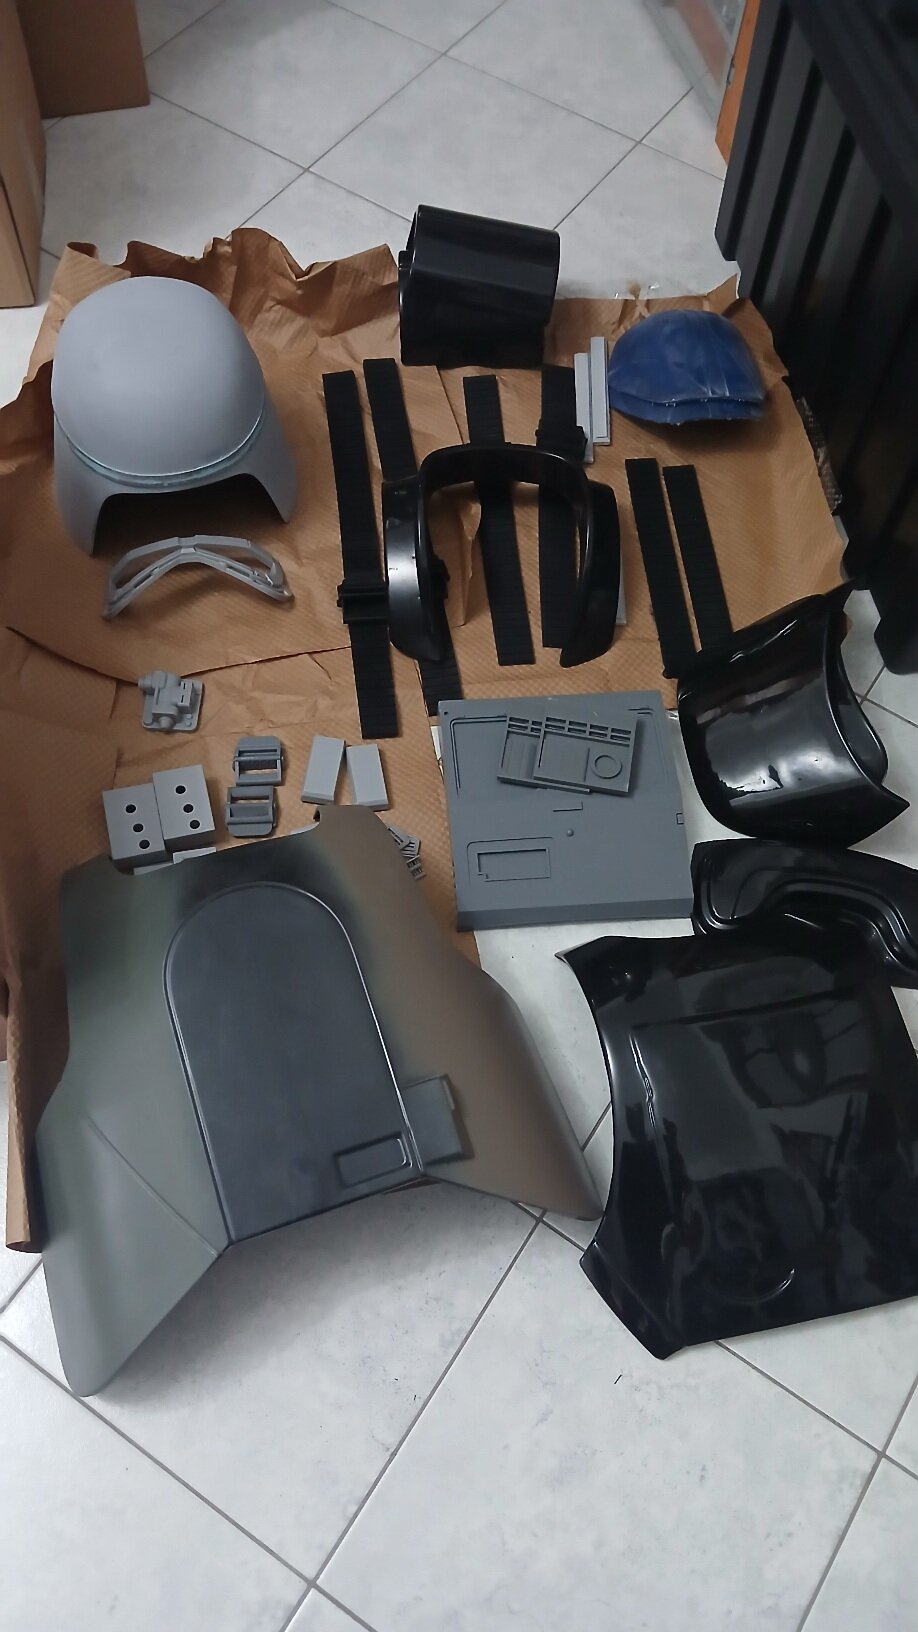
Hi everyone, sorry I'm not very active on the forum, but work leaves little time for Star Wars. The IST costume itself is progressing slowly. I've also prioritized the color change for the AT-AT commander's armor but, in the next days, I'll resume roughing out the IST pieces and I should receive the jacket and pants. I'll post the assembly progess as soon as I have it, while consulting the threads of those who have already made this costume, so as not to make any mistakes. (Don't mind the colors on the chest armor, I used it to experiment on the commander)
 2 points
 -
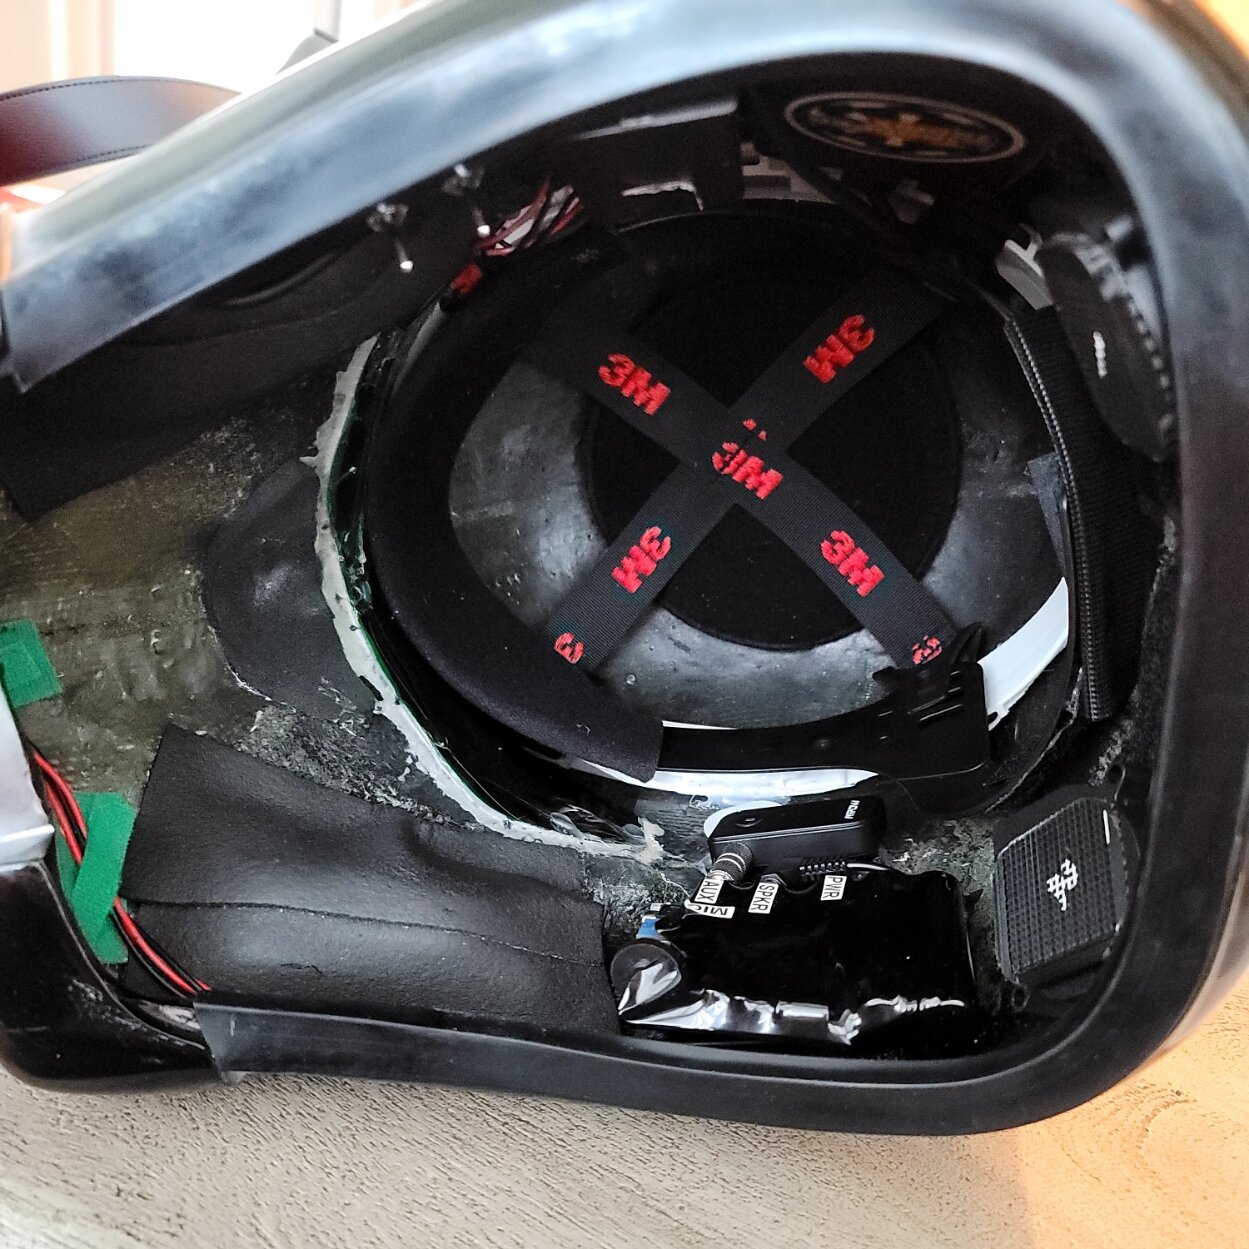
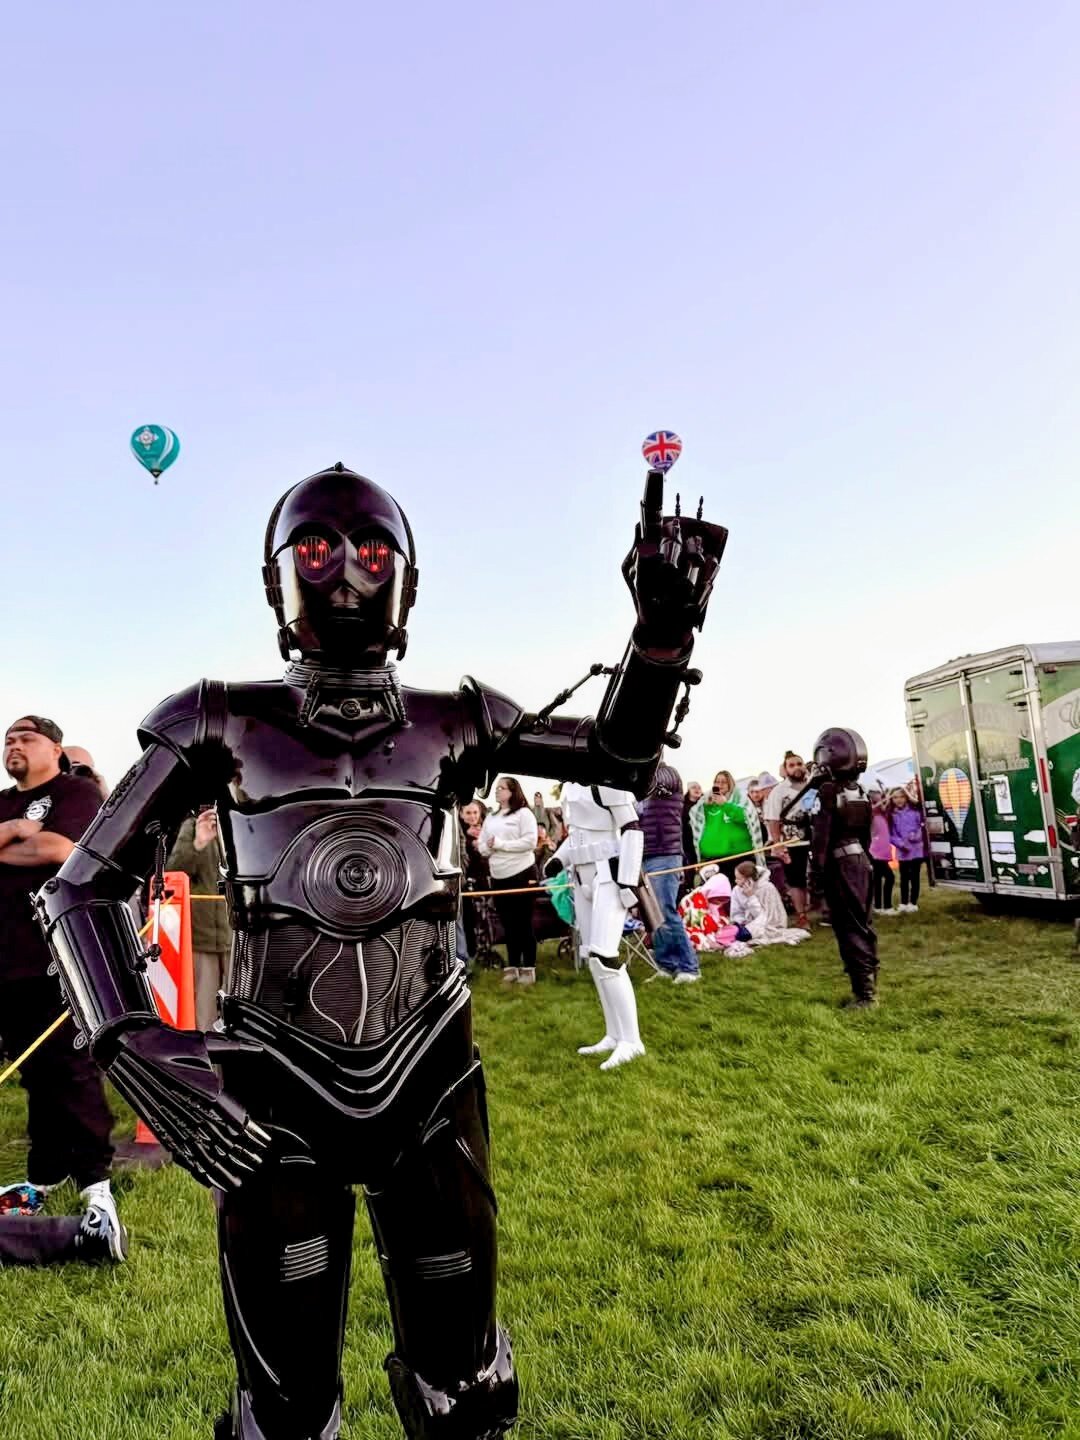
Some fun pictures a friend snapped of me on Halloween.2 points
-
Yay, I have officially been approved by my GMLs! TX-12657 reporting in! I may yet have further modifications to make for troopability so this thread shall continue. The next thing on my list is to start working on an E-11D and perhaps a DLT-19D as well. I have bought the files for all three DT blasters from MCM, and have already started printing. That's all for now.2 points
-
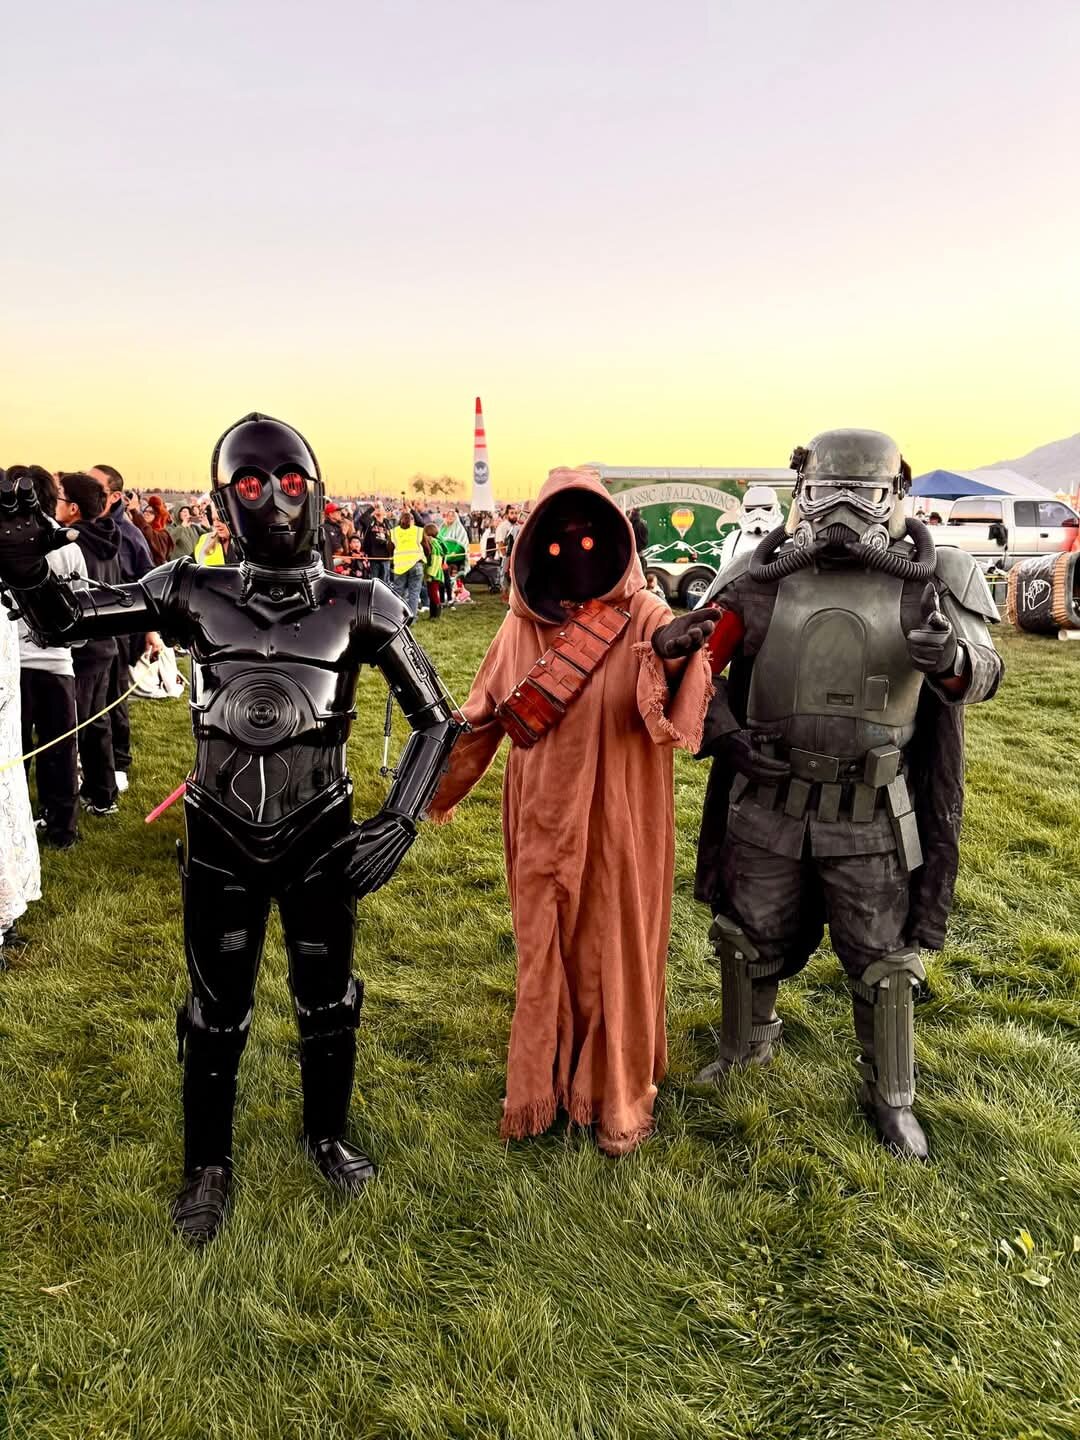
Any time and you're most welcome. I have a hard hat liner in my DT. It allows a lot more airflow that thick pads and makes aligning my eyes with the helmet visor easy. Here is what the inside of my helmet looks like: Here is a video on how to do it. It is using a TK helmet but the principle is the same. This was done my Trooperbay. And as I was looking for Trooperbay's video I found this one by Captain's Wookshop which he did for his DT Hope this helps.
1 point
-
Thank you for your very thorough response! I will look into the linked thread below and I think I'll refrain from adding any lifts in my boots to keep from being uncomfortable while trooping. I'm glad to hear that folks who are 5' like me are still intimidating haha. Oh one more question for now, do you know any of resources or information on what to add to the helmet for padding/fitting it well? Thanks.1 point
-
Congratulations!1 point
-
Congratulations Asher1 point
-
Congrats! Adjustments will also be ongoing 🤣 with this kit you'll always have something to improve on, took me about 8 troops initially until I got everything straight, then I started doing improvements and upgrades ... never ending1 point
-
we need to swing back around to it. Been busy with the Tactical Agent and Del rewrites.1 point
-
BBB day is today! https://imgur.com/TH27zcYhttps://imgur.com/TH27zcYhttps://imgur.com/TH27zcYhttps://imgur.com/TH27zcY https://imgur.com/J0QhLL9 Armor arrived super quick and looks fantastic! I'm guessing it got knocked around in shipping since there were 2 small cracks on a thigh piece, and one of the shoulder parts of the back plate snapped off. Nothing that can't be fixed with some fiberglass and resin. https://imgur.com/mgtFocQ https://imgur.com/Fqot18d Phoenix Props belt buckle and forearm rockets https://imgur.com/XWZrgN9 DLT-19D Progress Will get pics of the blaster later, but I did get the pipes finished. I decided to do pipes rather than use MCM_Design's STL files so that I could run wires through for the 2 under barrel lights. I used 3/8" pipe from Hobby Town, but had to try 3 different places on Amazon for the copper elbows until I found one that actually had 3/8" ID (https://www.amazon.com/dp/B09SBF2RH5?th=1). I put most of the blaster together and just eyeballed each section against the CRL pics which seemed to work pretty well.
1 point
-
1 point
-
Hi Shane, thanks for the post. Gideon Hask actually falls under the JRS Detachment, so @Wingmanand his team over there are the right ones to check with. There is also a section over on the main 501st forum for GMLs looking for feedback from DCAs on applicant clearance issues. Wishing you all the best of luck, I always love to see more Infernos joining on.1 point
-
I actually am in a garrison where I swear they have only snow troopers on the brain. I told them when a “snow troooer” was added to spec ops I would make one, and well….this is as close as I am willing to go. Plus I feel like I have a thing for all version of flames! I am almost done with an FO flametroooer and love them all! This one looks amazing and I might have to pick your brain in the future! Looking great! ❤️1 point
-
Jim Tripons undersuit is finally here. The top fits wonderful however the pants would definitely need some adjusting and taken in a bit but not alot. also around the neck its a little tight but not enough to choke me out. will that stretch out over time or can that be adjusted a bit? featuring my ss86 autobot blaster lol1 point
-
Hey Chaos, thank you so much for the reply! Yeah, my pictures are kinda wonky. I will attempt to take better ones tomorrow and post here with a bit more specifics. Armor material wise, it was made by the 850 Armor Works and is Vacuum Formed Fiberglass like. Again, will post better pictures tomorrow!1 point
-
You can trim that flared lip off the top of those hip boxes. Everything else looks fine1 point
-
Rob, The photos don't really show what the issues are. If you take another photo a little farther away and clearer we might be able to assist you better. Also, who produced the armor and is it ABS or polymer/fiber glass? How much do you need to shorten the shins to get them to sit correctly over the top of your boots. Where does the shin not close around your leg and how much is the gap?1 point
-
today i did my first suit up and learned a few things the armor and the snaps i mounted to the armor are pushed clean off by the rubber bridges. So I need to get the snaps off and put heavy duty velcro on. I need to cut my rubber straps down to a shorter length I got the tactical vest all set up and its nice and tight, so thats a good thing my leather belt came completely off the snaps i had mounted to itto secure it to the hard overbelt, so I need to rethink all that. That didnt work out at all the commpad window really isnt sized right for my commpad, so thats something i need to rework.1 point
-
Got to take the death trooper out for a zoo troop and see how it did. Lots of fun, and lots of things to fix. First off, the cooling vest suggestion was a life saver in tandem with some big ol’ fans in my bucket. I was actually reasonably comfortable for the troop. The first big issue though, was my ability to walk. As you can see in this picture, my leg armor is touching, no good there. That is getting further trimmed. Second, my helmet pressed on my nose which was not immediately obvious to me that it would be an issue, until of course I was light headed and out of breath. I have modified my padding so it sits higher, and furthermore does not rest on my nose at all. Still waiting for official approval from GMLs but I have plenty I can work on in the meantime time. Thanks all for the help so far!1 point
-
Thank you very much ! I can't wait to wear it and I'd like to see a lot of troopers with this armor ^^1 point
-
are we satisffied with the proposal above? id like to move on.1 point
-
I just heard back from Jim on my own L2 level tac vest , its a change to how he has produced them in the past. Its looking really good and once I have it in hand I will share on my own WIP.1 point
-
E-11b Finished my build the other day, the smell has finally gone, and I would say it turned out great. Still need to paint the ejection port silver, totally blanked on that. Belt Boxes Finished these as well, I think they also turned out great!1 point


.thumb.jpg.b14209ff3bd68636da46a33fb329e081.jpg)