Jump to content

RAIDER

Captain of the Guard[COTG]
  • Posts

    3,283
  • Joined

  • Last visited

  • Days Won

    395

Everything posted by RAIDER

  1. Find the most recent and updated version of the 000 (Triple Zero) CRL in English at the link below: https://databank.501st.com/databank/Costuming:TX_000
  2. The colors are tough for me to tell. I will defer to @Blackwatch @IcyTrooper and yourself regarding colors because I can't tell. Maybe because the shades and colors do change alot in the references is why I'm having an even harder time. This reference pic you posted is much closer for sure
  3. Nice @Blue Hatter! Persistent progress!!! Yea I'd say (what you said) just tighten up those hand-painted details and make them really sharp. You would be the model here on this and want you to look top notch. My only question at this point...are we sure on the color? It matches our reference material? Keep up the good work!
  4. @jen0farc Another idea to help w the bells maybe...they dont need to be rotated forward as much as u have them. Some space showing tunic between bell and chest is ok. That might hide some of it under the plash as well. Maybe.... And yes is if u trim and shape somewhere the top and sides are the safe spot so long as u dont hit the grooves.
  5. You're right about the bells. If you trim them the grooves (at the bottom especially) will be cutoff. No bueno. The mask...yea sometimes it's just perspective. In the references there are some masks that look big on the troopers and others not so much. The tensioner on the goggles is bronzed yes? How did you replace the chest indent? I'm assuming that it wasn't slanted (that's what most of the early makers had in their kits).
  6. @jen0farc At first glance I'd say you did a great job! The things that stand out to me off the bat are that the shoulder bells seem large for you...the mask as well. The bells might be trim-able. Not sure you could really do much w/ the mask. Some weathering on the mask couldn't hurt either to match a little better w/ the worn look of the armor. Possible to lengthen your tunic arms a bit to close that gap at the wrist a bit? Color is the one thing I can't really give you good feedback on. Can't tell shades apart very well. If I notice anything else, I will post. Thanks for asking for feedback!
  7. Mudtrooper update is complete. Text updated and CRL gallery pictures added. We will be able to add the DLT-19 as optional once we have a pic of a completed build. A medic model is currently being reviewed to add as a tabbed version. Once cleared, that will be published as well. Thank you to everyone who participated in the discussion here. Special thanks to @JAFO for initiating the proposal, @Blackwatch for all of the text updates, and @rickyboyblue for the new pictures and edits. Check out the updated CRL here: https://databank.501st.com/databank/Costuming:TX_-_Mudtrooper
  8. Tapatalk...we discontinued use of that here due to security issues w/ it following our forum upgrade/update. You won't be able to use it. For 501st member access, you should be able to see everything EXCEPT the detachment member areas. My suggestion is to open a web browser on your phone and keep it open permanently (check "remain logged in" or somesuch) and browse forums via that. That's what I do. Just keep the window active as a tab and refresh as needed when I visit.
  9. I can't stress it enough. Follow the CRL. This includes the model pictures that are a part of the CRL. Red drop boxes would be included in this. Any deviation from that, and you risk an issue w/ your GML. (Yes, I know that the GG statue has black boxes...but currently where the CRL stands that wouldn't clear your GML). Regarding rivets (side rivets specifically)...again I'm not sure where you're reading that they aren't there. These are your Specialist requirements in addition to the base CRL. Anything else you may have read elsewhere (such as the canvas shoulder strapping), disregard. https://forum.specops501st.com/index.php?/topic/3429-specialist-requirements-magma-trooper/
  10. Pretty much...as far as materials and build techniques go. In terms of getting Specialist, reference the link I copied for you. I believe FISD did an update on their ANH TK not too long ago while ours here hasnt been updated in some time (we are currently working on updates for our TK style costumes), so the CRLs of TK to TX are not identical. Follow the magma CRL as it is currently to avoid issues.
  11. Im not up on FOTK suppliers...but if the correct boots are readily available Im of the opinion we limit the CRL to that even for Level 1 and would support that.
  12. @Blackwatch Is this the updated version or do you have another one saved elsewhere? @rickyboyblue has gotten me most of the update photos. Just a few more to edit and this will be ready to publish.
  13. Just so everyone is aware @nanotek will be taking staff lead on CRL discussions regarding the Sith Trooper. We decided to do this entirely in the public sections so that the community can engage with its drafting and hopefully with more eyes on the material less details are missed. @Tarrif @Blackwatch and myself will be still be involved as well. The process... He has chosen to break the pieces into different sections/threads and will then pull the drafts for each section into the main proposal thread. It will then be given a final community review followed by a staff review and then finally (so long as a suitable model with pictures is available) published. Have fun dissecting the build!!!
  14. No time frame. Id like to see it done before the year ends but that depends on the volunteers working on it.
  15. Del Meeko CRL while it does have Level 2 requirements they are very minimal and so here at the detachment it hasnt been added to the eligible costumes. A CRL update proposal is in the works though because I would like to see all costumes made eligible for the program. In general there are some things w the costume that do need to be added for accuracy and reflected on the crl.
  16. I think its rumor/speculation based due to the red armor and “Red” in the title. But at this point, what isn’t speculation lol? In either case, its nothing a quick title edit cant fix if it ends up differently.
  17. Description: First Order Sith Trooper Prefix: TX Detachment: Spec Ops Detachment Context: Star Wars: The Rise of Skywalker Sith troopers were elite soldiers in an army raised on the planet Exegol by the Sith Eternal—Sith cultists who revered the dark side of the Force and were devoted to the Sith religion. Though they were not imbued with the power of the Force, Sith Troopers nonetheless shared the name of the revived sect of the dark side, drawing inspiration from a dark and ancient legacy. As such, their red armor was reminiscent of Sith lightsaber blades and the Imperial elite, evoking an aura of fear and death. They were the culmination of an elaborate contingency meant to ensure the eternal reign of a new Sith Empire, returning the galaxy to a dark age of a thousand years past. For 501st membership only the requirements listed in black need to be met. Black text indicates a feature that is required for approval. Blue text denotes requirements for Level 2 "Specialist", but is not required for basic approval. Visit the Spec Ops website for a full description of these standards. Special Notes: The armor parts are gloss and are made from one of these (or similar) types of materials: Fiberglass ABS (Acrylonitrile Butadiene Styrene) HIPS (High Impact Polystyrene) PLA (3D Printing) Polyurethane Rubber Blasters are not required for legion membership per our weapons policy 3D Printed parts are permitted, but all print lines and other artifacts must be removed This Visual Guide has been reviewed by the detachment staff and the LMO team and is certified for use as a minimum approval guideline for GMLs. GMLs are free to approve this costume type. This document is not intended to be a detailed how-to on costume construction; rather a visual guide to be used for 501st costume approval. Details on construction may be found on the respective costume detachment web forum. GMLs uncertain about an aspect of submitted costume shall post questions in the appropriate DL/GML peer review section of the Legion forum. Measurements given in this document are intended to be approximate and generalized; not criteria for approval. Requirements for all 501st costumes are proportional to the wearer in scale, fit and size. Text descriptions are only one part of the guideline. GML's and costumers must consider both text and pictures (CRL and Reference) when reviewing the costume. Required Costume Components The following costume components are present and appear as described below. Helmet Finished in a high gloss deep red that matches the colors of the entire costume. Lenses are black in color. They may be bubble in shape or flat and must be sufficiently dark enough to obscure the costumer's eyes. The lens frame extends back underneath the trap and terminates approximately 0.4" (1cm) from the back of the trap. The brow extends out from the lens forming a significant overhang. There are two recessed lines that run parallel to and are above the brow. The bottom recess extends above the clip greeblie running parallel to the trap and connects with the recess at the rear of the helmet. The top recess terminates where it intersects with the bottom recess line. A "mohawk" section runs along the center from front to back but is not raised. 16 recessed lines run parallel to the "mohawk"-like section from front to back on each side. The mohawk starts from the second brow line and extends toward the back, terminating in the recessed lines at the back. The frown is semi-gloss black with the following details: Mouth has one center "tooth" that connects to the snout and is separated by a detail that has a greeblie section with 14 "ribs." Mouth has 4 teeth either side of the center “tooth." There is no hexagonal mesh in the mouth area between the teeth. The area from the bottom of the mouth extending to the tears has hexagonal mesh. The center tooth is the width of the bridge and has 14 small ribs at the top. The jawline is angular and has the following details: Flat trapezoidal section that extends 3/4 way down the jawline from the frown. Flat triangular sections one each side of the trapezoid. 10 recessed lines extend from the base of the flat triangular section. Each tear (area beneath the corners of lens frame) are angular, trapezoidal shaped boxes that are matte or satin black. There is a recessed circle in the bottom-most corner. There are 3 recessed lines separating the top tear from the bottom section. Faceplate is two separate angular pieces that mirror each other with the following details: 14 recessed lines on each. Curved lower section that starts from the tear and curves towards the front of the jaw forming a filleted ledge. The ledge is more pronounced at the tear end smaller towards the frown. Faceplates are separated by a channel that runs vertically along the bridge of the nose between the lens and frown. The bridge of the nose has 10 small rectangular ribs from frown to lens frame with one larger one at the top. The side of the jawline has the following details: 7 rectangular cut out vents/tube stripe slots are on each side of the helmet. They have the appearance of being black at the base of each slot. 5 recessed lines extend from the front of the jaw and terminate in an angled manner below the trap. There angle of termination is complementary to the black trapezoidal shape. Two helmet clip greeblies are present over the traps on each side. Directly below the traps is a detail comprised of a vertical alignment of shapes in the following order. A small raised circular shape. A recessed B shape. A small raised circular shape. Below the traps toward the back and base of the helmet is a small black trapezoidal stripe. There are 5 recessed lines at the back forming a trapezoidal shape. The angle at which the recesses terminate are complementary to the rear black trapezoidal shape. There is one slightly wider recess channel that extends all the way around the base of the helmet. The base of the channel is black is approximately 0.3" (8mm) wide by 0.3" (8mm) deep. matches all the angles of the helmet as shown. The bottom of the helmet has a black ledge that runs the perimeter of the helmet that extends back into the interior. Black ledge is approximately 0.75" (19mm) to 1" (25mm) wide. Matches the angles of the helmet, most notable is the jawline. OPTIONAL Level two certification (if applicable): Lenses are bubble-like or bulbous in shape Lens frame has 4 recessed notches near the top of the tear The brow has the following details: There is a cutout section under the brow. There is a raised section underneath the brow that has a pattern comprised of 62 recessed pill shapes. The teeth are are metallic black or a very dark gunmetal gray. Faceplate pieces are visibly separate pieces, 4 slots under each faceplate for covering the teeth. The tube vents are a solid backing and painted black satin or matte black. No mesh or cloth is present. The helmet clip greeblies are the correct clips (refer clip greeblies diagram). Balaclava A balaclava is a black head sock/hood that is worn under the helmet and is used primarily to hide any view of the wearer's skin and/or facial hair. Cuirass Chest Finished in a high gloss deep red that matches the colors of the entire costume. Forms part of the Cuirass which is comprised of the chest, back and gorget. 3 vertical oblong recesses near the collar on each side of the chest near the center opening. The chest extends over the shoulder towards the back forming the shoulder straps which have an attached trapezoidal buckle that appears to connect to the trapezoidal buckles on the upper back armor. There are recessed lines extending diagonally out from the back collar to the shoulder, these lines intersect a few recessed lines deep with the vertical horizontal lines on the front. Raised smooth/flat section at front extends around the under arm of the wearer towards back. Starts as rectangular and tapers to match shoulder/arm hole. There are two raised panels on the lower section of the chest, each extends under the arms towards and forms the lowest part of the sides. Each panel has the appearance of a separate piece and there is a recess that runs around the outside edge. Left lower panel has one recessed diagonal channel. Right lower panel has a small rectangular box/raised area with at least 12 evenly spaced, vertical and slightly angled recessed lines, the bottom of the box/raised area extends slightly outwards from the wearer. There is a clip & buckle greeblie separated by a ratchet strap greeblie in a recessed cavity just above the box (refer to diagram). There are a number of vertically diagonal and evenly spaced recessed lines that start at the top of the rectangular part of the front boxes, and extend towards the armhole. There are a number of recessed diagonal lines under the arms that extend from the armhole towards the front, intersecting with the curve of the raised box section. There are a number of vertically diagonal, evenly spaced recessed lines that start approximately halfway under the armhole and extend back to and underlap the cuirass back. The recessed lines match the diagonal shape of the back armor. Both chest sides connect to the lower back armor. The center section of the chest has the appearance of being a separate piece that has rectangular and horizontal recesses in lower section, vertical recesses in upper section and a small rectangular recess near the top. OPTIONAL (Level 2) Chest shoulder buckle is a separate piece. Ratchet strap greeblie has 5 visible teeth. Small rectangular box on the right chest has 13 recessed vertical lines. There are 8 recessed lines extending diagonally out from the back collar to the shoulder, these lines intersect 6 recessed lines deep with the vertical horizontal lines on the front. On the front chest there are 27 vertically diagonal and evenly spaced recessed lines that start at the top of the rectangular part of the front boxes, and extend towards the armhole. There are 12 recessed diagonal lines under the arms that extend from the armhole towards the front, intersecting with the curve of the raised box section. The center section of the chest has the appearance of being a separate piece that has 12 rectangular and horizontal recesses in lower section, 5 vertical recesses in upper section and a small rectangular recess near the top. Cuirass Back Finished in a high gloss deep red that matches the colors of the entire costume. Forms part of the Cuirass which is comprised of the chest, back and gorget. The back has an O II (02) shape is made up of recessed II and the O is a recessed circular line divided almost in half by an intersecting horizontal line. The bottom part of the circle is recessed, is black and is slightly smaller in appearance than the top half. There is a small black vertical oblong recess in the top half to the left side. The back has two trapezoidal "buckles" at the top back of the shoulders where it connects to the chest shoulder trapezoidal buckle. The back has a recessed trapezoidal shape at the bottom of the left shoulder buckle that has more than 13 recessed vertical lines. The bottom of this shape is the same length as the top half of the lower trapezoidal section. The angle of the bottom matches the angle at the top of the bottom trapezoid. The recessed/raised lines do not extend all the way to the bottom. The inside line of the trapezoid matches the angle of the buckle. On the back there is a raised trapezoidal section that starts at the base of the back and extends towards the left shoulder. There is a small recessed rectangle directly about the top of the trapezoid and is black. The top of the trapezoid is the same width as the bottom of the recessed trapezoid under the top left shoulder. The angle of the top of the this trapezoid is parallel to the bottom of the recessed trapezoid at the base of the left buckle. The raised section gets higher towards the top and arches out slightly from the wearer’s back. OPTIONAL (Level 2) Trapezoidal recess on the back under the left buckle has 15 recessed lines. Gorget (Collar) Finished in a high gloss deep red that matches the colors of the entire costume. Forms part of the Cuirass which is comprised of the chest, back and gorget. One piece that goes under the cuirass to form the neckline of the armor. Finished in a high gloss deep red that matches the colors of the entire costume. Sits flat around the neckline. Sits under the cuirass (or chest/back), fits closely to the neck seal and appears to be part of the cuirass. If there is a seam, it is as discreet as possible and shall be securely closed with no visible overlaps or gap present. There are 3 visible steps forming rings around the neckline, ascending from the neckline to the cuirass or chest/back. The third ring from the neckline and is closest to the armor has the following details: 15-17 raised sections that start and end at the shoulders, one centre raised section at the centre front that matches the width of the opening of lower front part of the cuirass opening, 7 smaller and evenly spaced raised sections that extend towards the shoulder. Segments 1-5 (from the center section) and 7 are roughly 1" (25mm) wide. Segment 6 (from the center) is roughly 2" (50mm) wide. OPTIONAL (Level 2) The gorget must be a separate piece with no seam constructed of a flexible rubber like material. Shoulder Bells Finished in a high gloss deep red that matches the colors of the entire costume. One on each shoulder with the same shape but different features. Both the front and back lower edges have a graduated step/angular edge. At the top of each shoulder is a small extension or lip that appears from underneath, is rounded and butts up to the cuirass. When viewed from the front it appears as a little ledge that is lower than the top of the shoulder. Right Shoulder: Has approximately 16 recessed lines that start from the top edge of the angular section of the bell from front to back forming an arc. On the top is a "shoulder mounted sensor telemetry pod" and is mounted on a bracket that is fixed to the top of the shoulder. The sensor is circular when seen from the front and side mounted to the bracket. The front most part of the sensor is matte black, the remainder is red and matches the armor. Has a cone like protuberance forming an antenna from the center. The bracket is red matching the armor. There is an angular and chamfered box on the side of the bell. The outermost part has an extended raised rectangular chamfered box that has three black oblong recesses areas. Two larger ones to the bottom right and one smaller one to the top left. Vertical recessed lines on each side of the box. Horizontal channel at the top of box approximately 0.25" to 0.3" (6-8mm) wide. Left Shoulder: Has vertical recessed lines running from the bottom to about ¾ up the bell forming an arc. The recessed lines terminate in an arc shape that mirrors the arc on the bottom of the bell. The total width of the recessed lines equals the same width as the bottom of the bell. OPTIONAL Level two certification (if applicable): Right shoulder has approximately 16 horizontal recessed lines 0.04" to 0.08" (1-2mm) wide, spaced approximately 0.15" to 0.25" (4-5mm) apart each that form the arc. Shoulder Mounted Sensor Telemetry Pod: Has 2 recessed and 2 raised concentric circles starting from the cone forming a total of 4 concentric circles. Antenna is hollow. Shoulder Mounted Sensor Bracket: Semi-circle shape attached to bracket when viewed from the rear with a small circle that has a spherical button towards the right side. The flat top of the rear part of the bracket has a oblong bubble shape in the back left corner when viewed from the rear. There is a horizontal line that runs along the rear of the bracket. The outer most side of the bracket is an L shape. There is a circular button/pin detail on the top right of the bracket when viewed from the side. There is a circular indentation diagonally downwards from the button, when viewed from the side. There is an indentation when viewed from the rear. Approx. 8 vertical recessed line on each side of the angular and chamfered box on the side of the bell. Left shoulder has approximately 36 vertical recessed lines are 0.04" to 0.08" (1-2mm) wide, spaced approximately 0.15" to 0.25" (4-5mm) apart. Biceps Finished in a high gloss deep red that matches the colors of the entire costume. One on each bicep and are mirror opposites of each other. The biceps are made up of two parts; inner and outer bicep. One seam that faces forward. Overlap towards the inner rear of the bicep. Clip greeblie is present low and overlaps the seam. There is a small rectangular recessed section just above the clip. Two black ovals are present on the outside facing side of the bicep. Larger vertical recess towards the rear outer section, intersects where the bicep angles down toward the rear. The rear of the bicep has an angular line that drops approximately 1" (25mm) to form a rectangular section when viewed from the rear. The rectangular sections have approximately 11 recesses on each bicep. The angular sections that meet to form the rectangular sections at the back are flat. At the bottom of the rear rectangular section is a black horizontal oblong shaped recess. There are vertical recessed lines in the front of the bicep forming a 'V' pattern. Recesses start at the small rectangular recessed section above the clip greeblie. The recesses on the outer bicep terminate at a 33 degree angle approximately. There are a number of recessed lines angled at around 45 degrees that run around the inner bicep. Terminate at the front seam and bottom of bicep. Are overlapped at the inside-back by the rectangular section at the back. OPTIONAL Level two certification (if applicable): Clip greeblie is the correct bicep greeblie as per diagram. The recessed section above the clip has two steps. There are a total of 32 vertical recessed lines at the front that start on the inside of the bicep and end on the outside forming a 'V' shape intersecting at the bicep clip. There are a total of 25-30 visible diagonal recessed lines that that start at the front seam and continue around the inside of each bicep disappearing behind the overlap on the inner rear. Abdomen Section Finished in a high gloss deep red that matches the colors of the entire costume. The abdomen section must wrap around the wearer's body without a visible seam, the opening is concealed by the thermal detonator plate. The top of the abdomen is covered by the cuirass. The abdomen has 8 rectangular boxes that have chamfered edges, sit flush on the abdomen and matches the order and placement shown. The largest horizontal box has a small black recessed square to the lower left to the wearer. The smaller boxes are identical in size to each other. The 2nd box from the wearer's right has diagonal recessed lines. The abdomen has 4 vertical raised 'cover strips' along the front half of the abdomen, they start from the belt and disappear under the cuirass. The two right strips are smaller. The two left strips are larger, with a recessed channel just slightly off center to the right. In the first channel between the two right strips are diagonal recessed lines that start from the belt and disappear under the cuirass. Recessed lines run from the inside edge of the outermost 'strips' to a point just above the 4th abdomen box from the right. There is a black recessed rectangle above the 4th abdomen box from the left, on the plain section of the armor. Diagonal recessed lines extend downwards from the first right-most cover strip, appear to underlap the 2nd coverstrip and terminate over the 4th box from the wearer's right. Diagonal recessed lines extend downwards from the left most cover strip, appear to underlap the large cover strip (front left) and terminate over the same 4th box from the wearer's right. OPTIONAL Level two certification (if applicable): There is a visible ledge that holds the belt in place just below the abdomen boxes, it extends to within an inch from the edge of the thermal detonator mounting plate. There are 5 tabs below this ledge to support the belt. Widest one is at the front and aligns with Cod, with two smaller ones each side of the large one. The 2nd box from the wearer's right has 16 diagonal, recessed lines. The termination of the diagonal lines forms a small trapezoidal shape above the 4th box from the wearer's right. All the boxes are separate and not molded to the abdomen. 19 recessed diagonal lines between the 3rd and 4th boxes. 21 recessed diagonal lines between the 4th box and the cover strip covered by the largest box. Gloves and Hand-plates Gloves are all black consisting of the following details. An elastic wrist cuff that extends underneath the under-suit. The back of the glove is black ribbed Nylon-spandex-like Ottoman material that extends around the thumb. Black leather or leather like palm, thumb and forefinger. Hand Armour are slightly curved, trapezoidal in shape and are mounted securely over the back of the glove. Finished in a high-gloss, deep red that matches the colours of the entire costume. A number of recessed lines running parallel to the angle of the front-outer edge of the plate. An oval recessed detail is aligned with the index finger of each glove. Oval recess is matte or satin black inside. The face the recessed oval sits in is chamfered outwards slightly from the top to the underneath. OPTIONAL Level two certification (if applicable): Gloves: 5 padded & double stitched sections on the palm (See gallery image). A cutout section on the palm near the thumb (See gallery image). Two cutout sections in the leather on the index finger (See gallery image). Hand Armor: 15 recessed lines, 0.04" (1mm) wide at 0.15" (4mm) intervals, following the angle (45 degrees) from the front-outer edge of the plate. The inside edge closest to the thumb is thicker than the outer edge. Underside of the hand armour is curved and hugs the glove on the back of the hand. Belt and Boxes All parts finished in a high gloss deep red that matches the colors of the entire costume. The belt sits flush to the bottom of the belt-ledge on the abdomen. Has no visible openings or fasteners. Has the appearance of being flexible. 6 belt boxes are attached securely to the belt. Attached to the front are 2 evenly sized rectangular, horizontal boxes with the appearance of lids, matching the width of the belt. The outer edges of the box are filleted. Front-Right drop box is rectangular, mounted just above the top of the belt and drops down vertically, it is a single box in appearance that has no lid or visible seams. The edges of the box are sharp. The box is mounted to the belt with a piece of material that is approximately 03." (8-10mm) thick like a riser. (Gives the appearance of hovering slightly outward from the belt) Front-Left drop box is rectangular, mounted just above the belt and drops vertically down and has the appearance of a lid with a chamfered horizontal edge about 3/4 down from the top. The edges of the box are sharp. The box is mounted to the belt with a piece of material that is 8-10mm thick like a riser. (Gives the appearance of hovering slightly outward from the belt) 2 drop boxes with diagonal recess, towards the side rear, near kidneys on each side, mounted slightly above the belt, has a pronounced appearance of a lid and is deeper in volume than the other boxes. The box is mounted to the belt with a piece of material that is 8-10mm thick like a riser. (Gives the appearance of hovering slightly outward from the belt) There is a diagonal channel on the lid that starts near the top front of the box and extends downwards to the rear. The channel extends around to the sides of the lid. The outermost face of the lid has slightly filleted edges, the rest are sharp. OPTIONAL Level two certification (if applicable): Belt is made of flexible PU or rubber type material Belt ends must connect behind the front boxes. Belt is approximately 2" (50mm) wide and 0.3" (8-10mm) thick. The dimensions of the two front boxes are as follows: Approximately 4" (100mm) wide by 2" (50mm) high. Outer facing part is about 0.3" (8mm) thick, inner part is curved to match the abdomen. The boxes form a slight inverted 'V' shape when viewed by wearer. The dimension of the front right box: Box is flat with sharp edges and is about 0.6" (14-15mm) thick. About 3.15" (80mm) wide. About 3.75" (95mm) high. The dimensions of the front-left box: Inner box part attached to belt is 0.4" (10mm) thick. Outer lid part is 0.3" (8mm) thick the top and 0.15" (4mm) thick at bottom below chamfered edge. Total width of the box is about 3.15" (80mm) wide. Total height of the box is about 4" (100mm). The lid has a 45 degree chamfered edge that turns inwards about 2.5" (64mm) down from the top. The dimensions of the side/kidney boxes The total box width is about 3" (75mm). The total box height is about 3.75" (95mm). The box lid has a diagonal channel that is about a 0.15" (4mm wide), starts 1" (25mm) from top-front to 1" (25mm) up from bottom-back and extends around the sides of the lid. 0.25" (6mm) wide channel 0.3" (8mm) in from front, running around the perimeter of the box forming the lid. Total depth of the box is about 1" (25mm). Thighs Finished in a high gloss deep red that matches the colors of the entire costume No holster is present on either thigh Each thigh is comprised of 7 sections, front, inner-front, inner-rear, rear, outer-rear, outer, outer-front Front and rear sections are both raised slightly in appearance and smooth flat surfaces. A diagonal channel runs from the top outer edge of the section panel, to about 1/2 way down towards the inner thigh Each Front inner thigh section has a number of evenly spaced, diagonally recessed lines, starting from top of the section sloping downward from the wearers cod to the front of the thigh terminating 3/4 down the thigh Left thigh recessed lines terminate approximately at the top of the sniper plate Right thigh recessed lines terminate approximately half-way between the two vertical rectangular boxes above the knee that have chamfered edges Angle of the recesses is roughly 33 degrees from the font section edge Each Rear outer panel has a number of evenly spaced, diagonal recessed lines that slope downwards from outer to inner thigh Each outer section forms a visible vertical seam towards the wearers front, is smooth and has a clip greeblie near the top Each thigh has the appearance of an overlap on the inner thigh where the inner-front section overlaps the inner-rear section Front bottom edges of the thigh are angular in nature and dip towards the wearers knee from the sides Right thigh There are two vertical rectangular boxes above the knee that have chamfered edges Each box sits in a slightly larger recessed cavity towards the top leaving a small recessed section exposed at the bottom Recessed channel that traverses the front 3 panels roughly 1"-1 3/16" (25-30mm) from the bottom Left Thigh Large hexagonal 'sniper plate' just above the knee which has two raised rectangular 'boxes' in the centre of the upper left and upper right faces of the sniper plate two dark grey or matt black, rectangular shaped recesses above the sniper plate, are angled slightly outwards from the knee OPTIONAL Level two certification (if applicable): Inner thigh section has approximately 45 evenly spaced recessed lines Outer-rear section has approximately 34 evenly spaced recessed lines Greeblie clip is the correct thigh greeblie clip (see diagram) and appears to be slotted into a recess (i.e it doesn't sit on top of the armour) The inner-front section overlaps the inner-rear section forming an overlapping closure Cod Finished in a high gloss deep red that matches the colors of the entire costume. Has the appearance of being connected to the abdomen belt assembly. Sits directly under the belt. Has the appearance of two separate pieces joined together. Upper section is a trapezoid shape roughly 3-4" (75-100mm) in length and terminates about 1.5" (38mm) into the lower section. Lower section is curved and extends down to cover the wearer's groin. OPTIONAL Level two certification (if applicable): There is no connecting material between the cod and the posterior. Thermal Detonator & Mounting Plate The thermal detonator is divided into two distinct parts, the thermal detonator itself and the armor it is attached to referred to as the mounting plate. Thermal Detonator The outer cylinder is finished in a high gloss deep red that matches the colors of the entire costume. The internal cylinder is matte or satin black and ribbed. The right hand end cap has a chamfered recess that extend inwards to a small circular recess on the inside of the cap. The left hand end cap extends from the detonator assembly and there is a small channel that runs the circumference. There are no visible seams. Positioned just above the belt. Mounted on the lower section of the mounting plate. Mounting Plate Finished in a high gloss deep red that matches the colors of the entire costume. Sits under the cuirass. The belt overlaps the lower section of the plate. The mounting plate is a long trapezoidal shape, divided into 4 sections by recessed lines. The top and lower trapezoidal shapes are slightly raised outward and have a smooth surface. The bottom trapezoid is separated by a channel that runs around the perimeter. The recessed lines run parallel to the edges of the top trapezoid section. The recessed lines start from the outer edge and terminate in the perimeter channel of the bottom trapezoid. OPTIONAL Level two certification (if applicable): The left and right panels of the thermal detonator mounting plate have 36 recessed lines each. The black, ribbed, internal cylinder on the thermal detonator has 36 ribs. Posterior Finished in a high gloss deep red that matches the colors of the entire costume. Sits directly under the belt and has the appearance of being attached to the belt assembly. Trapezoidal in shape yet curved to a posterior shape. Has a recessed trapezoidal section directly below the belt, within this section are further recessed lines running horizontally. OPTIONAL Level two certification (if applicable): Recessed trapezoid section has approximately 14 recessed lines. Shins Finished in a high gloss deep red that matches the colors of the entire costume. Each shin can be divided into 8 panels alternating between recessed lines and flat, comprising of the following: The front panel of each shin is squared at the top, flat, and is the same width as the top panel of the boot armor. The front panel has a recessed channel that starts at the top of the panel closest to the inside, extends outward 1/4 way down then back towards the ankle meeting at the top of the spat forming a scalene triangle. The front inside panel overlaps the inside panel. The inside panel is slightly curved along the top. A clip greeblie is present on outside panel near the top of the shin. The front 3 panels have straight, angular edges at the top, with the recessed lines following the top edges of the two outer panels to base of the shin. The back 3 panels, the middle one has a straight line at the top, with the two outer panels curving slightly to the inside and outside panels. The outer panels have vertical seams that separate the recessed lines from the flat section. Each shin is roughly the mirror opposite of each other with the following differences on the outer panels. Right shin has a rectangular section that is about 2/3 up from the bottom. The right shin has two elongated trapezoidal boxes that are chamfered with one flat section between them evenly spaced in 3rds. Left Shin has a rectangular box appearing to have a lid, directly below the clip greeblie. The base of the shins is covered by a spat. OPTIONAL Level two certification (if applicable): Clip greeblie is the correct shin greeblie (refer to gallery diagram). Rectangular box on left shin has the following details. Has the appearance of two pieces, base and lid. The lid is a bout 0.15" (4mm) deep with a 0.04" (1mm) recess between lid and base. A small oblong shaped recess on the top left base part of the box. Front Inside Panel has 48 recessed lines. Front Outer Panel has 69 recessed lines. Back Inside Panel has 36-38 recessed lines. Back outer panel has 50-52 recessed lines. Spats Finished in a high gloss deep red that matches the colors of the entire costume The spats wrap around the lower ankle The spats are enclosed on the outside of the ankle with a clip greeblie that overlaps from the back side over the outside There is a flat section at the back of the spat that is equal in width to the rear flat section of the shin Are fitted over the bottom of the shin Are fitted over the top of the boot armor OPTIONAL Level two certification (if applicable): Clip greeblie is the correct spat greeblie (refer to gallery diagram). There is a visible seam on the inside of the ankle Boots & boot armor Boots: FO style boot finished in a gloss or semi-gloss red that closely resembles the armor Sole is black rubber with no visible heel No visible buckles or laces Boot Armour finished in a high gloss deep red that matches the colors of the entire costume Fixed to the top of the boot and sits under the spats divided into 3 sections that the top front section has a number recessed lines running vertically as shown the outer section has diagonal lines running parallel to the edge of the armour as shown the inner panel is smooth/flat and has no recessed lines the front panel is of equal width to and lines up with the front section of the shin OPTIONAL Level two certification (if applicable): The boot color and gloss shall match the armour Top front section of the armor has approx 10 recessed lines Outer section of the armour has at least 14 visible recessed lines Rectangular section on the toe and the heel of the boot that is knurled Stitching at the top of the sole runs the entire diameter of the boot There is a seam down both sides of the front that swoops out to the side of the foot There is a vertical zipper on the inside that spans the height of the boot. Optional Accessories ST-W48 Blaster Based on a replica Glock 17 repeating pistol, scratch-built, or a modified commercial Stormtrooper toy. Details to be painted satin or matte black, red (matching the armour) and silver per reference photos. Can come in two variations; Rifle Mode (with stock) and Carbine Mode (without stock). OPTIONAL Level two certification (if applicable): Has working lights. Mesh present in forward grip. Sonn-Blas FWMB-10B Repeating Blaster Blaster may be scratch-built, or a modified commercial toy Stormtrooper blaster. Details to be painted satin or matte black, red (matching the armor) and silver per reference photos.
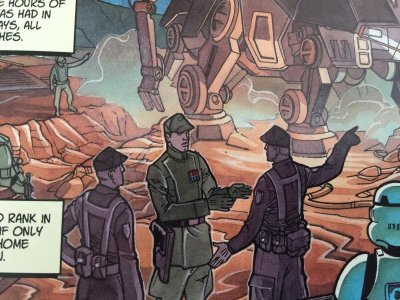
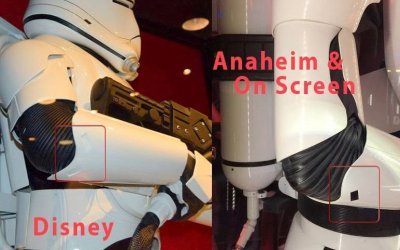
  18. I wanted to share some great news I received today from our LMO contact @Hask on behalf of the LMO team. It has been decided that the Sith Trooper will be placed here at Spec Ops upon CRL completion. While we still need film references, the community here can discuss costume details, begin drafting CRL text proposals, etc. Let the fun begin!!!
  19. Awesome man. Thanks! I will actually download these and do a new thread where these can be uploaded direct to the forums. We also created a new forum sub-section for this costume (so hopefully the costume threads can be found w/ better ease).
  20. I would say some of the edges need to be cleaner around the discs and red lines esp. The black doesn't appear to be a gloss which would be an issue. CRL only allows for gloss, not semi-gloss or satin.
  21. Here is a pic of my belt pop rivet (the armor was painted at a body shop tho so u cant see it as much as when I first installed it). For the shoulder straps, they dont need to be wide. Enough to cover the gap between back and chest plate (which shoudnt be huge). It varies based on how large your gap is.
  22. Ur good. Not derailing. Just pointing out. Thats the process. Essentially its more like a ROTJ belt. No button covers. On that CRL thats listed as an L2 requirement as are the angled corners. I would take this to mean that they are not necessary for Level 1 approval. We can do similar.
×
×
  • Create New...

Important Information

We have placed cookies on your device to help make this website better. You can adjust your cookie settings, otherwise we'll assume you're okay to continue.