

Fivezero
-
Posts
1,259 -
Joined
-
Last visited
-
Days Won
70
Content Type
Profiles
Forums
Events
Everything posted by Fivezero
-
Spent the weekend getting this armor strapped together and adjusted! And stripped the thermal detonator and sprayed a few coats of primer. Need to sand the primer down to take care of a few spots that are still showing through. Then some more primer, wet sanding then the final paint coat.
-
Got the pack mostly finished up yesterday, still a few small details to finish up. Plan is to 3D print all the details in gray and scratch build everything in white. Probably use a combination of my FDM and resin printers. Also here's a little preview into the engineering behind the scenes. All the major components are attached mechanically via fasteners (1/4" bolts/nuts in this case)and well hidden. Most of the smaller details have a raised boss to pilot into an appropriate hole as seen in the radio box below.
-
Alright here we go, had a storm roll through yesterday that knocked out my power, but I'm back. All good discussion here, there's a lot to this helmet, but I think we've got it. Also good because we have two similar CRLs coming (EVO update and new Shadow EVO CRLs) that I will base on the Jumptrooper. Anyway take a look, if it all looks good I'll update the main post and we'll move to the next piece of armor. @nanotek After we get through these first few pieces you looked at, I'll turn it back over to you to continue your review. Helmet Single piece lens must be sufficiently dark enough to obscure the costumer's eyes. It can be either flat or bubbled. Acceptable colors are black, smoke or dark green. A gray stripe runs below the lens ending at the top of the lens. This can be painted or a decal. There are two black "nostrils" present that are small rounded recesses on the bridge of the face, located between and slightly above the lower part of the visor eyes. The frown must have 4 to 6 teeth cut out and any gray coloring must not leave the indented area. Black mesh must be used to obscure the face of the wearer. The indents at the bottom of the frown are black. A recessed channel, painted black, runs around the ears and continues above and across the lower tubes. The lower tube stripes are gray in color and number 4 per side. These can be either hand painted or decals. The tube stripes connect to longer stripes running to the rear of the helmet. The upper cheek on each side features 2 vertical black bars that are rounded at the top. The rear bar is slightly taller than the front. The "ears" are rounded details with a notch to fit around the power cell housing. The ears feature two black pointed details. These can be either hand painted or decals. The power cell is comprised of 3 components; 2 power cells and the power cell housing. The power cells are small rectangular boxes that are connected to the power cell housing. Each power cell has a recessed face that is black. A black stripe approximately 3/32" (2mm) wide that runs around the outside of each power cell. There is a small gap between each power cell when mounted in the power cell housing. The power cell housing is seamlessly connected to the cheeks and has a recessed area where the power cells mount, the inner wall of the recessed area is black. A gray stripe approx 3/16" (5mm) wide near the top of the housing. The aerators are tan, and screening must be silver. The interior of the aerator can either be white or tan. Traps (trapezoids on dome of helmet) are gray and can be hand painted or decals. A red stripe is offset to the left side of the helmet and runs towards the rear of the dome. The stripe is approximately 1/2” (13mm) wide. Two small red symbols are present next to the dome stripe. Brow trim, black and approximately 5/8" (16mm) in height, runs from the rear of one trap to the rear of the opposite trap. The visor is attached with gray domed fasteners in the middle of the front traps. The visor attachment tab should be slightly smaller than the traps allowing the traps to be partially visible. The visor has gray stripes on each side, running horizontally from the rear and stopping short of the front. Red symbols similar to the dome symbols are present on each side with a red bar offset. On the left side, the bar is positioned towards the rear of the visor. On the right side, the bar is positioned towards the front of the visor. Visor mounts in front of the brow trim, with the top of the visor flush with the top of the brow trim. The hose port is gray in color with a red stripe approximately 3/4" (20mm) wide running down the front. Helmet is moderately weathered. All red detailing is weathered. OPTIONAL Level two certification (if applicable): Weathering will match style seen in reference photos. Heavier weathering is present around the power cell housings, aerators and hose port.
-
I agree with what @Blackwatch wrote. After thinking it over today, I was going to suggest that maybe we were trying too hard to define this channel. It's something inherent to the sculpt, so I don't think we need to get too detailed with it. My original intent was merely to suggest it's there and it's painted black. If we're all in agreement, I will combine the latest edits for a final review of the helmet before we move on to the next part.
-
So I've been leaving out detail on this recess, because it terminates in a "crease" where two surfaces are meeting. Not really at a defined measurement from a hard edge. Same goes for other measurements. Width, depth, etc. all vary. Here's another stab at it, the "painted black" was in the one above, but I threw it in its own section so it doesn't get buried. If we go this, let's rename any instance of "lower tube" to "lower cheek," the lower tube now being the surface below the blue line in the pic below. A recessed channel runs around the ears and continues above and across the lower tubes. The channel terminates where the lower cheek meets the lower tube of the helmet. This recess is painted black.
-
Not much to report on this rebuild lately, just started taking some CRL pics and figured I'd take a group shot with everything that is finished. Still need to strip and repaint the TD face, run the lights on the belt and get some clear armor parts. Once I get the TD repainted, I plan to move on and start getting everything strapped together.
-
Been modeling the pack off and on this past week. Got everything roughed out, now to add details and figure how it will go together.
-
Thanks for the feedback guys! I appreciate it, been a few years since I've written CRLs, definitely more detail nowadays, which isn't a bad thing at all. Regarding weathering, I have no issue adding it to each individual piece. Personally I feel like we should leave it a little open/broad for L1 and then maybe tighten down to match reference pics for L2. How about something like this? Helmet (or other armor part) is moderately weathered. All red detailing is weathered. OPTIONAL Level two certification (if applicable): Weathering will match style seen in reference photos. Heavier weathering is present around power cell housings, aerators and hose port. I feel this is a more consistent with how I've approached most of the L2 requirements for these Force Unleashed troopers, making L2 match exactly what we see in game while keeping L1 more "traditional" for TK-based parts. Just some other L2 examples are 2.5" belt vs. 3-3.5" belt, 9 ab buttons vs. 10, etc. I love the new term for the valleys! Here's the updated text. A recessed channel, painted black, runs around the ears and continues above and across the lower tubes. What do you guys think?
-
So to keep things rolling, here's the proposed update for the helmet and the new weathering language. All updates are in red below. If we are in agreement, I will update the first post. Special Notes: The armor parts are a combination of primarily gloss white and flat black parts, made from one of these (or similar) types of materials: Fiberglass ABS (Acrylonitrile Butadiene Styrene) HIPS (High Impact Polystyrene) PLA, ABS, PETG (3D Printing) Polyurethane Rubber Armor is moderately weathered. All red striping must be weathered. Blasters are not required for legion membership per our weapons policy 3D Printed parts are permitted but all print lines and other artifacts must be removed. Helmet Single piece lens must be sufficiently dark enough to obscure the costumer's eyes. It can be either flat or bubbled. Acceptable colors are black, smoke or dark green. A gray stripe runs below the lens and ends at the top of the lens. This can be painted or a decal. There are two black "nostrils" present that are small rounded recesses on the bridge of the face, located between and slightly above the lower part of the visor eyes. The frown must have 4 to 6 teeth cut out and any gray coloring must not leave the indented area. Black mesh must be used to obscure the face of the wearer. The indents at the bottom of the frown are black. The valleys that run from the "cheeks" to the "ears" on each side of the helmet are painted black. The lower tube stripes are gray in color and number 4 per side. These can be either hand painted or decals. The tube stripes connect to longer stripes running to the rear of the helmet and curve up to meet with the valleys. The upper cheek on each side features 2 vertical black bars that are rounded at the top. The rear bar is slightly taller than the front. The "ears" are rounded details with a notch to fit around the power cell housing. The ears feature two black pointed details. These can be either hand painted or decals. The power cell is comprised of 3 components; 2 power cells and the power cell housing. The power cells are small rectangular boxes that are connected to the power cell housing. Each power cell has a recessed face that is black. A black stripe approximately 3/32" (2mm) wide that runs around the outside of each power cell. There is a small gap between each power cell when mounted in the power cell housing. The power cell housing is seamlessly connected to the cheeks and has a recessed area where the power cells mount, the inner wall of the recessed area is black. A gray stripe approx 3/16" (5mm) wide near the top of the housing. The aerators are tan, and screening must be silver. The interior of the aerator can either be white or tan. Traps (trapezoids on dome of helmet) are gray and can be hand painted or decals. A red stripe is offset to the left side of the helmet and runs towards the rear of the dome. The stripe is approximately 1/2” (13mm) wide. Two small red symbols are present next to the dome stripe. Brow trim, black and approximately 5/8" (16mm) in height, runs from the rear of one trap to the rear of the opposite trap. The visor is attached with gray domed fasteners in the middle of the front traps. The visor attachment tab should be slightly smaller than the traps allowing the traps to be partially visible. The visor has gray stripes on each side, running horizontally from the rear and stopping short of the front. Red symbols similar to the dome symbols are present on each side with a red bar offset. On the left side, the bar is positioned towards the rear of the visor. On the right side, the bar is positioned towards the front of the visor. Visor mounts in front of the brow trim, with the top of the visor flush with the top of the brow trim. The hose port is gray in color with a red stripe approximately 3/4" (20mm) wide running down the front.
-
Well with the Jumptrooper build coming to an end and my TFU Shadow rebuild getting close, I figured it was about time to start a new trooper. Been almost 11 years, since I started my original EVO Trooper (can't believe it...), so it might need some updates and since I'm making parts, I might as well make two sets! So here we go, it's now time for the Shadow EVO Trooper! So this will be a slow build while we get the Jumptrooper and TFU Shadow Stormtrooper finished up, those are still the main projects right now. However, I've started modelling some new parts! Chest box and tube. Still figuring out how I want to tackle those little details on the top of the chest box... Forearm Tube Shin Tubes. One thing that caught my eye when looking at the model, was these have a little mount that they sit on. I had always assumed they were attached directly to the leg armor. Something I missed back when I built my EVO. Still working out some assembly ideas for these tubes, but the shape is ready to go! And next up on the list to model is the pack. Yes, it's pretty much a Sandtrooper pack, but there's a few quirks. So why not make an EVO-specific pack? Luckily this thing is mostly TK-style armor with the unique helmet, shoulders, knee plates and boots. So I will have to get a kit at some point, but for now we'll focus on the EVO-specific details. The plan for the helmet is to cast a Jumptrooper helmet and use that as a base for a new EVO sculpt. Make a mold, then cast two new helmets. So here we go!
-
Imperial Flametrooper (Jedi Fallen Order)
Fivezero replied to stevechewbacca's topic in Imperial Flametrooper (JFO)
As others said, keep at it! A little at time, that will get you there. Stay concentrated on the one piece in hand, don't worry about the whole build. Progress is progress, no matter how large or how small. Also once the sanding is done comes the painting, detailing and assembly (the really fun stuff, when the build really comes together). The build will fly by when you get there. I've spent many, many hours sanding and sculpting for all kinds of projects and troopers. It can get daunting, but if you keep slowly chipping away at it, you will get there one day. -
Shadow Stormtrooper (Force Unleashed) CRL Proposal
Fivezero replied to Fivezero's topic in TFU Shadow Trooper
Been a minute! Bringing this post back from the dead @nanotek @IcyTrooper. I rewrote the CRL proposal based on the latest Shadow Stormtrooper CRL that is posted, changing and adding details as necessary for this Shadow Stormtrooper. First post in this thread has been edited with my latest text. Have a look when you can. Obviously let's get the Jumptrooper finished first, but I wanted to get this posted and get the discussion going again. I will probably start taking CRL photos soon (in the next week or two). I'm at that point in my rebuild, where I want to get the CRL photos taken before I start strapping the armor together. -
Moving on to the other armor parts now. Shoulder Straps - I'm good with the rewrite! Shoulders - Also good with it! Biceps - Also good with the update! In regards to the L2 requirement, yes that is mostly just to ensure there is some thickness there. See picture below of my bicep model, the thickness between the green highlighted edges. Maybe return edge isn't the best term here? Maybe something like this? OPTIONAL Level two certification (if applicable): The inner ring of the bicep is approximately 3/16" (5mm) thick. If someone has a better way to word that, let me know. Also noticed the dimensions were wrong when I looked at my model. Forearms - And finally I like it. Again if we're all in agreement, I will update the first post with the changes.
-
Hey @nanotek, that all looks great to me! Overall, I'm not much of a writer so I'm completely open to suggestions. I'll respond with the Helmet in this post and move to the other parts in my next post. Overall great points and some good catches. Agreed that this helmet has a lot going on, so if there's any additional pictures I should take let me know and I'll get them taken. 1. Yes, obviously all of the armor is weathered as you noted. There is a blanket statement at the beginning of the CRL, should we add other references? "The armor parts are gloss white and weathered, made from one of these (or similar) types of materials:" 2. So the "valleys" are the black stripes running around the sides of the helmet, around the ears and cheeks. They are physically inset in the sculpt (about 5mm). This is present on the 3D model from the game. Pictures below, hope they help. If we need to find another term or reword it, I'm all for it. 3. That gray stripe is what you're seeing around the lens. From looking at it dynamically in-game, the helmet just under the brow trim seems to match the rest of the helmet (white), with the way light reacts to it. So that's why I kept the gray under the lens and didn't extend it to completely around the lens/meet the brow trim. The weathering/low resolution texture complicates things. It's tough but my vote is to keep the gray under the lens from what I'm seeing. Good catch on the brow trim! 4. Nostrils - agreed, I like what you wrote 5. Ears - How about this? "Ears are rounded with a notch to fit around the power cell housing. The ears feature two black pointed details. These can be either hand painted or decals." 6. Power Cells - So just a little background, I call them "power cells" because the actual in-game troopers have blue electrical effects (it might just be on the EVO Trooper, but it's the same detail on both helmets). Anyway here's my attempt: "The power cell is comprised of 3 components; 2 power cells and the power cell housing. The power cells are small rectangular boxes that are connected to the power cell housing. Each power cell has a recessed face that is black. A black stripe approximately 3/32" (2mm) wide that runs around the outside of each power cell. There is a small gap between each power cell when mounted in the power cell housing. The power cell housing is seamlessly connected to the cheeks and has a recessed area where the power cells mount, the inner wall of the recessed area is black. A gray stripe approx 3/16" (5mm) wide near the top of the housing." Yes it is gray, the weathering darkened it up a lot... 7. Aerator/Mic Tips - In game, there is not a lot of detail at all for these over than some beige/tan coloring and a hint of a mesh texture. So I created a simple aerator to house the mesh and painted it tan, much of it gets lost to the heavy weathering in this area. The interior is that same color (not weathered of course). 8. Red Stripes - Would this fall under the blanket statement at the beginning? I've got not problem adding it or maybe amending that statement to emphasize the weathering on this trooper. Also I'm sure someone could replicate the weathering with a decal, would just need some graphic design time so I hate to limit someone, but painting is far easier in my opinion... 9. Visor - Yep, agreed that shouldn't be there, good catch! Let me know what you guys think! I will update the Helmet text if we are in agreement.
-
@IcyTrooper Uploaded a few more pics of the jet pack, let me know if you need anything retaken!
-
Can do! Will try to get them taken tomorrow. If not tomorrow then will I get them this weekend for sure!
-
And the thigh ammo belt is finished and mounted! Printed off my standoffs and glued them in last night. Drilled and bolted the ammo belt to the thigh this afternoon. Only thing left to do is to light up the belt! Well that's the only thing left to do with what parts I have. Still need to get the clear parts...
-
Been a minute, hurt my arm and haven't been able to work on anything for the last couple weeks... Also had to run and pick up a Humvee last week... Anyway finally got back on this build. Get lights placed on everything. Chest plate is ready to go. Got the TD together and then damaged the paint when I glued the main plate on, so I'll have to strip and repaint that piece. And finished up the helmet, backed all of the lights with foil tape, no more light coming in to the interior of the helmet (I can see out of now...). And now I'm working on the thigh ammo belt lights. Got them glued in and then drew up a little standoff to print to mount the ammo belt. These will have bolt going through to bolt them to the thigh. Usually I just glue the ammo belt to the thigh, but I want the belt removable to work on the lights if needed. Also these are the perfect distance to really get that shine on the thighs.
-
@IcyTrooper Uploaded the picture of that hose!
-
@IcyTrooper Yep I can do that, no problem! My hose is glued in to the chest plate, but I have some extra of that hose laying around, so I can cut a piece to length and paint it tonight. I’ll get a picture after the paint is dry.
-
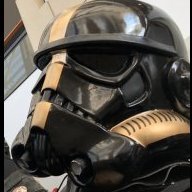
And moving right along on, here's the progress from the weekend. Finished painting the knee plate, adding the silver to the sides. And just about wrapped up the helmet. Lights run, S-trim installed and lenses installed. Ran some scuffed up acrylic under the tube stripes and frown to carry the light. I also printed out some adapters to hold the lenses. Usually I glue my lenses in, but I wanted these removable in case I had to do some maintenance to the lights. First round of lights glued in. Lens adapters. Used my old helmet and a heat gun to get the contour just right after I printed these adapters. Then glued them in to the new helmet. I love these little adapters, probably going to use them for all of my helmets. And here's the helmet with the lights run around the eyes and lenses installed, love it! I used some blue window film on the usual lens material. I'm going to grab some blue mirror film and see if that looks better. Once I make a decision on the lenses, I have to do some final gluing on the eye lights and then paint over the glue. I've got a lot of light shining on the inside of the helmet, got to cut that down... I also have to sort the wiring once I figure out the whole suit (right now I have 6 individual battery packs/switches for the helmet...). Overall everything is going great! Nice to have a helmet back together for this trooper.
-
Got a little work done on the helmet this weekend! Buffed the paint, painted details, added brow trim and got the mic tips painted and put on. Next I need to add some clear plastic behind the frown and tube stripes and then run the lights. Still need to figure how I'm mounting the lenses, I would like to have them removable in case I need to do some maintenance on the lights. Got some ideas going. Hope to have the helmet done this week. Before and after buffing. Mic tips mounted, painted and added the mesh. Came up with a little tool to make perfectly sized mesh for these 3D printed mic tips. Some painting progress, made up some paint masks for the stripes on the rear traps and tears. Drew these based on the in-game textures. And then a little preview of the next step!
-
Dusting this topic off real quick, wrote a quick description for the rail detonator. I kept it short like many of the other CRL weapon descriptions. Let me know if I should add more detail or reword anything. Rail Detonator Built to match reference photos. Main body is painted flat black with details painted silver Optional: The front fins can be illuminated with red lights or painted to mimic lighting.
-
Thingiverse has been giving me issues the last couple days... Alright all the my STL files should be uploaded now, topic link is below where all the links are at.
-
Finally got Thingiverse to cooperate, that has been awful the last couple days.... Went through my latest files and updated the links above and added new links. This should have everything that I used in my build.

