

Mal86
-
Posts
183 -
Joined
-
Last visited
-
Days Won
6
Content Type
Profiles
Forums
Events
Everything posted by Mal86
-
I modified the TD Connections so that that have a slight angle on the part that connects to the back plate. I think these will work well. They are printed in PETG. My plan is to: - Add heat set inserts in to the 3D printed holders - Drill screw holes in to the back plate for connection points - JB Weld the TD to the connector - Prime and paint with rest of kit, when I get to that stage Is JB Weld the best option for connecting the PETG to the TD?
-
For the TD: Is this positioning (from top to bottom) good? Is there anything wrong with a single connection method in the center like this? (I'll widen and reprint as a single piece): When centering the TD, do you center from between the to raised edges or all the way across? Center the red line or the blue line?
-
Thank you! It’s not bad on the nose and a little padding might be the easiest solution.
-
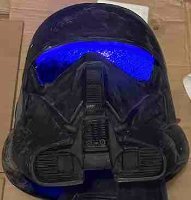
It’s been a while… I went to an armor party today and got some guidance on some of my hang up areas. i did a little bondo work, got the hard hat liner set in the helmet (though it bumps my nose). Did anyone else run in to the helmet hitting the nose problem? If so, how did you address? One person suggest grinding some of that area out.
-
I’ve done most of my work on Jim’s lot outside. I did a little in the garage and a lot on my front and back porch. You’ll likely be cutting fiberglass with a dremel. You’ll be using some strong glues. You’ll want to coat the inside of the kit with something. I’d assess if you can do those things in the areas you have. Take a look at build threads for both Jim’s kits and 850 kits. See what each person did and if you think you can make it work.
-
This took a lot longer than it probably needed to since I chose to make this a fully functional pouch with no visible stitching. It is completed and I am one step closer to finishing the build.
-
I echo everything Gerald said, except I think he thought you meant attaching them to the chest piece, veruss the armor in general. If that is what you mean, then I agree with him. If you meant the armor in general, then this is my thought: On the issue of attaching the shoulders, if you are going for Level 2, you'll need to attach them to the armor. Otherwise, they won't sit high enough. Attaching to the armor also keeps the gap consistent as you move. Lastly, the shoulders and biceps are generally connected to each other. So, keep in mind how well the attachment points work with movement, if you do it another way.
-
I've been out for a little bit working on a different costume. My daughter wanted to be a Jawa in a parade August 30, which was the reason I set the goal of having my DT done by then. However, I learned a few months ago that I could not be her handler in a bucket (which makes sense). They told me I could be her handler out of costume, but what is the fun in that? So, I quickly started working on a Generic Jedi (something else I want to make anyway) and set aside the DT. The Jedi is not done for RL approval yet, but it was good enough to fit in in the parade. Hopefully, I'll be picking the DT back up and finishing working on the Jedi soon. It'll probably be October before I'm back to any of it due to work and personal commitments. In the meantime, my bubbled lens from Ople has shipped.
-
C’mon! Let’s make that Death Trooper Kmon. WIP
Mal86 replied to Kmon's topic in Imperial Death Trooper
This is the cutting wheel I got from trimming Jim's armor: https://www.amazon.com/dp/B000HI5WUS?ref=nb_sb_ss_w_as-reorder_k0_1_17&=&crid=QKHHA43M39KS&=&sprefix=dremel+fiberglass It has worked very well. As Dan said, eye protection and a respirator mask are a must. Some angles of cutting literally had bits flying in my face. I also used some old clothes (long sleeve shirt and pants) that I wasn't worried about getting messed up. -
I didn't 3D Print my kit, but I know bambu slicer (or Orca slicer - I can't remember which I did this on) has the ability to add pegs to reconnect items when you split them. I will tell you that you may want to test the tolerance. I printed a whole item in 4 parts and the pegs didn't fit together. I'd probably make a cube, cut it up with the pegs, and test the tolerance that way. That should assist with your alignment issues.
-
Do you mind sharing where you got your lenses from?
-
Are there any other options other than Ople Props (or an Anovos helmet) for the the level 2 bubbled lenses? I still haven’t gotten any recent responses from Marc and I’m trying to figure out what I should do.
-
@Baron Tarkus - If you are on the Death Trooper Facebook Group, there is a thorough PDF that @Chaosprepared comparing the Cyber Craft to screen used and what needs to be changed. The file is too large for me to post here.
-
@DoggyDocGlad to hear that. He's been pretty active on the OPLE Props FB page, so I don't know if he's just been really busy or what. I tried sending a message through FB Messenger on July 9 asking to see if he had gotten my emails and haven't heard back yet. I'll wait a little longer and see what happens.
-
Has anyone had issues with OPLE Props responsiveness or shipping speed? I placed my order May 29. We had some communication about the measurements, which I sent June 7. I followed up June 20 and July 3. I have not heard anything since his June 7 email to me before I sent measurements.
-
Dyed and sealed the leather pieces: No pictures, but: - Glued two inch strapping to inside of belt. - Tested adding threaded inserts in to one of my misprint straps (went well). - Printed/Reprinted everything (except the SE-14R) in PETG (though I'm not having as clean prints, so I've been messing with my settings. - Newly printed Shoulder buckles sanded smooth. Slowly making process..
-
@PiotrRasputinThank you for the suggestion. My father in law has some contour gauges. I'll borrow them next weekend and see what I can come up with. I also reprinted the brackets solid. I think some of the issue I had before was getting to the infill when trying to shape. Hopefully the contour gauge and the solid piece will help me get to the shape I need.
-
@Chaos, maybe I'm overcomplicating it. I was trying to make the point where the bracket attached to the armor match the curve of the armor. It may be simple enough that when I attach it, it'll flex the armor enough to not make it look like it isn't attached. Also, it'll be on the insides of the TD, so it might not be noticeable. Gerald had told me he used a belt sander to add the curvature to the back, which I tried to do (poorly) with a dremel).
-
How are people connecting the thermal detonator? @DoggyDocshared his method with me, but it involves shaping a squared 3D printed file to fit the curve of the armor, which I'm having trouble doing. Any other methods or suggestions?
-
Taking a new step in my leather working my trying to stitch leather. I had some pretty thick leather from some armor I made that I am using for the pouch. My order of operation would not normally be to sew first, but I wanted to make sure I could do it before I did anything else. I'll probably dye and seal the leather then come back and add the snaps, attach a strap for the belt on the back with rivets, and then try to finish sewing up the edges.
-
Death Trooper building in Germany (Jim Tripon kit)
Mal86 replied to Deathwatch's topic in Imperial Death Trooper
I think that your right shoulder looks better. The level 2 requirement says minimal spacing, so I think closer is going to be considered better. With the metal tabs, I thought that they’d sit a little higher. Are they sitting on the tabs? Overall, it’s looking good and seems like it’s coming together well. -
I haven’t printed with petg yet, but I’m going to pick some up tomorrow add reprint everything except the SE-14R. I don’t want something to get ruined because it gets too hot and the blaster is done, so it if gets messed up then I’ll deal with it then. Everything else isn’t finished yet.
-
So, I printed my shoulder buckles, pouch plates, SE-14R and (eventually will print) my belt boxes with PLA+/PLA Tough. Today, I left the buckles outside in the direct sun for a couple of hours while doing something with one of my kids. It was soft when I got it and slightly deformed. Before I continue finishing the PLA+ pieces and making more, should I anticipate a problem trooping with these parts or them being in the car during events? Thanks!
-
@DoggyDoc thank you!
-
@Chaos that was part of my headspace. I haven’t really gone cheap on the rest of it. If it’ll give me a more durable and longer lasting finish, then it seems to make sense. He also said that if it gets scratched then I can polish or wax. This is what he recommended I get: https://www.ebay.com/itm/143633367231?mkcid=16&mkevt=1&mkrid=711-127632-2357-0&ssspo=mJk8wBaTRJ-&sssrc=4429486&ssuid=F6hPmDASQTC&var=&widget_ver=artemis&media=COPY

