

Mal86
-
Posts
183 -
Joined
-
Last visited
-
Days Won
6
Content Type
Profiles
Forums
Events
Everything posted by Mal86
-
I'll open by saying that the kit I'm working on is not MCM Design's files (Previously known as Tom's files), so take my feedback for what its worth. I'm not sure on the 3 different versions. You could take a look here: https://cults3d.com/en/3d-model/various/death-trooper-armor-star-wars-rogue-one Click folder details and see what files are currently included and see if that helps you any. Otherwise, I would compare the looks of the STLs to the CRL images and see if one seems more up to date. On holding the parts together, I doubt you'll find full instructions for that. That is generally up to the person assembling to look at and figure out. I'd search through the forums for builds using MCM Design's files (Previously known as Tom's files) and see what you find on how different people put it together and see what makes sense for your knowledge and skills, as well as what skills you want to learn. If you search the forum here for his posts and the facebook group, you may see some of the ways he originally designed it. As mentioned @TookBreaker, you will probably want to print the traps in TPU. On the wrist straps, I'd also search the forums. There are a number of suggestions of how to do it. Here is some of what I found in my previous searches: On connecting with Tom, the impression I've gotten is he has stepped away from addressing this stuff directly himself, so I don't think you'll get answers directly, but there are a lot of great people on the forums who will be happy to help how they can. I hope this gets you pointed in the right direction.
-
You could message MCM Designs, who now sells the files on behalf in Tom. (Info in the vendor post) What are you trying to figure out for assembly? Are there specific parts you’re not sure about?
-
@DoggyDoc @ChaosCan you glue parts on to the resin for strapping, etc?
-
I may give this a try. Any tips or tricks to be aware of?
-
Is masking tape a good option for edges and areas I don't want plastidip or is there a better option? This will be my first time using plastidip. Any tips or advice would be appreciated.
-
Thanks for the explanation! It looks like I just need to cut a thin indentation in for that.
-
Can anyone help me understand what the level 2 for the shins are referencing (and let me know if Jim Tripon's kit requires any modification to meet this)? OPTIONAL Level two certification (if applicable): There is a raised strip that begins at the rear vertical cover strip angled up and around the left outside shin and joins the front vertical cover strip. The top edge of the raised strip is angled and aligned as if it is an extension of the raised angular extension or flap just above the inside ankle. There is an indented groove approximately 1/2" (12mm) wide that runs along the inside bottom of both shins from the rear center to the beginning of the front boot arc. This detail is partially covered by the triangular closure flap. Looking at the shins I got from Jim, they seem consistent with the pictures. Is there anything that needs to be modified on his shins to get to level 2? Thanks.
-
@TookBreaker - Thank you for the feedback. I'm in Georgia, it'll be hot and humid for me as well. My plan is to connect everything with E6000 to start, so I can easily remove and adjust. I just wasn't sure how easy it is to get the plastidip off if I need to adhere to a place I put the plastidip.
-
I've decided not to spend the time sanding the inside of the armor. I'm going to connect all the strapping points/greebles, then mask those and any other gluing points, then go ahead and plastidip. It doesn't seem practical to to try to get everything adjusted before plastidiping. I'm also thinking about getting something like this, cutting it, and shaping it to connect it to the bottom of the ab armor to add velcro for the belt. https://www.homedepot.com/p/Palight-ProjectPVC-12-in-x-12-in-x-0-118-in-Foam-PVC-Black-Sheet-156238/205852828 If anyone has any thoughts on a better way to do any of this, feel free to share.
-
Here is the armor kit: Also, helpful tip for those who might need it (clearly, I did): The suspenders work better when sewn so that they go the same direction: But they are correctly assembled now (despite the lack of a picture).
-
Death Trooper built - questions about boots and 3D blaster stores
Mal86 replied to MarcG's topic in Imperial Death Trooper
On the boots, you basically have two vendor options unless you are going to hunt down similar boots on eBay. https://keeptrooping.com/product/killer/ https://crowprops.bigcartel.com/product/deathtrooper-boots Keep Trooping has limited sizes and Crow Props custom makes, so they have larger sizes. You can search forums for each. I got mine from KeepTrooping. -
Thanks! I messaged Jim. He suggested sanding with 200 grit sand paper and hosing it off. There is so much loose fiberglass, that I'll probably hose it off first and see how it goes from there. I did a quick fit without the undersuit last night and I think I'm going to need to trim the forearms and potentially the thighs. My current plan is to get it cleaned up, strapped, then take some pictures with everything on and post them for feedback on trimming.
-
That makes sense and was my concern. How would you recommend doing fitment without the plastidip? Wear sweats and wash them after?
-
A small update: I found someone who wants to do a Night Death Trooper on FB and sold them my buckle and ordered one from Phoenix Props. Much cleaner and nicer looking buckle. I'd highly recommend. The big update: FedEx just dropped the box with the armor and undersuit at the house. (I'll post pictures after I get a chance to open it up and inspect everything.) Would the recommendation be to check for fit, do any cutting, strap it, then plastidip it, OR plastidip very first thing to address fiberglass and then sand off any plastidip at any locations I need to have better adhesion? Leaning toward the second, but wondering if there is a best practice. Thanks.
-
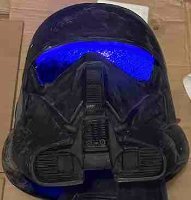
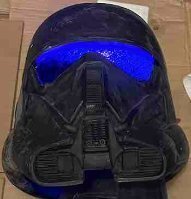
Road Kill Death Troopers ... Images and Thoughts
Mal86 replied to Mal86's topic in Night Death Trooper
@IcyTrooper Here is another you can add to the reference library https://imgur.com/a/X9zT0PI -
TookBreaker's Death Trooper - COMPLETED
Mal86 replied to TookBreaker's topic in Imperial Death Trooper
I think you have to have some black material on this side of the mesh, based on the CRL so that from the outside they see the vents, mesh, then black. -
Thanks. That is ultimately the plan. I was curious if I could fit anything useful in them. My phone is a little too big for it to keep form. I'm thinking that for my wallet, I might try to 3d print something for one of them that puts a raised base and solidified the edges, while having a spot for my wallet.
-
Just FYI - I ordered my Soft parts and kit from Jim Tripon in mid-september (hasn't shipped yet). At the time he told me he had a 2 month wait for soft parts. However, he was fairly responsive. I think almost every message was responded to within 1 business day, if not sooner.
-
Sewed together my first pouch. This is my first ever sewing project, so I learned a lot. The dimensions look off, but that's just the angles. They are pretty close to accurate. Any feedback on this or before I make the other two: '
-
Boots came in. They look nice and fit decently. The insole slides to the front when i slip my foot in, so I may need to adhere it to the bottom of the shoe. (Anyone have suggestions on whether to keep the KeepTrooping Insole or get a different one?) The front edges of the boot covers flare out. There is an opening where the stitching is that I could stick a piece of wire through to see if I can use that to better form it. Any other tips or tricks anyone recommends?
-
I’m equal parts excited for you and jealous of you. I’m intentionally doing mine as a project, but I’ve got at least another month before it ships to me as an unfinished kit. I’m looking forward to seeing your kit, once it arrives.
-
A 501st Newbie: A Death Trooper Story
Mal86 replied to GrandMoff501st's topic in Imperial Death Trooper
Casey, I'm planning to order the imperial boots tonight. How is the sizing? Did you stick with your typical shoe size? -
Does anyone have feedback on Imperial Boots sizing? My Ecco dress shoes are EU 44. My Ecco boots are EU 44, but say US10. Most of my US sized shoes are 10.5 or 11. A pair of hiking shoes I have say EU44.5/US11. I emailed Vincent for feedback, but thought I'd ask the group as well.
-
Road Kill Death Troopers ... Images and Thoughts
Mal86 replied to Mal86's topic in Night Death Trooper
That makes sense. At first glance I thought that the gold was smooth and perfectly filling in the "cracks," which made me think it would work. However, as @LVLAsian pointed out, there are definitely un-repaired cracks as well as tatters on the belt and other areas of significant wear. For the lightsaber variant, I'm just envisioning one of those headbands with half an arrow on each side. Some one posted some much better pictures in the Death Trooper build FB group, with a higher brightness. If you need some to grab, those might be good. -
Ahsoka S1E8 spoilers below.... I tried to grab some quick screenshots. They could probably be improved by lightening, etc. Images: Thoughts: I'm not going to approach the red fabric, as I think that's self explanatory, but I think there are two ways approach the gold: 1) Replace SOME of the armor pieces with ones that have the gold painted on and make the gold permanent on those. This will add some more versatility to the sets of death trooper armor someone may already own. 2) Is there a good gold paint that could go over the clear coat and wash off. This would allow modifying to this build without extra armor pieces. Given that I haven't even started my armor yet, I'm not in place to test anything, but I thought I'd share my thoughts.

