Chaos
-
Posts
1,469 -
Joined
-
Last visited
-
Days Won
111
Content Type
Profiles
Forums
Events
Everything posted by Chaos
-
Rob, The photos don't really show what the issues are. If you take another photo a little farther away and clearer we might be able to assist you better. Also, who produced the armor and is it ABS or polymer/fiber glass? How much do you need to shorten the shins to get them to sit correctly over the top of your boots. Where does the shin not close around your leg and how much is the gap?
-
Hey Dan, apologies for the delay, work has been crazy, I've been flying my ass off. For your Specialist L2 application its good that you have taken new sets of pictures. Here is what we will need by way of photos. 1. Standard set of photos for basic approval: Front: arms down - palms inward, arms up parallel to the ground - palms down Right side: arms down - palms inward, arms up parallel to the ground - palms down Back: arms down - palms inward, arms up parallel to the ground - palms down Left side: arms down - palms inward, arms up parallel to the ground - palms down Some type of action shot with a weapon or using your hands like in a fist or "force wave" 2. After you take the basic photos you will need to take photos of each of the L2 requirements that are mentioned in the CRL example, if the L2 Requirement says "There are two small notches on the outer ⅕ of each side of the canister approximately 3/4" (20mm) from the inner edge of the end caps and spaced approximately 1" to 1.25" (25-30mm) apart on the lower edge of each horizontal grooves. Refer to reference photos for specific details." then we would need a close up photo of the detail with a ruler next to the detail to verify the detail and measurements. If an L2 requirement is visible in the basic photos or in another close up, you don't have to take an up close photo. 3. If you have Microsoft Office you use Word or PowerPoint to insert all your photos and then save the file as a PDF and upload that into your Application thread. If you can't do that, then it would be best to create an account on an image storage site. Imgur is what I use. Create a post and upload all the photo to there and post the link in make it shareable in your Application Thread in the Specialist sub-forum. 4. Make sure all your photos are clear, well lit, and in at least 960 or larger resolution. Let me know if you have any issues or other questions. You can go to any of the request threads for examples.
-
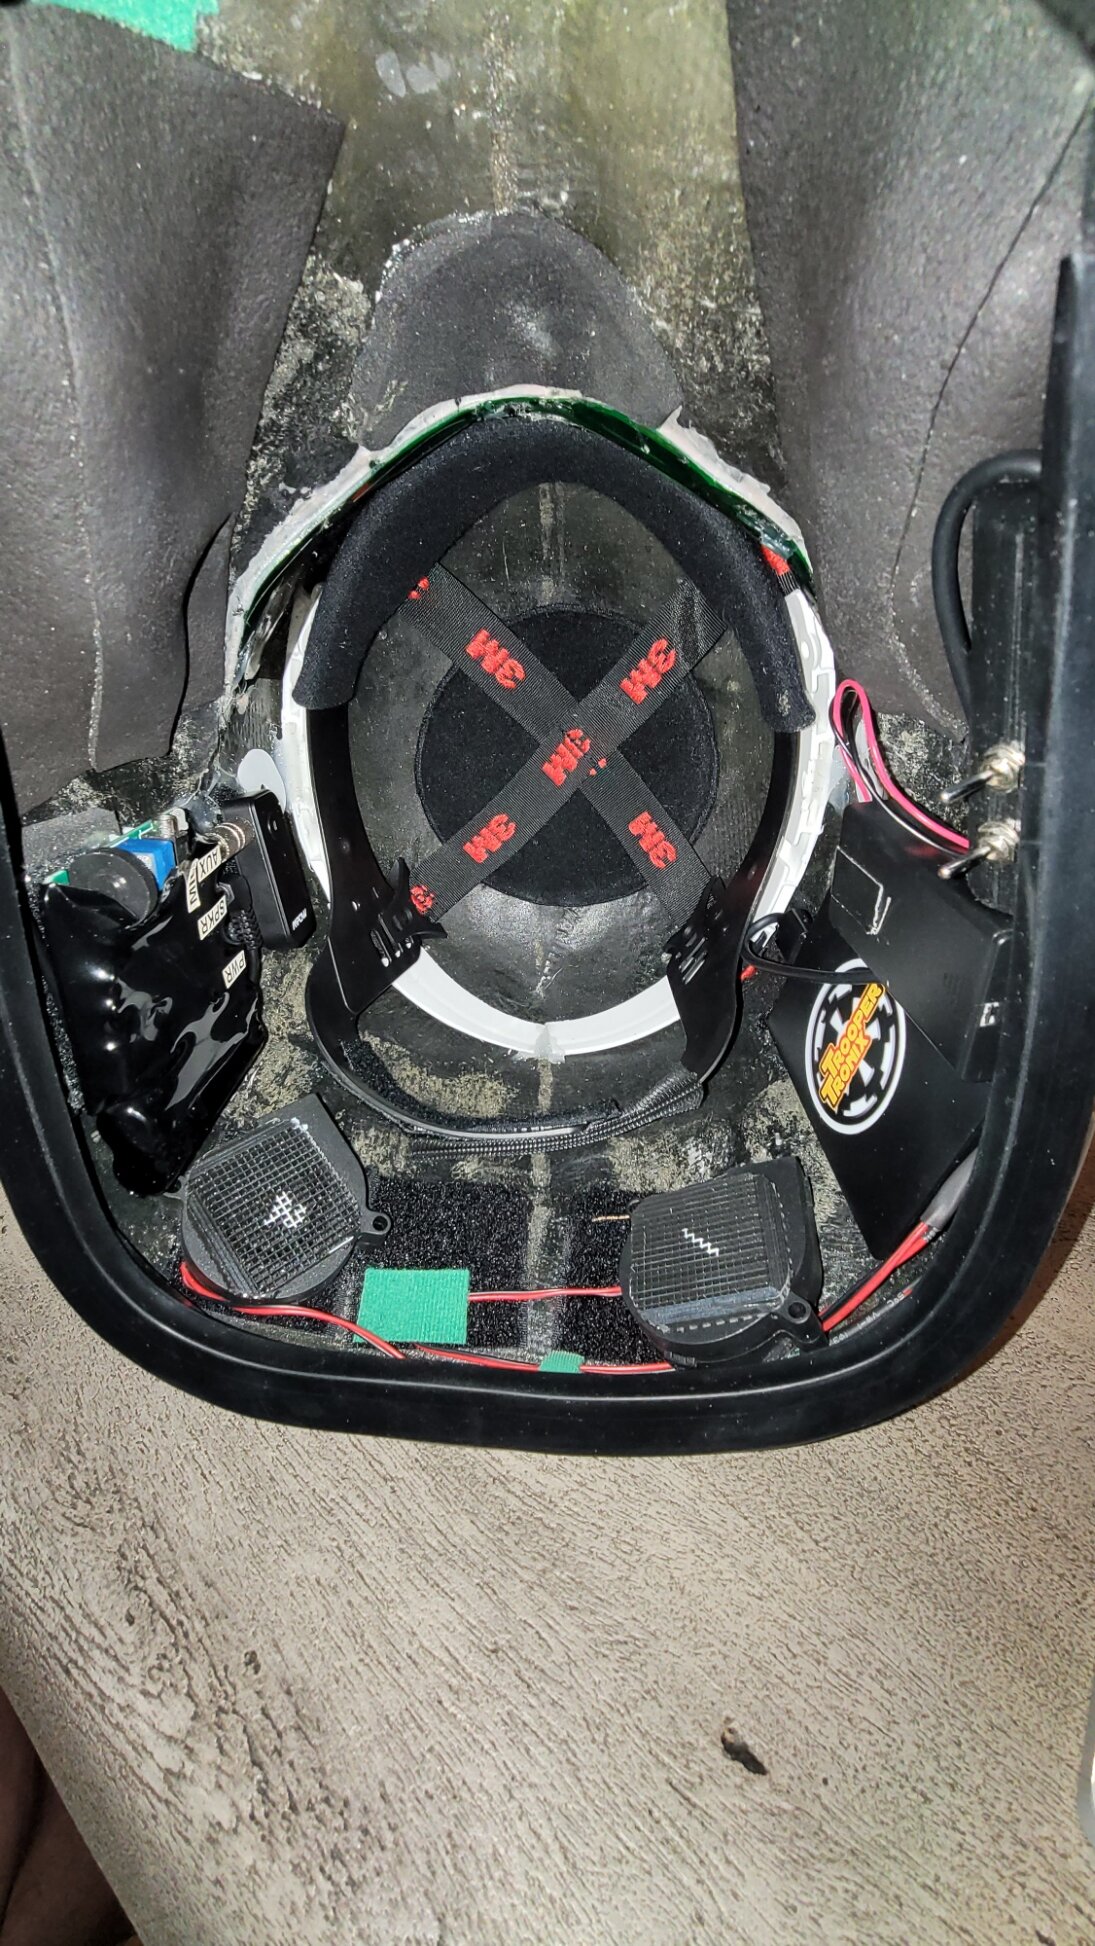
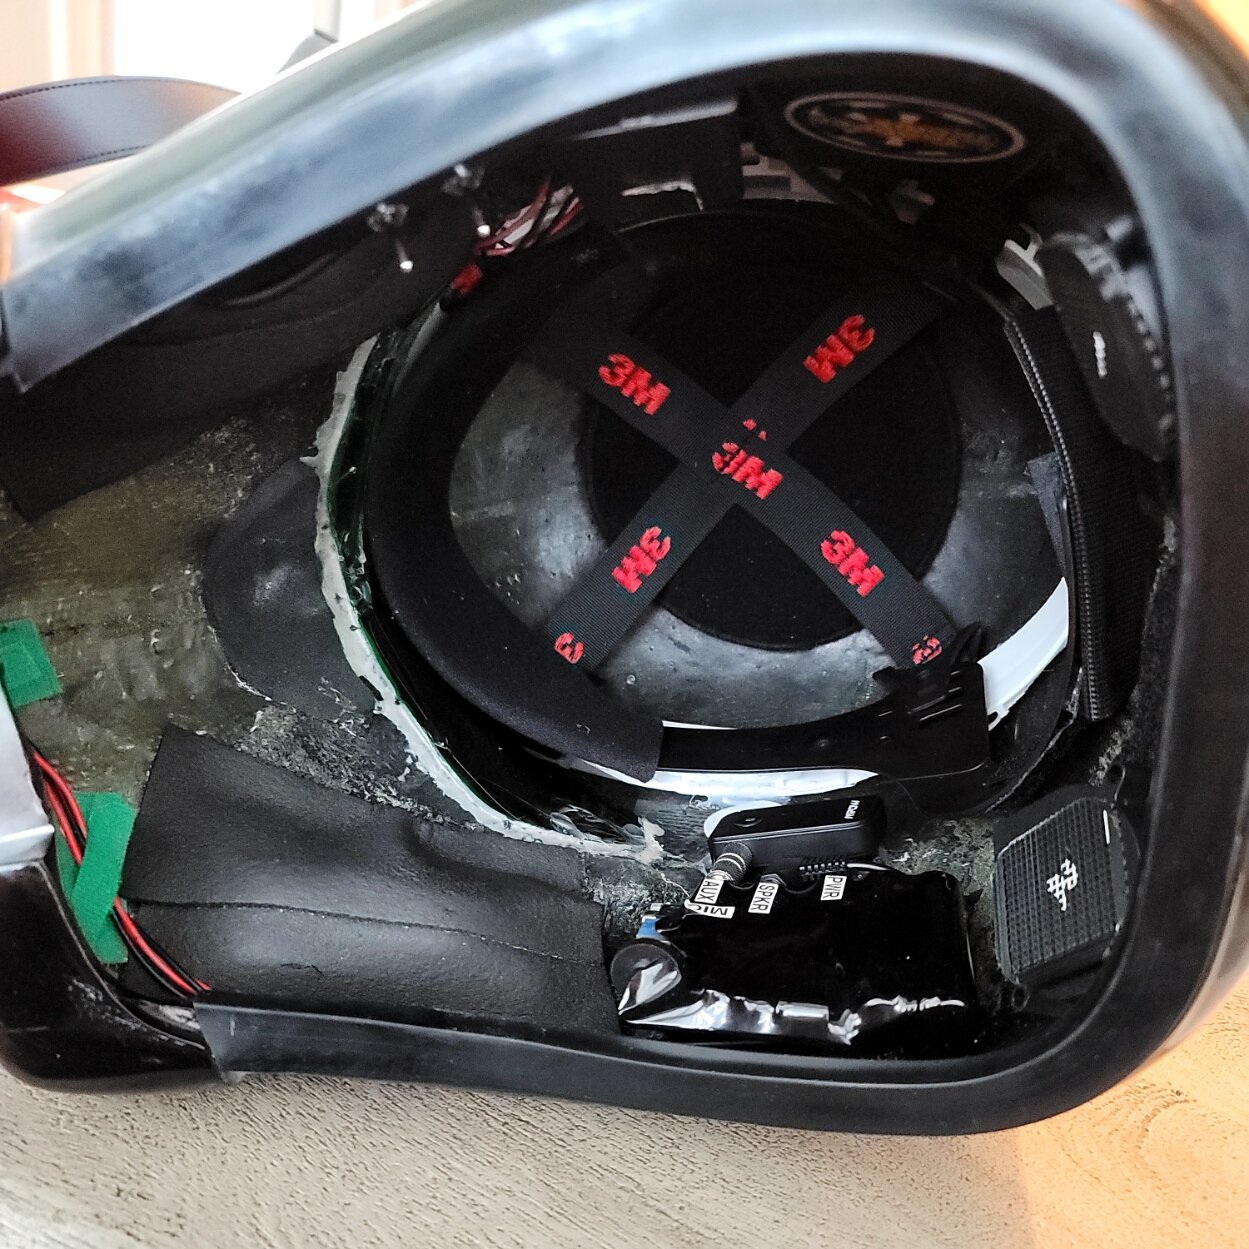
Looking good Trooper. Yes, the DT is a very warm and motion limiting armor kit. I have fans in my helmet; Additionally, I used a construction helmet liner to provide more air flow around my head. Most people complain about the range of motion in their upper legs and pinching between the thigh armor and cod piece. You can make the gap bigger between the thighs and cod piece by determining how much of a gap you need and trimming that amount off the top of the thighs. When you trim the top of the thighs, follow the shape all the way around so the appearance of the thighs shape remains the same. If you are getting binding or limited range of motion in your knee area, you can cut an additional amount off the top of the thighs and raise up the thigh armor, this will increase the knee gap enough to allow for a greater range of motion. I am not sure how your torso armor is strapped but if you are having issues turning your upper torso, a way to increase the range of motion is to have the chest and back separate from the lower back and abdomen armor strapping. This will allow your upper body to twist and the lower armor to stay in place. Issues occur with the helmet hitting the neck collar in the back when looking up. There is not much to do about that other than either making sure the collar is as close to your neck so that the helmet opening allows the collar to rise into the helmet opening. Or you can trim the neck collar's edge down some to give you more of a gap. It took me almost twelve troops and experimentation to get all my armor strapped and sized so it gives me enough freedom of movement to walk up and down stairs, climb onto parade trailers, and be able to actually sit down. Even to this day I am still tweaking mt DT set up. Shins, if clam shelled, definitely need a locking type closure. I use Velcro along the vertical split on mine and it works perfectly.
-
 I have been following along in the FB messages and I am so sorry for your loss. I actually posted the request there to have another set of eyes as I knew you had a lot going on. After looking at @Andreas Funk's photos and videos, his armor may make the mark for the CRL so we may not have to wait on someone to build a kit and this CRL approval may go quickly once we get the wording completed. I am still building mine with 3D FDM and Resin printers so its taking a while. Plus once I get mine finished I will have to figure out how to send it back to the USA when I leave my job. Good to see you getting back into things, if you ever need anything send me a message.
 -
Rudi, Welcome to the Darker Side of the Darkside! You have chosen one of the more intricate kits to build. The DT is impressive when completed and is one of the few kits that has a lot of minor details which are required for basic approval. I recommend that as you build each section of your kit that you refer to other Trooper's build threads. Any questions that you may have about your build have already probably been addressed by others and how they solved an issue. It is also good to consult the CRL when building and painting. Yes the armor for the DT is gloss black, however there are some paint schemes that are highlighted in the text of each piece along with a Paint Scheme Guide link in the CRL. If you have any questions or need something clarified, do not hesitate to ask here in your build thread. Best of luck with your build and we look forward to seeing your progress.
-
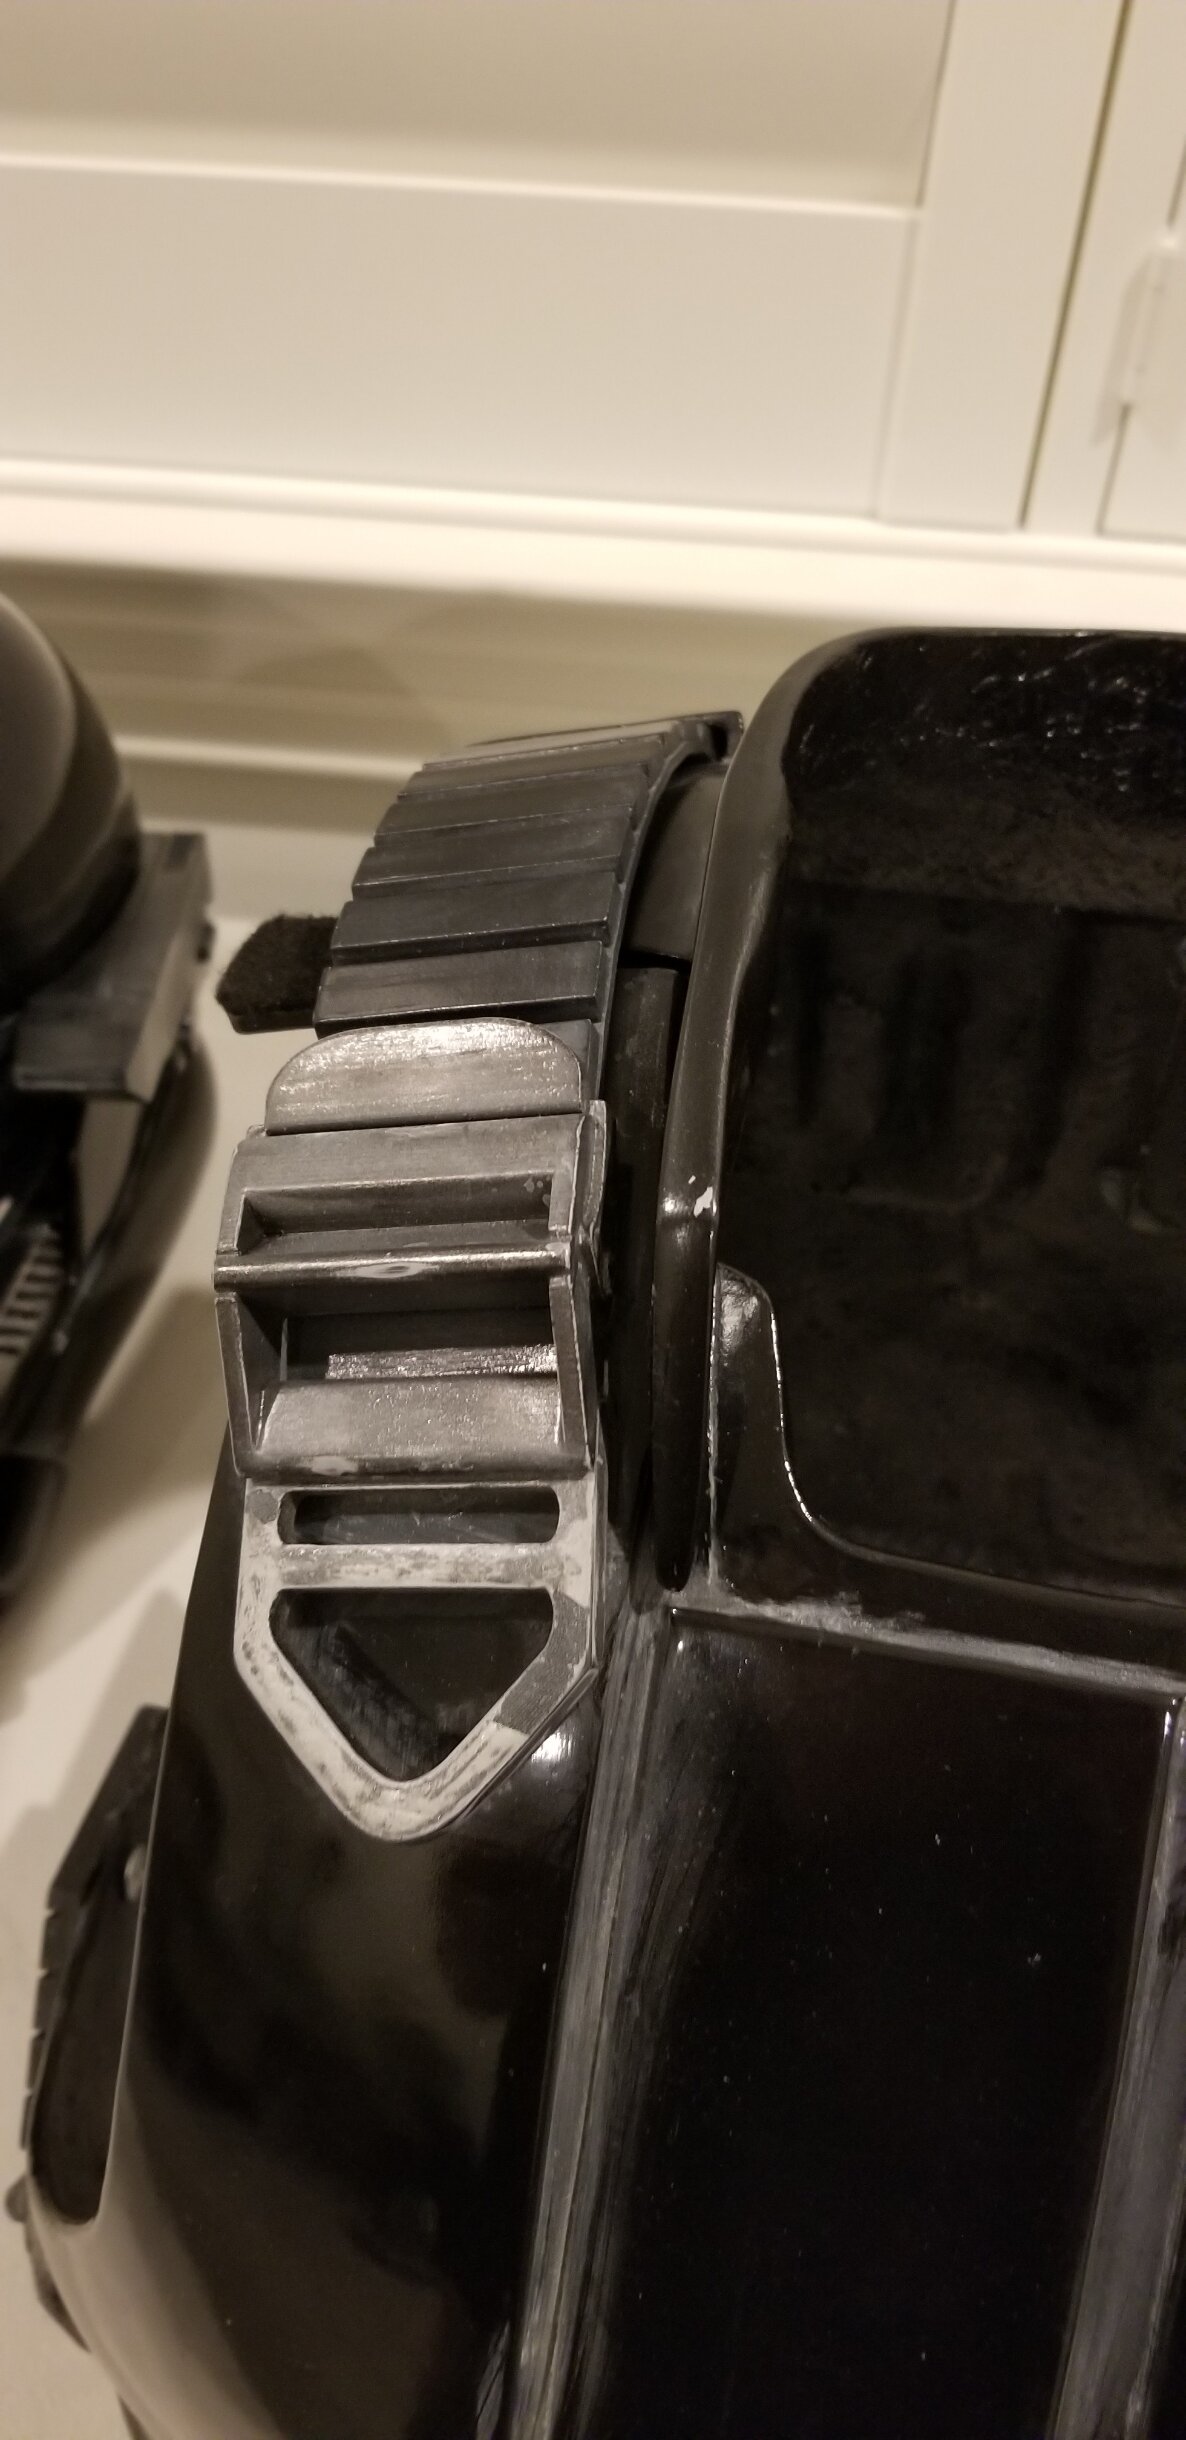
What the heck is going on with the right hand box? Is it intentionally designed to not be flush with the opening?
-
DeathTrooperIAm's Death Trooper Work In Progress
Chaos replied to DeathTrooperIAm's topic in Imperial Death Trooper
His contact info is in the Death Trooper Vendor list. -
Airsoft mags are acceptable
-
DeathTrooperIAm's Death Trooper Work In Progress
Chaos replied to DeathTrooperIAm's topic in Imperial Death Trooper
Jim Tripon has a tailor who makes under suits to a person's measurements. -
Nathan does an amazing job of weathering his kit. For your helmet this might help. The same technique will work for the forearm cylinders. For your armor this will help as well Ideally, you will want to use acrylic paints. This provides two benefits... it's not permanent and can be washed off if you ever want to look like you just walked out of an Emperial Quartermaster. I also highly recommend that you use flat black or the Tamiya TS40 for the recess details mentioned in the CRL. Pay attention to this because not all recesses are painted. I used the same method on mine, but instead of a brush, I used an airbrush with light gray and a damp rag to wipe down the excess wash. Best of luck and the best advice I can give you this is not like a sand trooper or mudtrooper. When it comes to weathering DTs, less is more. Keep it conservative.
-
C’mon! Let’s make that Death Trooper Kmon. WIP
Chaos replied to Kmon's topic in Imperial Death Trooper
Everything is looking good so. Regards to the placement of your abs and lower back, best to put the top front and back armor on, the adjust the abs and back to get the correct placement -
Nice!, Don't forget to paint your snaps black.

-
Engineering Trooper’s Death Trooper build WIP
Chaos replied to Engineering trooper's topic in Imperial Death Trooper
Excellent progress! Sounds like you are eventually going to go for L2, if that is the case, once you perfect your shoulder strap mixture, try and find a mold that has the curvature required for the shoulder straps "Shoulder straps will be rubber with the same appearance as basic, but they will also have a slight inward angled curve following the shape of the neck opening." Also keep in mind, the thigh rubber gaskets are different widths. The ribbed infill shall be made of black rubber, or a semi-gloss black material, or if part of the thigh pieces, have the appearance of being rubber or rubber-like material. The inside thigh ribbed section is wider than the outside ribbed section. -
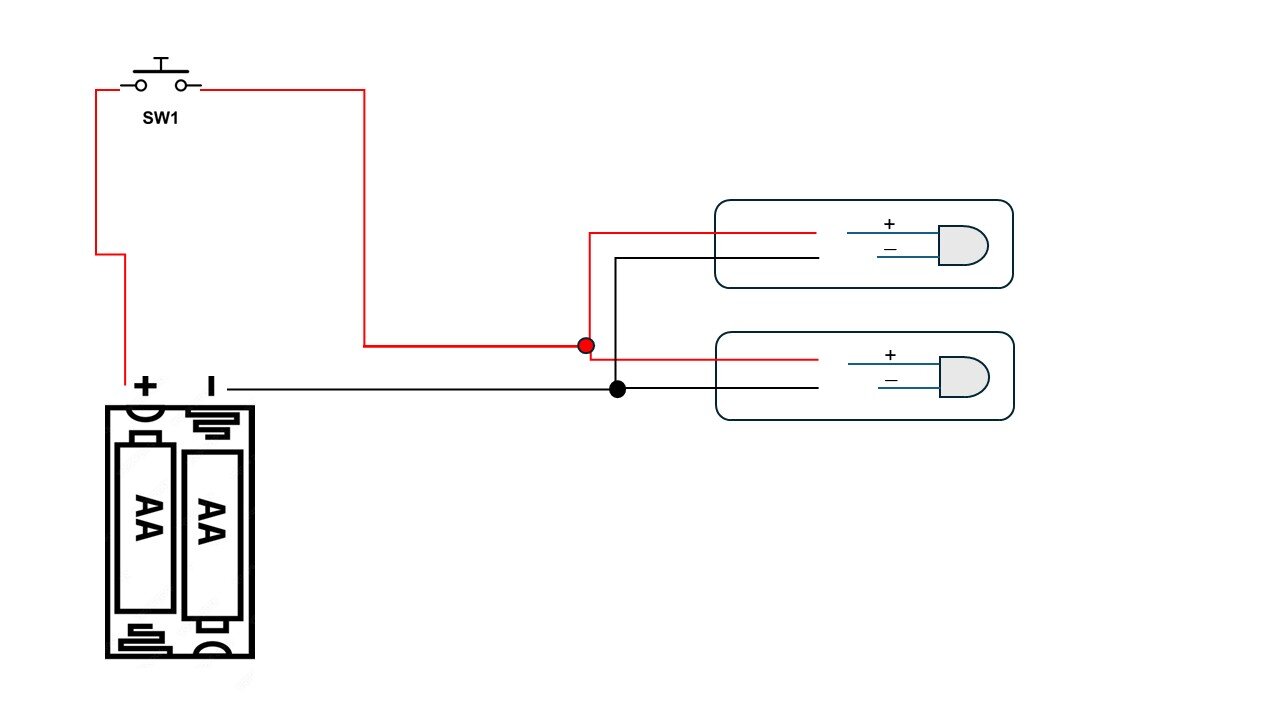
https://www.amazon.com/Transparent-Intensity-Lighting-Electronics-Components/dp/B07RB5FG8W drill two 10mm holes in the center of the lights, cover with white opaque lens or cover, run the wires to your battery and switch ... bam, you have lights.
-
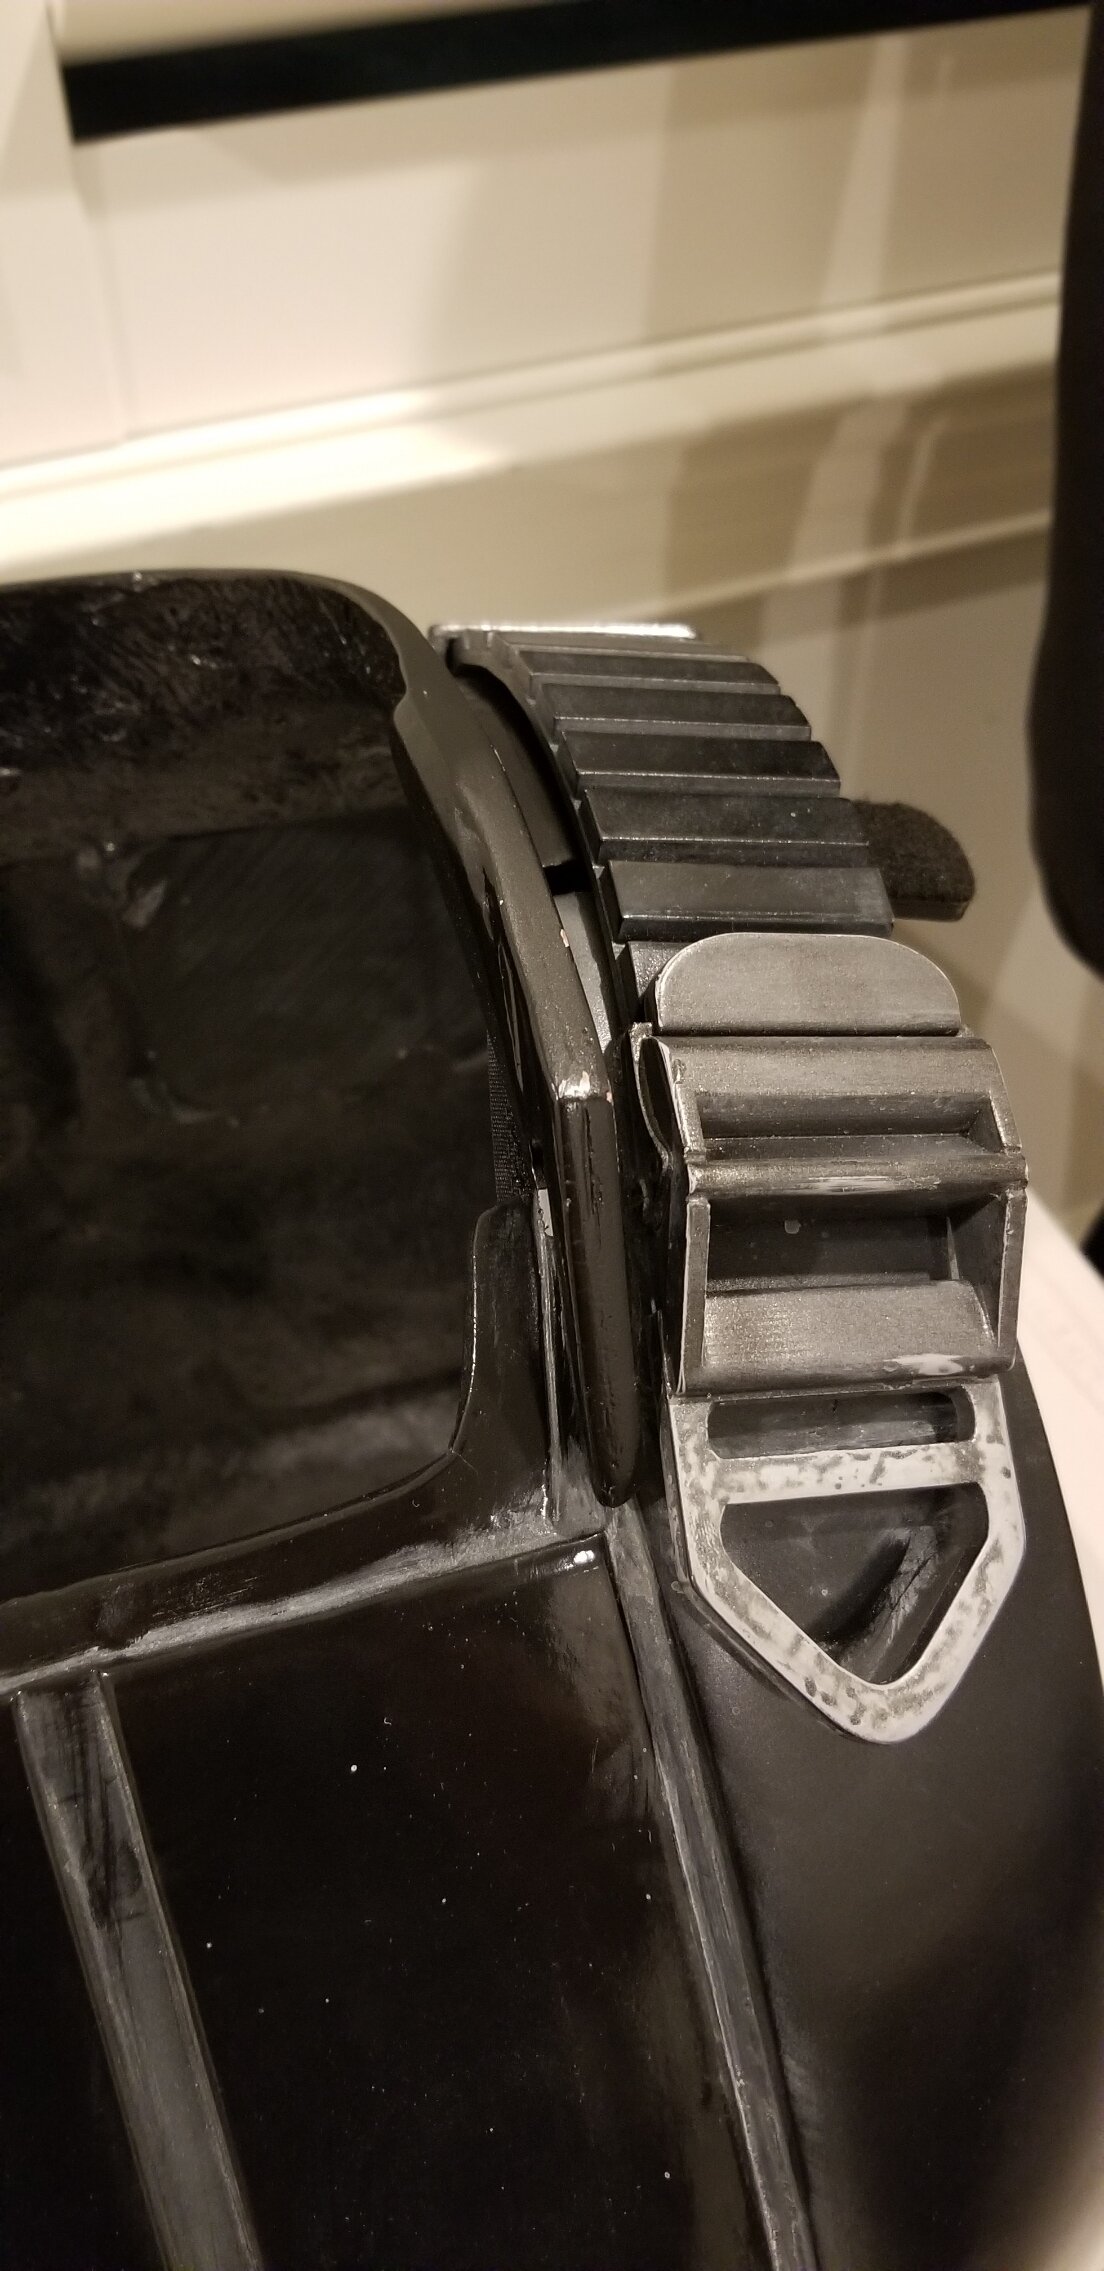
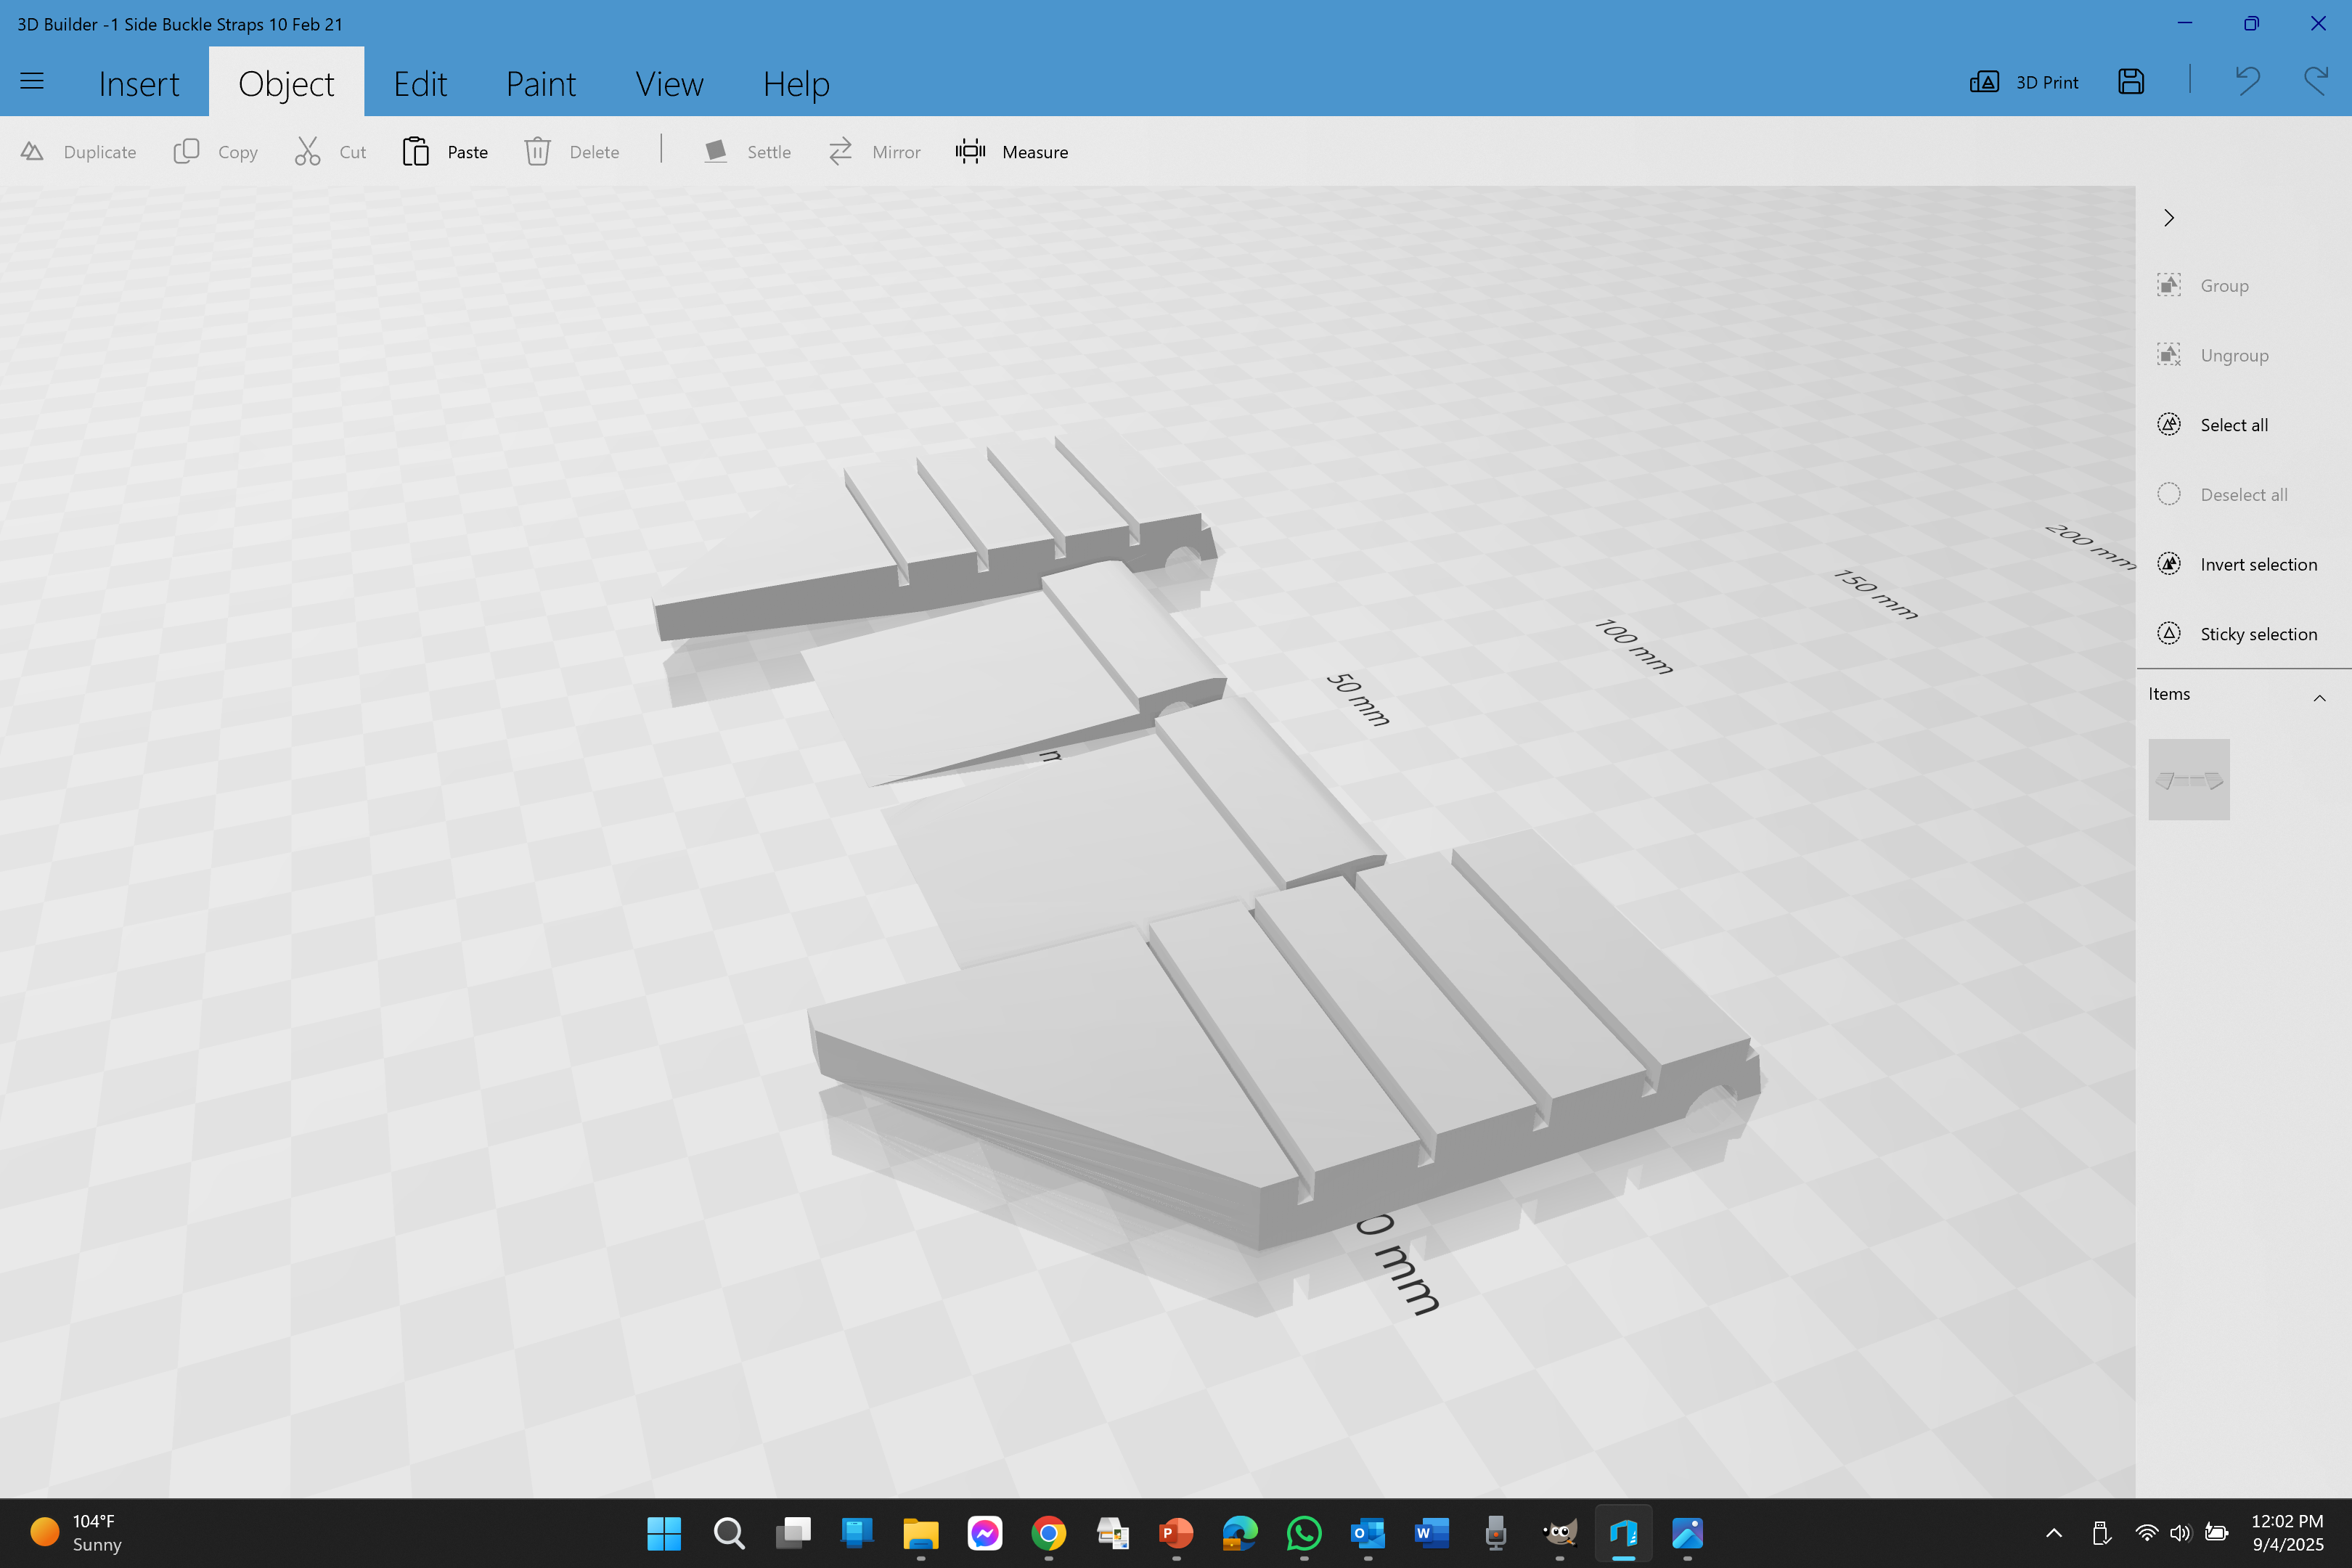
Chris, Do you have access to a 3D FPM or resin printer? If so you can use these files I used on my Jim kit. Print at 100% infill. I didn't like the shoulder and V rings. The lower side buckles are good enough, I just hollowed out the Buckle to accommodate a side strap that I made. I attached my chest rig all the time and it is heavy because I have heavy magazines in the pouches, I have never had an issue with any of it. This kit is expensive in it's basic form, metal accessories are nice to have but so not necessary! 0 Updated Shoulder Buckles and Rings 8 Feb 2021.stl 1 Side Buckle Straps 10 Feb 21.stl
-
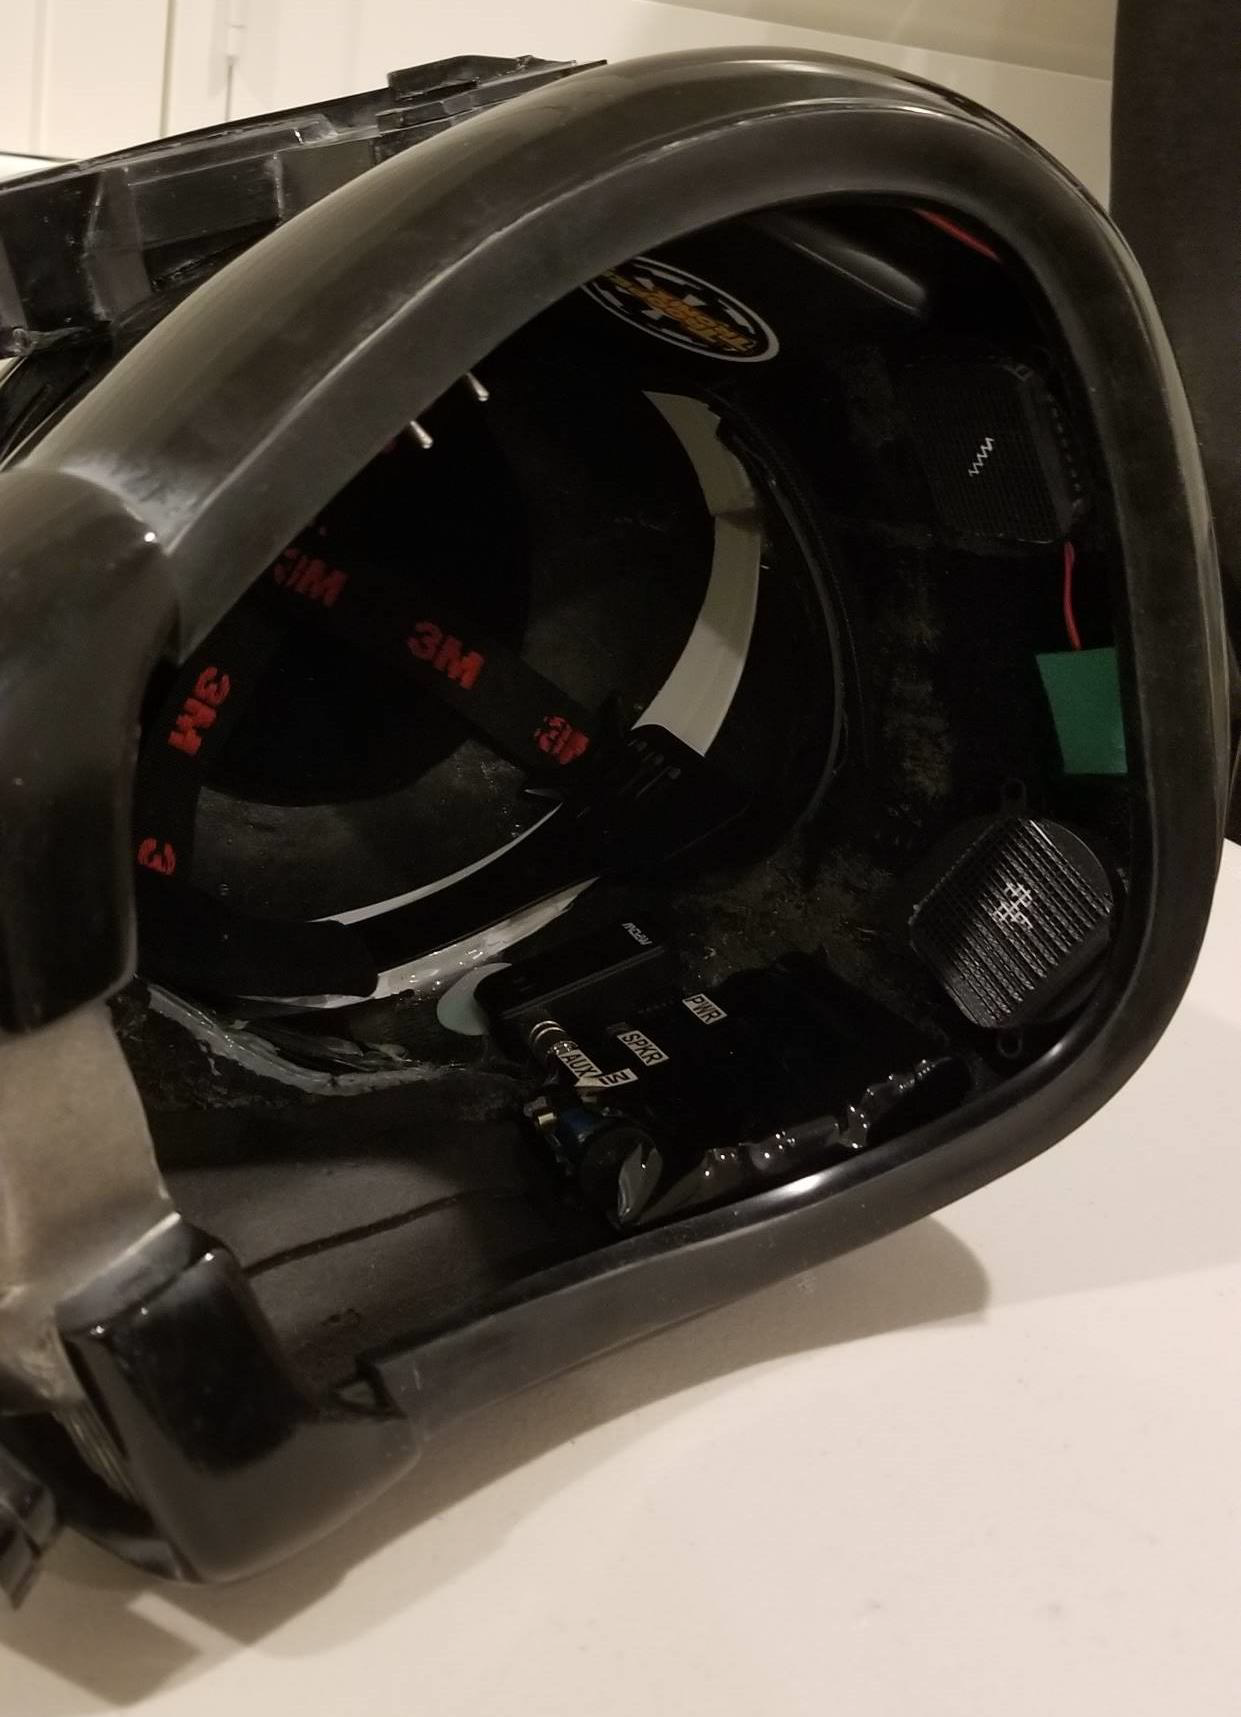
This is the appearance of the flat black rubber seal around the inside edge of an Anovos helmet, it matches the size and appearance of the screen used helmet's rubber seal. Since there is no basic approval requirement for the rubber seal and its only referenced as an L2 requirement your GML will probably approve it without a seal. However, if a rubber seal is on a helmet, your GML may require that it at least looks accurate. Any seal that is approximately 15-20mm across the flat area will work. So make sure that what ever you put around the edge looks like the Anovos seal, especially if you are thinking of an L2 approval. This seal material I know meets the requirement. I get that the CRL doesn't give specific measurements, but this sentence "Text descriptions are only one part of the guideline. GMLs and costumers must consider both text and pictures (CRL and Reference) when reviewing the costume." adds another layer to any L2 determination. https://www.amazon.com/uxcell-Channel-Length-Protector-1-5-2mm/dp/B0C2HMP9MK/
-
Anything that would mount the TD to the belt would work. Paul's mount might need to be modified so that the mount itself sits flush against the curvature of the DT TD. Just don't use zip-ties wrapped around the TD 😄
-
-
Your list is solid. My kit is a Jimmi kit. I have made a lot of upgrades over the years. You will find his parts are slightly heavier than an ABS kit. I like that about Jim's material because ABS wouldn't stand up to the abuse I have put my armor thru. Let me know if you have any questions about anything. Looking forward to seeing your progress.
-
-
Sending you a message.
-
Congratulations Dan!
-
Grand Mosh Tarkin's Death Trooper WIP
Chaos replied to Grandmoshtarkin's topic in Imperial Death Trooper
Here is what an Anovos looks like, if you trim the rim and add the black flat rubber gasket yours should be good to go.
-
👍


.png.b54cc854b39de3db59d4874e725d4eb6.png)
.png.60c09a170f4fe3178f65b02fc8dd8e8c.png)
.png.1b961dcb900674f2ab4ed15f767cbdfc.png)


.png.7c436644010992ba0be35813224a6b64.png)