
Chaos
-
Posts
1,469 -
Joined
-
Last visited
-
Days Won
111
Content Type
Profiles
Forums
Events
Everything posted by Chaos
-
helmet as it is presented on the website is approvable
-
I have the system, with the files I don't need to scramble my voice. I only talk normal if I need to, the rest of the time I just reply to people using the audio file. There is an app for iphones that you can adjust your voice output that sounds similar but not exact to the DT scrambled comms.
-
I've seen DTs with an Aker speaker in their chest armor, it did have to be positioned as to not hinder the abdomen armor. Have you thought about UKSWRATH's helmet sound system? Not sure if you have considered it but here is a video a made a few years back.
-
Death Trooper Specialist Complete/Question
Chaos replied to DT-F17 VLG's topic in Imperial Death Trooper
Rob, you are in luck! If you have a 3D printer or access to one, you can use these files for all your pouches: 1 Updated Belt pouch covers 150x75x8.stl Belt box and or fillers 150x87x60.st Chestrig LEFT pouch covers 140x75x8.stl Chestrig pouch covers 140x75x8.stl Chestrig RIGHT pouch covers 140x75x8.stl -
CJ, I think you may have misinterpreted what was being said. The CRL has always stated: Boots Boots are made from matte black leather or leather-like material with a capped toe and seams as seen in the photo. The sole shall have no heel. The boots extend under the shins. All fastenings/laces are hidden behind a rectangular panel made of smooth rubber or a shiny black material with approximately 1/4" (6mm) wide horizontal ribs. The side edges of the panel shall be turned back on themselves to form a smooth rib-less border. The rectangular panel extends from under the shin. For basic approval the boots have to look "similar" to the Dr Martens but only have to meet the above criteria. For Level 2, they have to either be Jareds or "replicas." OPTIONAL Level two certification (if applicable): Original Dr Martens “Jered” shoes or replicas with a leather pull tab midway on the heel. The rectangular panels shall not be wider than the width of the top of the shoe and will lay as flat as possible against the shoe with the front edge not extending past the upper and sole seam. Currently there are two makers who provide L2 approvable "replicas", Crow Props and Keep Trooping. Right now both have the boots available on their sites: https://keeptrooping.com/product/killer/ https://crowprops.bigcartel.com/product/deathtrooper-boots
-
Jack, Welcome to the Darker side of the Darkside! Excellent choice in choosing a Death Trooper. We have someone who ordered a finished Jinta kit, he would be ideal to connect with for information and tips about the kit. His forum name is @AChanster Best of luck on your kit. Any questions you can think of have probably been asked and answered in the DT forums. Use the search feature, but if you can't find the answer, there are a lot of Troopers who can assist.
-
As far as the Denuo Novo DT helmet, they took over the Anovos production and the helmets are identical. So yes, they are approvable as is. The only thing that I am not 100% sure about would be the screening and black backing of the side snout vents.
-
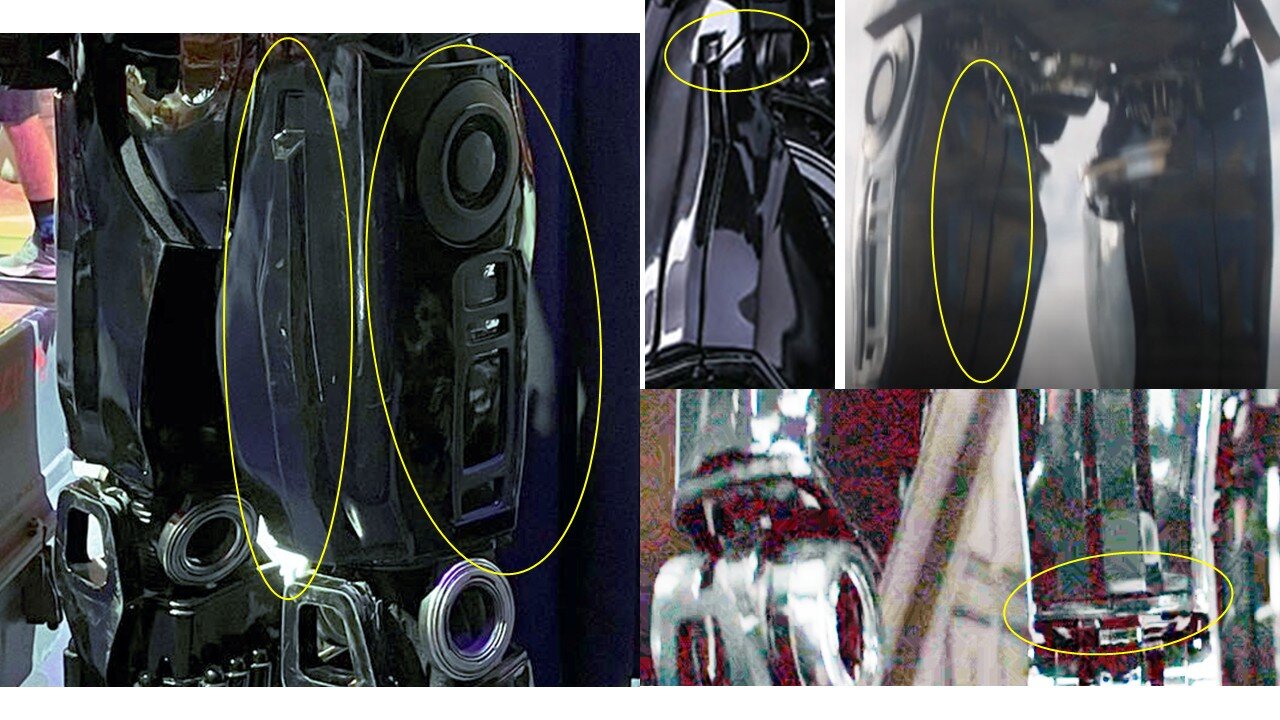
Dan, You are wanting to basically visually replicate these recessed areas of the shins. Because people have had to trim shins to make them the correct length, we agreed that as long as the upper edge appears to be there its acceptable.

-
Those boots are Doc Martens Talib boots, they are basic CRL approvable. I would recommend using those unless you are trying for Level 2, then you would need the DM Jared or replica boots.
-
Asher, excited to hear that we will have another DT in our ranks. If you prefer an ABS kit there are two options right now: 850AW and Jinta Props, both meet basic approval. There are several Troopers who have either made each, or are in the progress of making. I recommend looking through their build threads and note the Pros and Cons to each kit. I took a look at the Black Series helmet. Currently the Preorder option is sold out. I was hoping to grab one and take a hands on look. From what I can tell from the online photos and the SWC video on Fanta Track's site, This is what I see: The Neuro-Saav Macromotion (NSM) Monitor has a white LED in the upper elongated oval which is not in the CRL nor do we see it in any screen shots. This will have to be discussed at the Detachment Level to determine if any CRL wording will be changed. All the assembly seams will need to be filled in which will requires a repaint. The electronics button on the NSM shouldn't be an issue as it is already part of NSM details photo on the CRL. The paint scheme does not have all the "asymmetrical" colors, it looks as if it is all gloss black. As long as a helmet presented for approval has all the CRL requirements and looks like the CRL photos, it should be approvable, even if it is a Black Series.
-
Revision 0 Thigh Armor Gloss black in color unless noted below. May be painted in accordance with the Color Scheme Guide. If used, all armor pieces must be painted using the Color Scheme Guide. It has an overall elongated rectangle shape and the appearance of one closed piece with the lower portion tapering inward just above the knee. There is a 0.4" to 0.61" (0-15mm) recess around the lower edge of the thigh. The front side is slightly rounded outwards and tapers inward top to bottom. There is a narrow elongated vertical recess approximately 1.2" to 1.6" (30-40mm) wide centered on the front of the thigh which starts at the lower edge and ends approximately 2" to 2.4" (50-60mm) from the top end. There is a trapezoid shaped raised strip inset in the front recess. The lower end is flush with the bottom edge of the recess 1" to 1.4" (25-35mm) from the top edge. Refer to the CRL photo for details. There is a narrow recess that runs from the inside corner of raised strip at 45 degrees up to the inner thigh opening. There is an elongated vertical recess approximately 3.9" (100mm) wide in the lower 2/3rd of the outside thigh. There is a raised inset detail which has four rectangular cutouts of varying height aligned vertically. Detail is flat or matte black in color. Refer to the CRL photo for details. There is a raised detail at the top of the outside thigh which has three raised circle rings of varying height and width. The detail is flat or matte black in color. There is an elongated vertical recess approximately 35-50mm wide centered on the rear of the thigh. The recess runs the length of the thigh. There may be additional details on the upper inner thigh area that has the appearance of mechanical jointing. Details are silver in color. Thighs may be slightly weathered but must be uniform with the rest of the costume.
-
Hey Dan, sorry for the delay on this but the photos you posted over on the FB DT build group reminded me to take a look. I figured I'd post it here instead of on the FB page. If you have any questions about what I am talking about let me know and I can post some explanatory photos. Couple of things before you submit for basic approval. First thing ... you have done a great job with your kit, it's obvious you put a lot of time and effort into it. There are just a few "minor" things to work out, most you have identified already. - Forearms, the ladder detail is aligned with the bicep and shoulder center raised cover strip - Left forearm, cylindrical detailed parts, need to be painted metallic black (TS40) or weathered silver, since you already have them silver, just hit them with some thinned black paint wash. - Boot covers, put some velcro on the front corners to make the covers lay over the shape of the boot toe. This will keep you from looking like you have “duck feet” - Boot covers, if you put a piece of velcro on the front top side of the cover, and the other piece on the shin front inside, it will help keep the boot cover under the shin and help keep your shin from rotating around. - Thermal detonator, remove the zip ties or whatever the two bands near the middle. - Forearms/Shins, any pieces that you have clam shelled for closures, make sure they are completely closed when you submit. - Biceps, CRL “It is held in place by one or two black elastic cord straps.” The elastic cords are the same type as a ponytail holder (which is what they were on the screen suits. The elastic band you have is way too wide. Ask your GML if he/she will accept it. I can go back and take a look for Level 2 if you like.
-
That is why I have multiple harnesses.
-
I wanted all my armor sections to move independently. example my upper chest and back sit squarely on my shoulders and move with my upper torso. My abdomen and lower back are attached as the corset which is snug with my waist and twists with my lower back and abodmen. My thighs need to be supported to keep the correct height and gap when I raise and lower my legs, climb stairs, sit down etc. The correct height is set based off my shoulders. This is where I chose to suppport them from. I origianlly had everything strapped like a TK where everything was attached the piece above it and then hung below. for less complicated kits that works fine, but the weight of all the DT pieces plus the complexity of how the parts are supposed to move led me to my current strapping process. If you check out Paul's Shore Trooper, it is basically the same way.
-
I figured out how much I needed to trim off the top edges of the thighs to keep them from pinching (it was about 2") So I put painter's tape along the top edges and measured 2 " from the top edges and just drew a new top edge. Then I uses a dremel with a cut off wheel to cut the 2" off. You can use any type of ABS or thick plastic material to cut a strip. My kit has the same bottom edge that is turned back and has a gap. The piece that I designed has a raised block that slides into the gap so that it can be epooxied to the inside of the lower abdomen. photo and file attached. UPDATED abdomen belt extension piece.stl
-
This might help. Go to pages 20-23 for a solution. This is how I affix my belt.Armor Strapping.pdf
-
No need to clear coat the TS40, won't effect any approval at all.
-
Grand Mosh Tarkin's Death Trooper WIP
Chaos replied to Grandmoshtarkin's topic in Imperial Death Trooper
^^^this^^^ -
It makes sense to say all hard pieces are gloss black unless otherwise stated. Then we can eliminate the gloss black on each section 👍 I concur with your edits. I think the thighs are next in my cue. I'll get it on here this weekend.
-
I'll take a look this weekend. Since it looks like it is a Jim Tripon kit I know exactly what I had to modify to meet L2.
-
Grand Mosh Tarkin's Death Trooper WIP
Chaos replied to Grandmoshtarkin's topic in Imperial Death Trooper
Don't mind at all. Happy to answer any questions you may have -
Grand Mosh Tarkin's Death Trooper WIP
Chaos replied to Grandmoshtarkin's topic in Imperial Death Trooper
Hey guys, thought I would throw out a tidbit concerning weapons and Level 2. Weapons are not required for any type of approval, but if they are included in approval photos they must meet the Level being applied for. With that being said, if you are going for Level 2 and your weapons are only Level 1, don't use them in the photos. For the L2 action shot you can point, fist bump, peace sign etc and it counts as an action photo. By the way any DT L2 approvals come my way for input. -
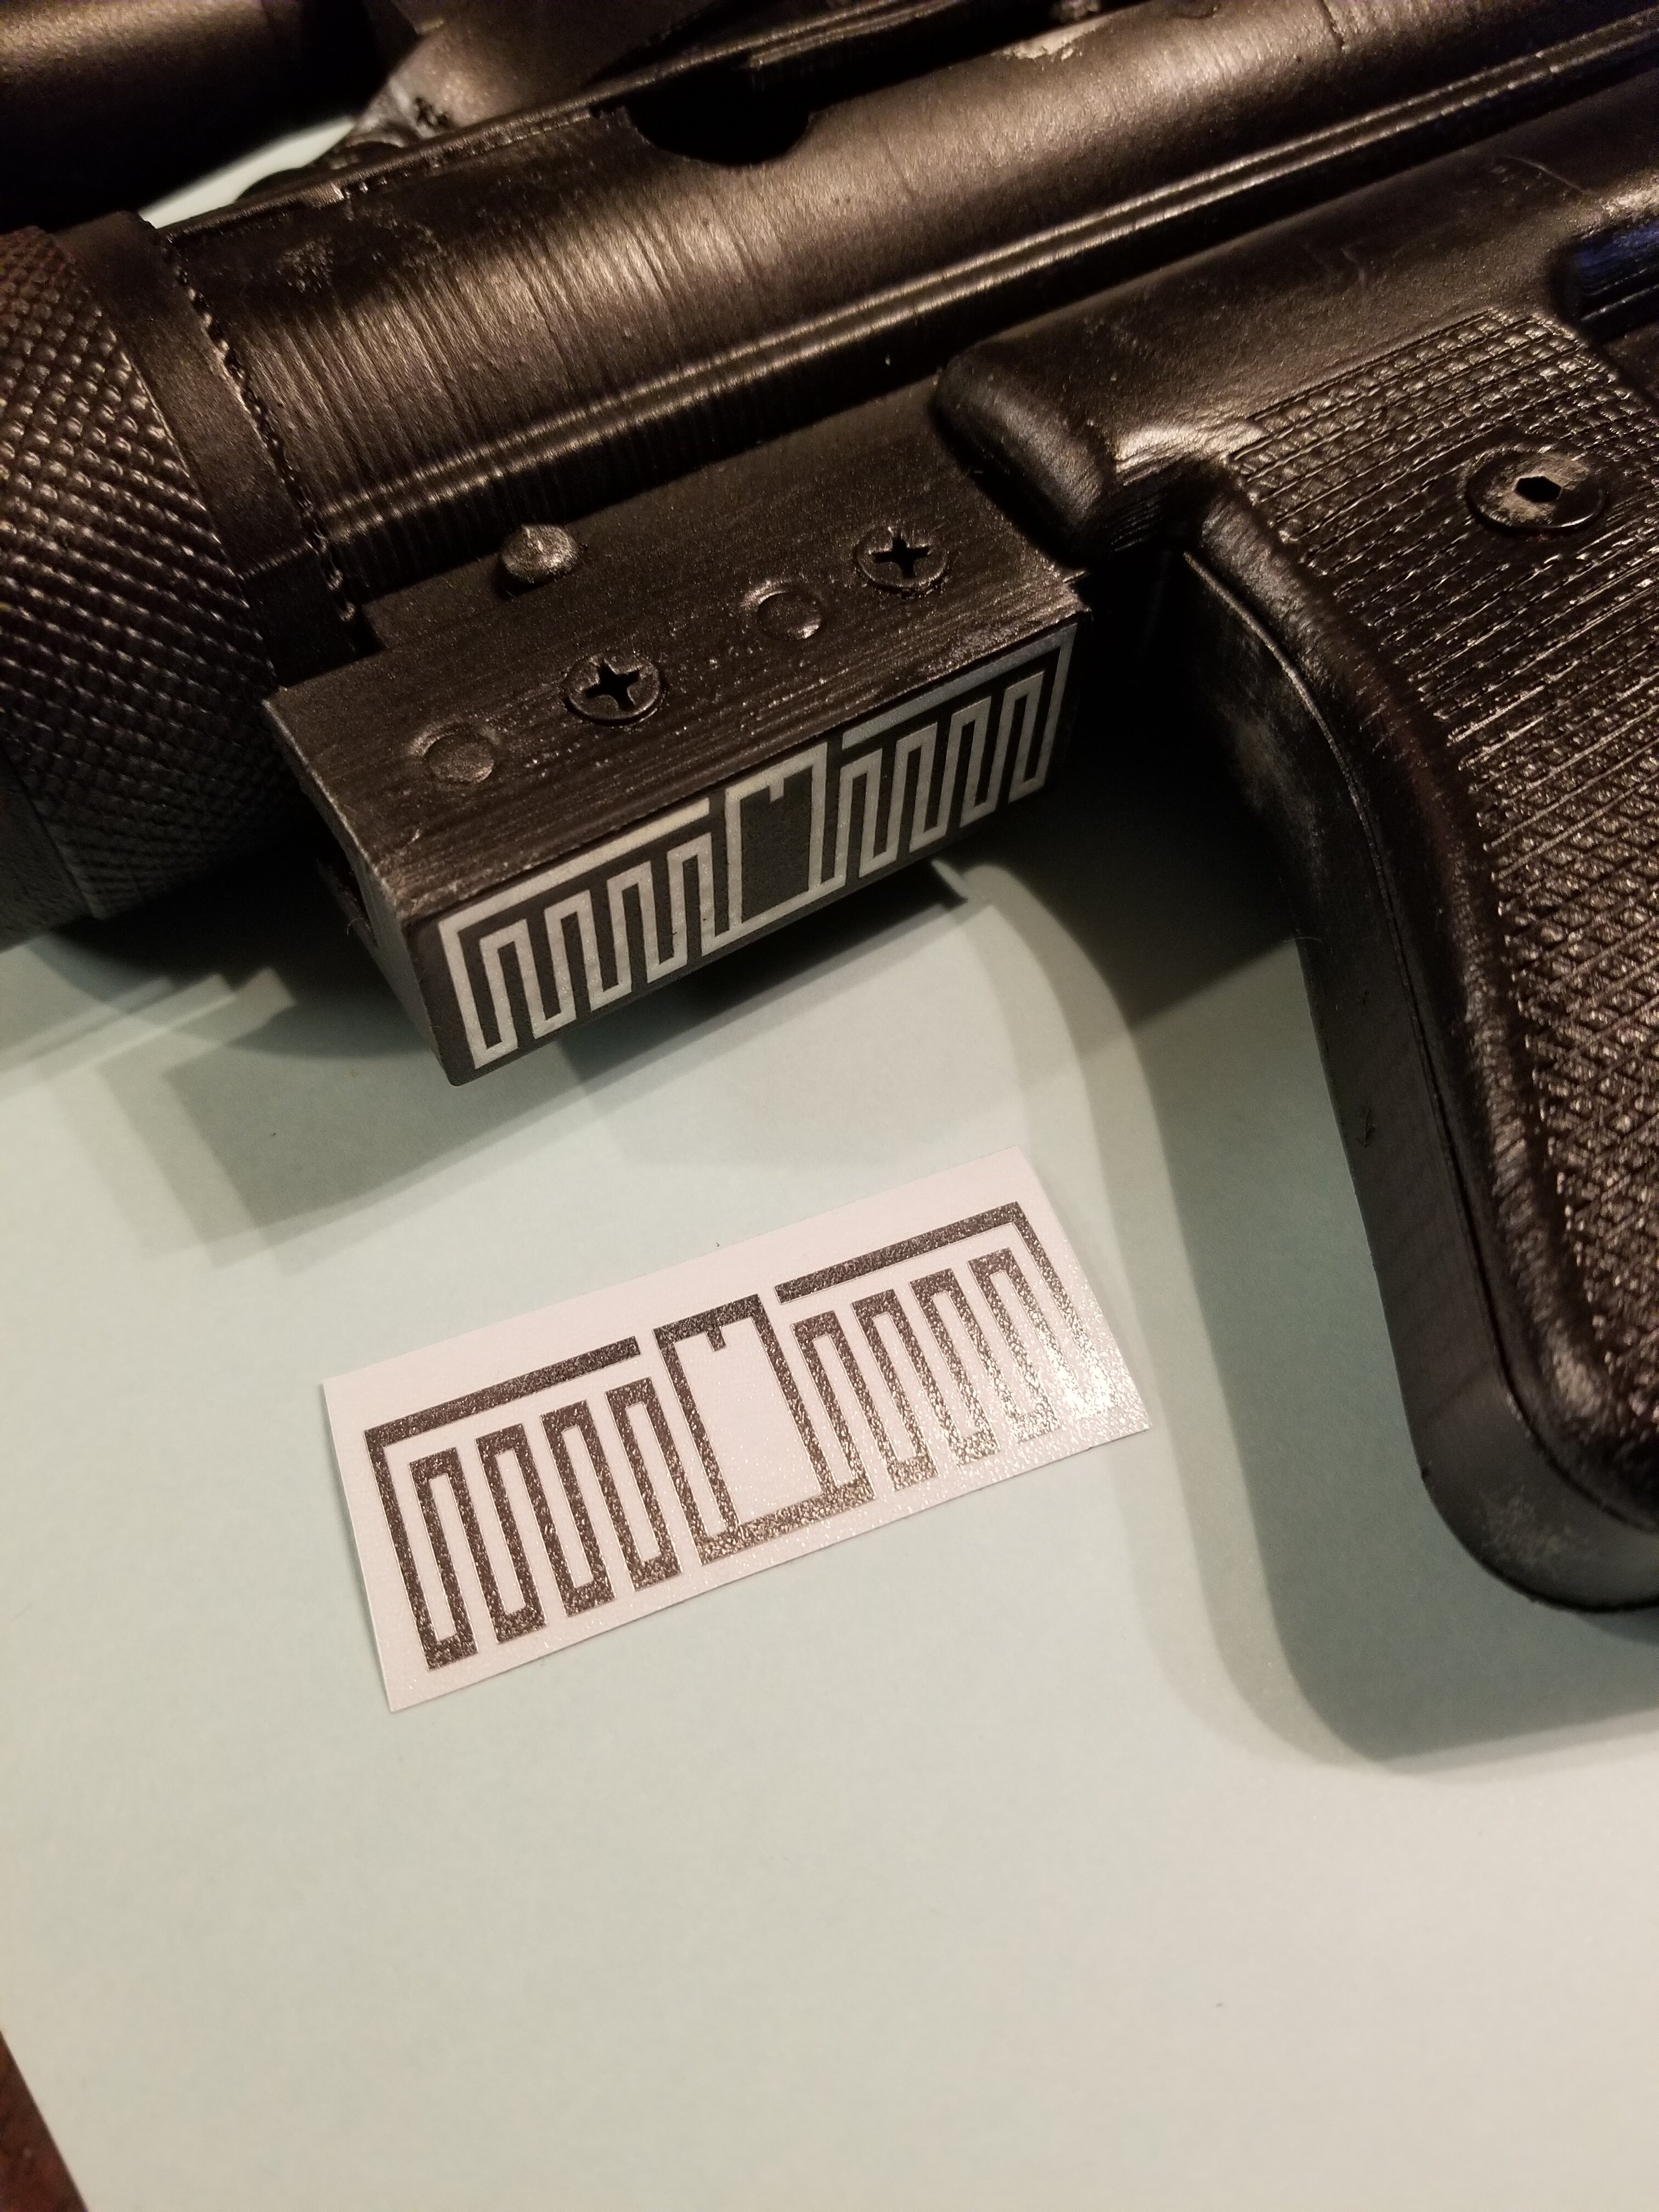
SE-14R - Circuit card sticker / decal providers or file?
Chaos replied to MarcG's topic in Imperial Death Trooper
It's the lighting and angle, both are the same type sticker. -
SE-14R - Circuit card sticker / decal providers or file?
Chaos replied to MarcG's topic in Imperial Death Trooper
If you have someone who has a Silhouette cutting machine I have a file to use. When I was not working overseas I had them in my Etsy shop. I used chrome adhesive vinyl to cut the decal out. It has been on my pistol for years and has not peeled off at all. LOL someone that I gave the file to some years ago has started selling them. Kind of a dick move since I gave the file to him but it is what it is. If you want the file send me a PM and I'll send it to you.
-
Grand Mosh Tarkin's Death Trooper WIP
Chaos replied to Grandmoshtarkin's topic in Imperial Death Trooper


.png.e240a175d869103476eb1cf5764051dd.png)
.png.1614eaf8dfd27a912540bf80cd6e9d77.png)