

Rat
-
Posts
208 -
Joined
-
Last visited
-
Days Won
8
Content Type
Profiles
Forums
Events
Everything posted by Rat
-
So I noticed with the update the bucket had a clear s-trim around the bucket opening, but I didn't notice any reference to it in the actual CRL. Is it an optuon or required?
-
Yes this helps a lot @Dark Helmet. Did you just E-6000 the mesh to the lenses? I'm thinking of velcro as well, some 20# industrial. I'm also thinking of using the velcro for the face plate so as to avoid the screws.
-
Yeah I made some cross struts, but they're a little too long. My issue I'm having at the moment is getting rid of the gap near the cheeks. I trimmed at the flash lines and still have a bit of a gap. I'll get some photos added tonight when I'm off work.
-
So I got the lenses in yesterday. However I have a couple of questions about them. First question is how do you mount the mesh? It seems there's some excessive flashing and it severely limits the gluing surface. Mounting them I'm thinking of 10# industrial velcro. Second if I trim the lenses where should I trim them to? Thanks in advance.
-
Moving right along. So I put in the support struts for the mohawk section and then realized it was off a bit. However I realized it was because I cut them just a bit too long. . Now for the positive side of today's progress. The shoulder strap mounts are on and the straps are a tight fit and hold the weight well. Now I should get on finishing that crimson trooper with the fine sanding and rivets and then paint.
-
Is there suppose to be?
-
Si last piece for the day. Shoulder strap mounts done though I'm not sure how the straps work into them after mounting. I trimmed as much as seem manageable, but they're still a tight fit. If anyone has suggestions I'm all for hearing them. .
-
TD together and ready for paint. Back plate "OII" done just need to add the shoulder strap connections. So these in not sure if they are still too thick or not. I suppose I'll wait for some input before adding them. Also got the greeblies sanded and ready for paint and gluing.
-
Bucket decals are in.
-
The trimming has started and so far I'm happy with the way it is going. I have a few questions, but I think I've gotten it mostly sorted out. So I realized the back plate didn't fit the back without removing the inside section of the back. I'll update as we go.
-
So carrying on with the fun building. So I got that BBB delivery about a week ago and I've gotten as far as rough trimming. Got that box opened up and did inventory. So it seems everything is there. Lenses from Pole are on order and waiting on customs clearance. I'm pretty sure I'll go for specialist level, but as this is a commission it will be up to the client if he wants to go for that approval.
-
So I will be adding a DLT-20A to this. It's a PLA print from AprilStorms on etsy. Other than the pistol grip being a bit chunky it's nice and has a good weight to it. It sort of makes me sad I can't leave it with the black and red color scheme.
-
So my gloss clear wasn't the 2X, but rather this instead. This is the automotive paint I used Dupli-color Flash Red. It only comes in a 8oz. can so I think it took me about two and a half or three cans for the entire kit.
-
So the paint I used for this was Dupli-color Flash Red and Rust-oleum 2X gloss clear. I'll get some photos of the can with a product# tomorrow.
-
PROPOSED MODIFIED CRL- DEL MEEKO- finalized text. (COMPLETED)
Rat replied to Blackwatch's topic in Inferno Squad Del Meeko
Curious question I'm prepping to do a commission build for this and the kit is coming from Walt at WTF. My question is this is his bucket okay for this up to specialist? -
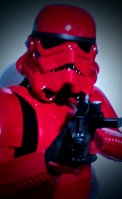
PROPOSED CRL MODIFICATION: Crimson Stormtrooper / Magma Trooper
Rat replied to RAIDER's topic in Crimson Stormtrooper
It has been a pleasure working with you all. -
So I'll be starting a Del Meeko commission build soon and can't seem to find a river size or type. There are the rivets for the leather belt and then the ones for the box belt. Any info I can get would be appreciated.
-
PROPOSED CRL MODIFICATION: Crimson Stormtrooper / Magma Trooper
Rat replied to RAIDER's topic in Crimson Stormtrooper
Can't wait to see this finally go live -
The things we do to get a new costume. LOL!
-
So some slightly updated photos and I think I can call this build done. And now time for a coffee.
-
So it's been slow going and life interrupting, but finally the end is near. So close to being done.
-
So in the next day or so I'll be making a big photo update to this build and hopefully an end to the build.
-
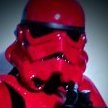
Got rid of that weird headlight look on the mic tips.
-
So I got the first full test fit in despite not feeling well. Happy that I only have a few minor tweaks and adjustments to make and those are already underway. Almost to the finish line.
-
Who doesn't?


