Lt. Dan
-
Posts
225 -
Joined
-
Last visited
-
Days Won
14
Content Type
Profiles
Forums
Events
Everything posted by Lt. Dan
-
Congrats on the approval Michael!
-
 George, this was nothing personal. Don't get me wrong, if I upset you I'm sorry! But especially when you spend so much money on a costume, the shoes shouldn't be the achilles heel of the costumes overall appearance. To me they look weird, just my 2 cents! In the end its up to your GML.
 -
I totally agree with @Chaos statement above! All we can do is to provide help & tips if asked, but in the end its a personal attitude to certain things especially details. In my opinion its irrelevant if 80% of the shoe is hidden by the armor. Its a certain part of the costume and should be correct as possible even when the prices are high and the resources are low. Otherwise another cheaper costume would be the better choice.
-
ARMORY SHOP PROPS UPDATE
Lt. Dan replied to HRivera7322's topic in Armor/Soft Parts and Where to Find Them
What a shame this whole thing is! Decided to buy a raw casted Jet Trooper helmet from Denis. May the funds help you! -
Very nice Michael?
-
Here´s another vendor who offers them: https://850armorworks.com/Deathtrooper-Rubber-Wrist-Straps-p276306684 DIY is difficult I think, because you need a negative mold to cast the parts. This is only worthwhile in larger quantities. And carving the parts out of the solid might not look great either?
-
TheFireAwakens1807's Deathtrooper WIP
Lt. Dan replied to TheFireAwakens1807's topic in Imperial Death Trooper
Woohoo, time to get started!? -
Would these boots be ok to use for the deathrooper?
Lt. Dan replied to GeorgiosHD's topic in Imperial Death Trooper
As above stated from @nanotek, way too much issues with this boots. Here, the effort of reworking would exceed the benefit in my opinion. If you don´t want to go with the "Killer" from IB, try searching the Doc Martens "Talib". These are pretty much around, easy to modificate and level 1 appropiate. -
Coating for interior of Death Trooper armor?
Lt. Dan replied to Tiderion's topic in Imperial Death Trooper
I backed the inside of my armor additionally with coats of fiberglas and then sprayed Plastidip on it. Due to the very rough surface it holds excellent. Currently, I have not yet noticed any noticeable wear. Plastidip is only easy to remove on smooth surfaces, then you can peel it off from the edge. -
I just kept it simple and used benzine from the hardware store!
-
Looking good so far! Watch your left shoulder strap?
-
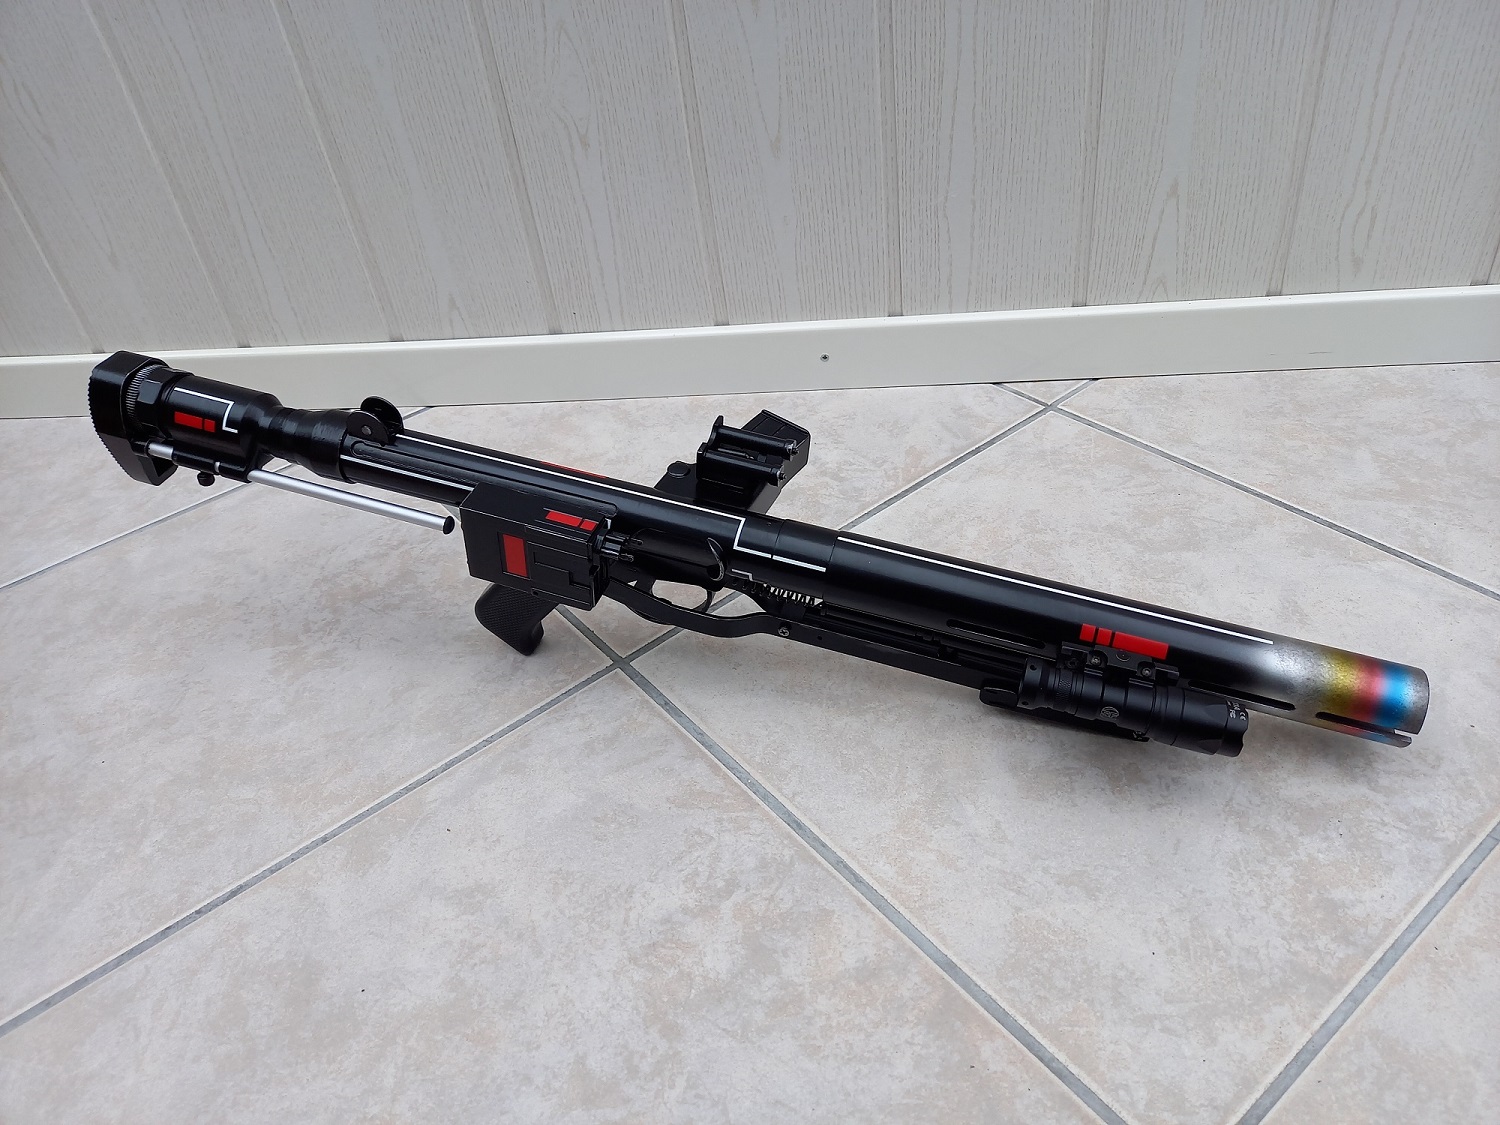
Hey Hector, that was exactly the colour I used for my E-11D barrel + Alclad transparent blue, red and yellow for the scorch effect. Dulled it also a bit down to give a smokey effect. Worked fine!

-
Coating for interior of Death Trooper armor?
Lt. Dan replied to Tiderion's topic in Imperial Death Trooper
I went with "Plasti Dip", a kind of sprayable liquid rubber which worked well. But sanding at first is a must to shorten the fine glasfiber hairs. -
Tiderion Death Trooper Specialist build
Lt. Dan replied to Tiderion's topic in Imperial Death Trooper
Hey James, nice shopping list and a good start on that build. Looks like a lot of work ahead? Looking forward to your progress! -
It can't be shiny enough in my opinion?
-
Hard to say Mike, but did you painted the grooves of the thighs the same way as the the shoulder bells/biceps armor? CRL says: The grooves may be matte or metallic black, matte silver, or dark gray and must match the rest of the armor. Also, I personally would paint the holder of the forearm rockets black.
-
As far as I know, Jim Tripon sells his undersuits seperately. I ordered the soft parts for my ICAT Driver from him also without armor. So, that shouldn´t be a problem for the DT stuff as well.
-
I think that also depends a lot on your camera. I use a 3:4 format. Personally, I always take the approval photos in daylight and indirect sunlight in front of a bright, non-blinding wall. No flash! I have a winter garden, which is perfect for this. You have to find a place and try it out until the pics are good I'm afraid. Btw, your GMO's are quick in replying?
-
Yeah, I recognized also but I wasn't really sure about that because of the dark pics. Great that you spotted it by yourself and fixed it?
-
Hello Mike! Nice looking first suit up attempt. Considering that you have no craft experience as you wrote, then it´s not too bad I would say. While looking at your pics I recognized some spots where you should do some rework. First of all, when you submit your pics for approval try to get better light, because some shots are very dark and details are hard to mention. You must wear a balaclava to hide your face skin under the helmet. When I´m right, you don´t wear one on the pics. Watch your shoe panel. It has to extend from under the shin, which the left one doesn´t do. Also, one of the pull tabs has come loose I think. Your shoulder bells look like airwing flaps. Try to pull them down a little more depending on your attachment system. Its hard to mention in the close ups of the helmet, but there must be eight vent ribs on each side panel. I only count seven when I´m right?! The belt setup on the back isn´t that advantageous. The left small box is too way backwards and should be between the hip and kidney. The thermal detonator has two different end caps which must be vice versa than yours. Also the detonator should be located higher, so that the big back pouch could fit better underneath it and doesn´t look that squeezed. All in all the arrangement of the lower back armor and the posterior armor should be improved and the belt shouldn´t be crooked that way. Hope that helps for the beginning, but again: not that bad for the start!?
-
I like the one with the knee gasket. Looks like a peeing dog? Great?
-
Next time, I'll include a description for the numbers. I wasn't aware off that somebody didn't know what I mean?
-
Questions regarding recess and highlight painting
Lt. Dan replied to Tiderion's topic in Imperial Death Trooper
First of all, thanks for the trust that is put here in my opinion, but I am not the official costume advisor this is @Chaos and he should comment on these subtleties. I had problems with the colors myself, but I strictly followed the colour scheme guide and the CRL. As for the paint code for dark metallic gray, Tamiya metallic black TS40 is recommended. -
At first glance it looks good, BUT the first thing which is obvious when reviewing the CRL are the slotted vents on the side panels. There must be 8, but this one only has seven. Also, you couldn't strive level 2 with this one because of the nose bridge ribs. These have to be 6, 8 and 9. AND, this shop is also located in Russia?
-
TookBreaker's Death Trooper - COMPLETED
Lt. Dan replied to TookBreaker's topic in Imperial Death Trooper
I waited seven months for my kit regularly. If you ordered in February, you don't have to worry. Not even without this damn war! ?