Leaderboard

Popular Content
Showing content with the highest reputation since 09/29/2025 in all areas
-
Received GML clearance , just to wait for the admin stuff to get done and then request full access Then V2 lol3 points
-
gonna try my best to log everything in order. im slowly working more and more on the kit during the weekends as its my only availability right now. ive been sanding and filling this helmet the entire time. got the last round of sanding and hit it with black paint. some areas are needing to be fixed but that is completely okay. once i have all the pieces i need to be black i will hit everything with 2k gloss along with the help of a local star garrison friend. Jim notified me last night my undersuit was ready to be shipped so i paid off the rest and it is now on its way. very excited to get it done Up next. we finally, got the 850 kit in. now some things to address. i was unaware they were gonna trim some of it as a favor. at first glance i was very confused until they reached out a couple days later. not all of the pieces are PLA printed, it is all in fact resin, which means i would have to fully paint the entire armor set to match. the backplate they did do the hard part for me so i now have to clean it up entirely and fix a corner. i was missing a back side wing so i am being sent extras as we speak. the thigh connector parts were looking a little rough with the mold so i kind of left it alone for now until i work on it more. looking at it all was a bit overwhelming but yeah, i worked with what i got. Sunday was the 501st armor party. the host was great for giving advice on how to cut and trim excess materials. it took about almost 4 hours to cut everything as much as we can. next we're gonna have to clean up the rest we can with belt sander to get it all fine and trimmed and then we can glue everything together for assembly.3 points
-
are we satisffied with the proposal above? id like to move on.3 points
-
After emailing 850 and having to put my foot down, i finally got the shipping notice that it’s on the way. Hopefully it’ll be here next time in time for the 501st armor party I’m attending3 points
-
Alright, This bad boy is almost ready for a test fit. I have an event on october 18th so i hope i can make it approved in time
 3 points
 -
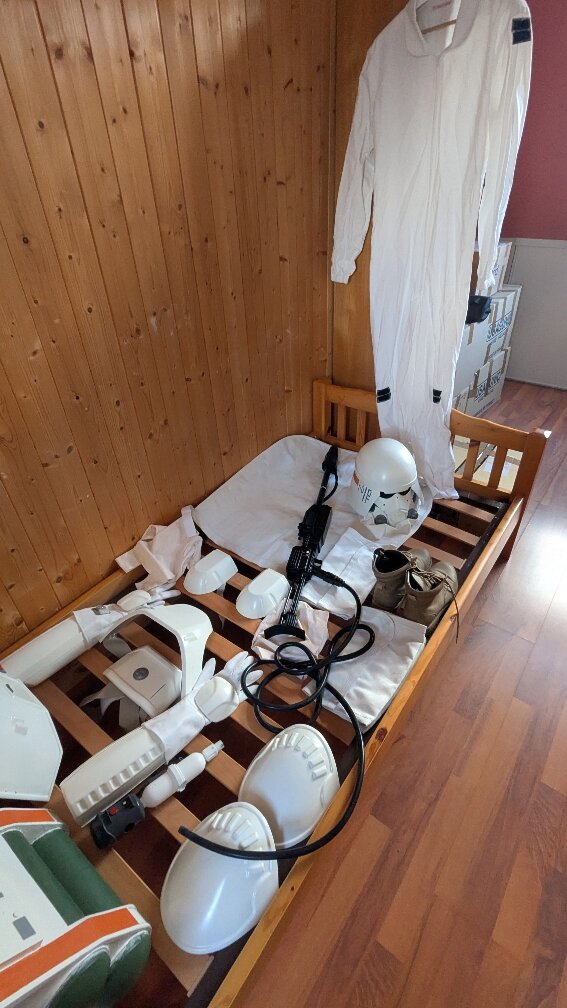
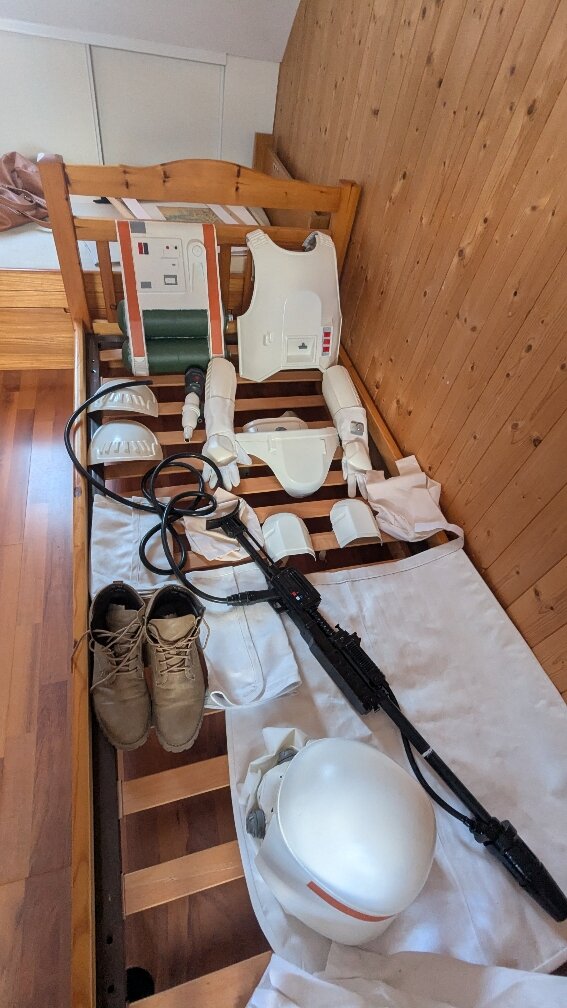
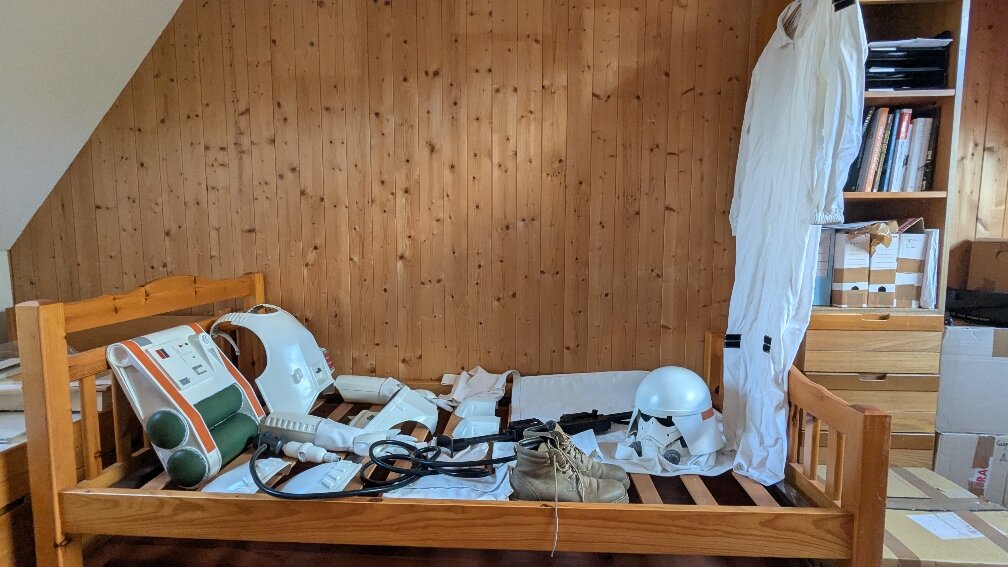
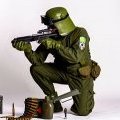
Got to take the death trooper out for a zoo troop and see how it did. Lots of fun, and lots of things to fix. First off, the cooling vest suggestion was a life saver in tandem with some big ol’ fans in my bucket. I was actually reasonably comfortable for the troop. The first big issue though, was my ability to walk. As you can see in this picture, my leg armor is touching, no good there. That is getting further trimmed. Second, my helmet pressed on my nose which was not immediately obvious to me that it would be an issue, until of course I was light headed and out of breath. I have modified my padding so it sits higher, and furthermore does not rest on my nose at all. Still waiting for official approval from GMLs but I have plenty I can work on in the meantime time. Thanks all for the help so far!2 points
-
Greetings. I'm brand new to cosplaying, but I've always wanted to build some Star Wars outfit. I naively decided to make a Death Trooper outfit. It's just black right? 😝 I bought some STLs for the helmet, armour and a E-11D Stormtrooper Blaster from GA and started printing. I'm printing the parts on a Voron 2.4 350 using ABS and a layer height of 0,12mm, so that I can reduce the layer lines a bit. So far, I've printed the top of 1/2 of the helmet and the mandible and I'm busy printing the sides and the back. I saw an interesting technique called vapour smoothing, which I want to try, but I'm willing to "Learn to Love Sanding™. Any tips, tricks or other advice will be much appreciated.2 points
-
Looking good Trooper. Yes, the DT is a very warm and motion limiting armor kit. I have fans in my helmet; Additionally, I used a construction helmet liner to provide more air flow around my head. Most people complain about the range of motion in their upper legs and pinching between the thigh armor and cod piece. You can make the gap bigger between the thighs and cod piece by determining how much of a gap you need and trimming that amount off the top of the thighs. When you trim the top of the thighs, follow the shape all the way around so the appearance of the thighs shape remains the same. If you are getting binding or limited range of motion in your knee area, you can cut an additional amount off the top of the thighs and raise up the thigh armor, this will increase the knee gap enough to allow for a greater range of motion. I am not sure how your torso armor is strapped but if you are having issues turning your upper torso, a way to increase the range of motion is to have the chest and back separate from the lower back and abdomen armor strapping. This will allow your upper body to twist and the lower armor to stay in place. Issues occur with the helmet hitting the neck collar in the back when looking up. There is not much to do about that other than either making sure the collar is as close to your neck so that the helmet opening allows the collar to rise into the helmet opening. Or you can trim the neck collar's edge down some to give you more of a gap. It took me almost twelve troops and experimentation to get all my armor strapped and sized so it gives me enough freedom of movement to walk up and down stairs, climb onto parade trailers, and be able to actually sit down. Even to this day I am still tweaking mt DT set up. Shins, if clam shelled, definitely need a locking type closure. I use Velcro along the vertical split on mine and it works perfectly.2 points
-
Hi Chris, We will get together to get this sorted for you. Please be patient & we will have you sorted as soon as we can arrange the meetup. Thanks2 points
-
Sounds good. Thanks for your understanding.2 points
-
We will working on it! Please be patient!2 points
-
It is something we'll need to do on the backend via the Holocron. I'll get with @Dropkick and @BlacXabbath to show them how to do it. We were supposed to do it a month ago but my wife passed away, so Legion kind of took a back seat.2 points
-
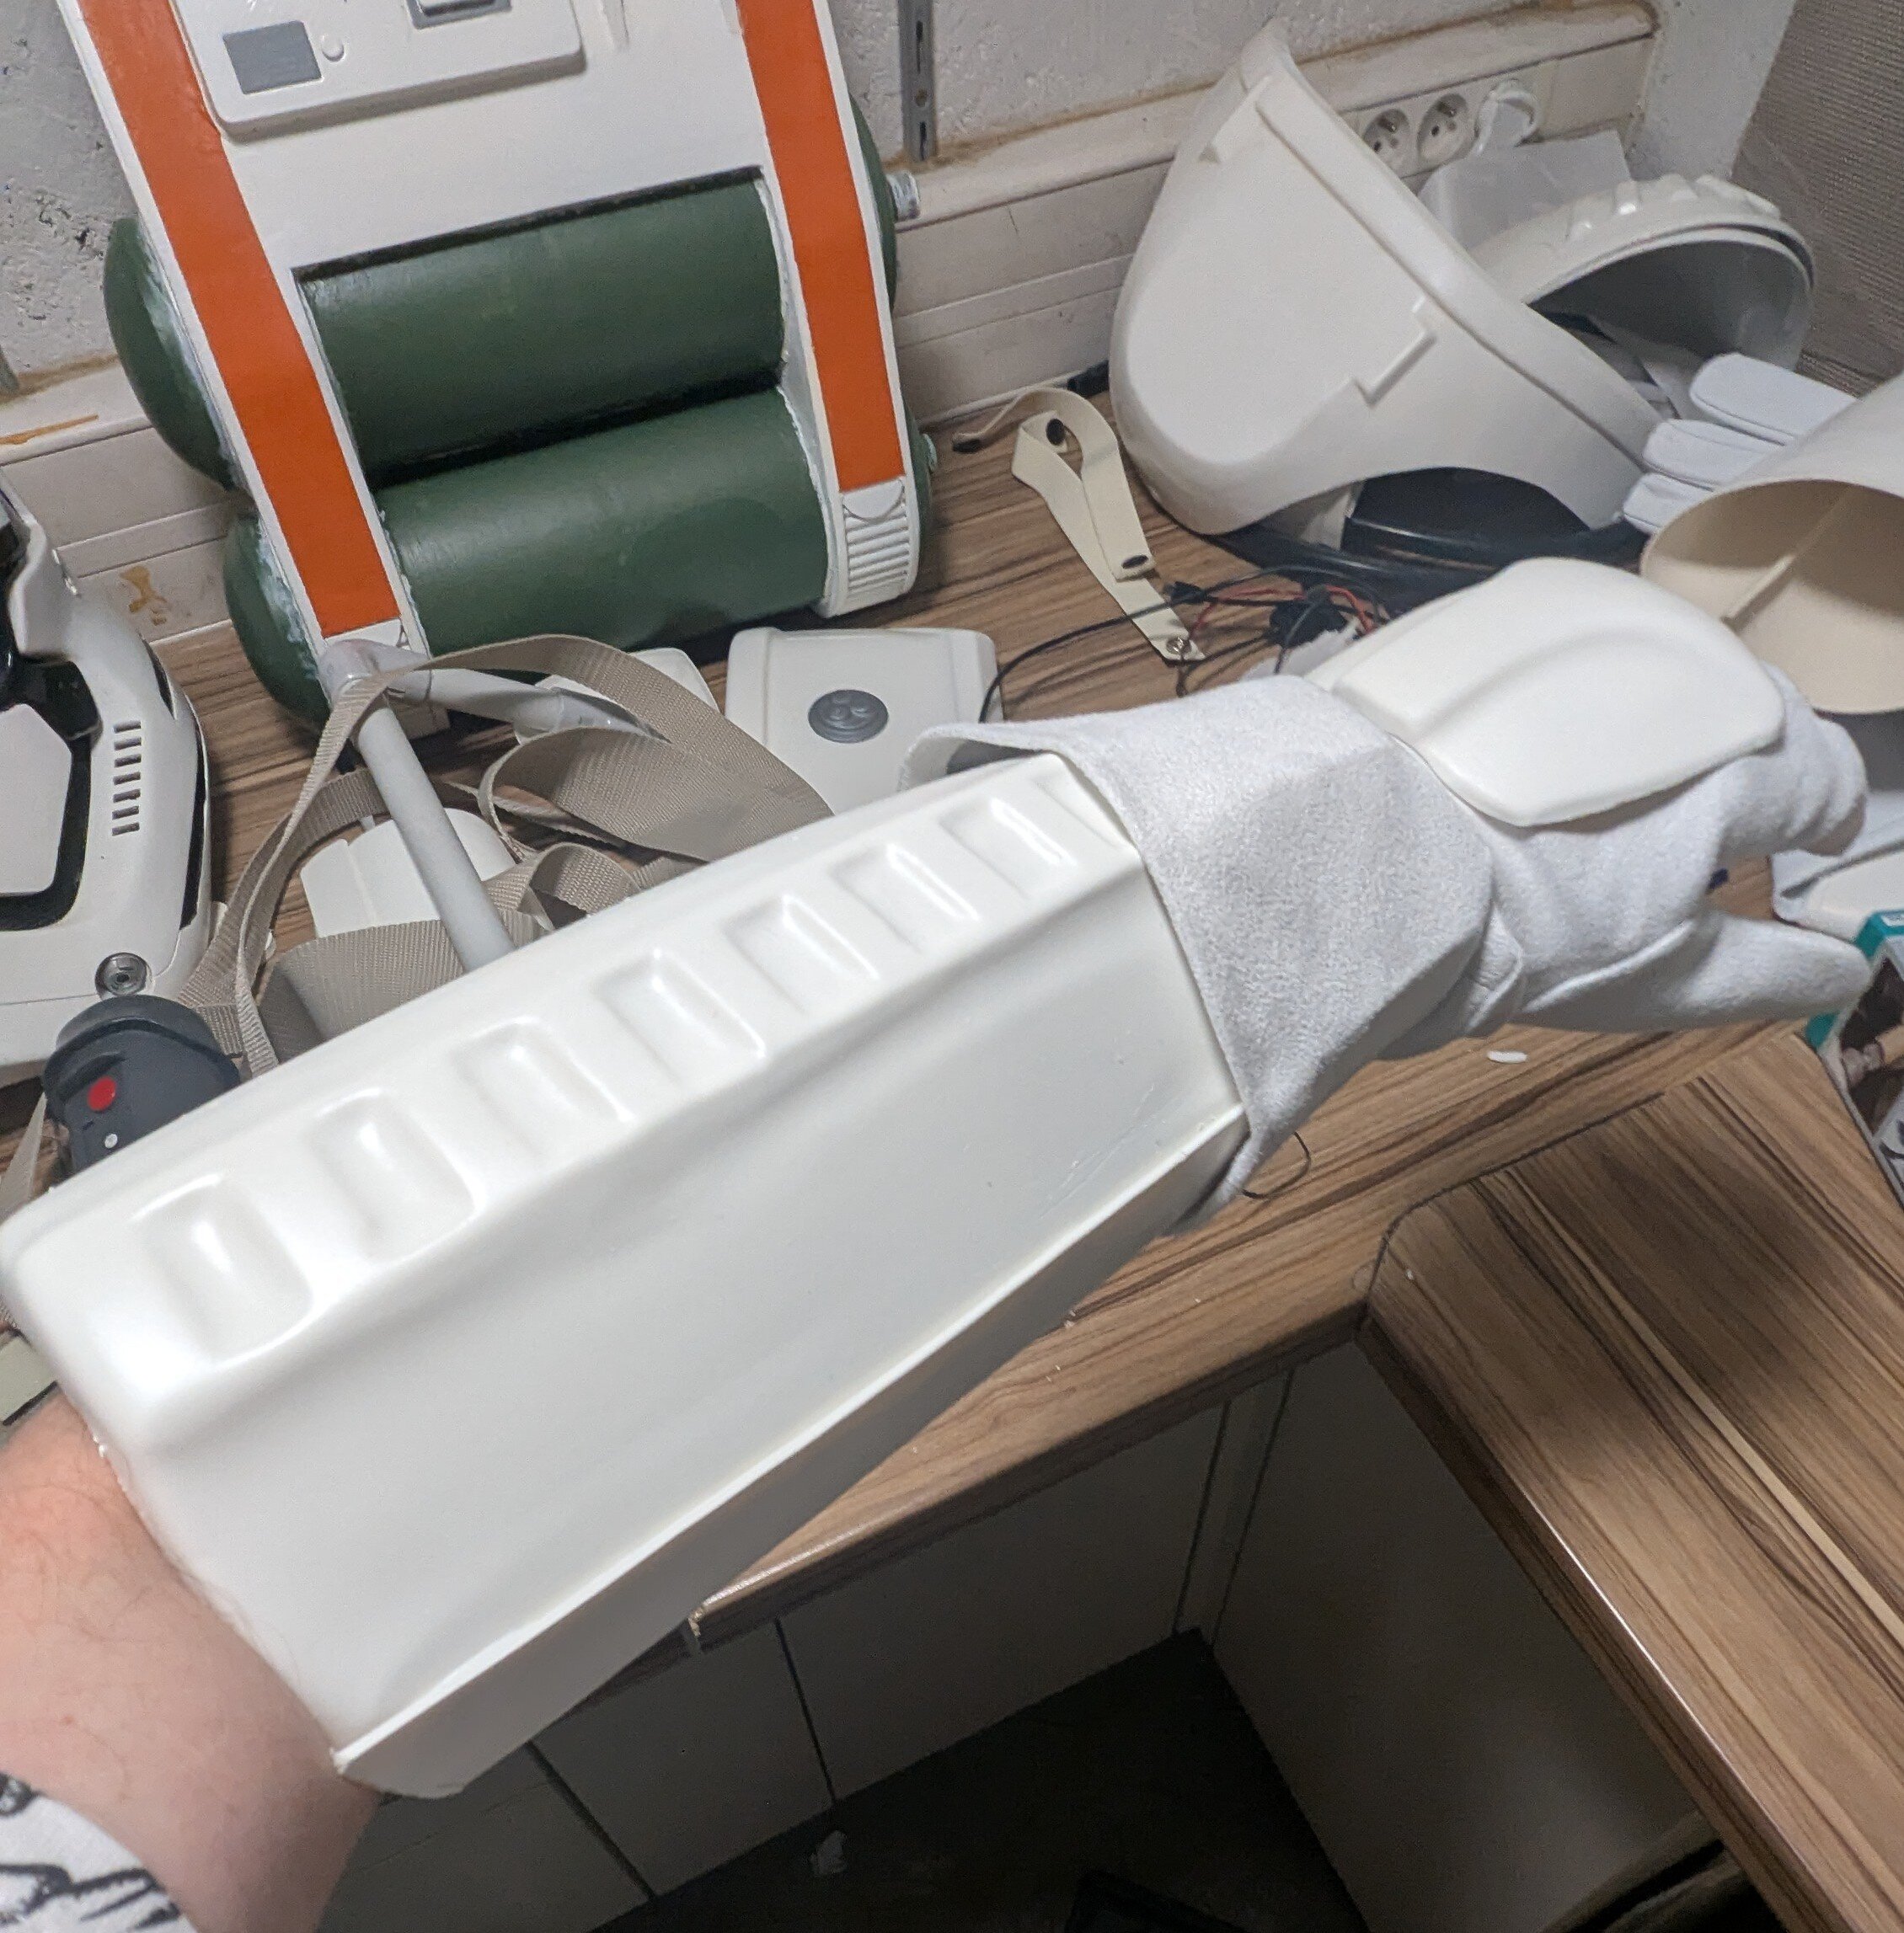
Update! I was able to repair my back plate using mold-able epoxy putty and even get back some of the lost details in the corners. It is definitely not perfect but I'm thinking it should hopefully be good enough at least for basic. Also, my assembly of the shins has seemed to work out pretty great and those are now almost done (aside from the bottom flaps). I also went and painted almost everything in gloss black, except for the thighs which I am still assembling. Almost all the bits are painted now and currently drying/curing. Then I can go in with the metallic black on the details. I will need to decant some into a bottle so I can brush on the fine details like the grooves and such. I have started getting things strapped as well. The chest plate goes together in four places with velcro at the armpits and shoulders by the collar, which I think is looking good, what do we think?2 points
-
Helmet bolts on! @RAIDER, do you have anymore edits you'd like to see?2 points
-
I just got in my new boots from Keep Trooping. My old ones were a size (maybe a size and a half) too small and the tops got mangled at some point. They were authentic Doc Marten's though. In any case, having properly sized shoes has been amazing on my feet. I already moved over the gel insoles, my velcro straps for closure instead of the strings, and the metal pieces I was using to maintain the shape of the toe. I think they look pretty good! I also ordered an embroidered helmet bag as I had nothing to transport my helmet in. Nabbed some patches too and sewed them on myself. I'm considering putting one of the large back patches on the other side of the bag, either from my local squad or a larger Spec Ops patch. Next up is my application for specialist. I am trying to get everything together now, but my big miss is another suit up. Maybe at my next armor party or something!2 points
-
Lets please stay on topic. This is for the CRL discusion not wips. With no further input regarding the forearms this is our final text: Forearm armor Forearms may be present on both arms and consist of flat angled plates with facets joined at an angle at the outermost part of the arm. If the right shoulder and bicep are not present, the forearm is not present. The left forearm may also be missing. Forearms are symmetrical and mirrored left to right. Four allen-head screws are present on the lower longer trapezoid shape area on the forearm. A commpad featuring various depressions and shapes is mounted to the left forearm. One red and one blue acrylic rectangle approximately 3/4" (19 mm) x 1" (25mm) are present on the lower side of the commpad. Lighting is permitted but not preferred. The Com-pad has 4 low profile button head screws with centered flat slots. Flexible straps with a tan or white color, similar to the lower leg straps design, are fixed to the forearm white strapping, and closes with a white side release buckle with square opening on the side. The rest of the strap is white textile webbing. The receiving end of the side release clip is fixed to the longer trapezoid side. A white cylindrical torch approximately 3/4" (19mm) x 4" (100mm) is present on the inner edge of the left forearm. Inside of the forearm should be padded so it does not fit tightly to the arm. Forearms and straps are weathered to match the rest of the armor. Optional level 2 details: Commpad lights are not illuminated2 points
-
Here's a 360 view.2 points
-
1 point
-
Hey Chaos, thank you so much for the reply! Yeah, my pictures are kinda wonky. I will attempt to take better ones tomorrow and post here with a bit more specifics. Armor material wise, it was made by the 850 Armor Works and is Vacuum Formed Fiberglass like. Again, will post better pictures tomorrow!1 point
-
Looking forward to seeing this bad boy as a new kit in the group! Crossing my fingers for you bro on this kit! It is one I would LOVE to make myself!1 point
-
That's awesome. If you see Michaela again, ask her if I can rather use a pumice stone instead of a foot sander 🤣1 point
-
Congratulations Matt1 point
-
1 point
-
Great job Tyler, I always enjoy seeing another Inferno kit coming together. For the armour I'd definitely recommend velcro. I tried a few other methods but nothing else was as reliable or simple as that. I epoxied the hard shoulder straps to the rear plate, then used velcro to attach the shoulder straps to the chest plate, and then more velcro to attach the side plates.1 point
-
Sure! I was a little confused figuring it out as well. Here’s the right thigh: The long side has a little detail and the short side sticks down. Left side: Long side is smooth with no detail, Short side is level at the bottom, and gets one of the little box greeblies on it. I glued all sides butting up against the front and overlapping the back based on what I could see in the CRL photos.1 point
-
Also ich bin zu allem bereit und meine Rüstung ist fertig und Tragbar, Sie war ein riesen Erfolg bei der German Garrison in Speyer und warten alle gespannt auf meinen Eintrag ;-)))) Wenn ich einzel Fotos für die Crl machen soll braucht ihr es nur zu Sagen in welcher größe und Auflösung LG Andreas1 point
-
Any update on this? They've already transitioned the CRLs to the new web format. However, the "Imperial Security Trooper - Andor - CRL Discussion" thread is still closed. Is the moratorium still in effect?1 point
-
I'll sort one when I get back to my laptop 👍1 point
-
I have been following along in the FB messages and I am so sorry for your loss. I actually posted the request there to have another set of eyes as I knew you had a lot going on. After looking at @Andreas Funk's photos and videos, his armor may make the mark for the CRL so we may not have to wait on someone to build a kit and this CRL approval may go quickly once we get the wording completed. I am still building mine with 3D FDM and Resin printers so its taking a while. Plus once I get mine finished I will have to figure out how to send it back to the USA when I leave my job. Good to see you getting back into things, if you ever need anything send me a message.1 point
-
You may find this guys' 3D printed Death Trooper build videos helpful. He used the MCM Designs files for his kit. It helped my build a lot:1 point
-
lol, I'm busy watching M.M.'s Prop shop, and she just mentioned her foot sander. I'm going to try the ABS slurry post-processing first and if that fails, go through the multi-stage sanding steps. Here are the side and back pieces of the helmet.1 point
-
Thanks, I missed out the E+D, but luckily I bought the correct STL. I thought it was all going to be shiny black when I purchased the STLs, but then saw it was more than just glossy black, so that comment was more tongue in cheek.1 point
-
Welcome Rudi. you have picked a great costume. Take your time and ask lots of questions. for vapour smoothing, It looks like a neat technique but from what I have seen, you will still need to sand some. I have recently seen people using Bondo/Acetone wash that is painted onto the armour. It appears to do a great job smoothing out the print lines but will affect fine detailed areas. Thankfully, the death trooper does not have a lot of fine details except for around the muzzle. I recently purchased an electric foot sander from Amazon. It is a small circular sanding disc and it makes sanding so much easier for larger areas. I look forward to following your build.1 point
-
I am using rustoleum painters touch 2x cover gloss black paint+primer on everything. There are nicer options out there but I’m cheap and I was able to achieve a result I am pleased with. I have been told the rustoleum high performance cans deliver a much nicer finish. That being said, I have not used a clear coat and since I plan to weather my armor, I am not worried about a perfect finish anyway.1 point
-
Getting groovy! I painted all the grooves and details and started strapping the armor. I got to test fit the upper body and the shins with the flaps now glued on. I still need to affix the shoulder buckles in the front. I’m not sure yet how I will close the shins in the back. But, heres some test fit pics! Please let me know your thoughts!1 point
-
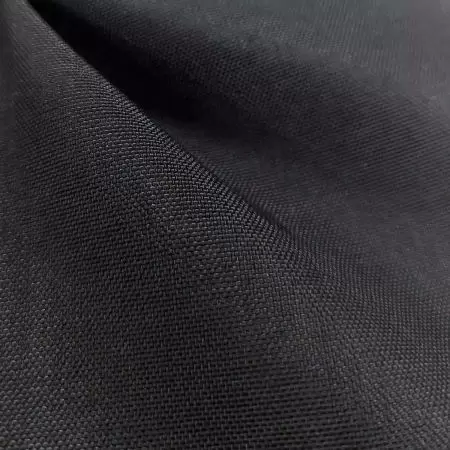
Hi Dennis, thanks for the feedback. It's definitely important to give people as many options as possible while staying true to the references, so that's what we want to do with the vest too. I fully agree that the weave on the vest is slightly wider than that in the flightsuit. Just a quick reminder of the new text we currently have in draft form: "The tactical vest and its pouches are made of black fabric similar to the flight suit material. Heavy black canvas is recommended. " It's important to note that we're not saying that it has to be the same material as the suit, just that it has to look quite "similar". As you show in your picture above, the Cordura already looks extremely close to canvas, so would be 100% acceptable for both basic and Level 2 clearance under the newly proposed text. I wouldn't like to specifically name the Cordura brand as a possible option in the current text, just in case people get confused and think the flightsuit should be made from that material too. However to make it even more flexible, what about the following small tweak? "The tactical vest and its pouches are made of black fabric similar to the flight suit material. Heavy black canvas or similar fabrics are recommended. "1 point
-
Ok. But I would also add Cordura 1100 as fabric option as said most of the real world tactical Vests are made of this fabric. Here's a reference. Looks close to Canvas. Could you may post pictures of your Vest from Jim? Would really love to see it. Thank you.
1 point
-
Yes the recessed pill /slot is on the front return edge, where the raised detail running along the top plate stops and meets the return edge near the fingers.
1 point
-
Mine is not showing up on my profile also. Imperial Army Trooper Andor. TK 19197. Any help would be appreciated.1 point
-
Yesterday's update is the new CRL system should be fully operatioinal in a few days.1 point
-
Essentially when it arrived all the armor pieces looked like this (photo from 850 AW website) After some trimming or cutting off the excess plastic from the forming process, they are looking like this (these are just some of the pieces I have trimmed). Here you can see the thighs, forearms, shoulder bells, and codplate. I will take some more pictures when I am home and finished trimming everything, and then I will start assembling the armor.1 point
-
its been a few days with no comment. I feel we can move forward. Im ready to photograph my own del hopefully this weekend for submission.1 point
-
Heard back from my GML today, and we are officially approved!1 point
-
printed in silver silk you are great for scratches to show through as they wear in1 point
-
I will also send my Binoc photos, on the outside they look great, I believe the width needs enlarged some.1 point
-
I tried another variation of the helmet bolts but I don't think my FDM 3D printed can do it justice, so I reached out to Imperial Surplus to get a set of the accurate bolts. For the boots, I added notches where the tread occurred on the boots, please let me know what you think (I'll clean up the grey overpaint soon): I also got a better suit up, I think it's looking pretty much there. I can do the belt and cod a little bit higher and the boxes a little bit wider next time.1 point
-
Hi Fernando Welcome to the spec opf forum. Can you also head over to the Spec Ops recruits section and make a post there, so we make sure you are set up with the correct permissions. The coat is an original desing, and doesnt share much in common at all with a BDU coat. And i have a LOT of BDU coats leftove from my service days. I dont know of a pattern for it, and people have been making them from scratch. I know Sheev's Emporium has posted all their research on their FB page, and JimTripon JImmiroqui and KeepTrooping are offering them for sale. I would be inclined to say its pretty simple but I know its not, because in all our research on it, there are features that are blended from othe military blouses over time. The coat hoooks on the sides to hold the belt, the mandarin collar, the cut of the sleeves, its a custom job. You COULD start with a simple jacket patttttern like farm chore coat or even a long sleeve shirt pattern and work ack from that, keepiing in mind the overlap similar to a BDU coat, the blouses featured a back yoke which is easy to see on the green uniforms. You can take a look at a very early sketch a tailor worked out in a post on this page .1 point
-
RIOT HELMET (Incomplete) Just wanted to post this WIP of the riot helmet. It's coming out really nice! Only a few more parts to print.1 point
-
I just heard back from Jim on my own L2 level tac vest , its a change to how he has produced them in the past. Its looking really good and once I have it in hand I will share on my own WIP.1 point
-
Aaaand tada ! New gloves arrived ! Time to get back to the project
1 point


.thumb.jpg.b14209ff3bd68636da46a33fb329e081.jpg)


.thumb.jpg.4b7f118dc6c023f5a5030ef2f1a3fe15.jpg)