IcyTrooper
-
Posts
4,109 -
Joined
-
Last visited
-
Days Won
378
Content Type
Profiles
Forums
Events
Everything posted by IcyTrooper
-

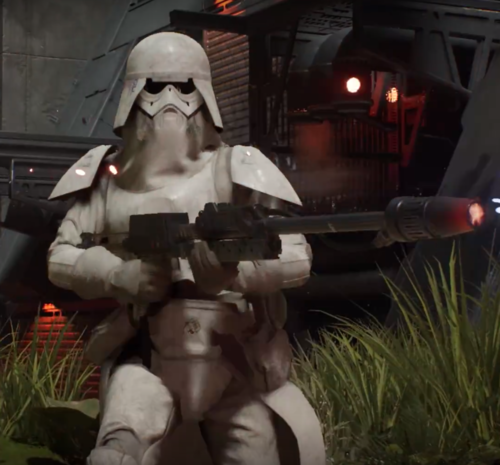
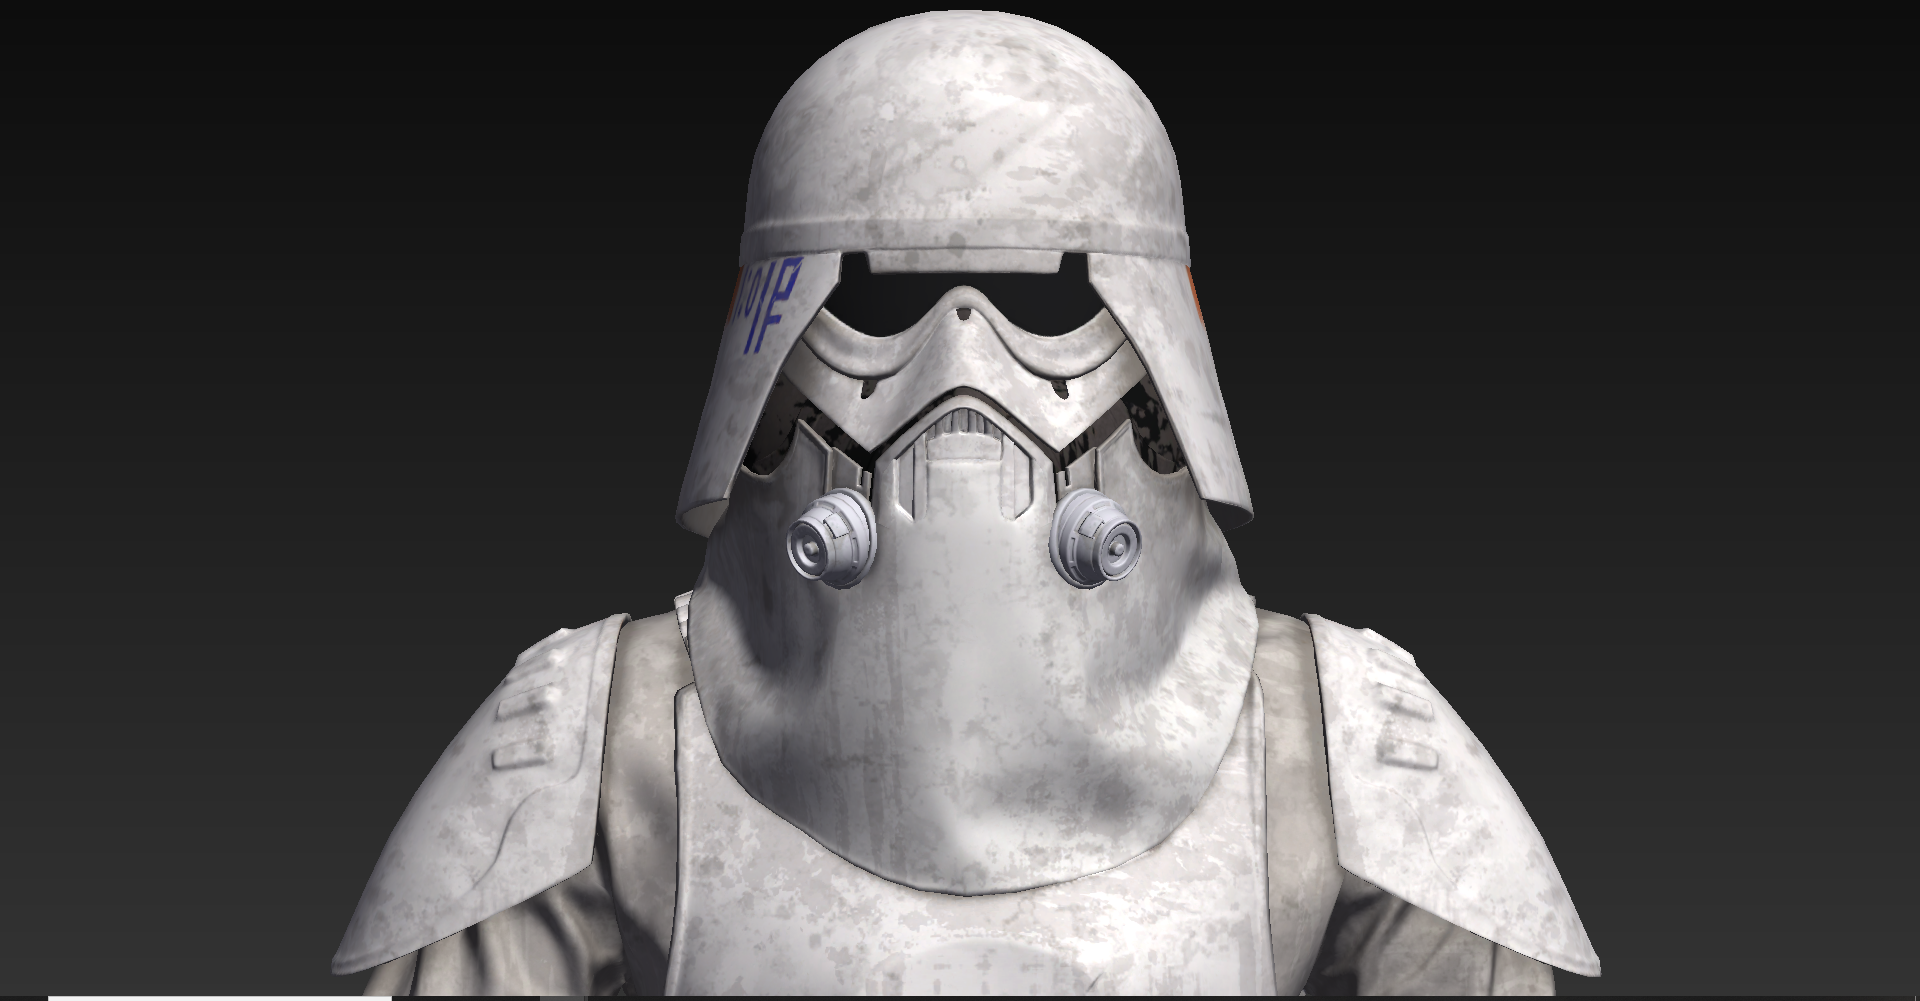
Imperial Flametrooper (Jedi Fallen Order)
IcyTrooper replied to stevechewbacca's topic in Imperial Flametrooper (JFO)
That case fits it perfectly! -
I think the part we are seeing is usually the ridge on the chest goes all the way to the neck, at least that is what I'm used to seeing with ROTJ TB's. The bicep stuff looks fine to me. Ultimately, the GML will be the one reviewing it and approving or not approving, so it is good that you are checking with them!
-
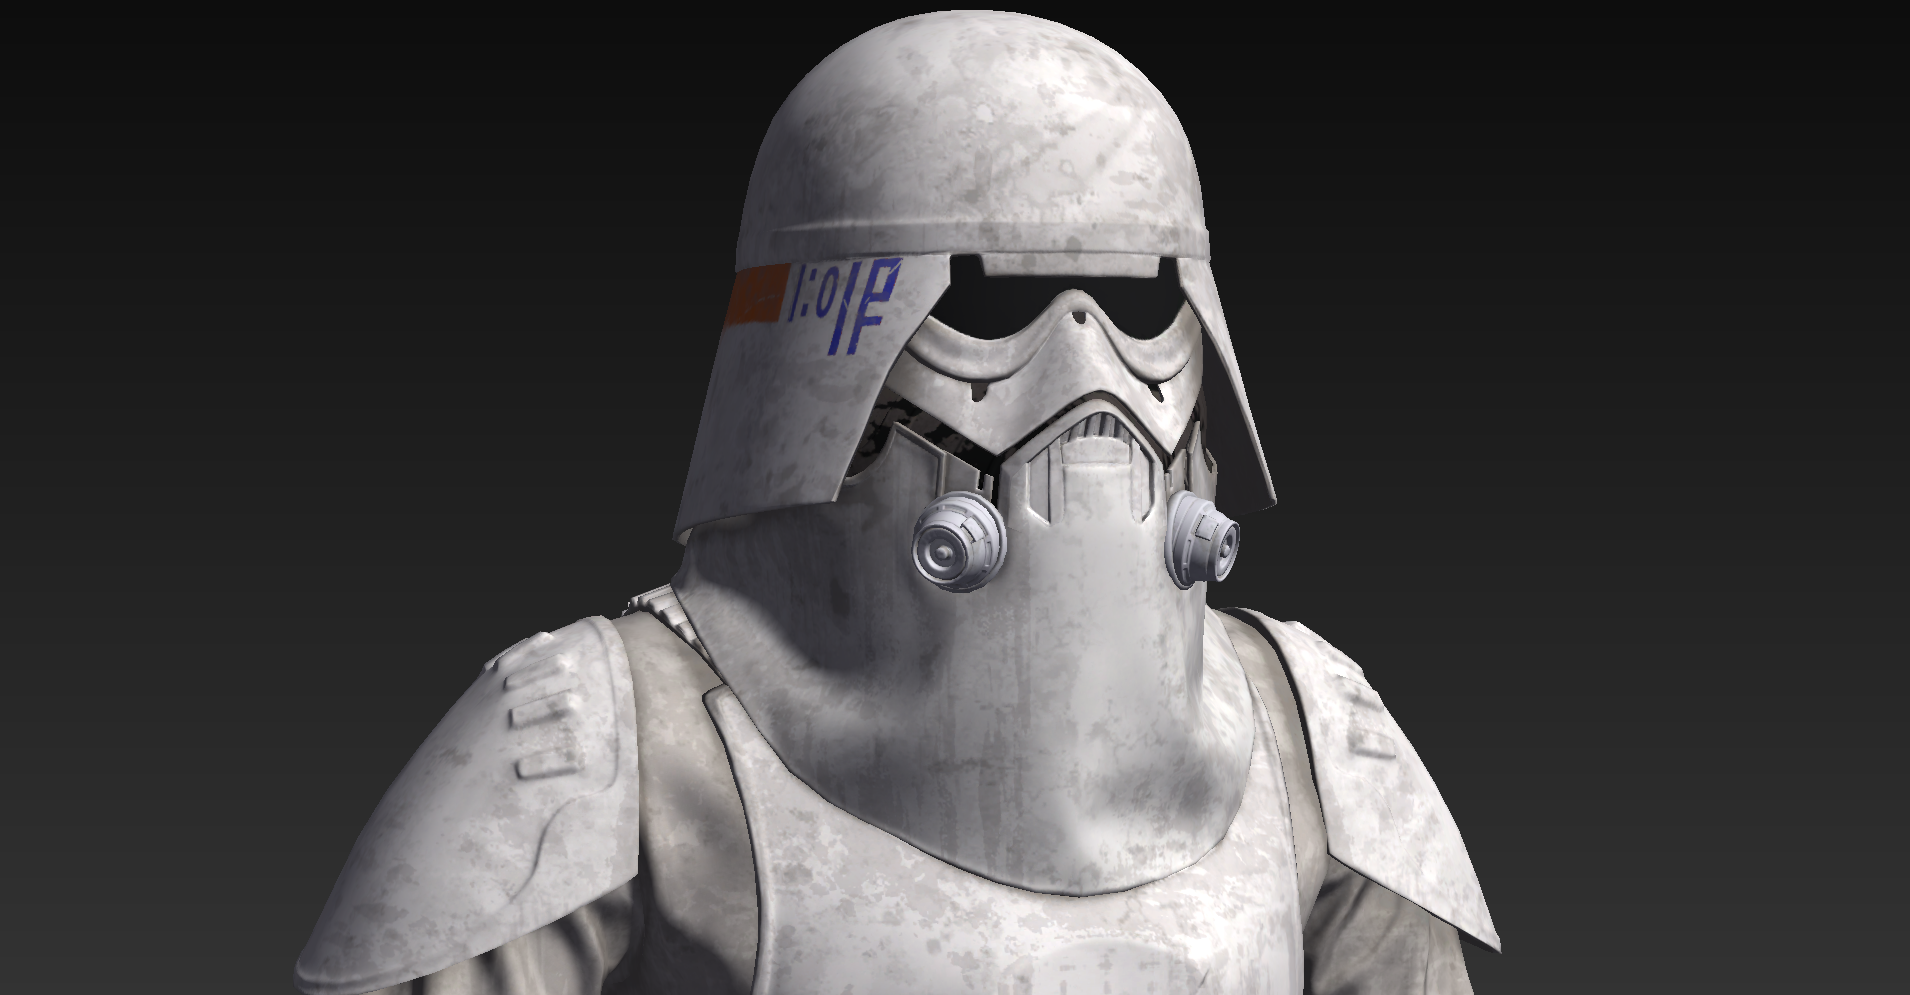
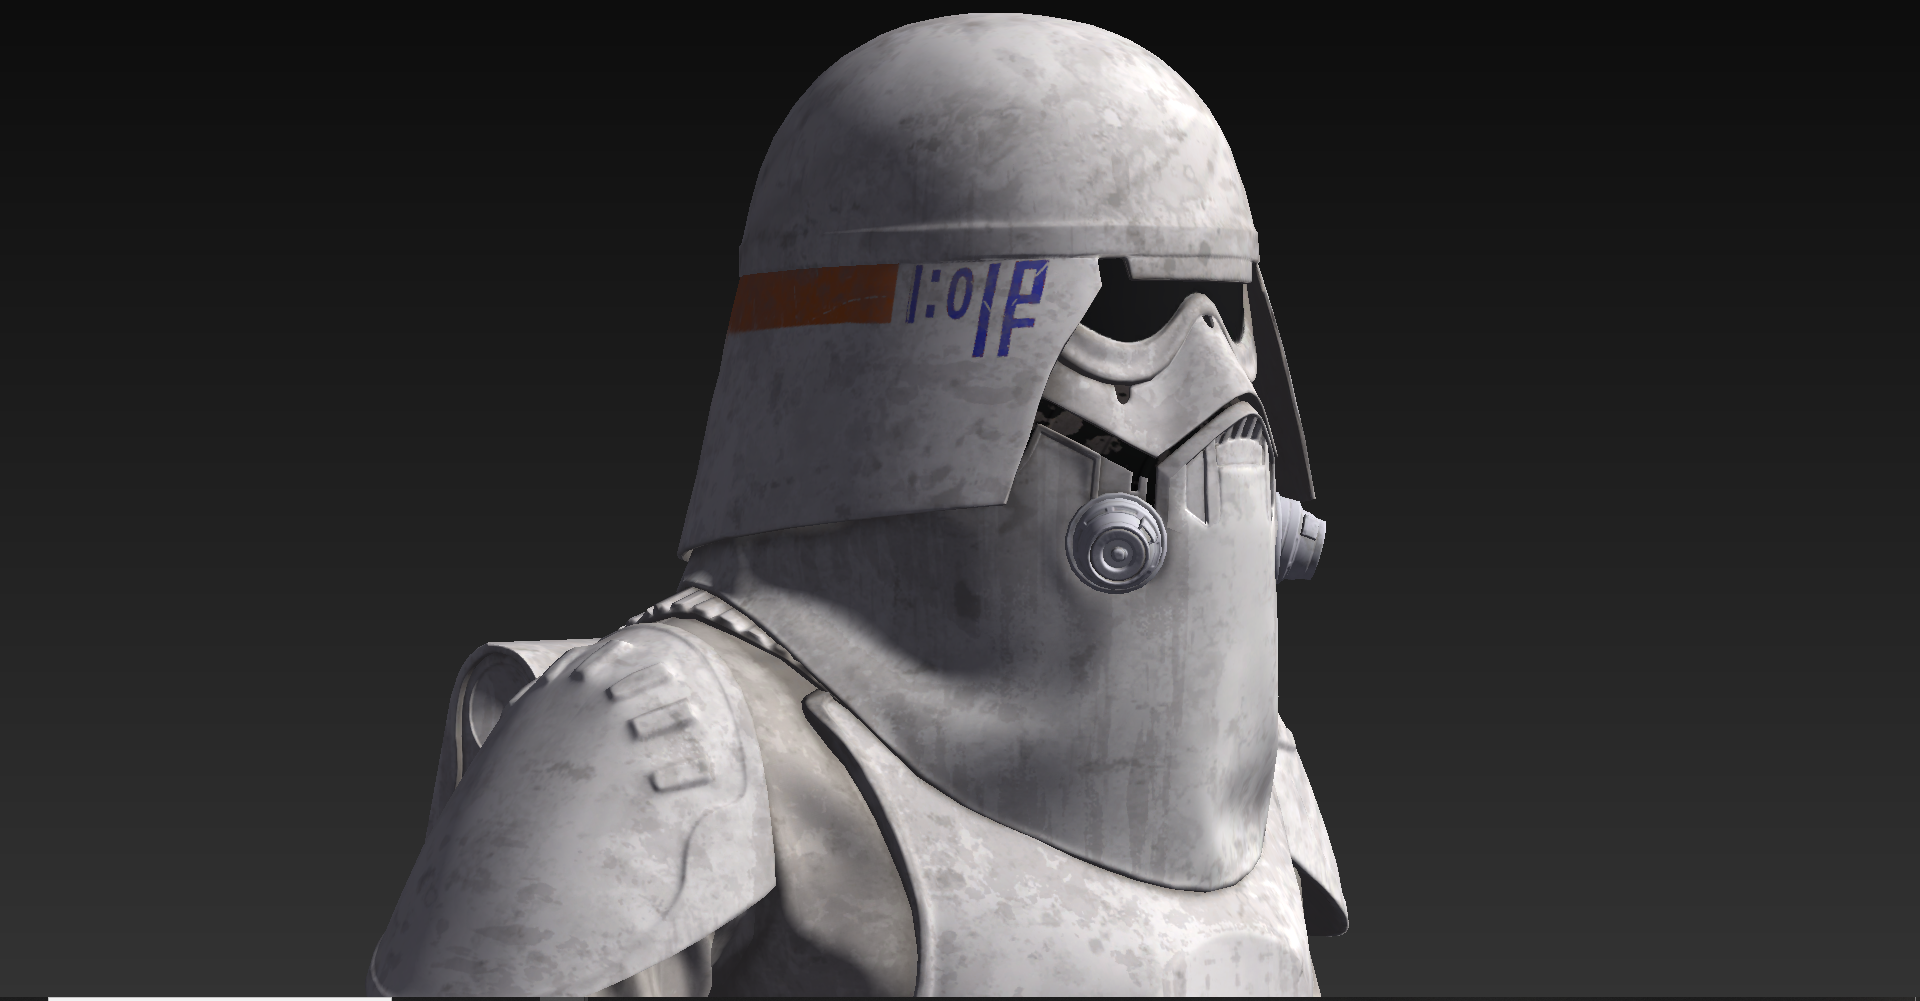
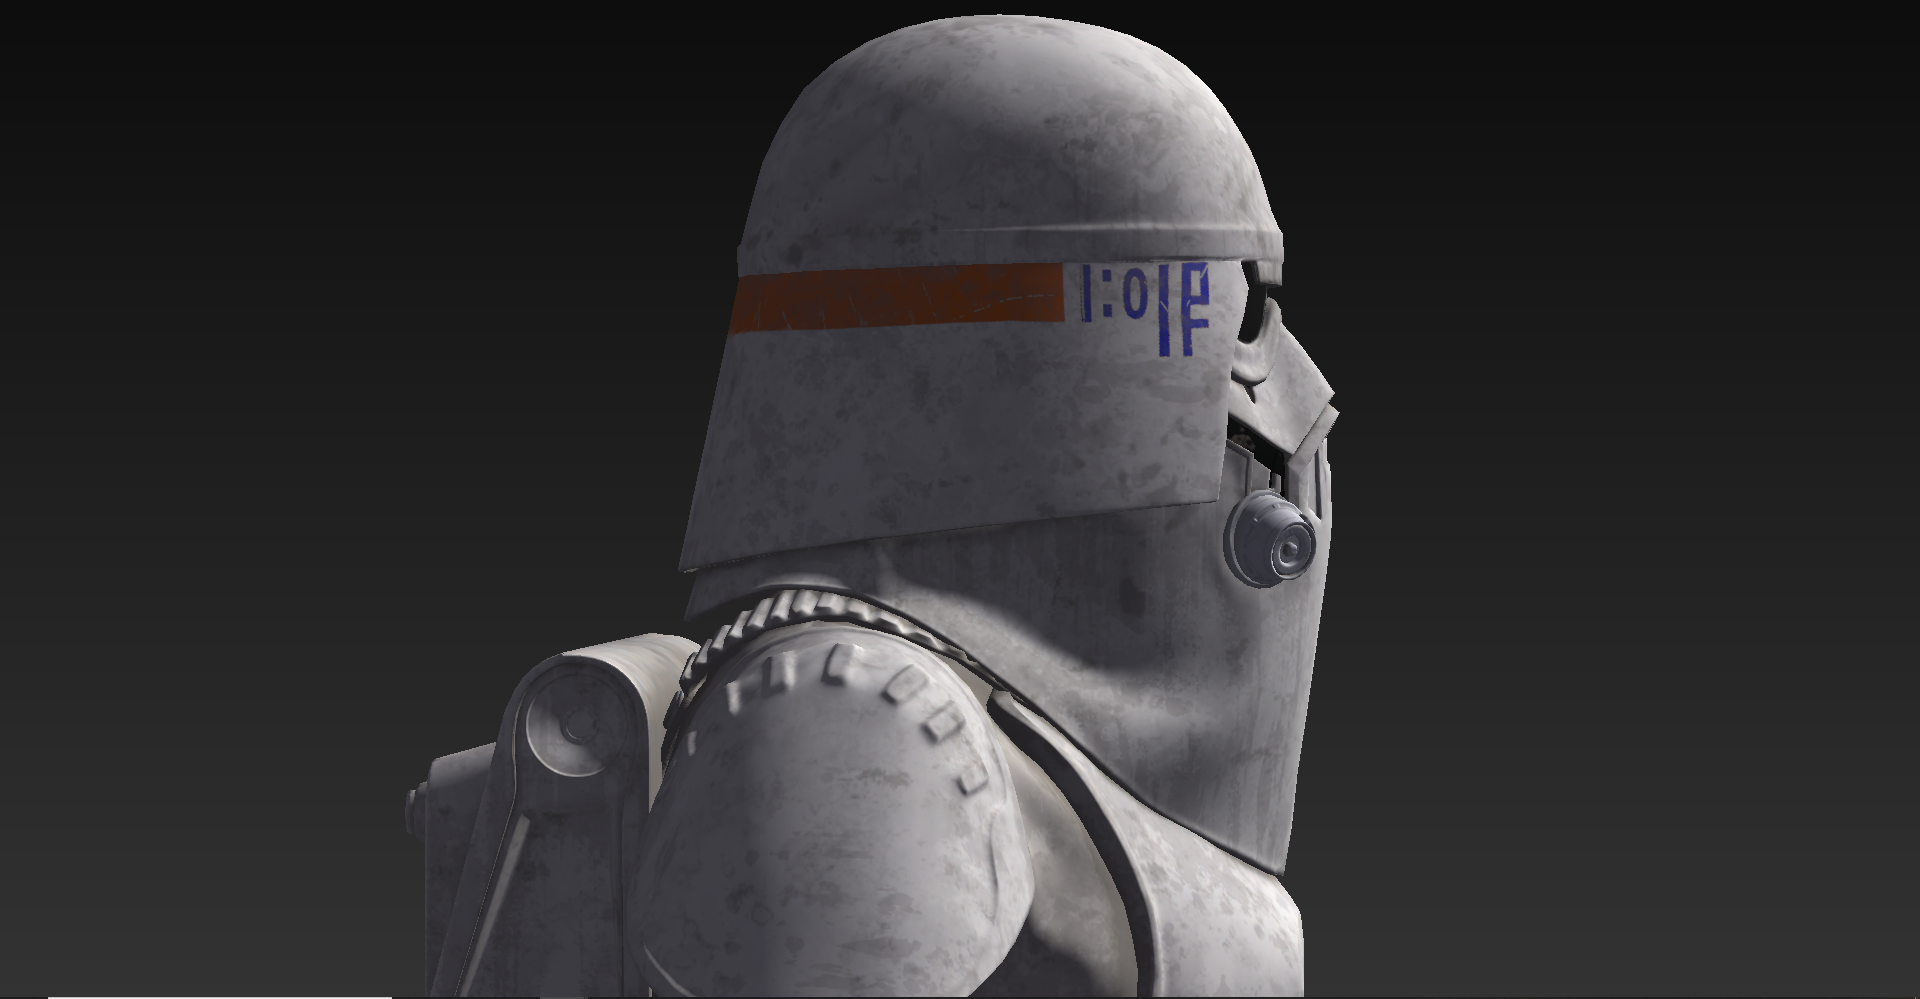
Imperial Flametrooper (Jedi Fallen Order)
IcyTrooper replied to stevechewbacca's topic in Imperial Flametrooper (JFO)
I like it!! -
Looking pretty darn good from what I can see so far. I'd see if you can bring the chest piece down a smidge in the front so that there isn't a gap between the ab plate and the chest plate.
-
Blackskull's Work in progress for IAT and LT Sunber
IcyTrooper replied to Beau Thacker's topic in Imperial Army Units
I can't see anything that you have missed in that list. -
Very nice!! I understand how that feels about making a mistake and the intuition. It is all a learning experience and just think of the knowledge you just gained! You'll also know how to fix it in the future as well if something breaks or rips, etc. and that is a big plus.
-
Blackskull's Work in progress for IAT and LT Sunber
IcyTrooper replied to Beau Thacker's topic in Imperial Army Units
Here is a good thread for the Lt: -
This list may help ya out:
-
Nice job so far!!
-
Best Build Thread to use as a guide
IcyTrooper replied to CrookKnight's topic in Imperial Death Trooper
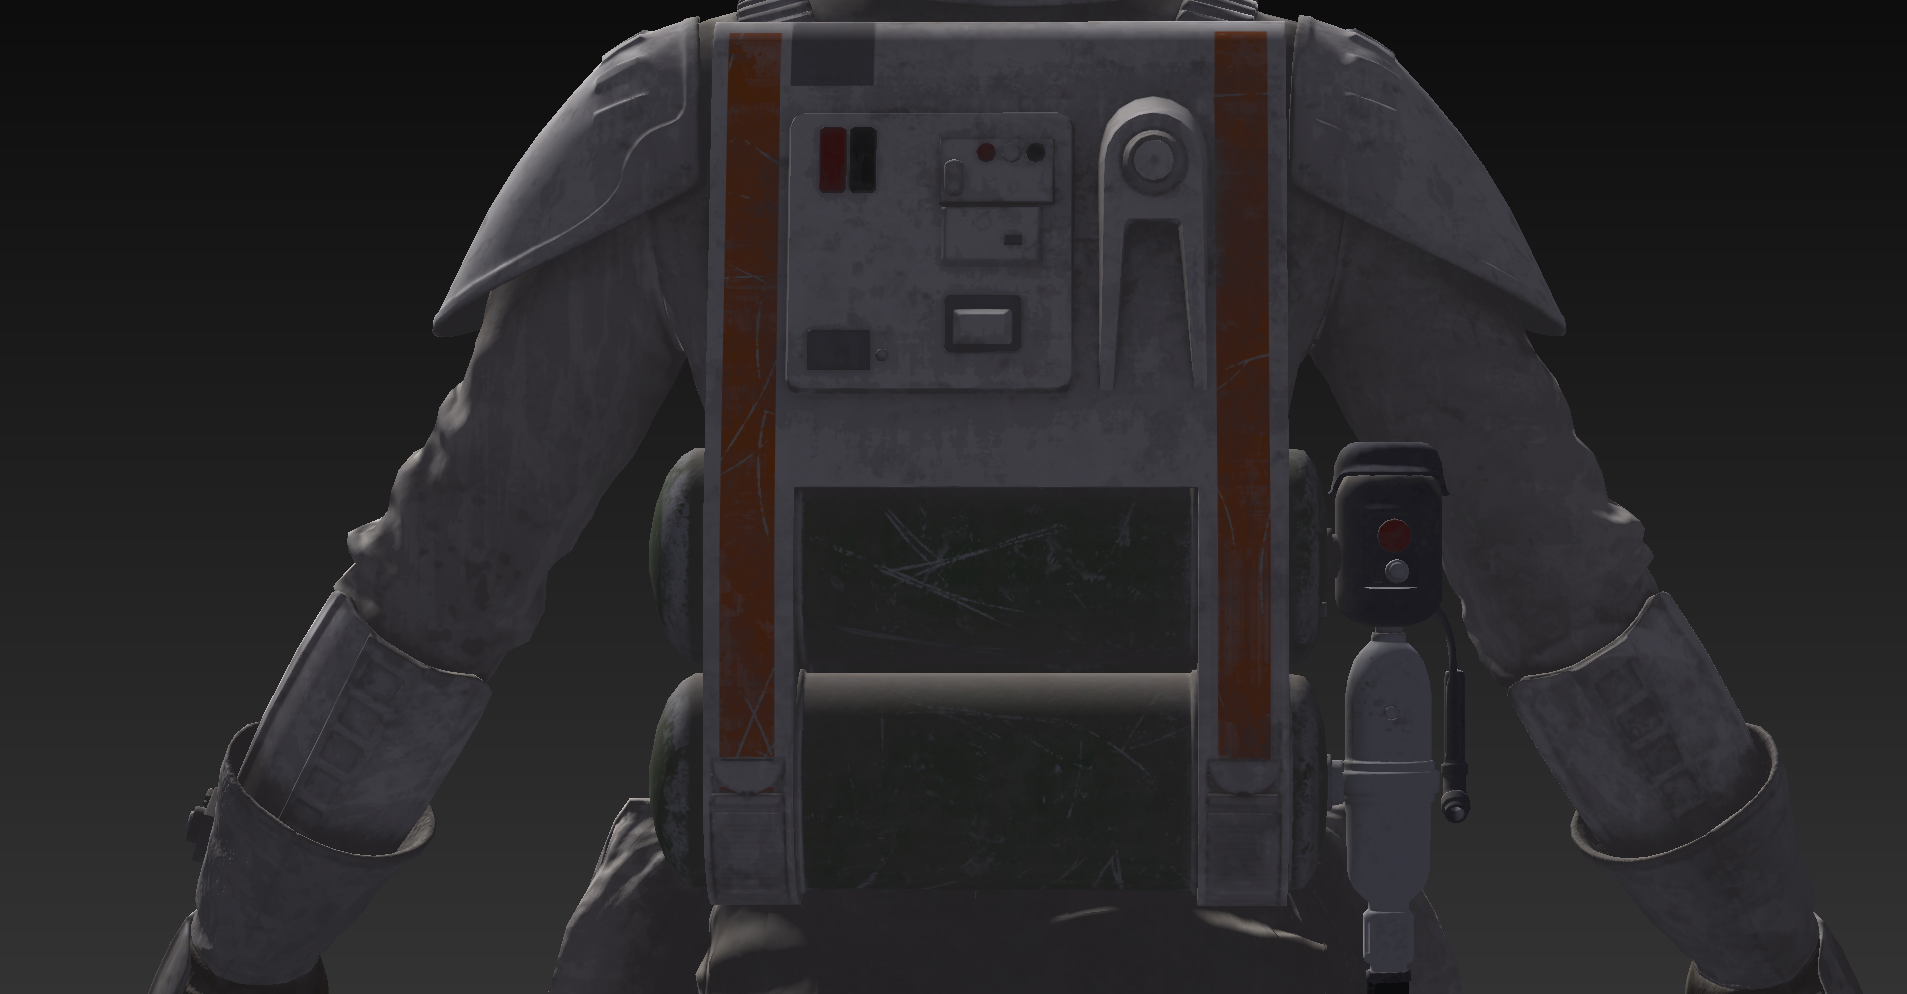
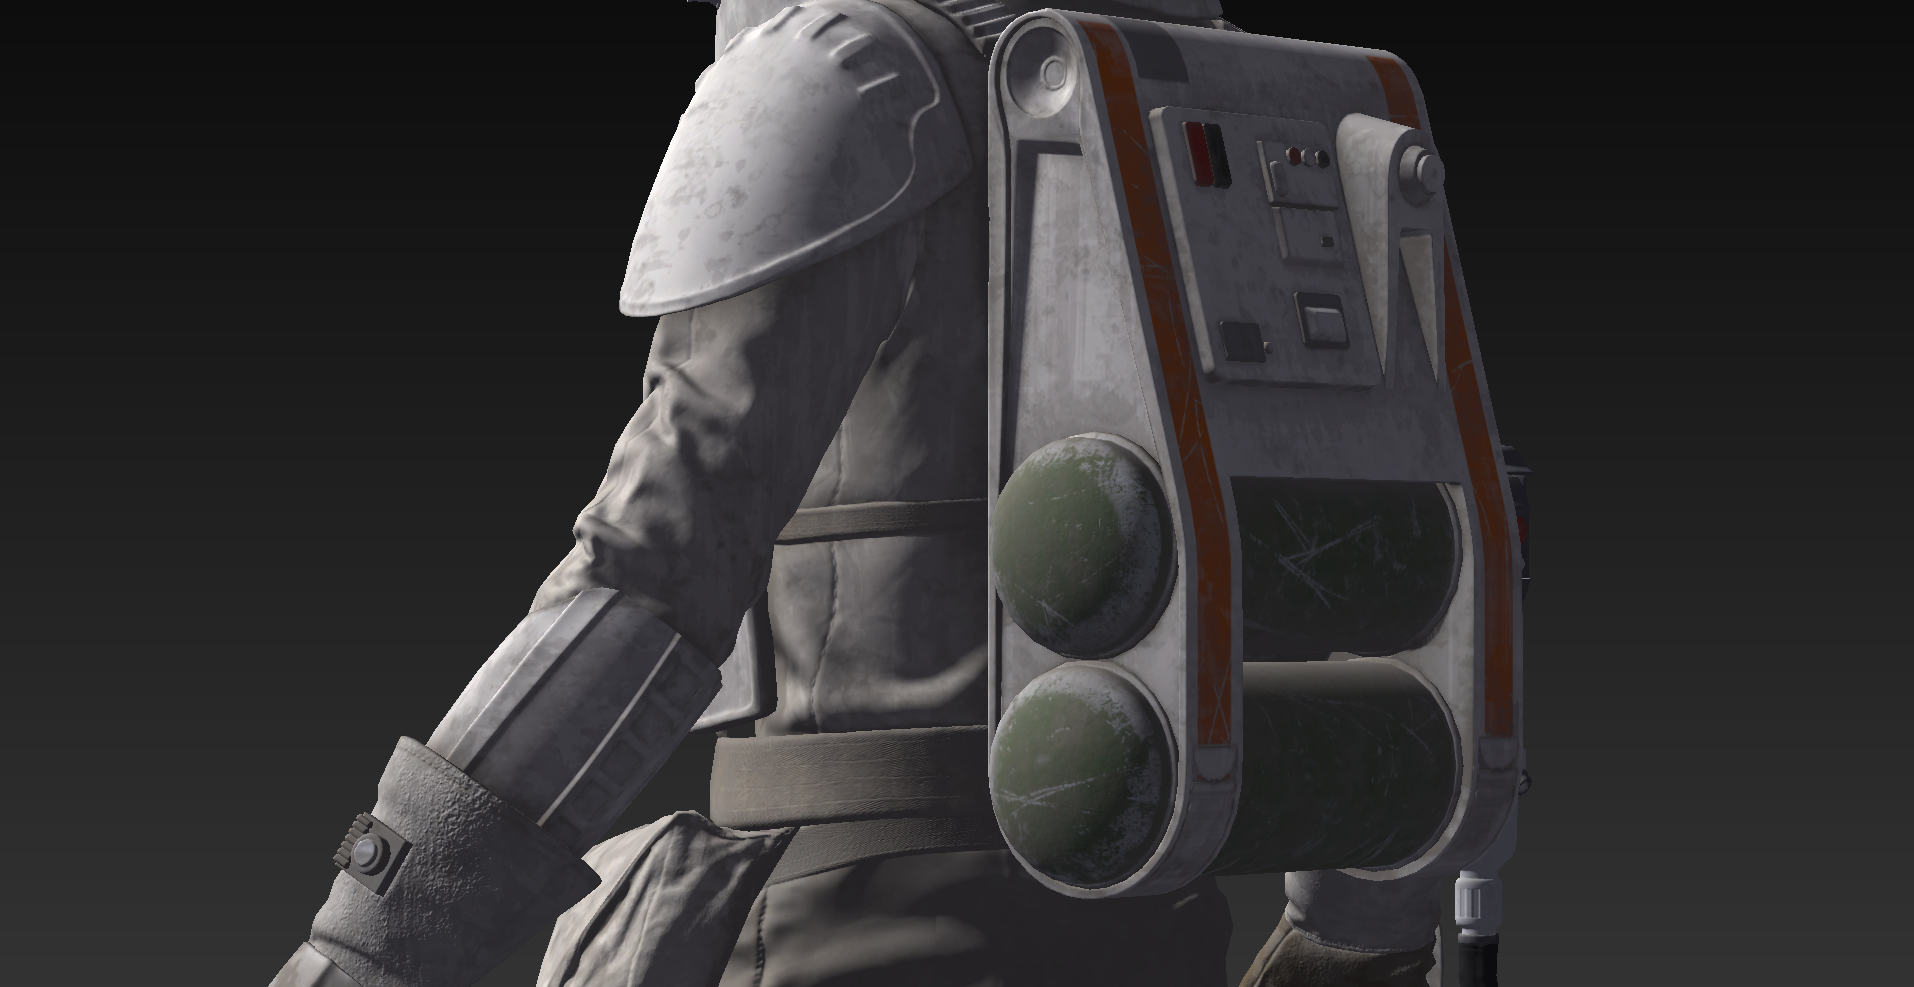
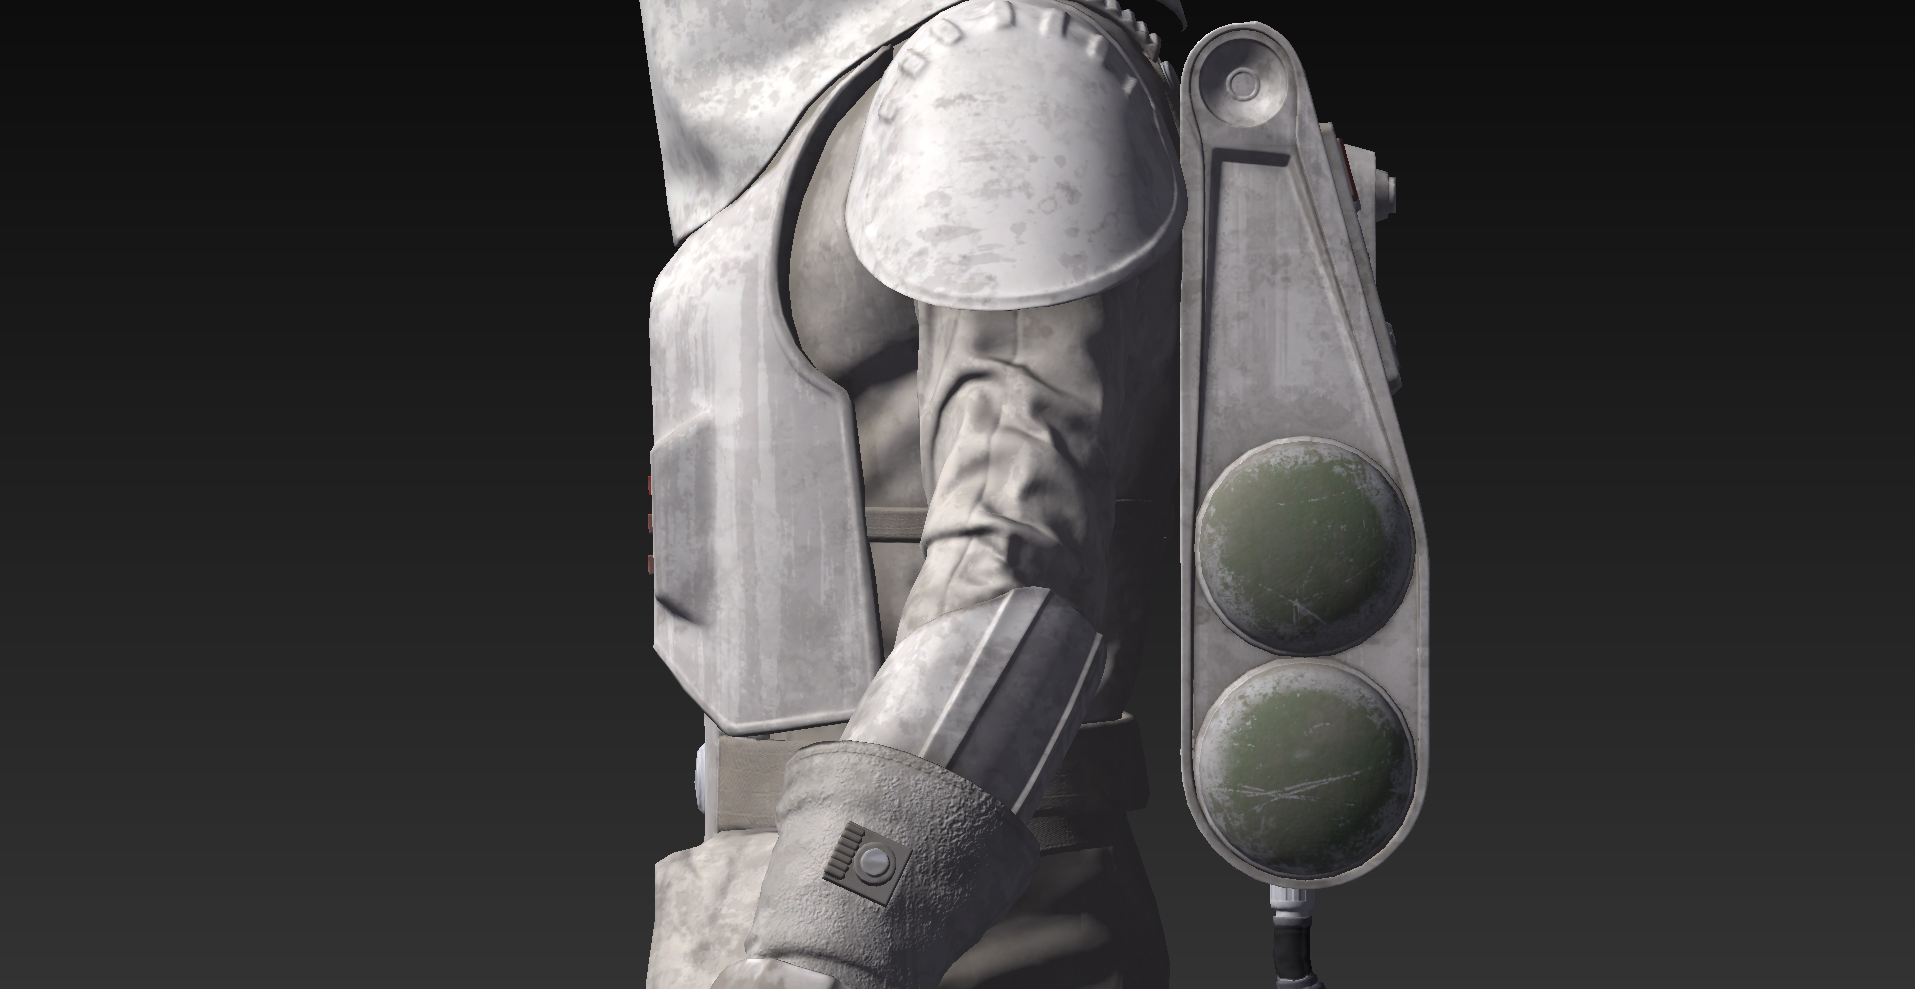
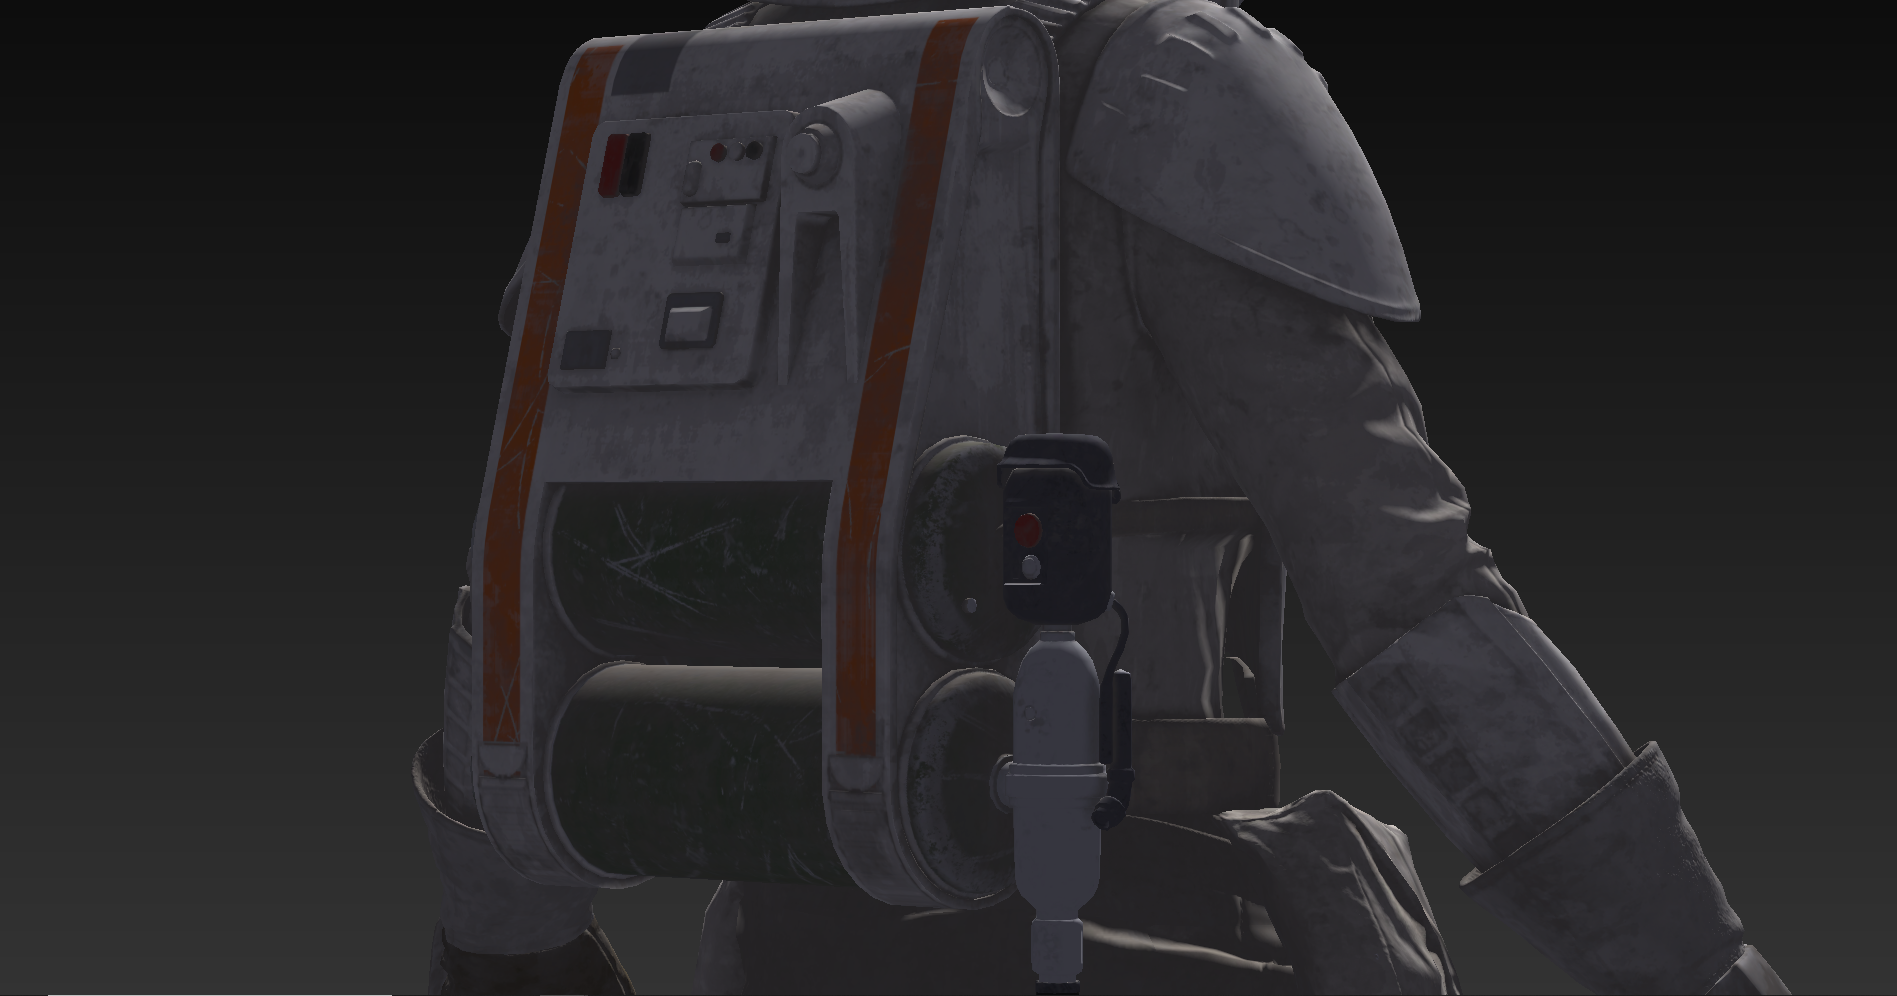
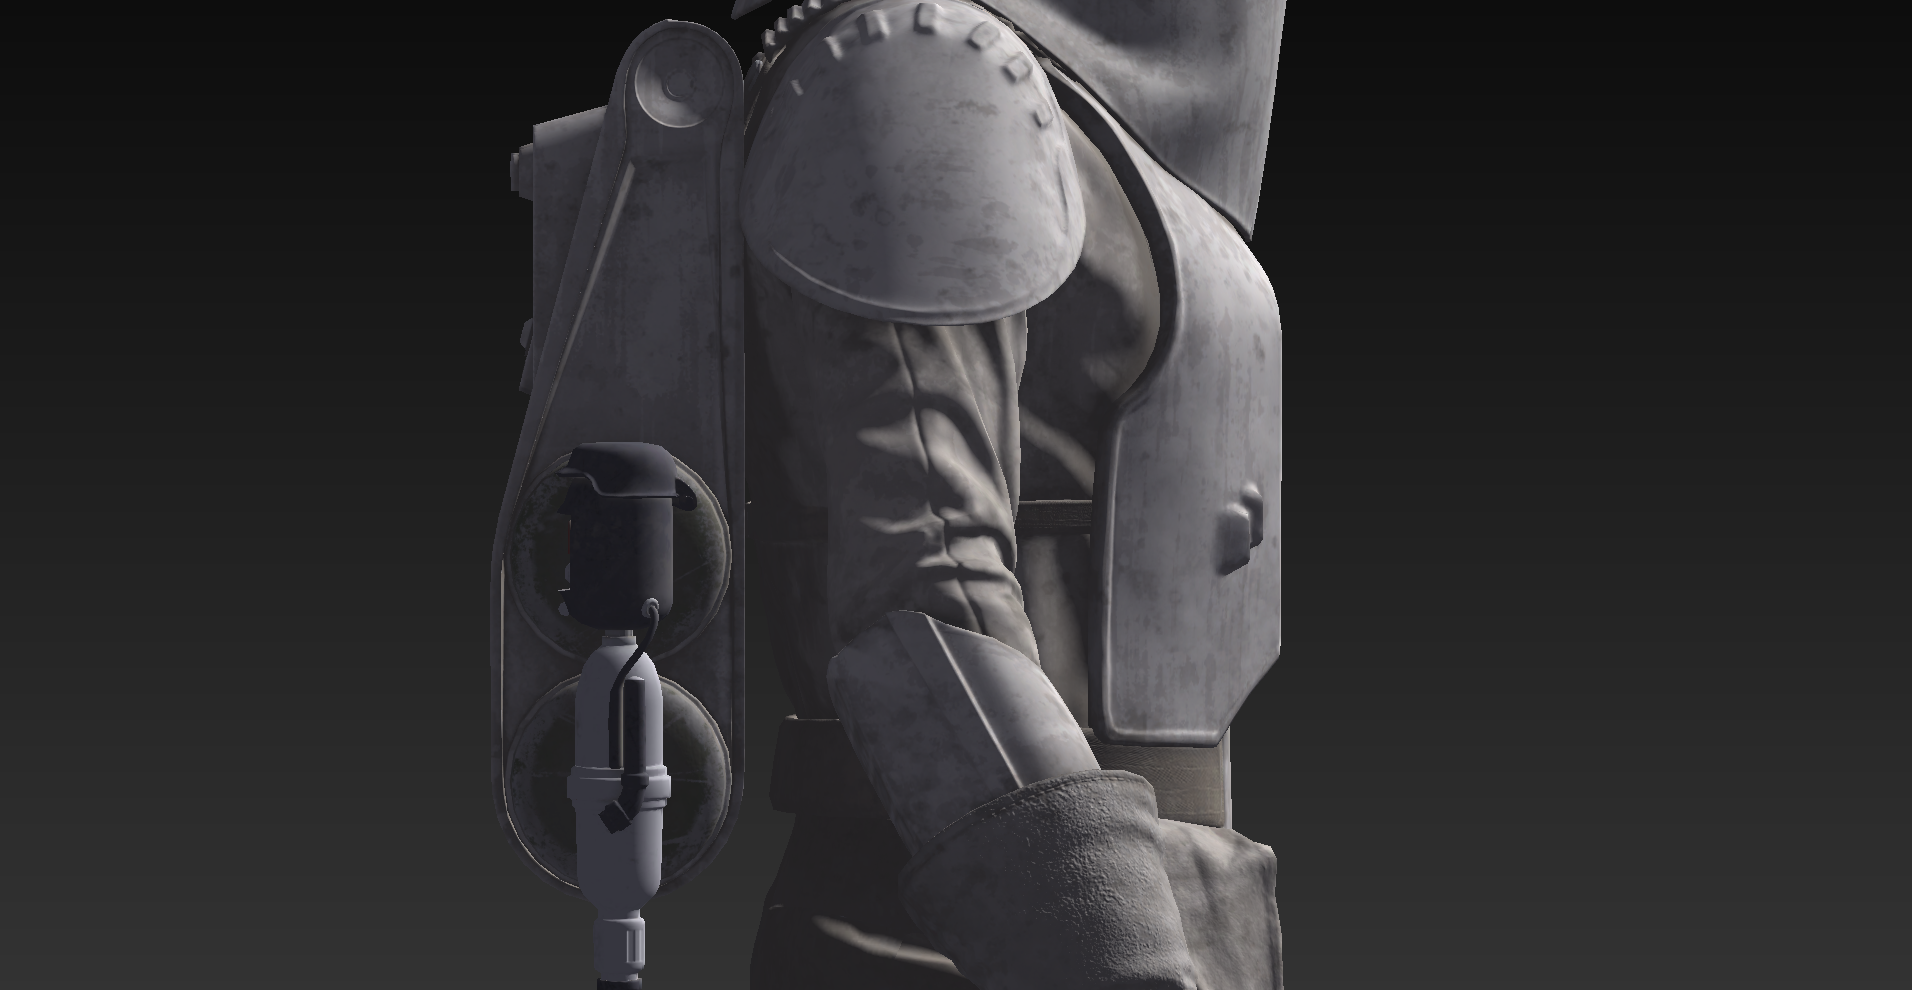
I have a R1 tank driver that I did and it is the same setup (minus the straps) and what I did is permanently affixed the back part of the extension piece to the back plate and used Velcro to attach the front part of the extension piece to the chest plate. -
I can link them into here, that is a good idea.
-
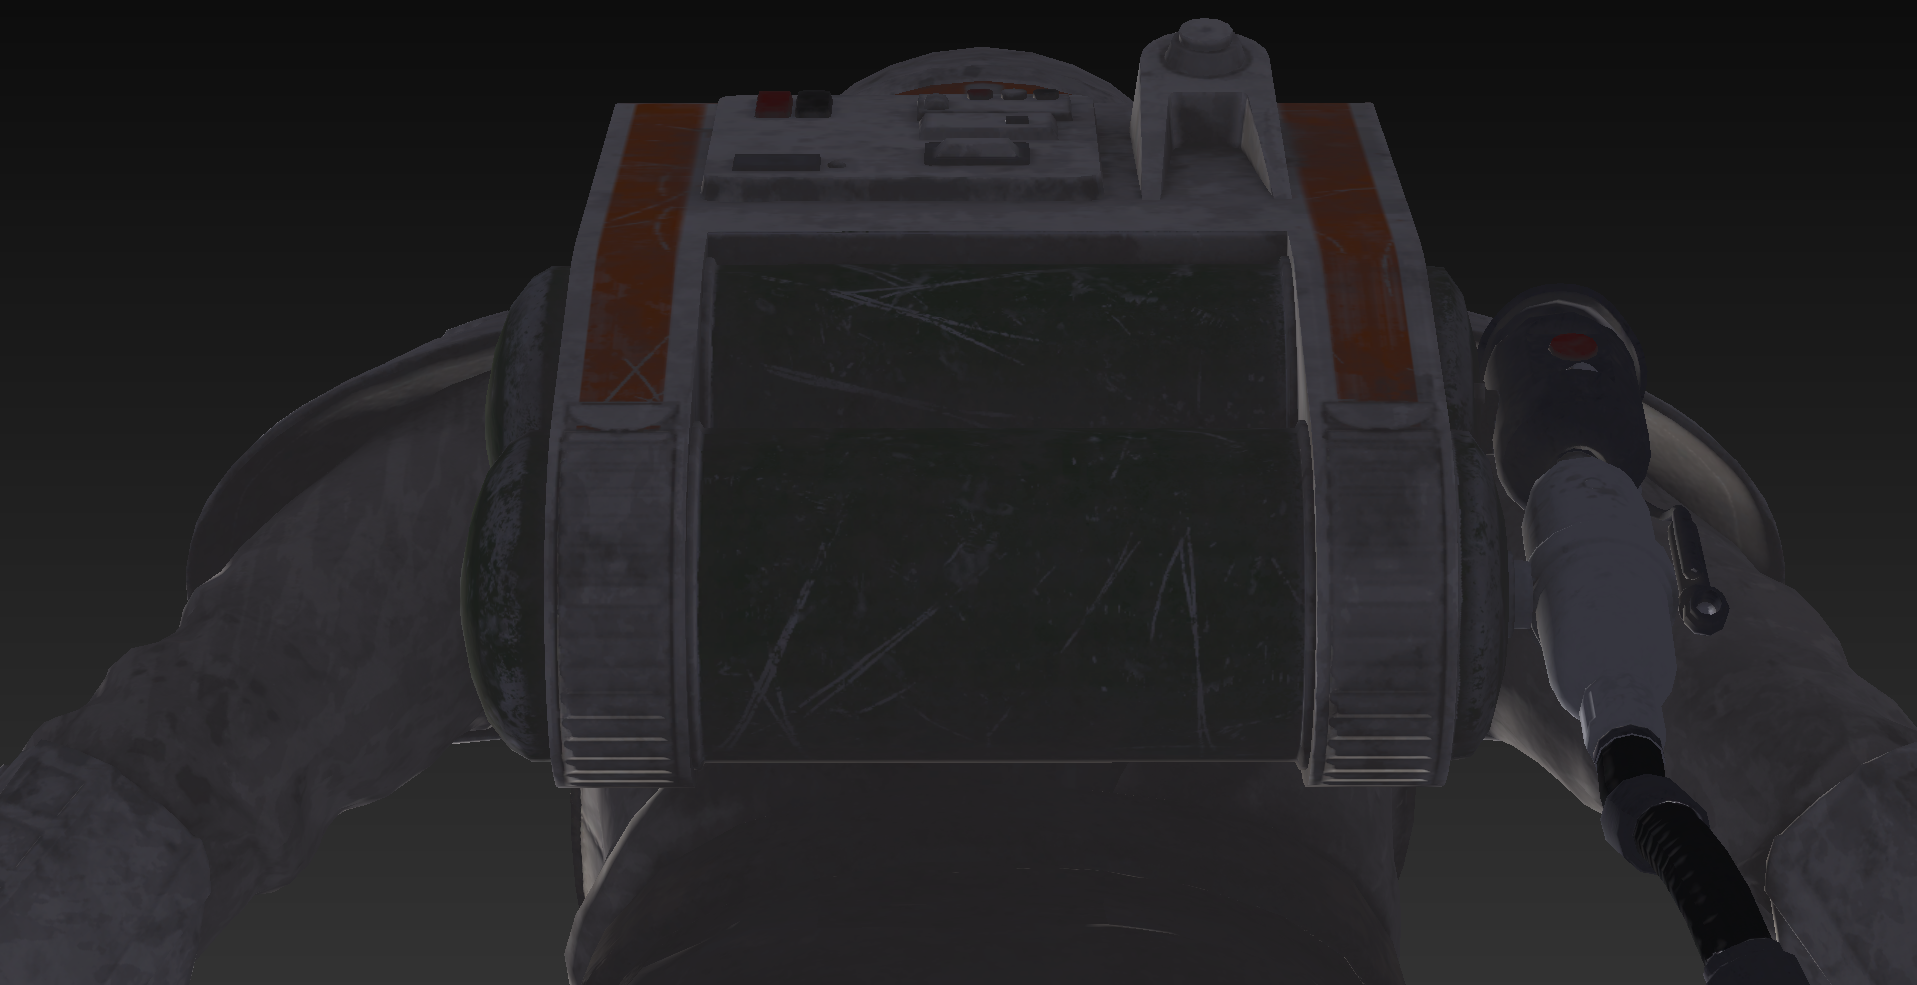
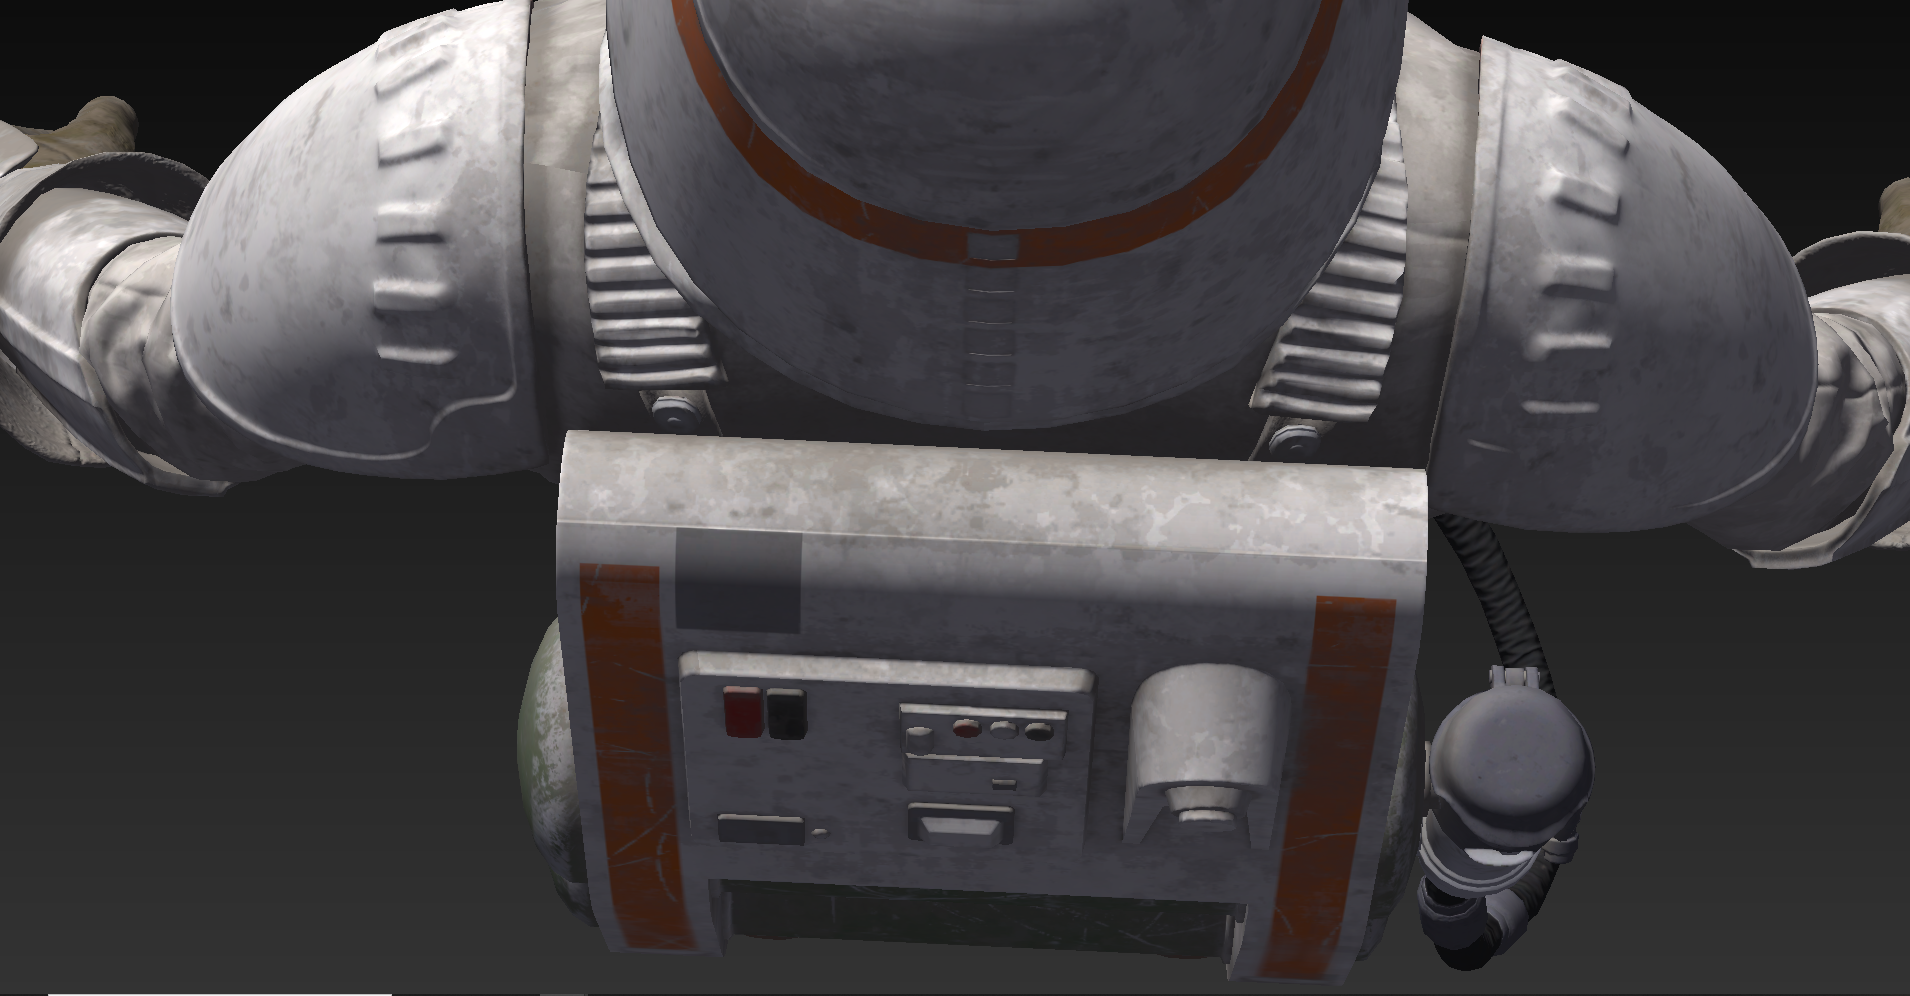
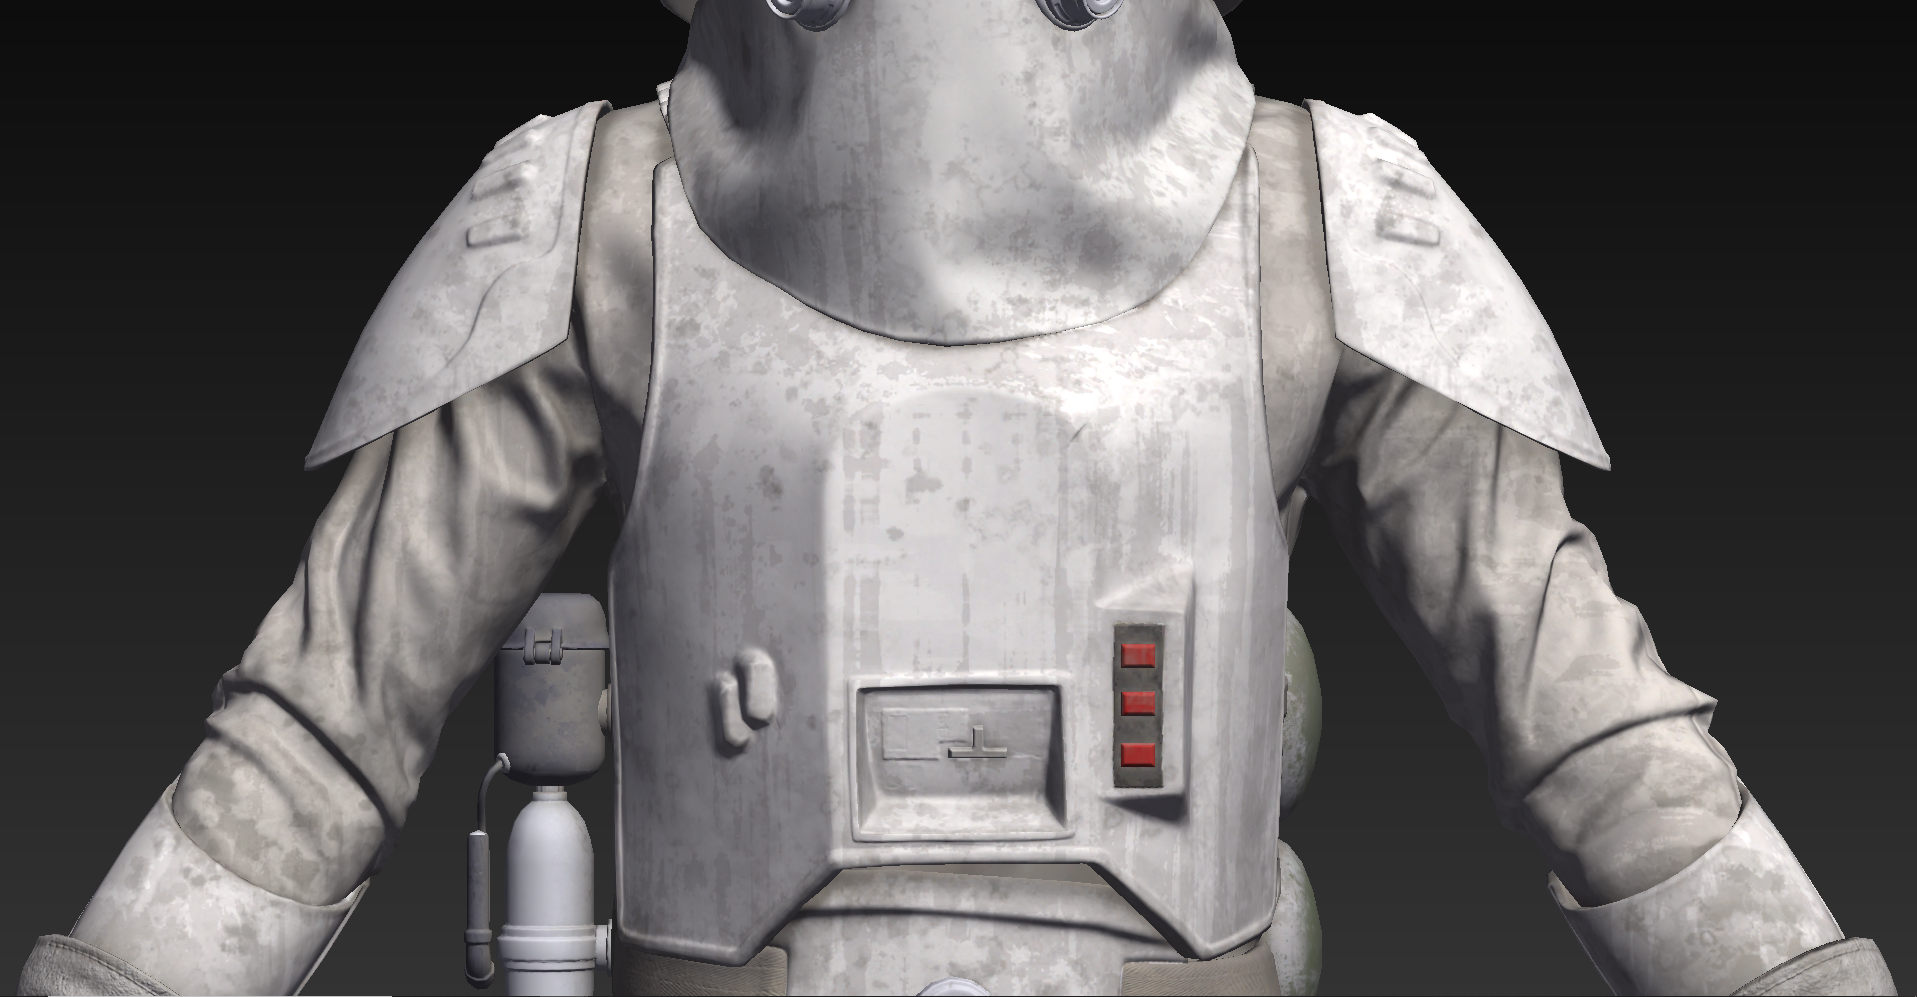
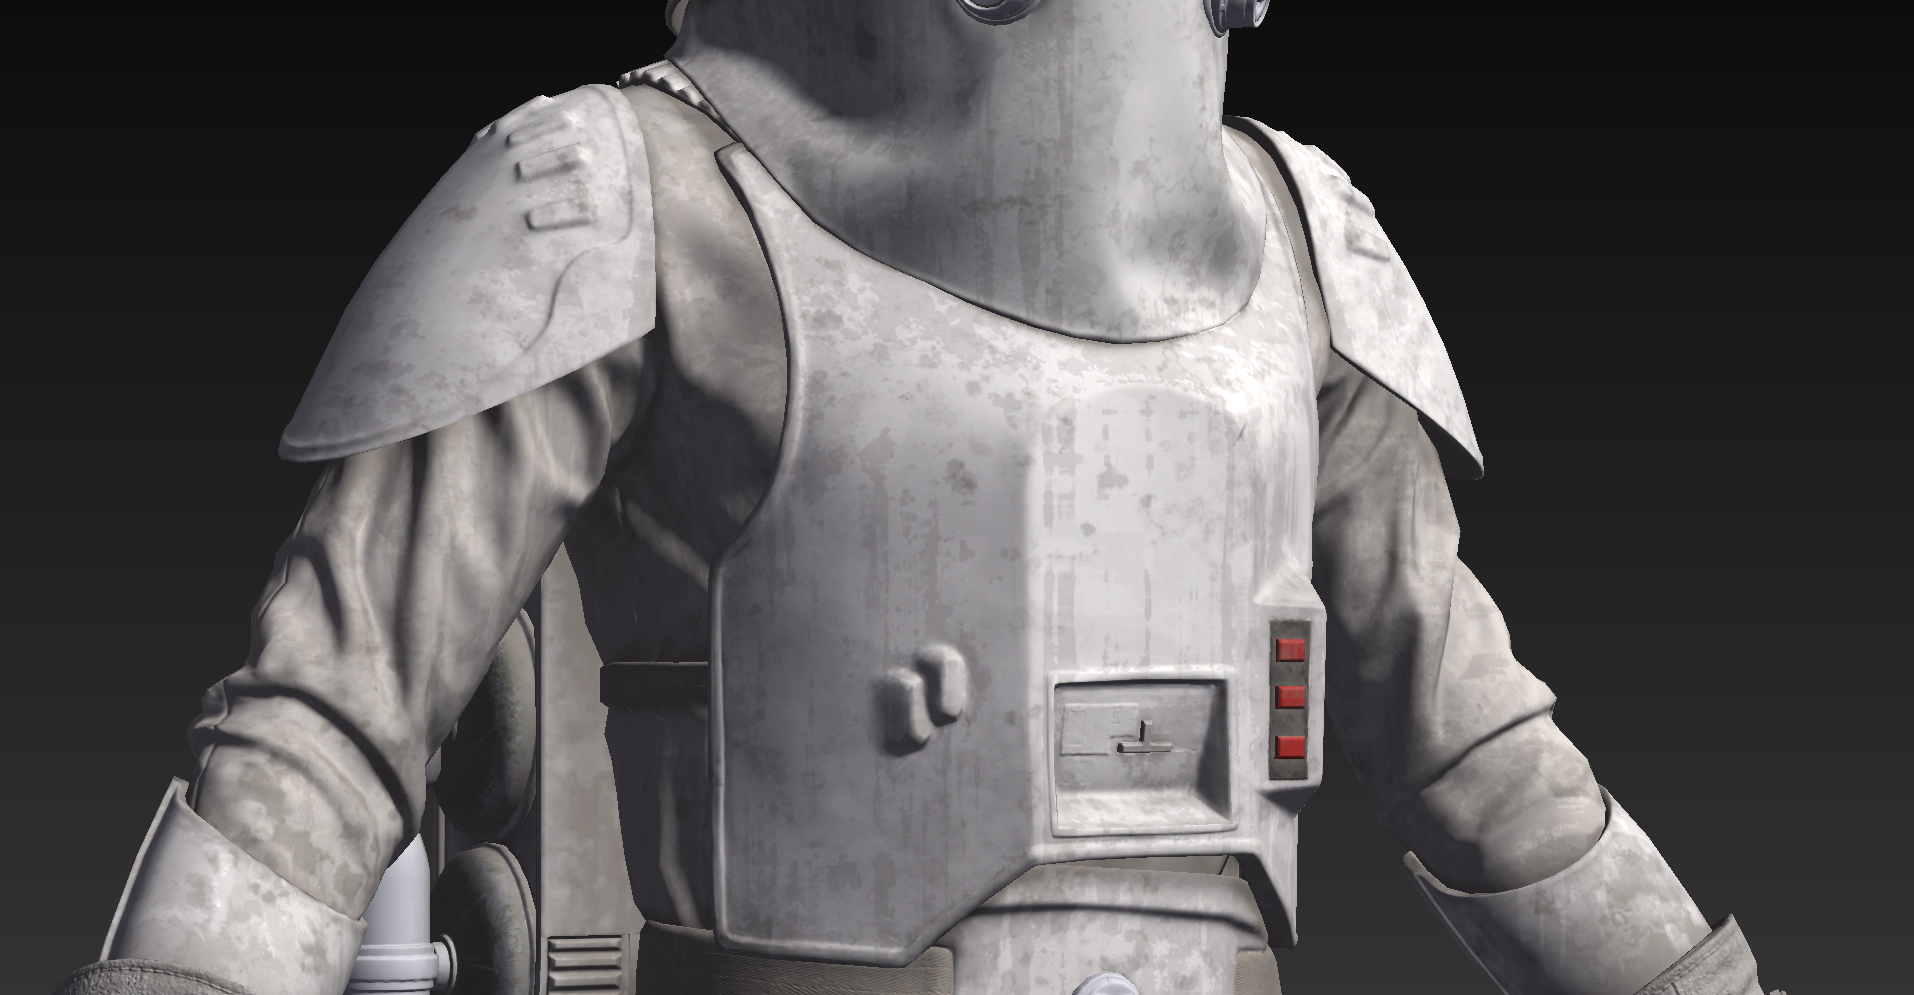
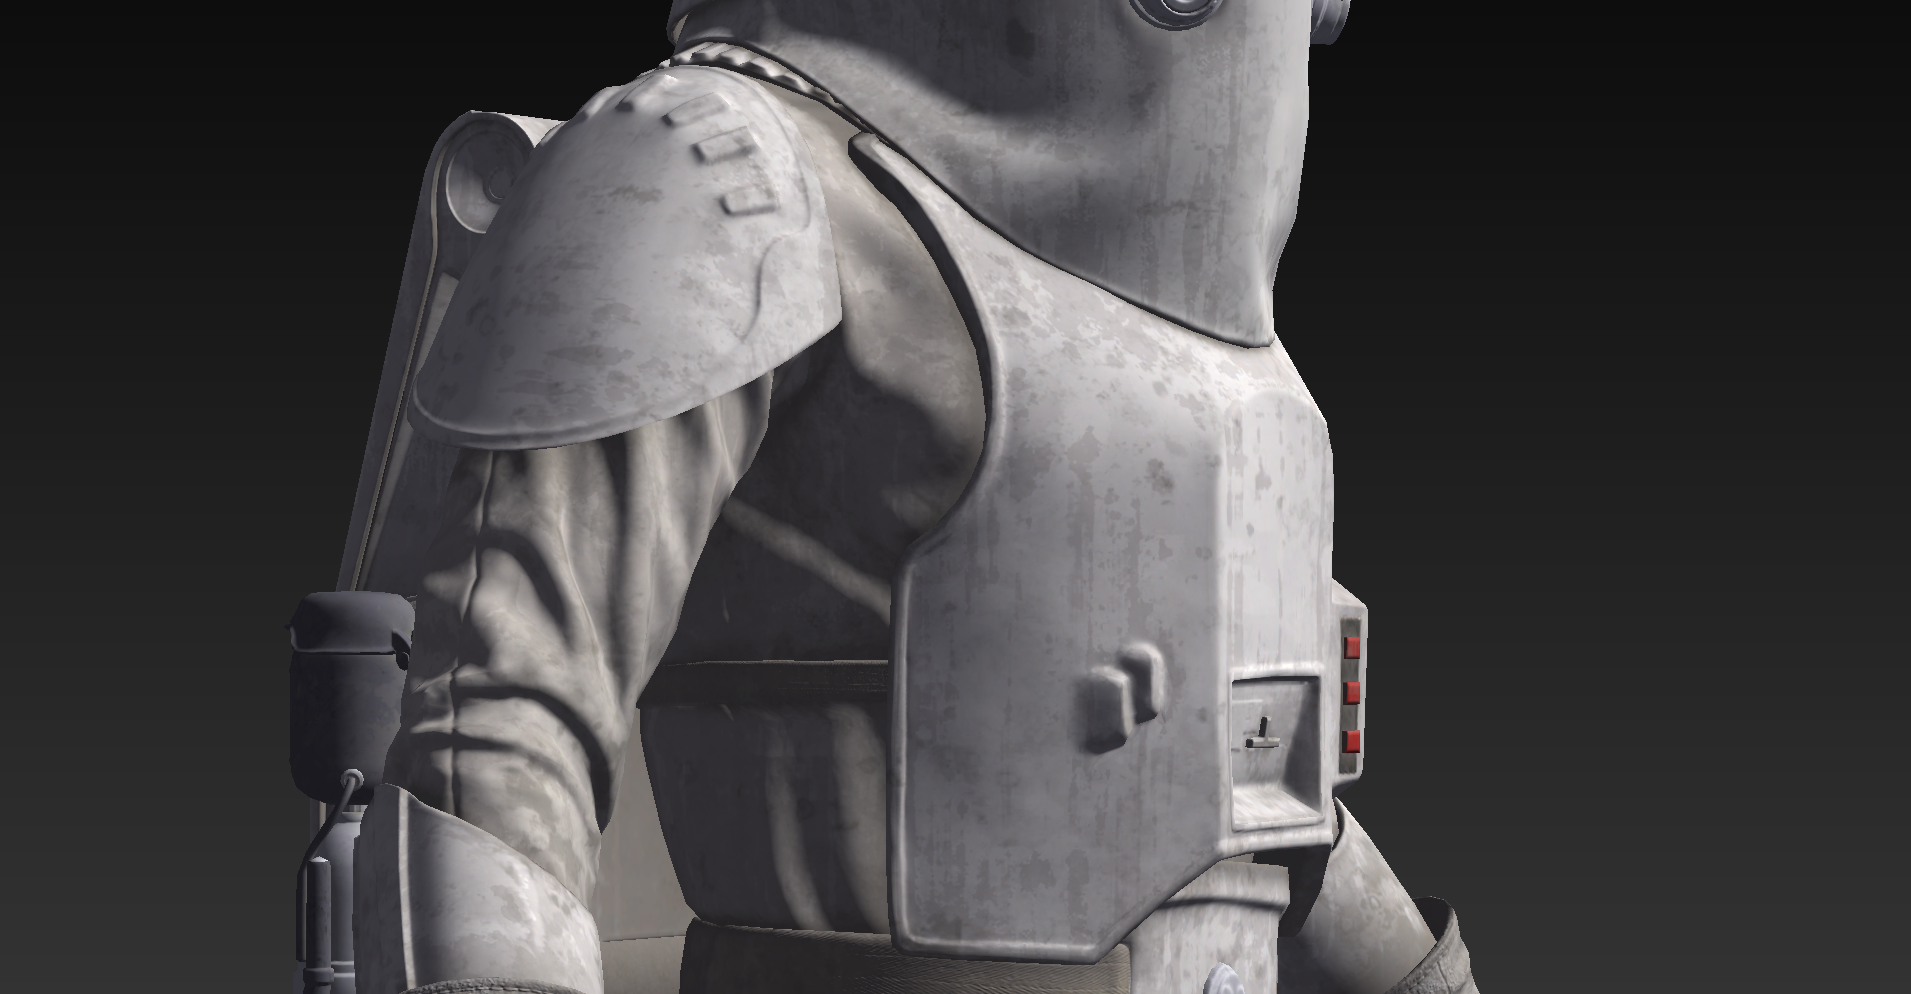
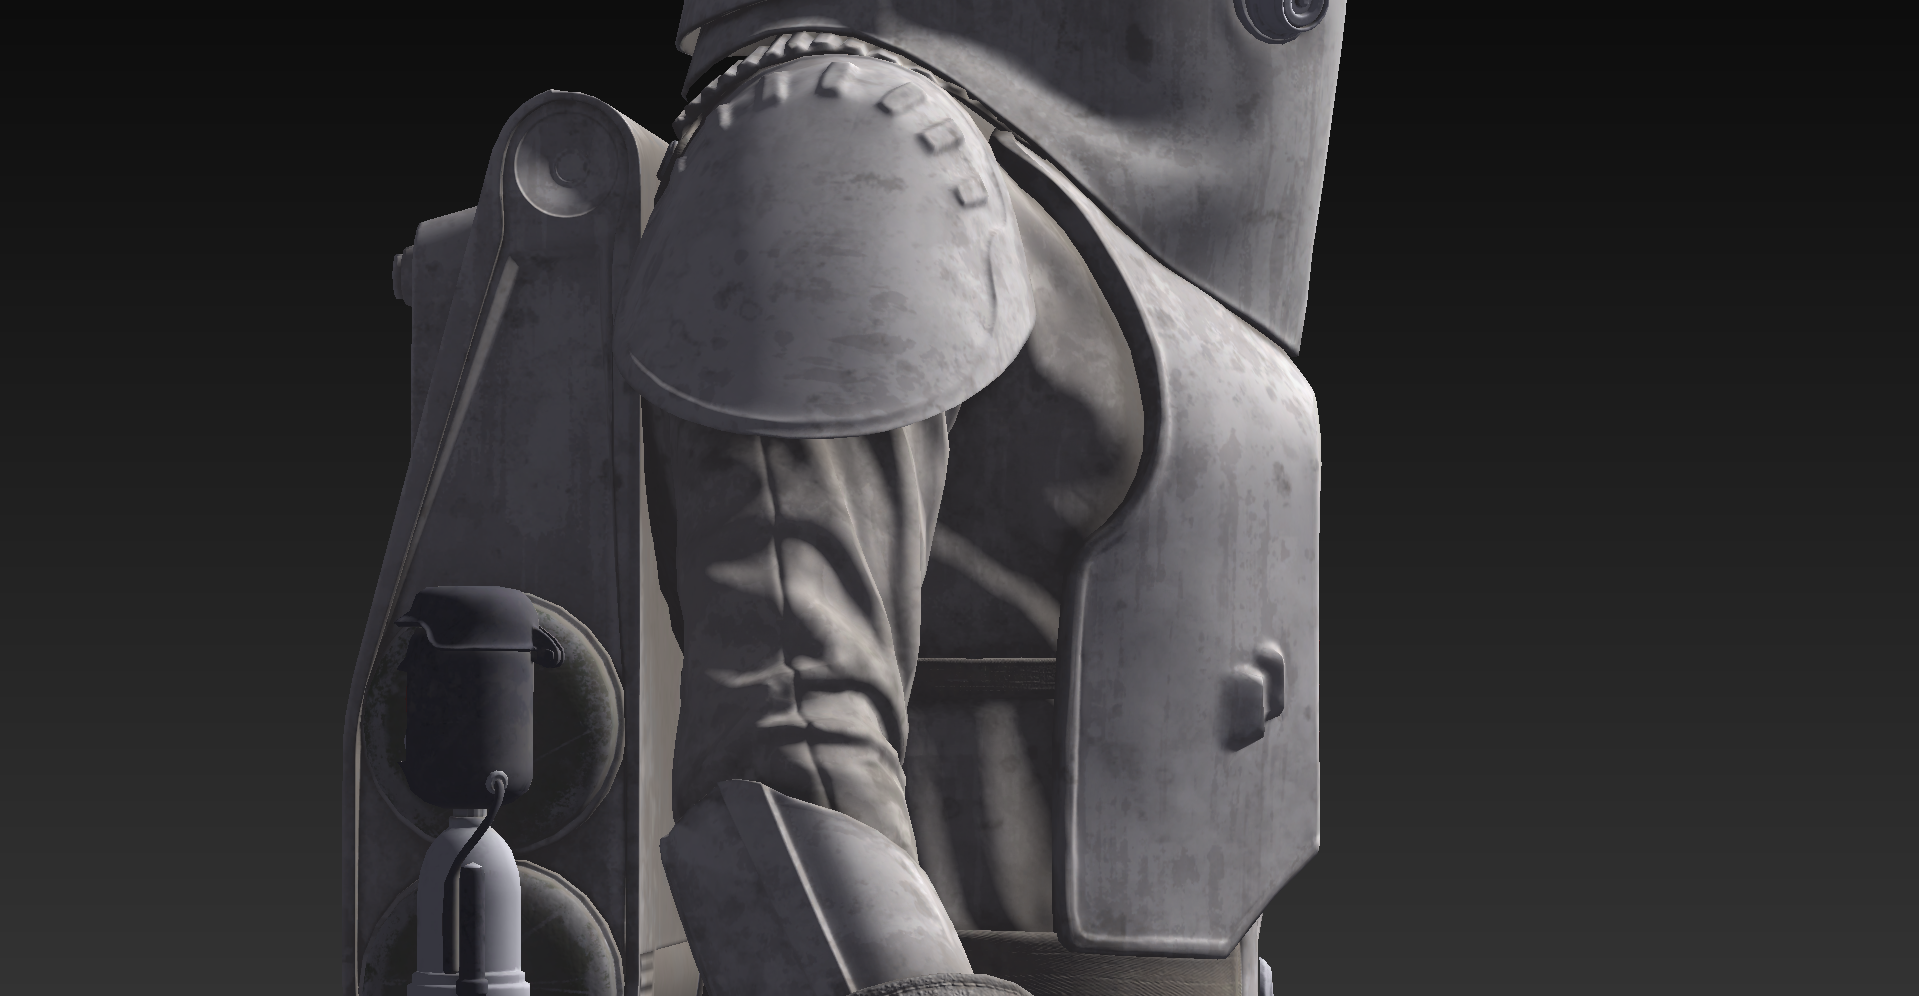
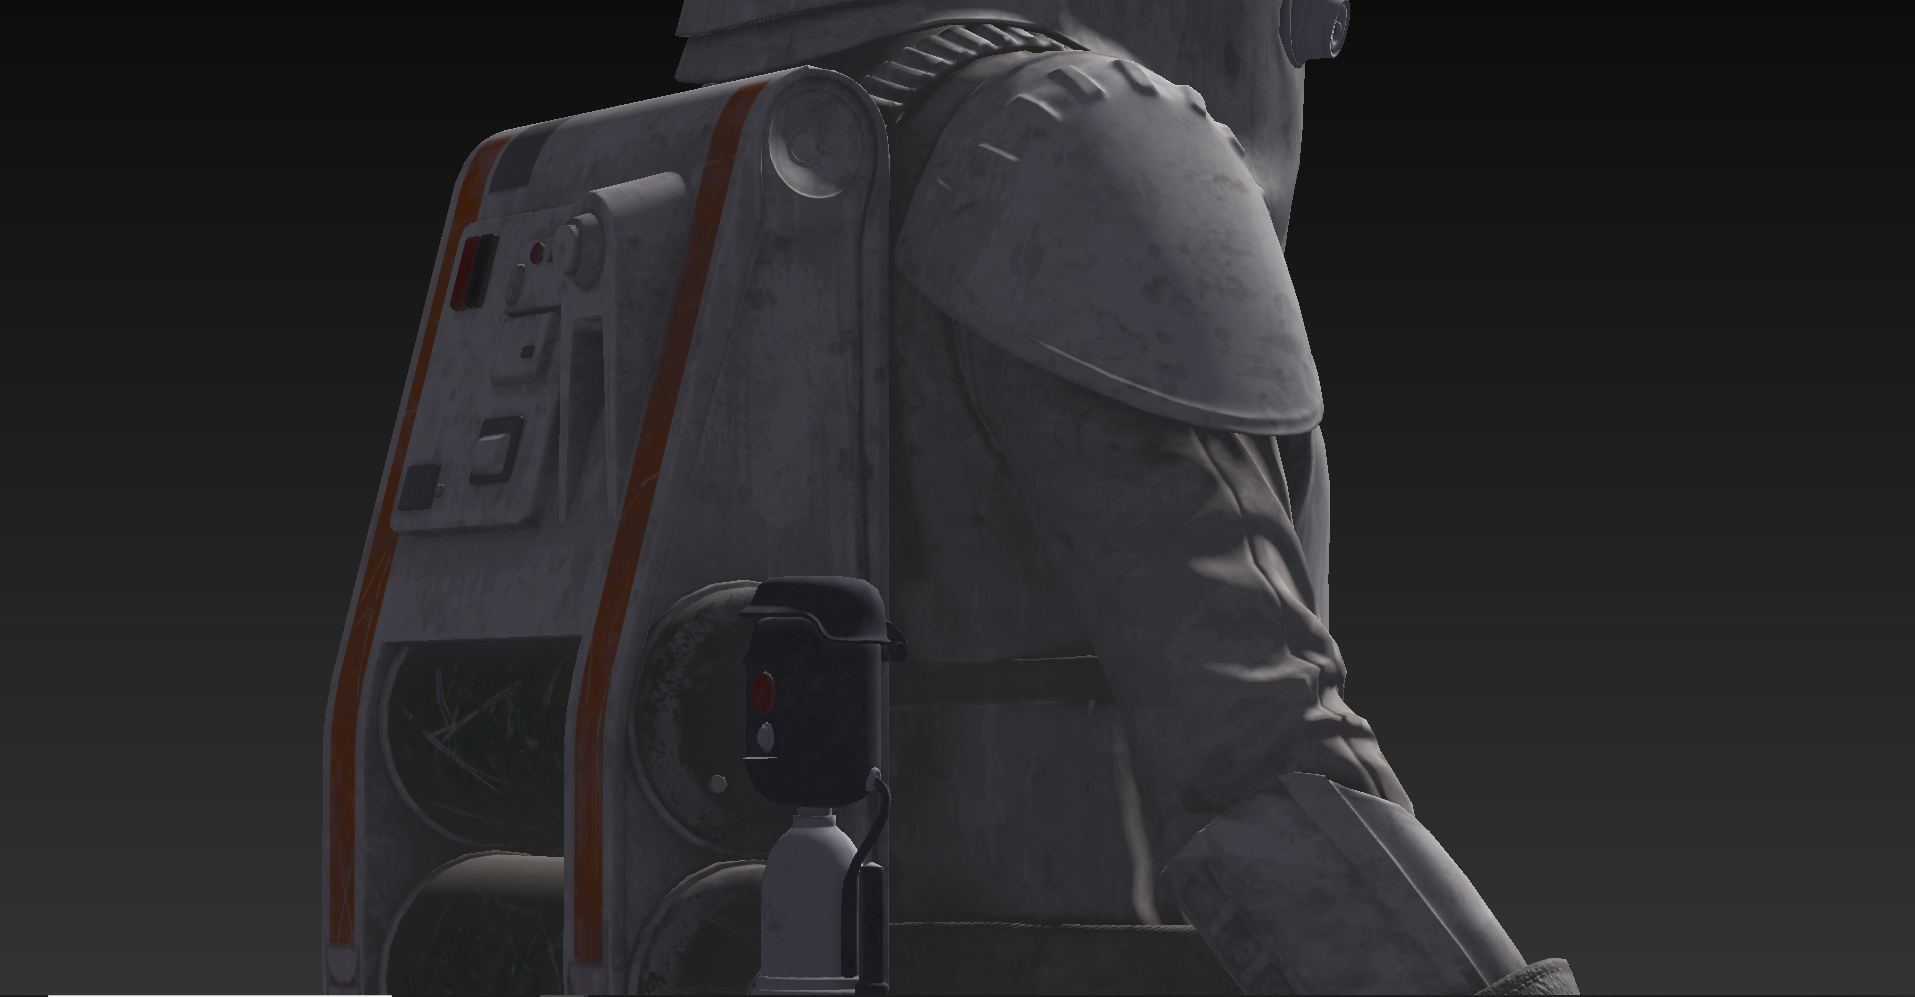
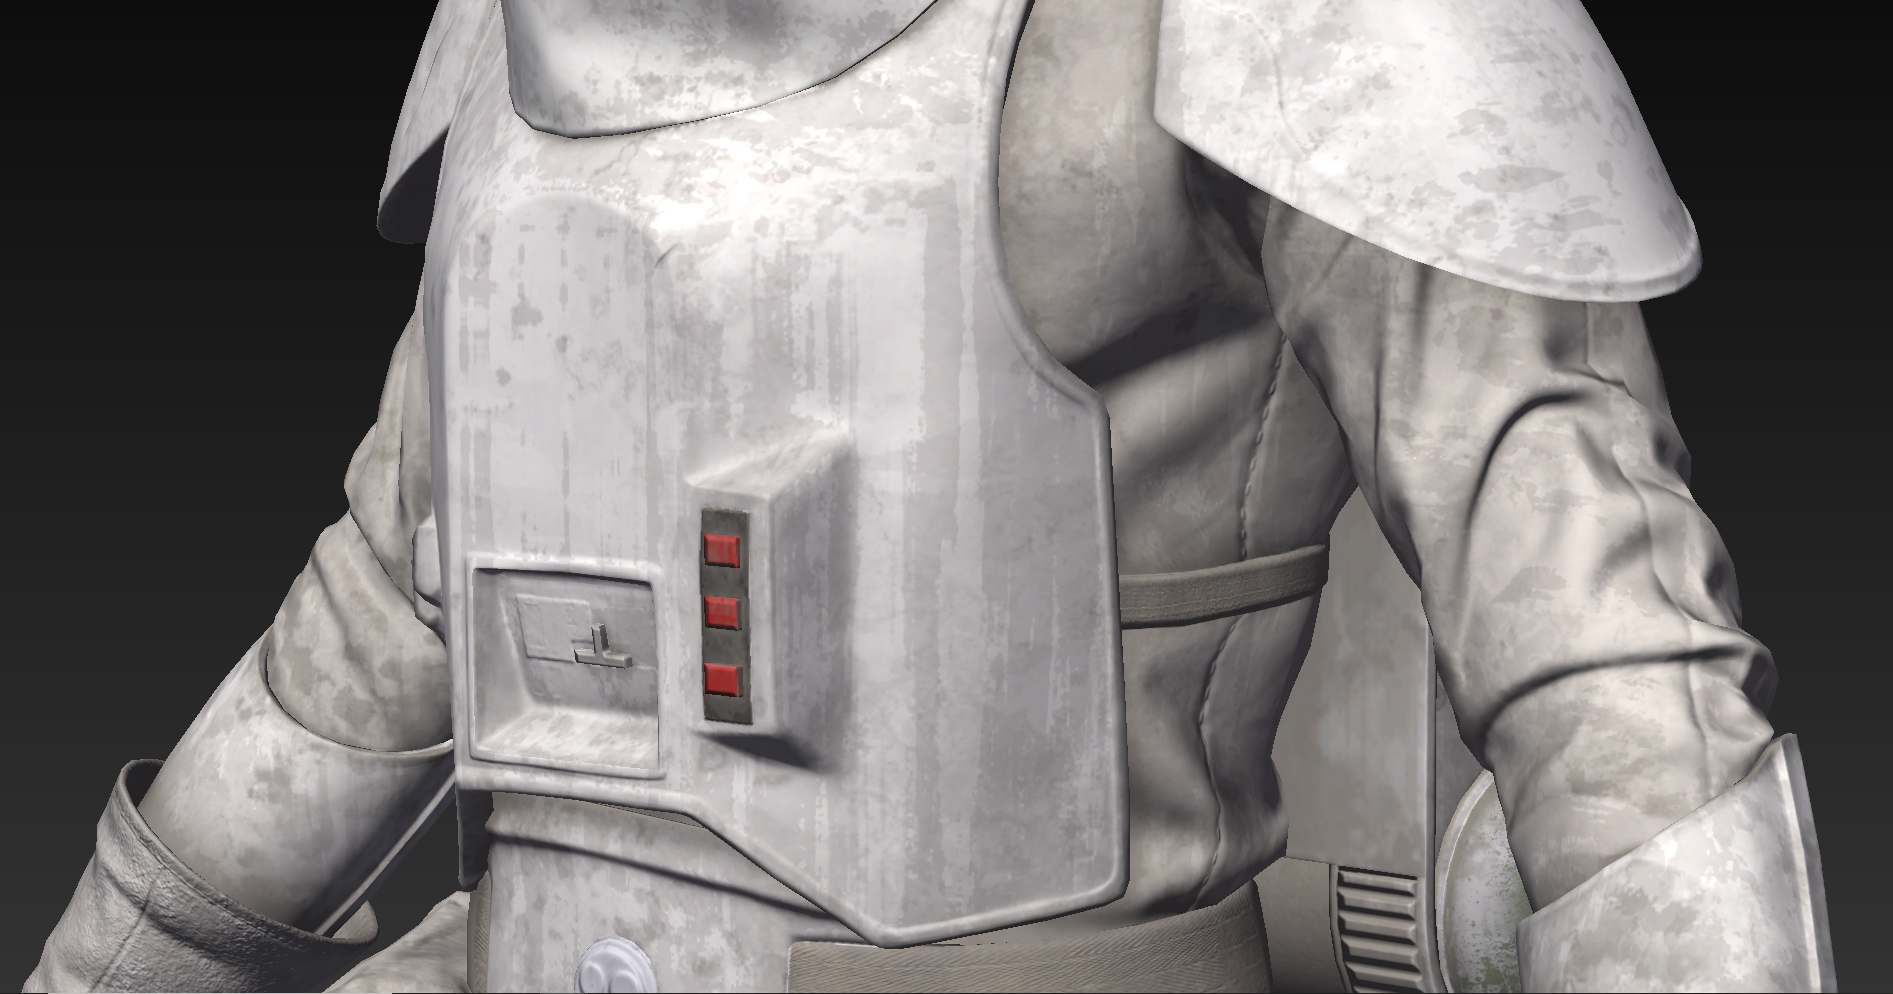
Here is what I have for the shoulder armor and orange pauldron: Shoulder Armor One on each shoulder. The shoulder bells are considered effectively symmetrical. They can be worn interchangeably on the left and right shoulders. OPTIONAL Level two certification (if applicable): There should be a minimal gap between the shoulder armor and chest/back plate. ----------------------- Orange Pauldron Light orange in color and made from vinyl or leather. It must be worn over the right shoulder. The shape of the pauldron looks like a shell with the following: On the side closest to the neck it runs from front to back almost straight with a slight bend towards the outside of the shoulder. On the front and rear there is pronounced curve from the inside of the shoulder to the outside as it rounds out to a more gradual curve on the outside of the pauldron and shoulder. There is a black Imperial cog that may be painted or a decal and affix to the lower corner of the front of the pauldron, closest to the chest armor.

-
TheFireAwakens1807's Deathtrooper WIP
IcyTrooper replied to TheFireAwakens1807's topic in Imperial Death Trooper
I haven't trimmed fiberglass in on armor but I'd imagine that if you washed it down with warm water and a brush (not wire brush) it should remove it from any surface it is on; similar to removing from clothes. If you get it in your skin then you do a cold shower to close up pores and then hot shower to open them to release the fiberglass. -
Since I don't think there are any other things needed for the helmet I can add it to the "pre-finalized" status above and touch back at the end or during discussion if something else pops up. Additionally, we are probably going to need L2 details to make sure there are no visible attachments on the shoulder straps that show how they are attached to the armor. This could be a L1 detail though because modifications are already needed to the chest plate if I remember correctly. With that being said, moving onto the shoulder armor should be good.
-
That's a nice print and setup!
-
Imperial Flametrooper (Jedi Fallen Order)
IcyTrooper replied to stevechewbacca's topic in Imperial Flametrooper (JFO)
That is absolutely no problem! We'll get a group together to work on the text. -
Imperial Flametrooper (Jedi Fallen Order)
IcyTrooper replied to stevechewbacca's topic in Imperial Flametrooper (JFO)
Very nice update! Just a question, did you have any CRL text started yet? I wanted to ask that before I prep the thread for the CRL text discussion and we go piece by piece. -
No worries! Life comes first as well all know ...at your own pace is absolutely ok! I look forward to the updates in the future
-
Sergeant Kreel WIP. Comic Star Wars (2015) Issue #59&60
IcyTrooper replied to darthRivera's topic in Sergeant Kreel
Much better! -
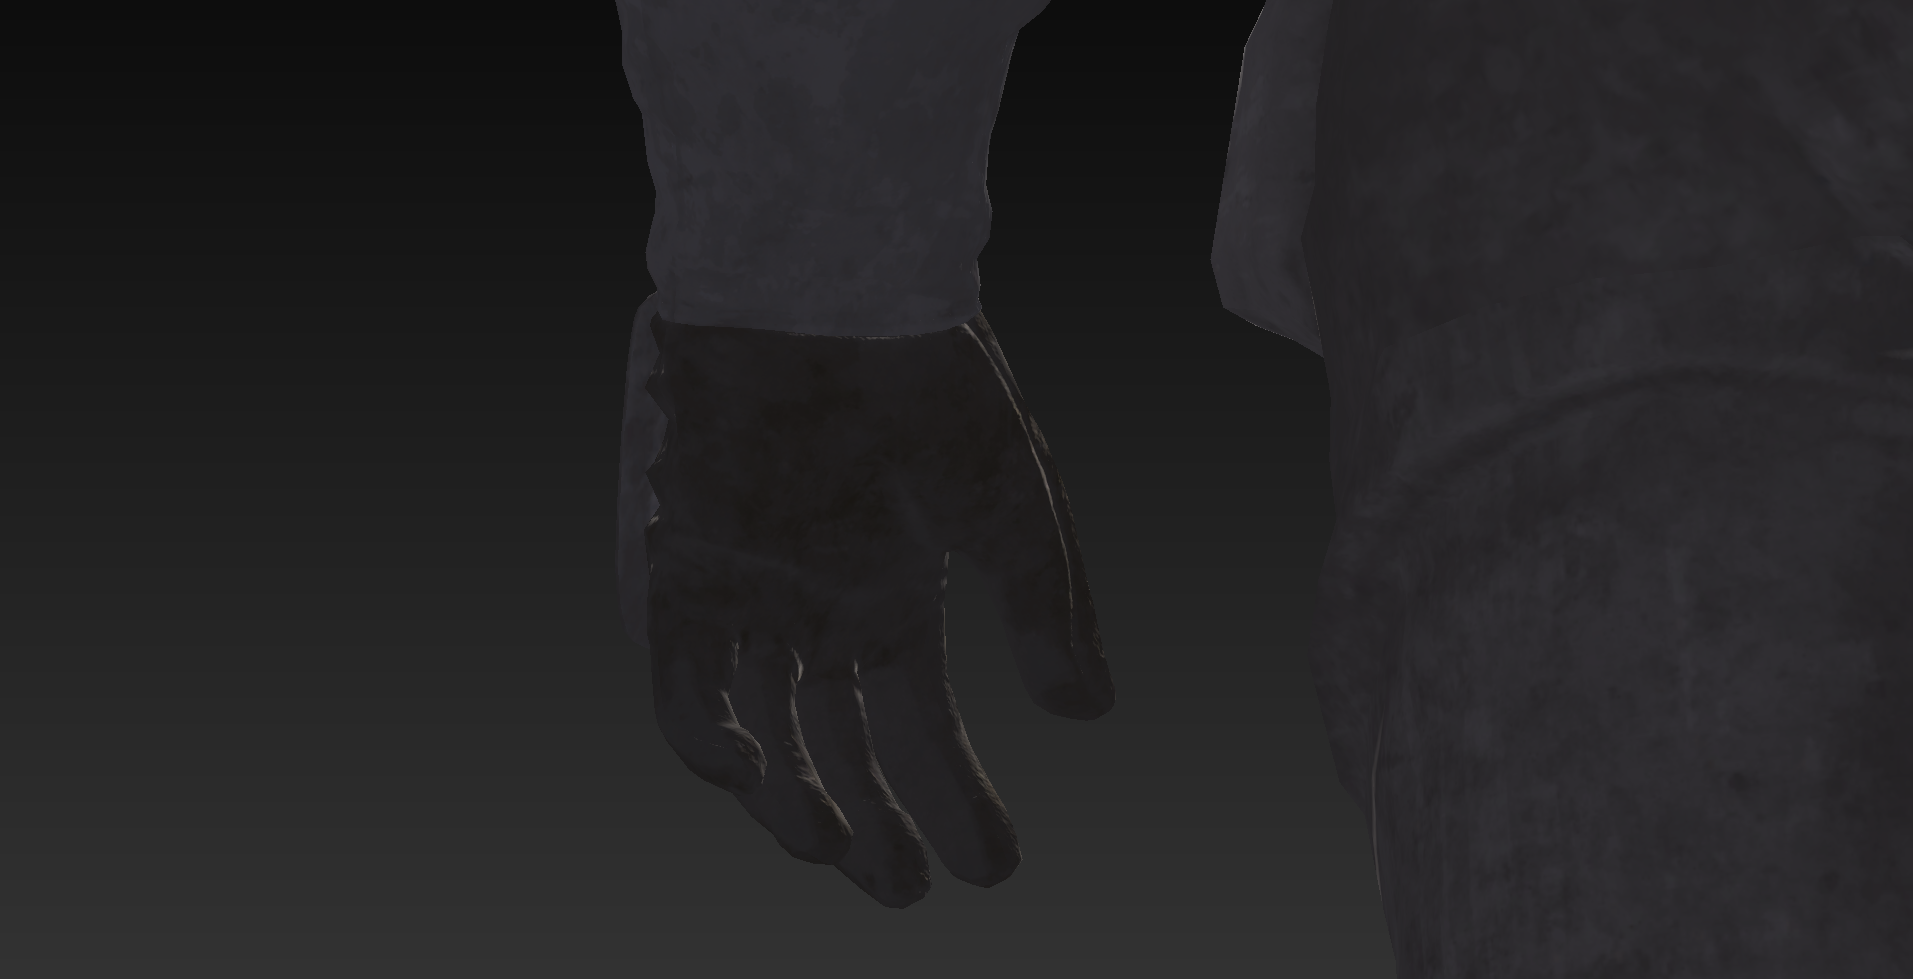
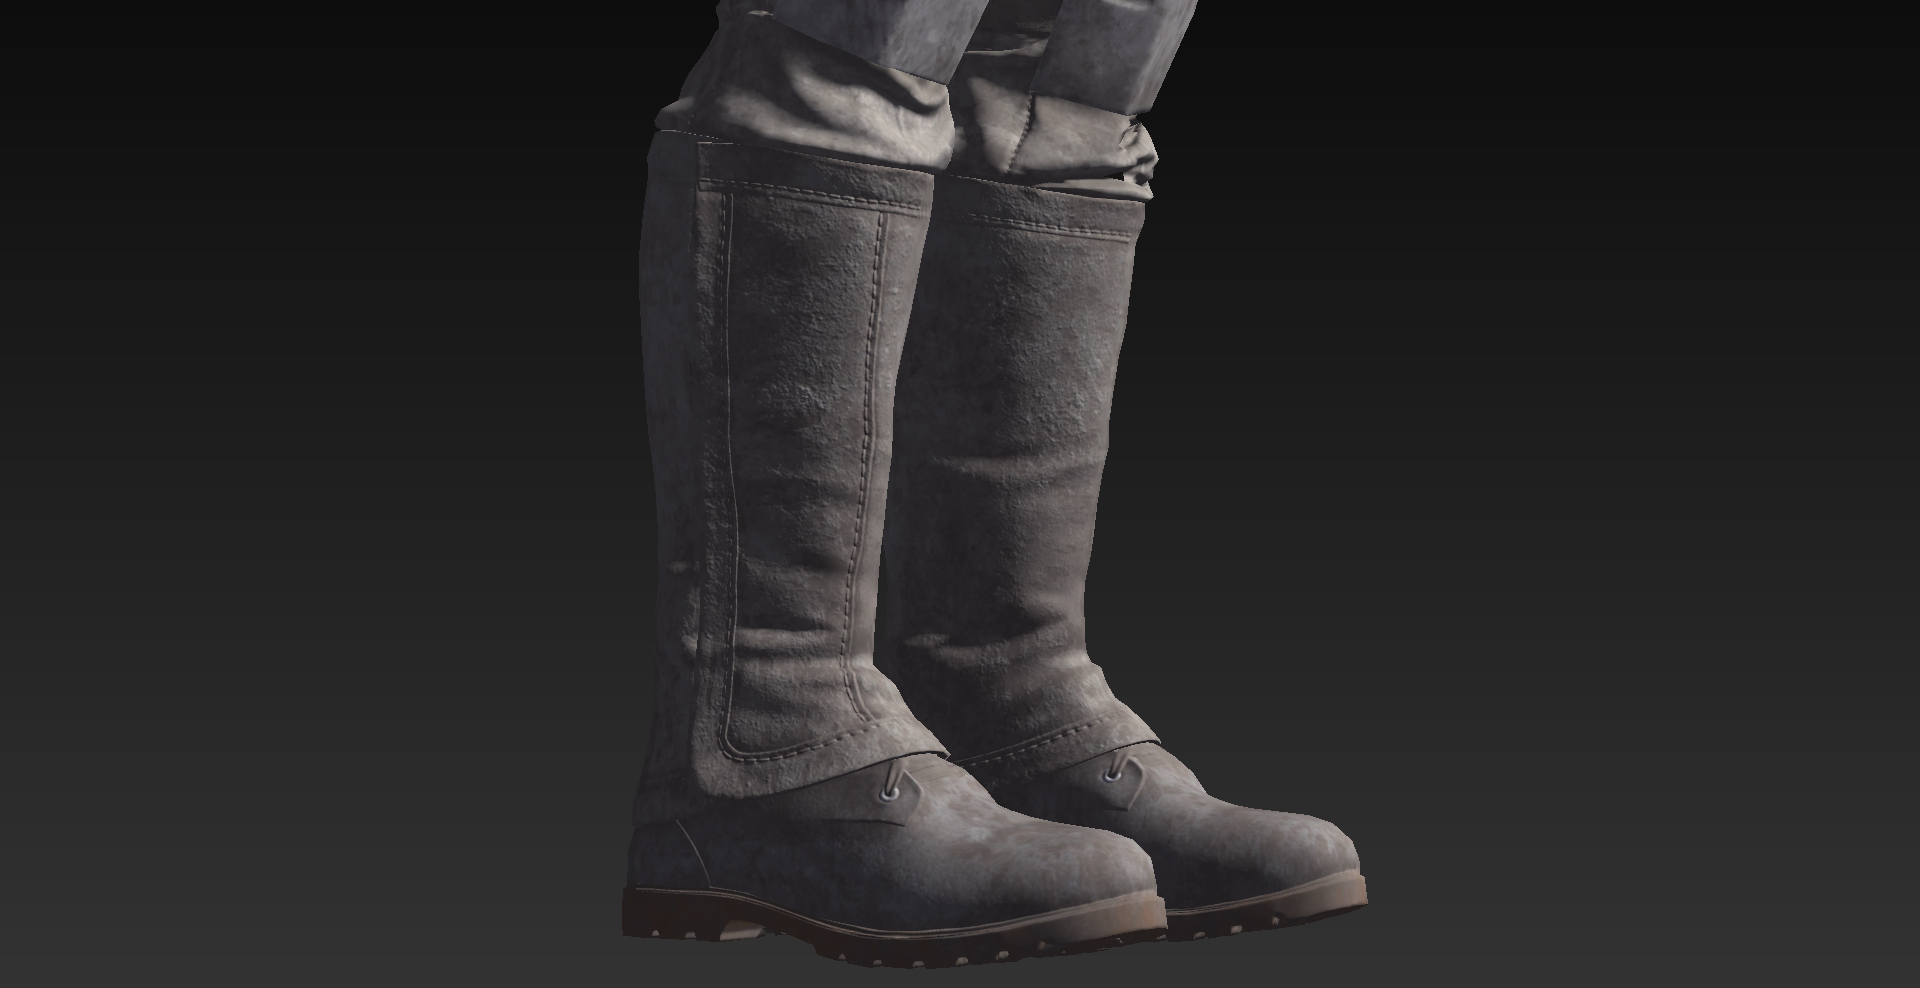
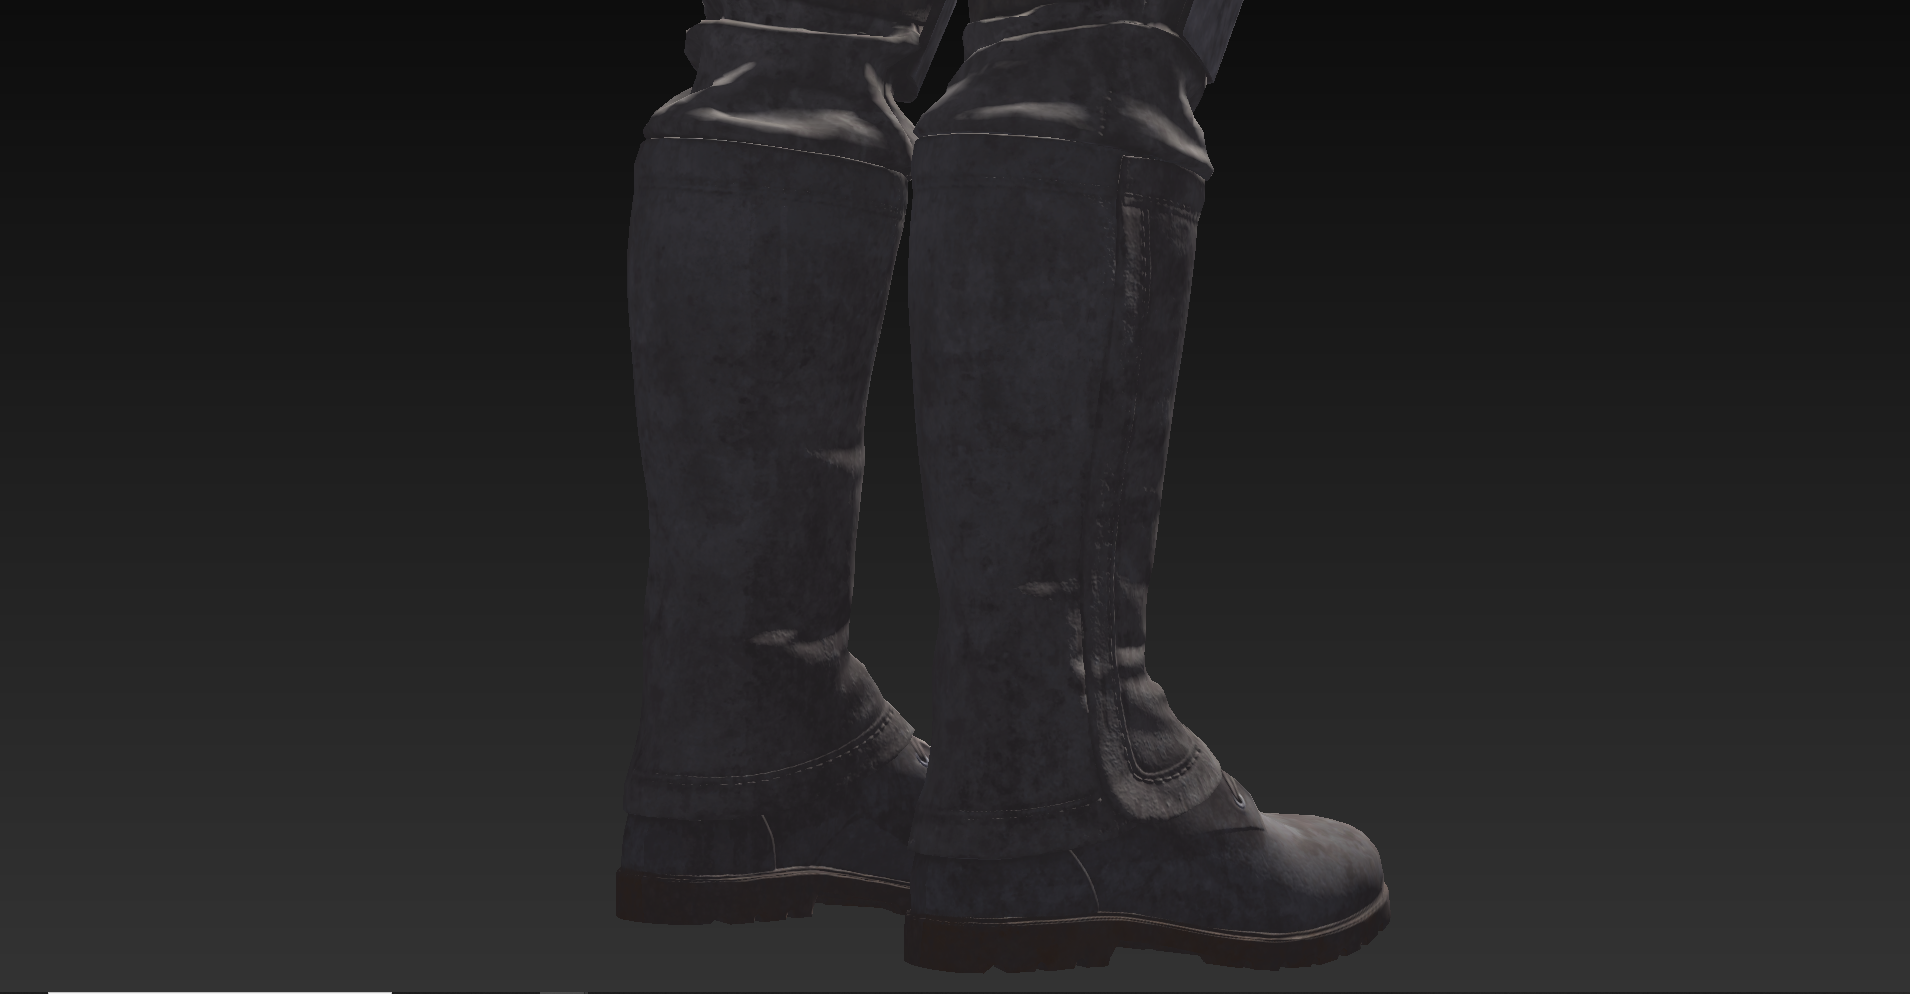
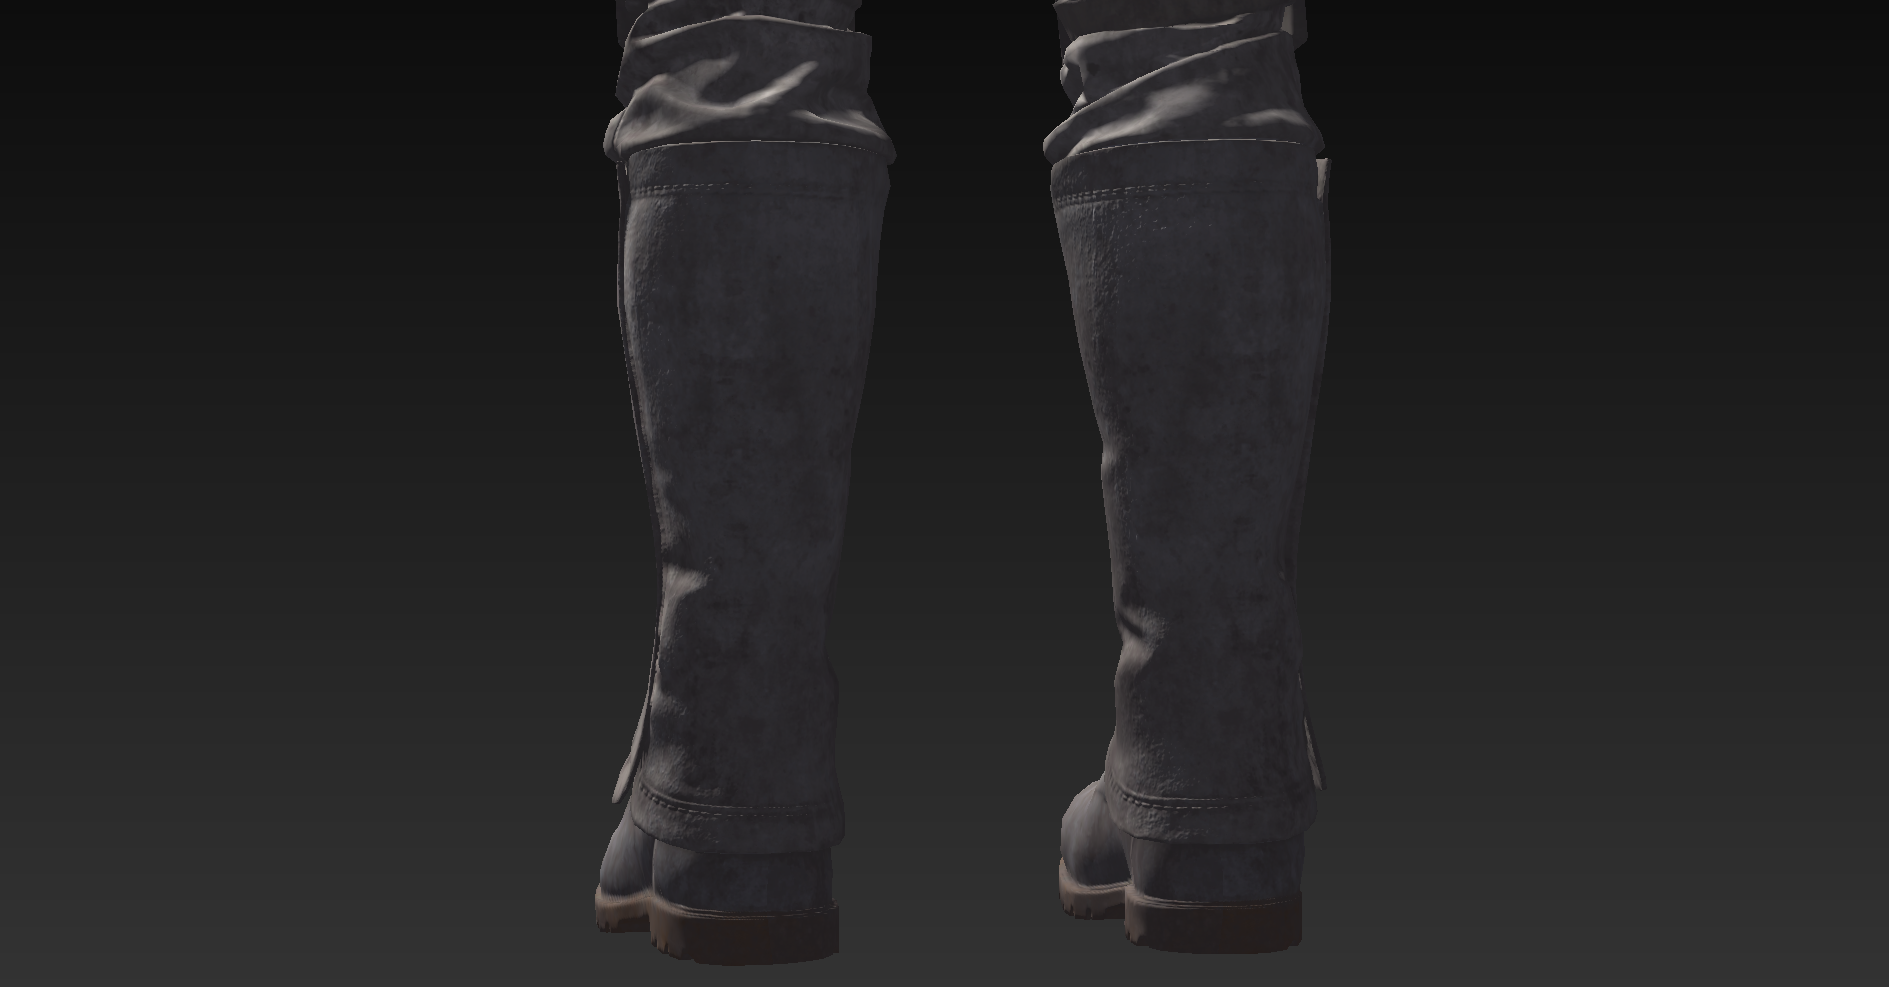
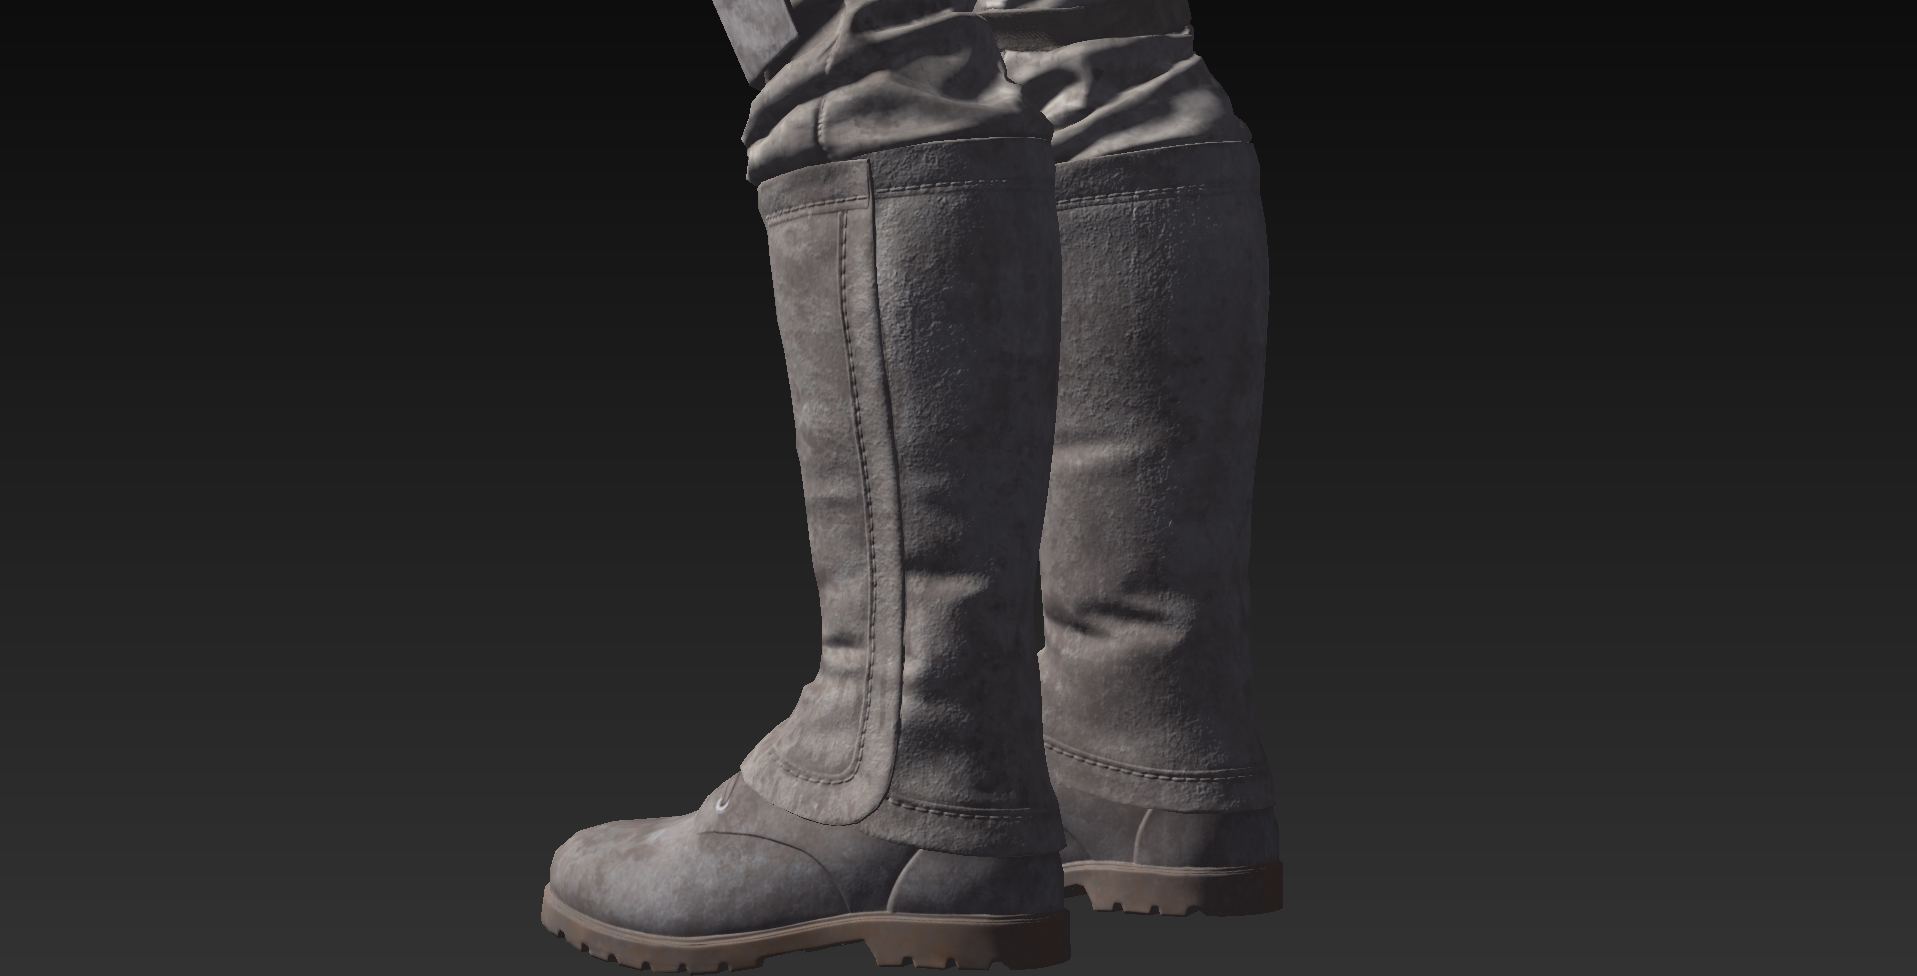
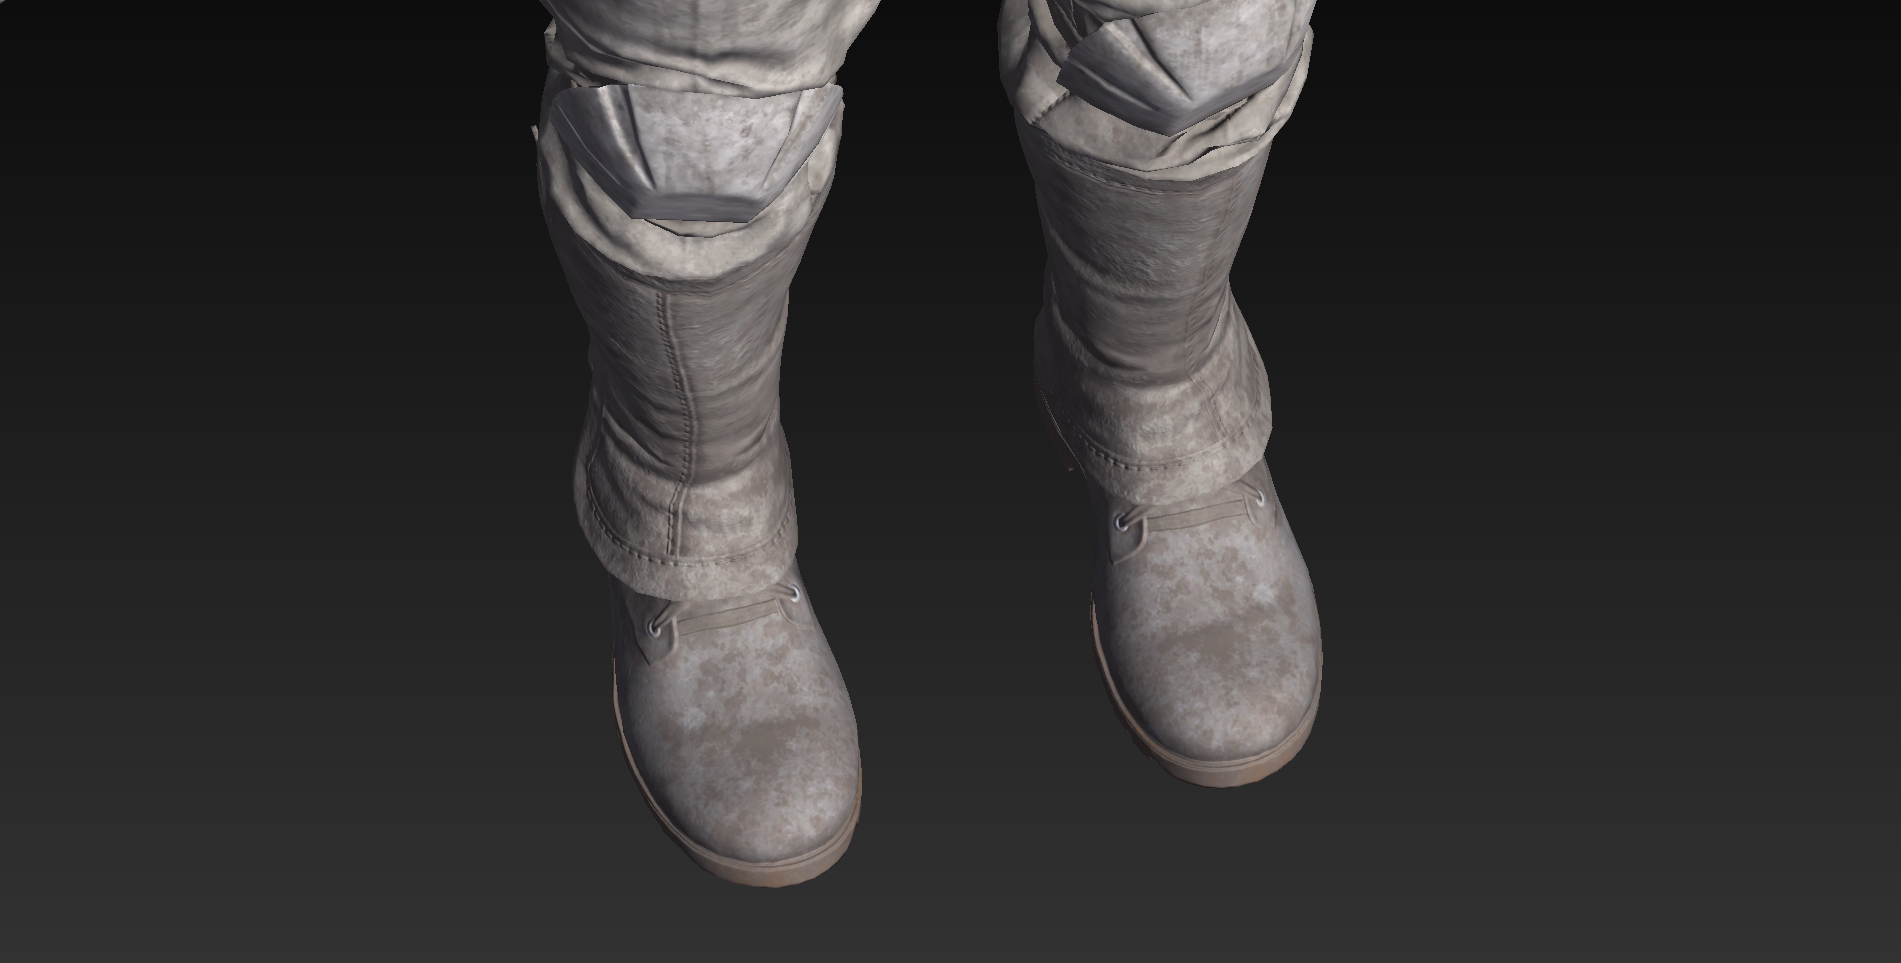
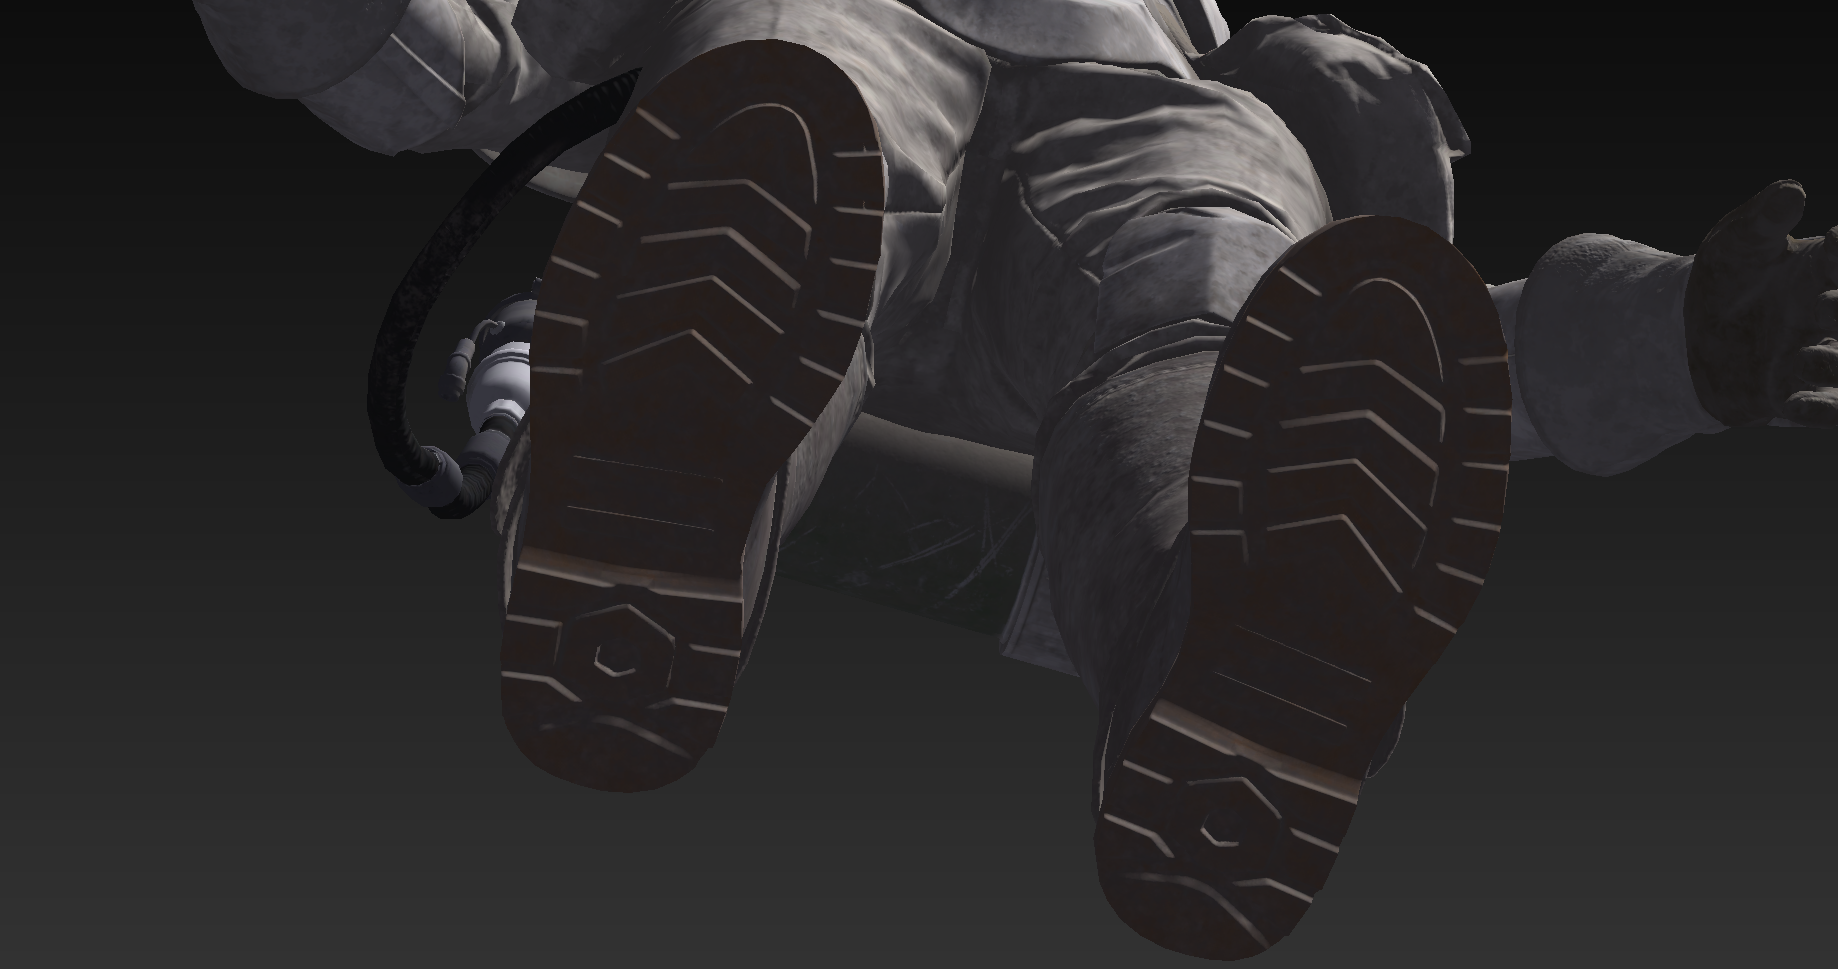
Boots - correct ones and possible color revision
IcyTrooper replied to FireMist's topic in Shadow Stormtrooper
Darylee, Thanks for the post! Yeah that boot style is considered "Elvis" which under the 6th bullet point on the CRL states "Elvis or Mariachi boots are not allowed." I'm not sure where you are located but I saw that Target at one point (at least the one near me) had Jodphur/Chelsea style boots that you could repaint. ImperialBoots also had the proper boots for sale as well. -
Polyflex is awesome stuff! I used that for my Royal Guard helmet after recommendation from some clones. It smooths out perfectly, the only thing you have to watch is very small amounts at a time because it hardens so damn fast! Other than that, it is great!
-
How's it going @Dishrack?!
-
Imperial Flametrooper (Jedi Fallen Order)
IcyTrooper replied to stevechewbacca's topic in Imperial Flametrooper (JFO)
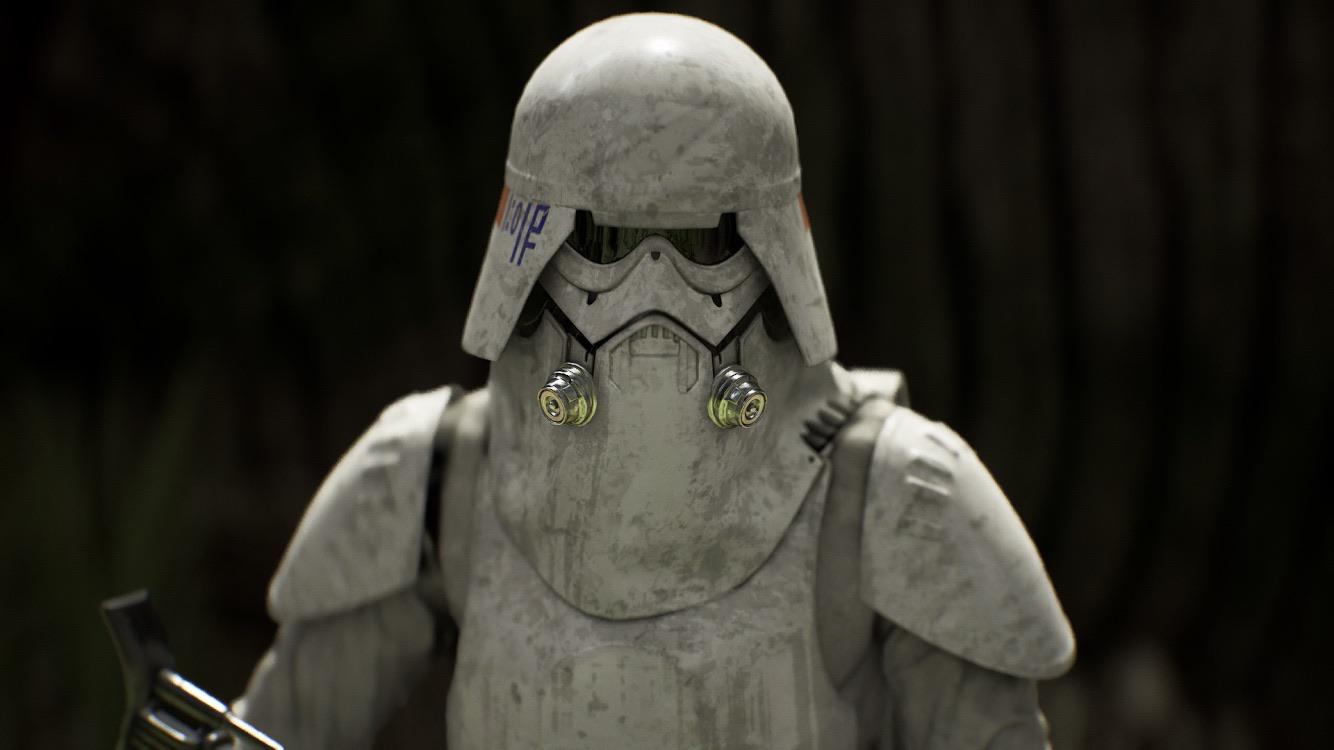
Hello! Do you have a picture of the rivet holes? Generally if it isn't visible in the game we try to steer away from it on the costume, UNLESS, it is something that is required for feasibility of the costume. There is also the possibility that we can move it to a L2 detail. If you don't want it to show you may be able to fill it in and smooth over the spot, or remove it and do the same with an attachment of Velcro or the like to provide the ability to keep the sides together. With the snow knee pads we can for sure make that a L1 detail to have the edge and L2 to not have the edge. I'll have to take a look at the material for the suit and straps/belt and see if we can really focus down on the details. We had a huge debate with suit material when it came to Del Meeko a month or so ago, so discussions could mimic that as well. I'll work on getting a text thread going for CRL stuff today. -
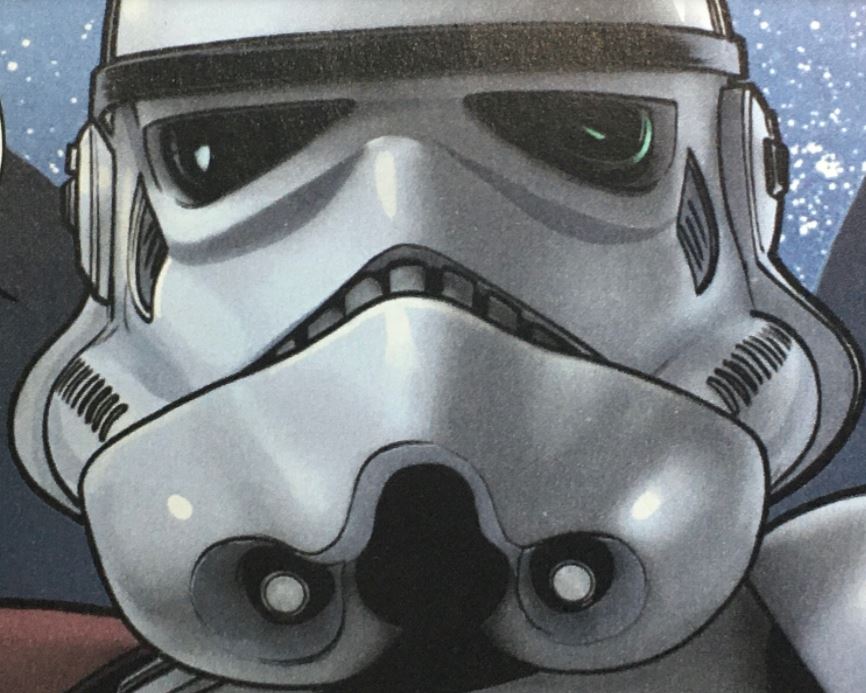
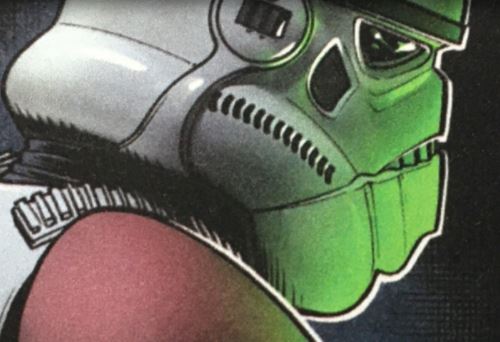
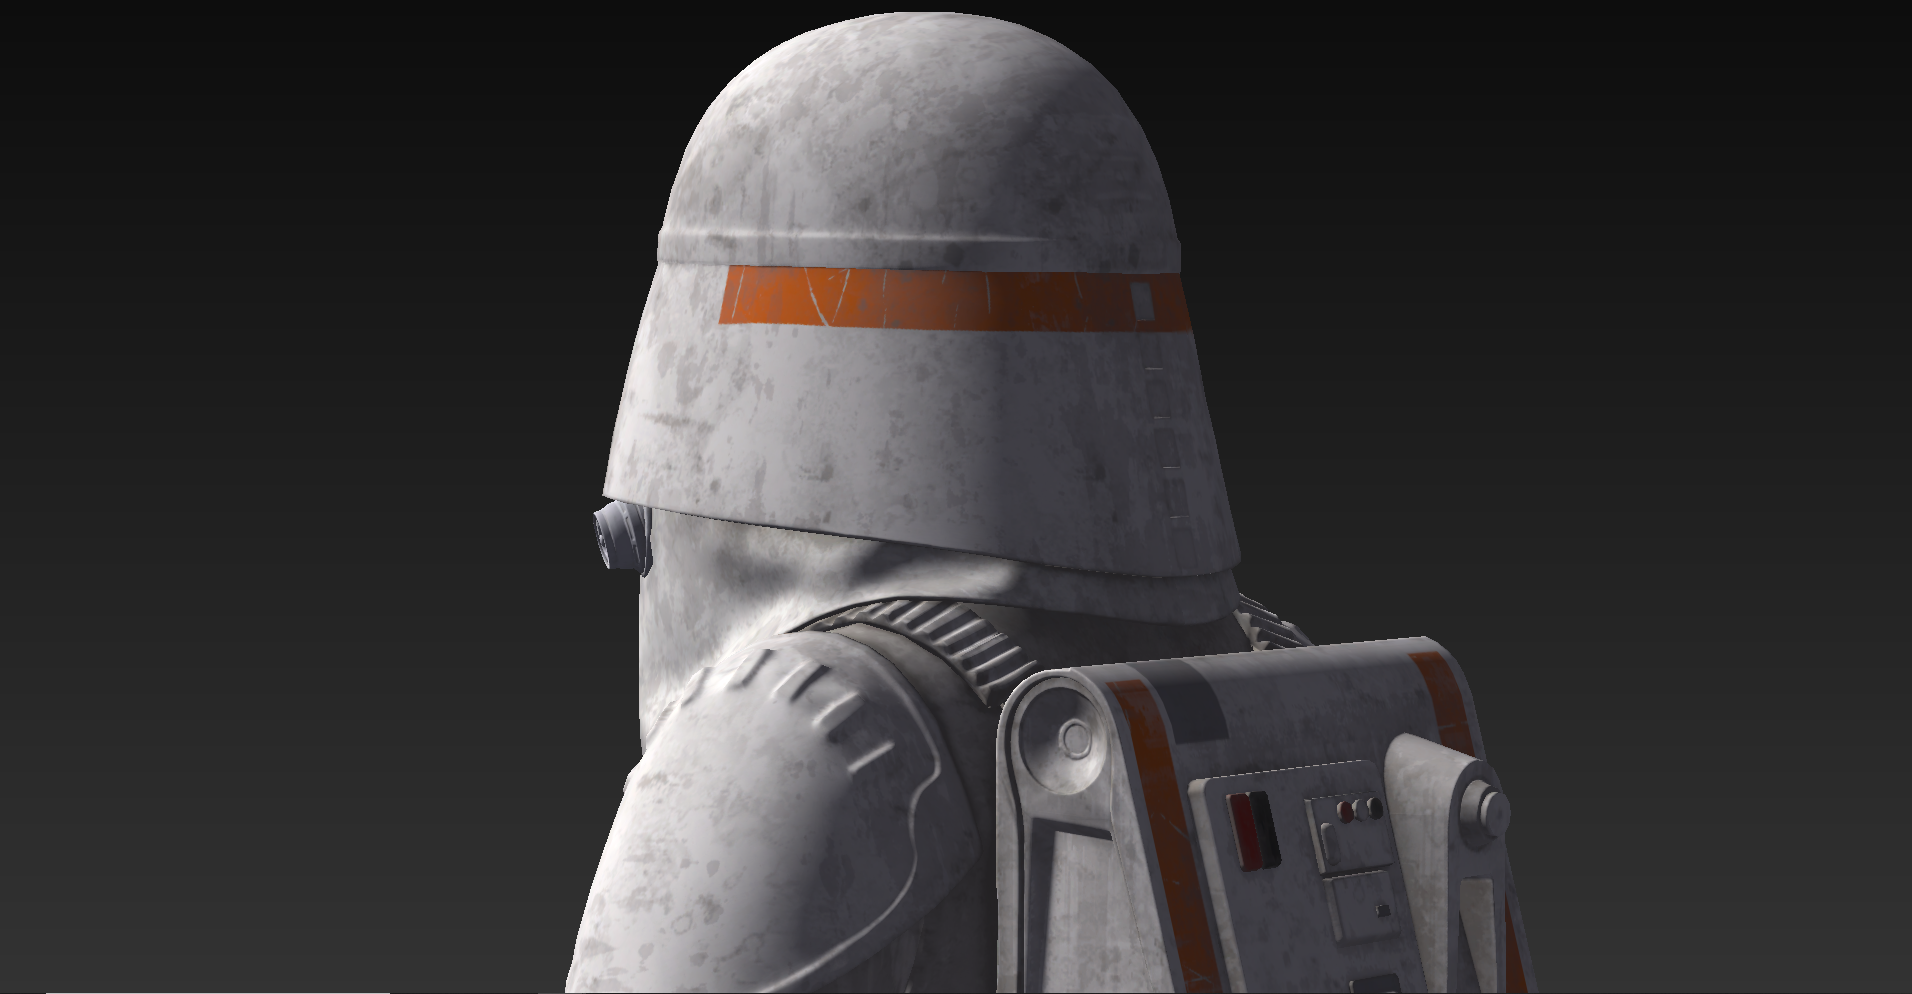
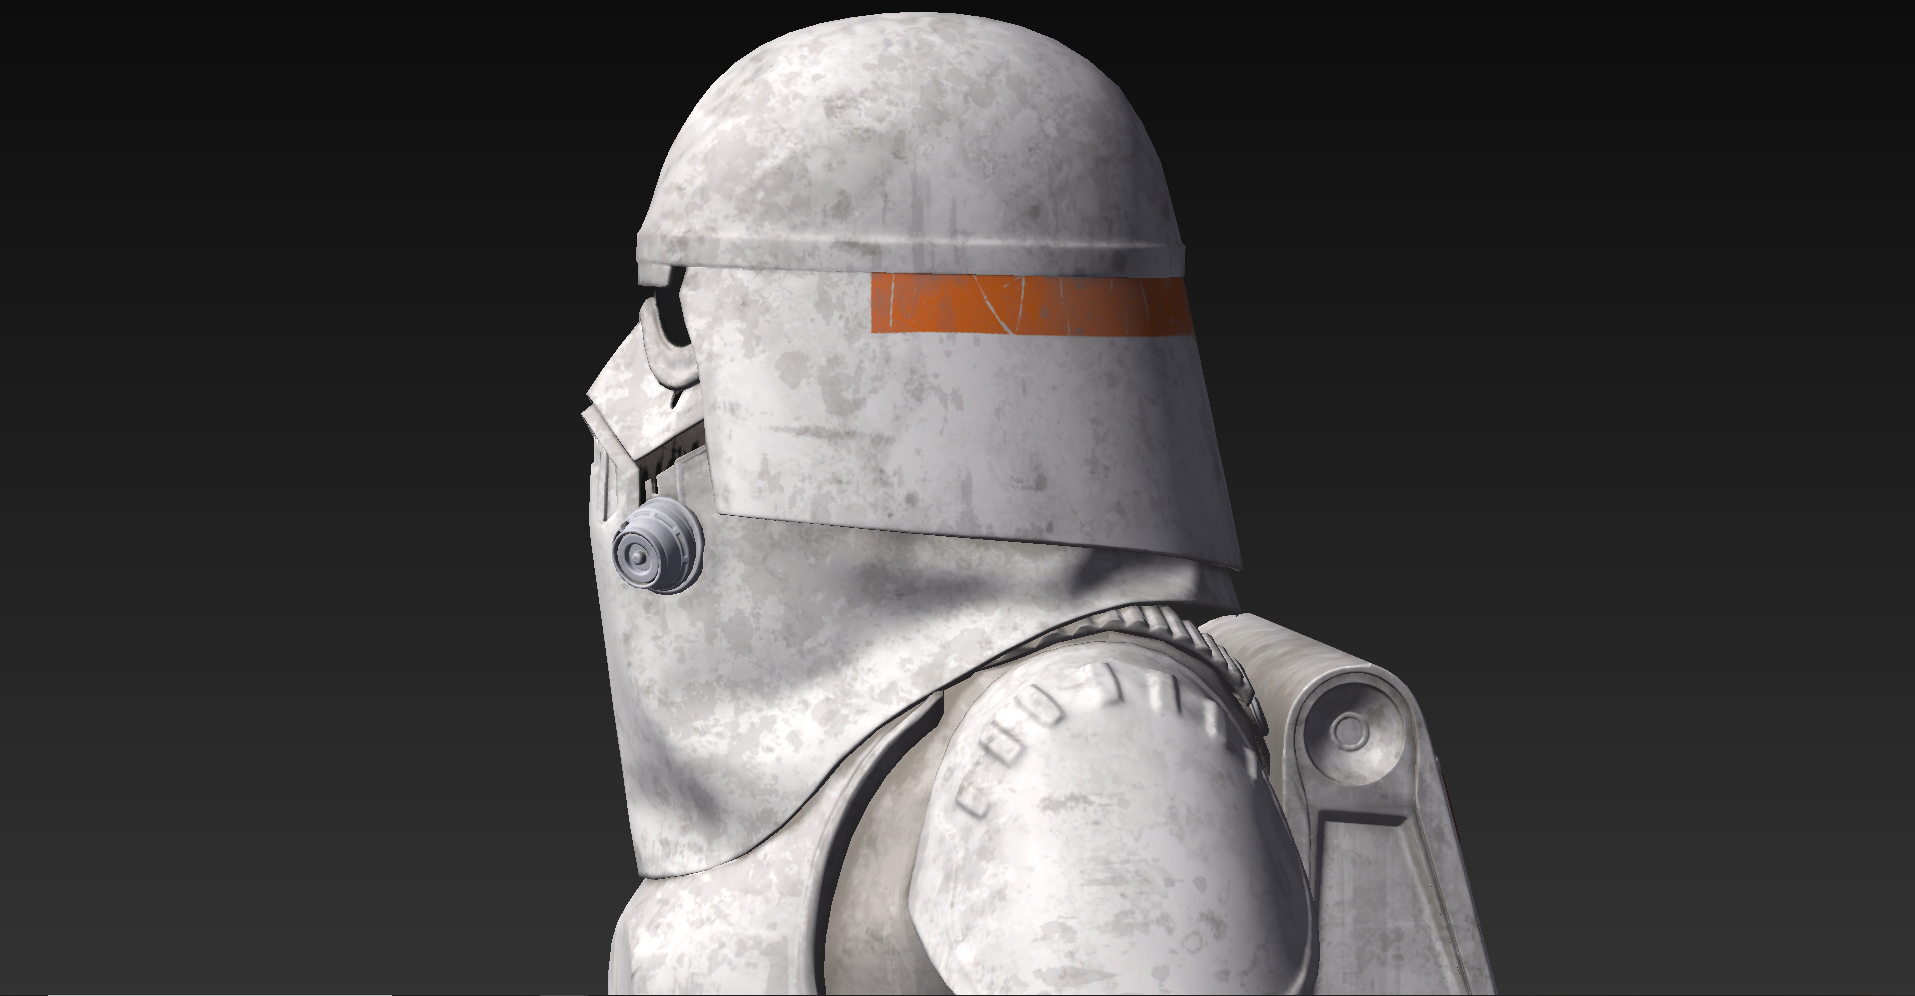
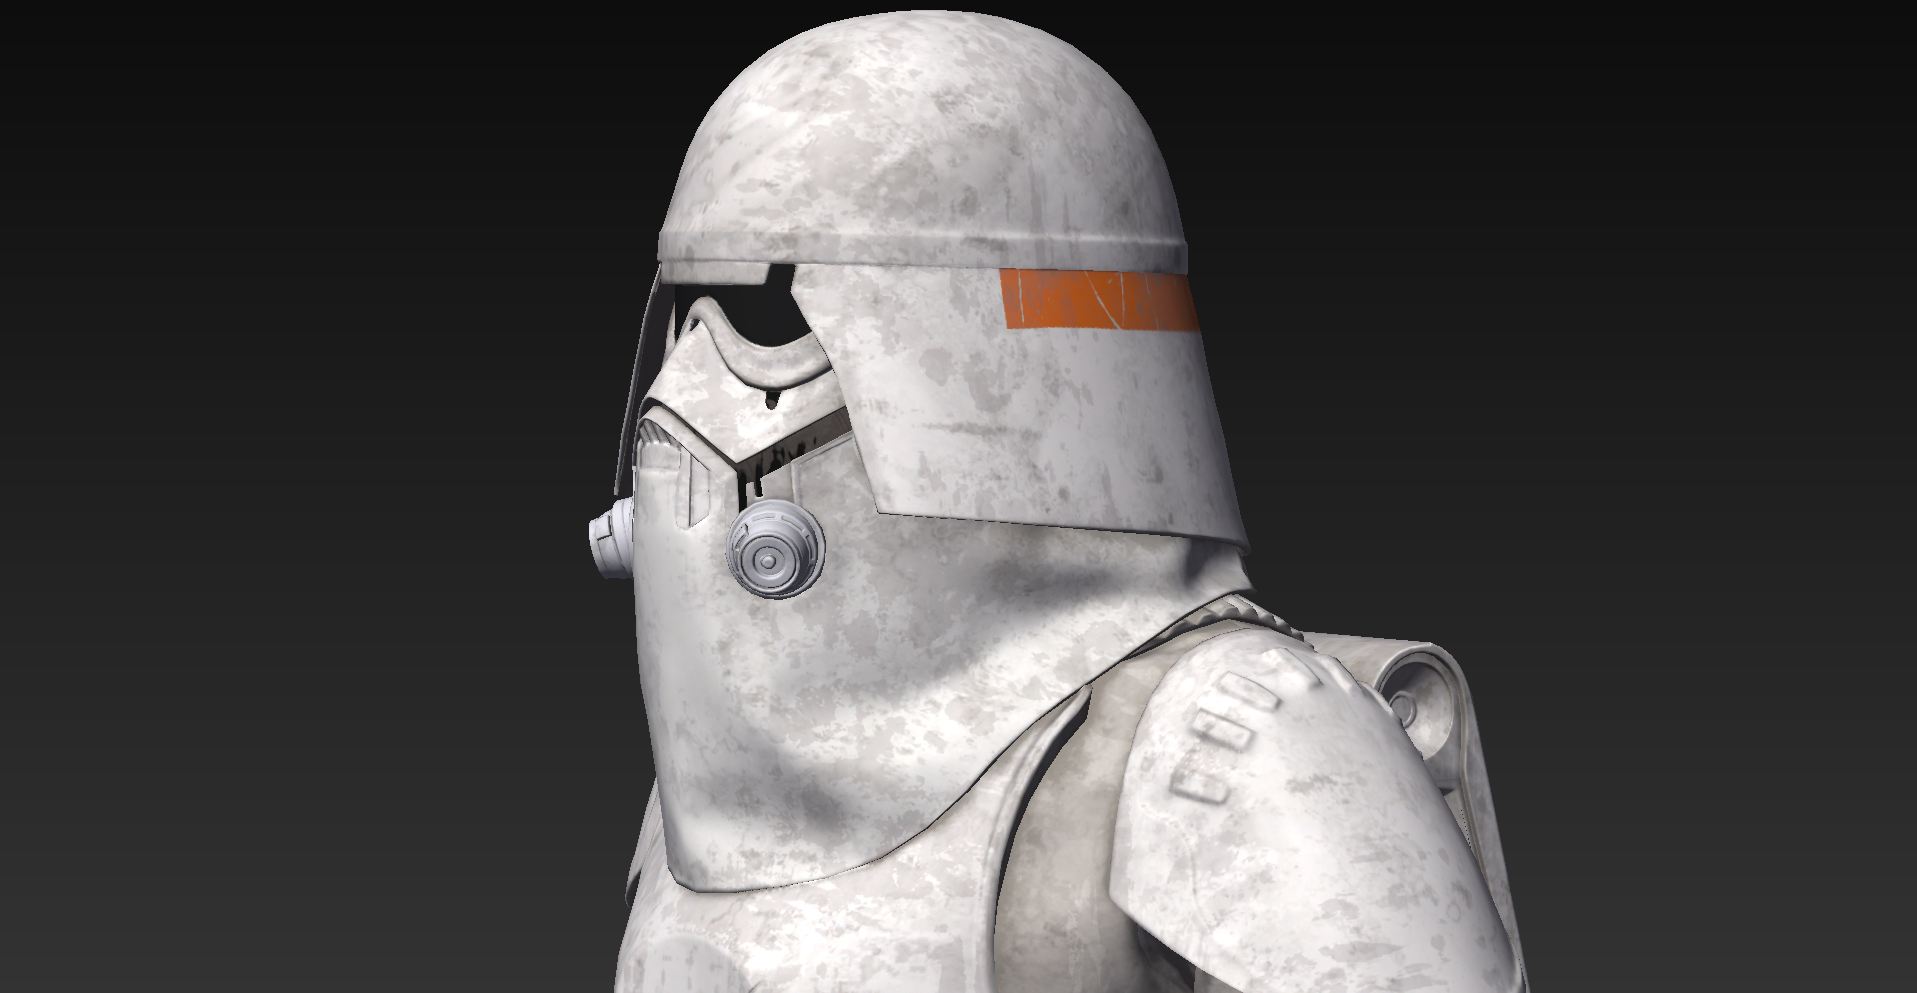
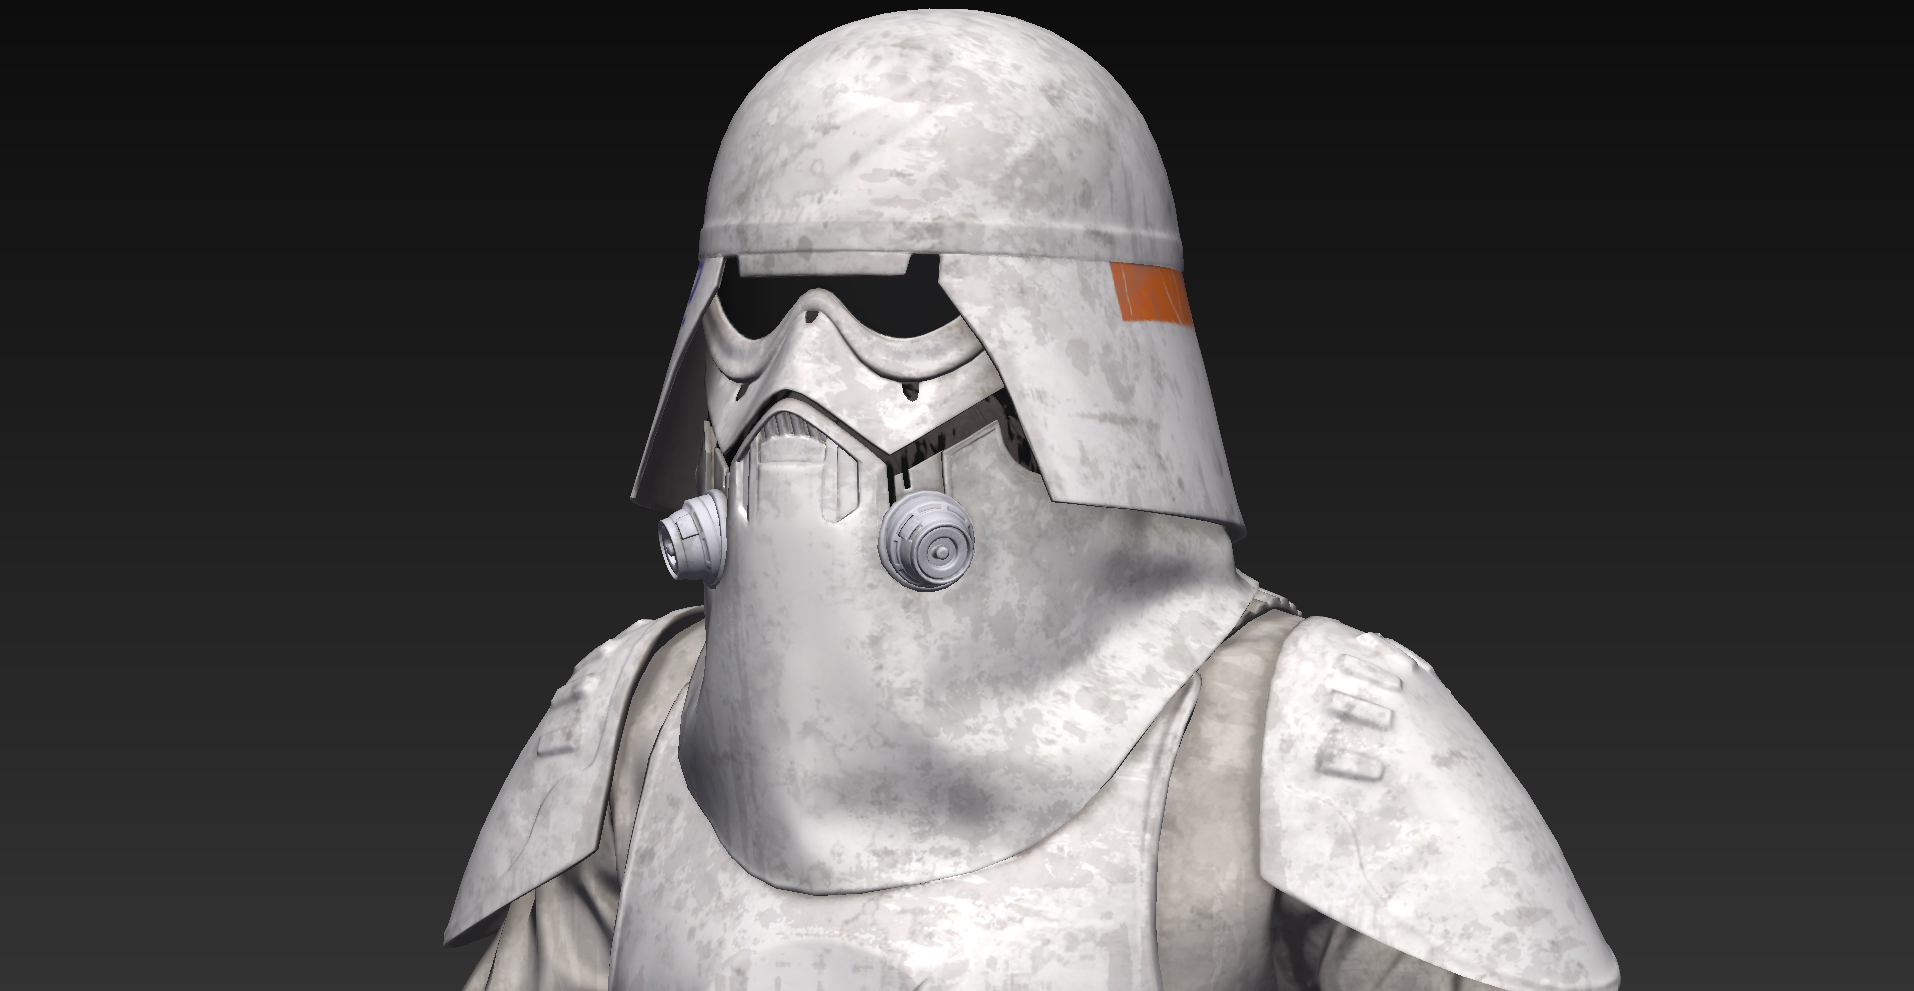
Alright so now is time to go piece by piece, starting with the Helmet! Helmet Lenses must be sufficiently dark enough to obscure the costumer's eyes. They are either flat or bubbled. Acceptable colors are black, smoke, or dark green. The “ear” bars have three or four bumps and are gray or painted gray, with a black outline. Painting the bumps with rank stripes (highlighted) in black is optional. The frown must have 7 teeth cut out and any coloring must not leave the indented area. Acceptable colors is gray. Black mesh must be used to obscure the face of the wearer. The tube stripes are blue in color and may number between 9 and 15 per side with the curve bends extending backwards. These can be either hand painted or decals. Vocoder (vertically ribbed chin detail) is painted black. The aerators (cylinders on either side of the vocoder) are black, and screening can be either silver or black. The interior of the aerator can either be white, silver or black. Traps (trapezoids on dome of helmet) and tears (area beneath the corners of eye lenses) can be hand painted or decals. Acceptable color is gray. Rear traps and tears have vertical black lines. OPTIONAL Level two certification (if applicable): Lenses are bubbled and are dark green. On the ears there is the presence of 1 screw above the ear bars and no screw below the rank bar. The screw is painted white. Ear bars have 3 bumps only, not 4. A black rank stripe is painted on the rear most bump. There will be 13 blue tube stripes per side with the curve bends extending backwards. These can either by hand painted or decals. I used what you had in your Google Drive file with a little reference to our stormtroopers we currently have. There were a few unique details I noticed on the SCAR troopers in the 59/60 issues.