Chaos
-
Posts
1,469 -
Joined
-
Last visited
-
Days Won
111
Content Type
Profiles
Forums
Events
Everything posted by Chaos
-
Put your cod piece in place when you're fitting, I ended up having to trim the tops of my thighs so they didn't rub and pinch my boys ? Better to find out now than on a 2 hour trooping
-
@Lt. Dan post a picture from the side of your front and back armor joined. That way I can help. I use a tab set up like Paul's but it's just the tab with no fore/aft extension.
-
@CrookKnight if you're doing an 850 then your best thread to check out is:
-
@CrookKnight Shawn, it really depends on which kit you will be building, we have two of us in the Carolina Garrison, Drew Menard who is in Charlotte and myself in Raleigh. You can reach out when you start for advice, no one kit is perfect and all require some modifications. Best is to post your own build thread and ask from there. What kit are you building?
-
I like that you like it @ukswrath ?
-
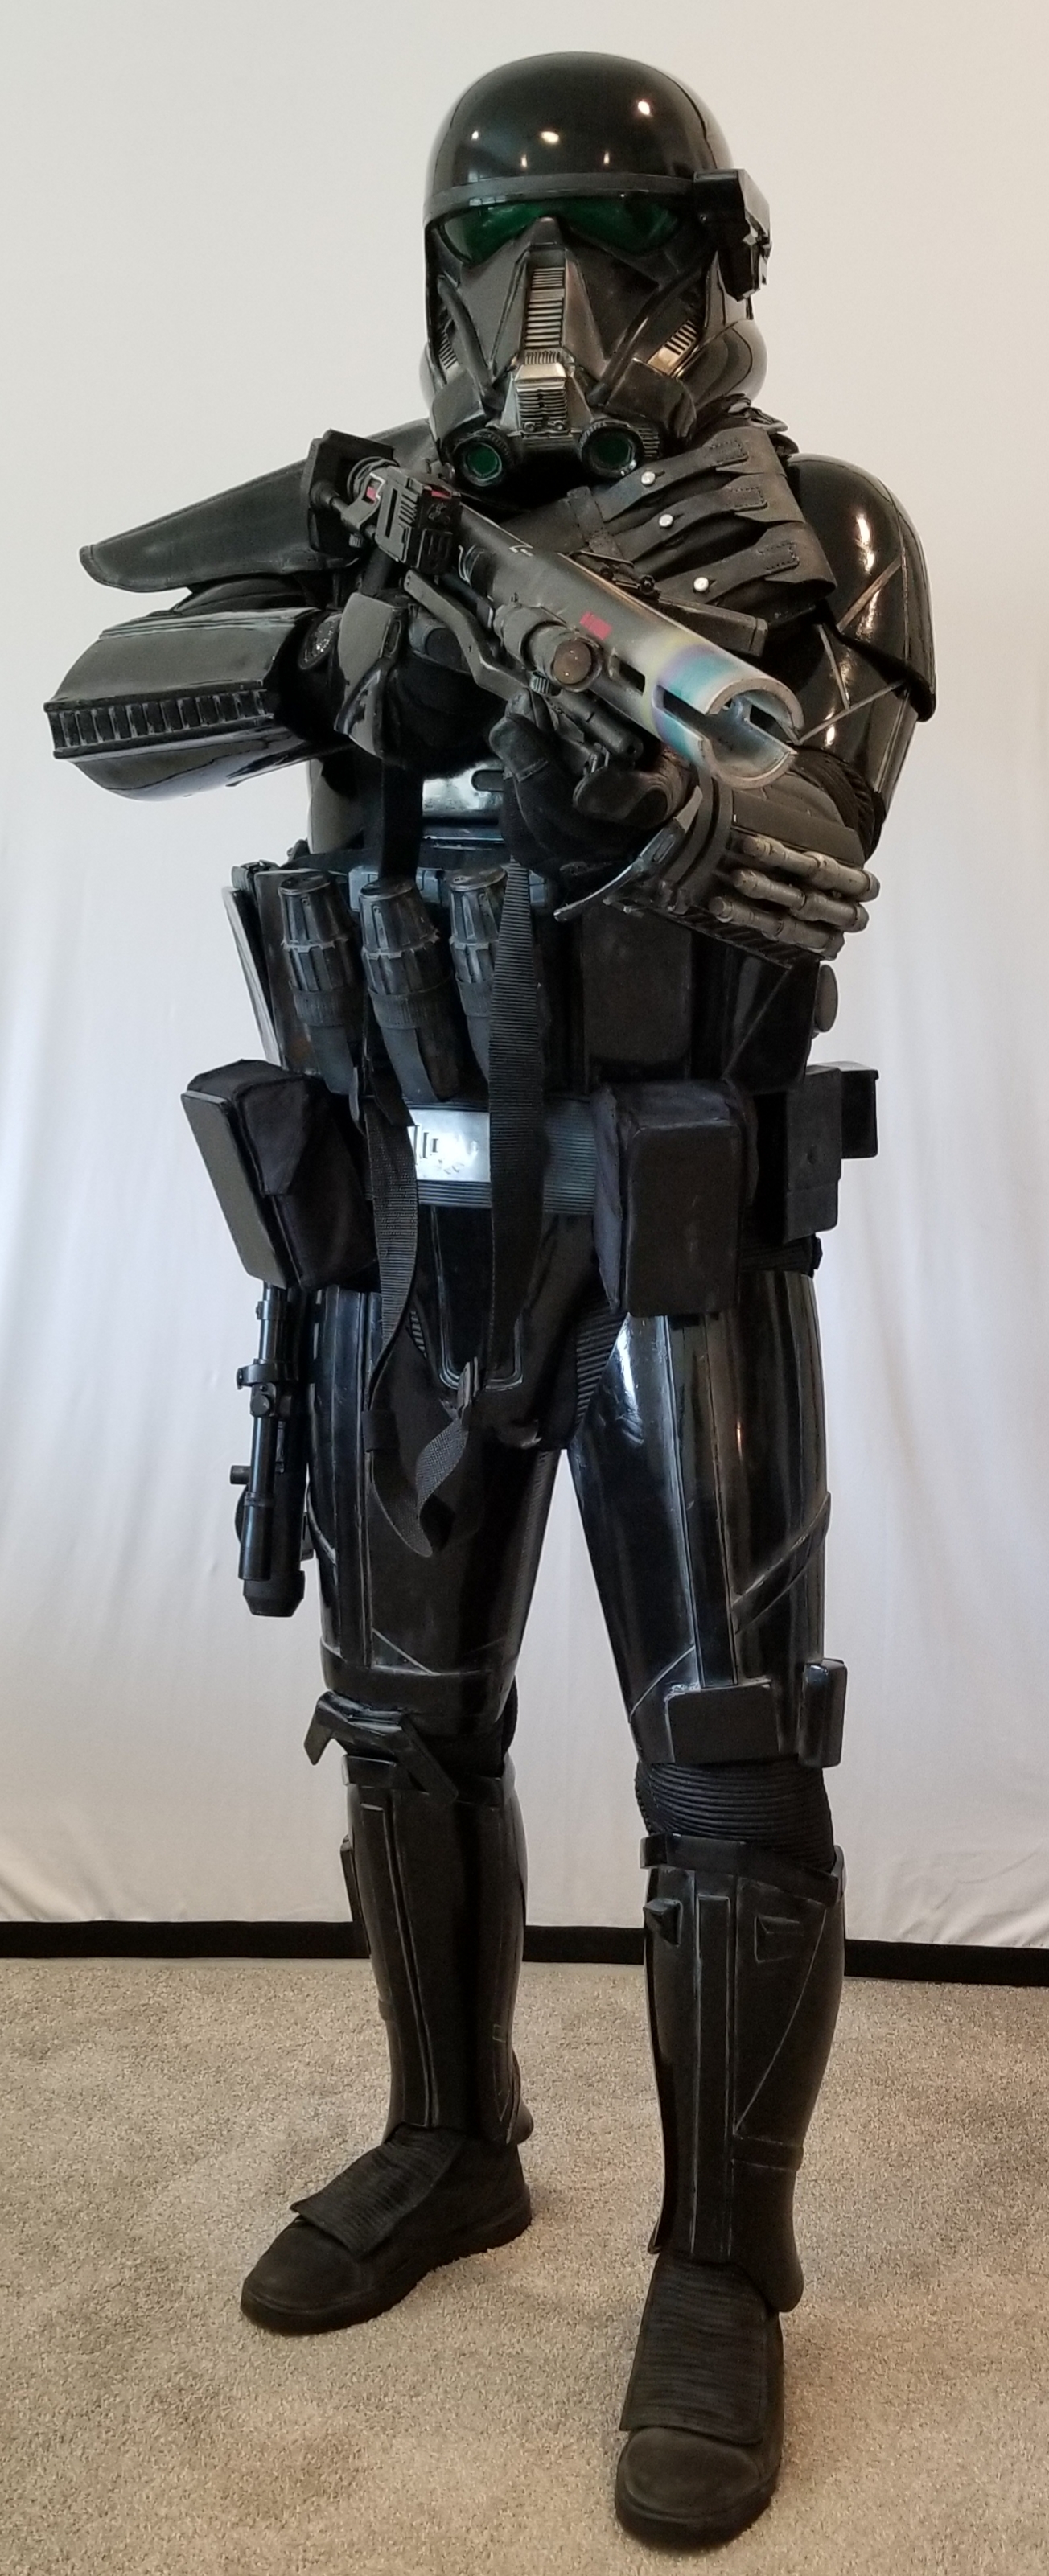
@mjt82 I air brushed the areas with a light acrylic gray, then wiped with a dry rag. Nice thing is it can be completely removed if I want to go back to looking like a new recruit. There is a link photos in the CRL text that you can use as weathering references. https://databank.501st.com/databank/CRL_Gallery:Imp_Death_Trooper Remember that when weathering the CRL says "slightly weathered" so less is more so to speak.
-
@Lt. Dan outstanding news! I've tweaked my armor pieces a lot over the years, it's a never ending process but each one gets us closer. He'll even the suits made by the pros for the movies were constantly getting repairs and adjustments. Looking forward to your completion.
-
Apologies, I was still working on my first cup of coffee this morning, you are correct, the outside is narrower.
-
Also, if at all possible to make the ribbed sections opposite and even.
-
@Lt. Dan hey man, it looks like your thighs are not rounded enough. Food for thought, if your armor is 3d filament and you are willing, take a hair dryer or heat gun on low, put your undersuit gaskets on and from the inside gently heat the inside areas "Gently" then when they are warm enough to flex, wrap them in place around your thighs. Once you get a good fit, you can then mark and trim the ribbed areas to fit. For appearances, try and keep the (CORRECTED) outside ribbed area narrower than the inside. A lot of people, to include myself, made the circumstance adjustments and sacrificed the inner rib width to make our thighs fit. You can then glue the outer sides, and clamshell velcro the inside so they are easier to put on.
-
Nice work Dan, so you decided to glue your forearms instead of leaving the inside seam clam shelled?
-
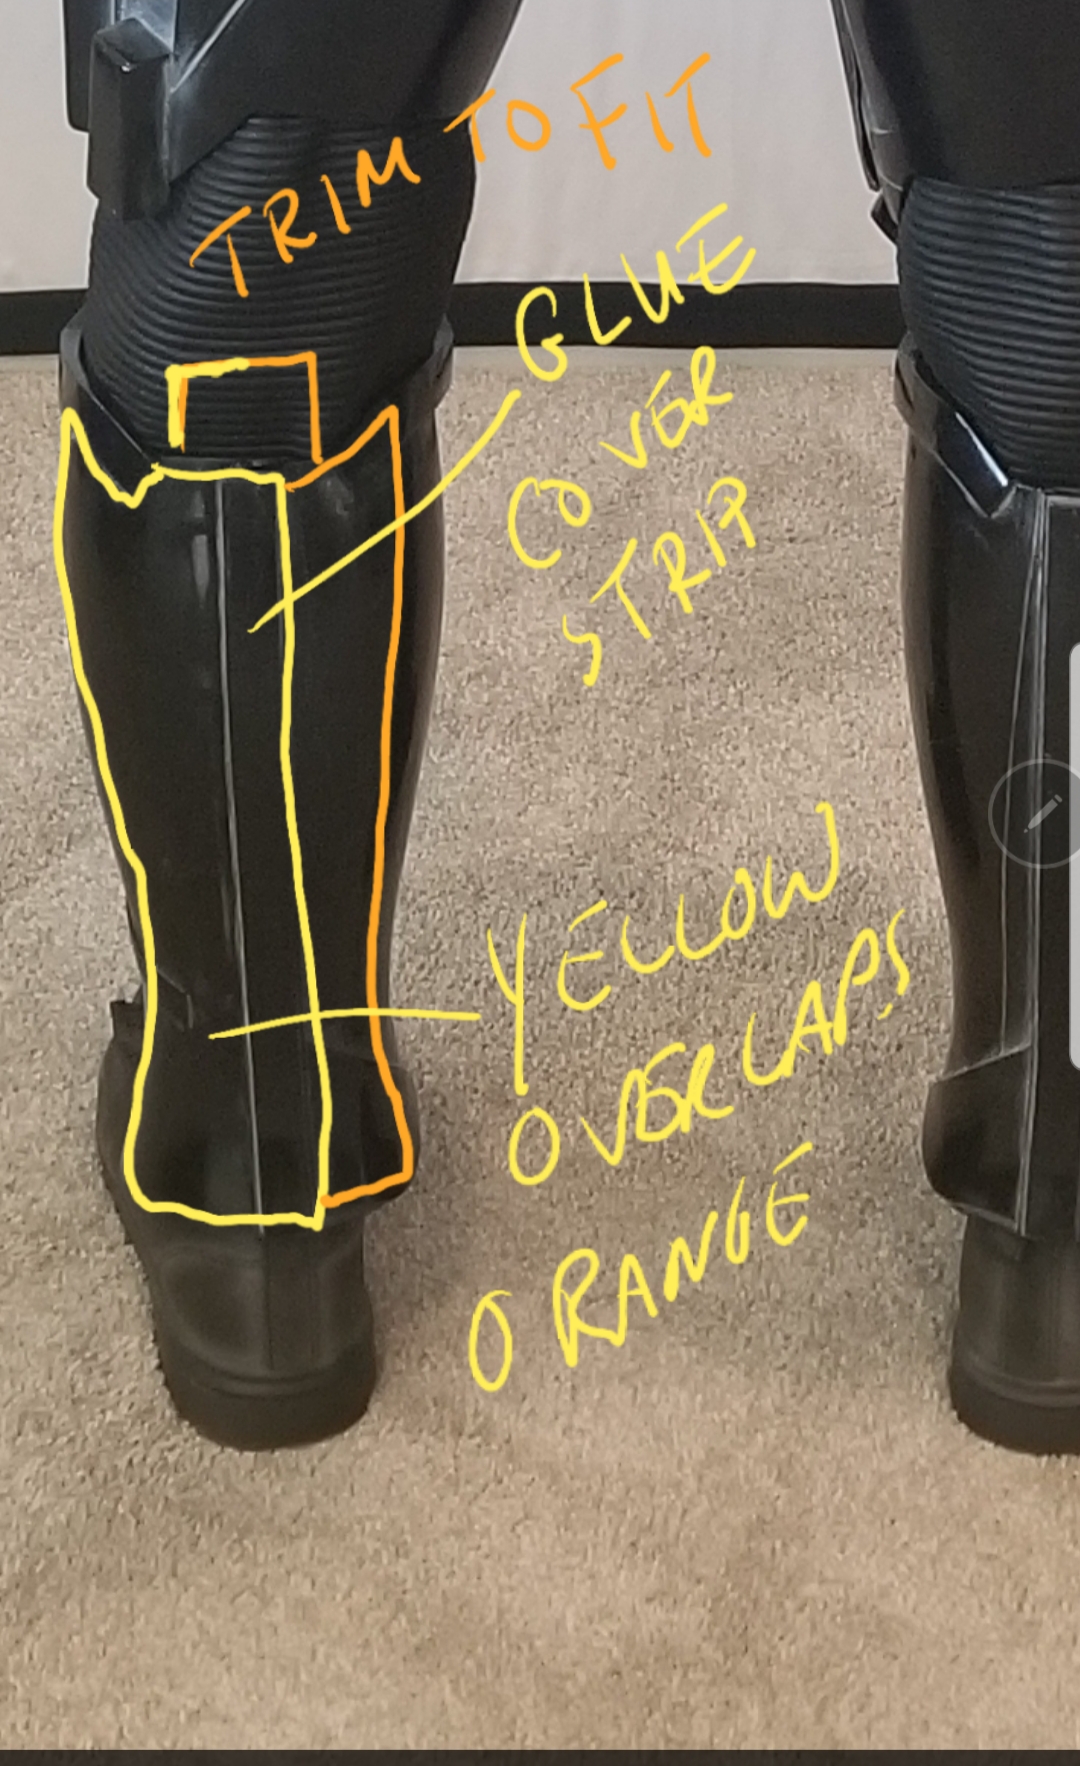
@Lt. Dan that will work! If possible clamshell the outer shin over the inner shin, makes the closure less noticeable (not a CRL or approval requirement)
-
Dan post a picture of your shins, I'll take a look, my angular extension is part of my outer shin so it's not an issue if it is not part of the inner shin, as long as it is there.
-

Death Trooper 3d print build in Melbourne
Chaos replied to Damo Fett's topic in Imperial Death Trooper
https://www.facebook.com/groups/DeathTroopersBG -
@Lt. Dan I found this over on Paul's Shoretrooper build page, a lot of the Rouge One armors where built the same. The little greeblies inside are where elastic filament is threaded to pull the forearms together but allows them to clamshell open. I modified mine to do the same.

-
They are Dr Martens Jereds
-
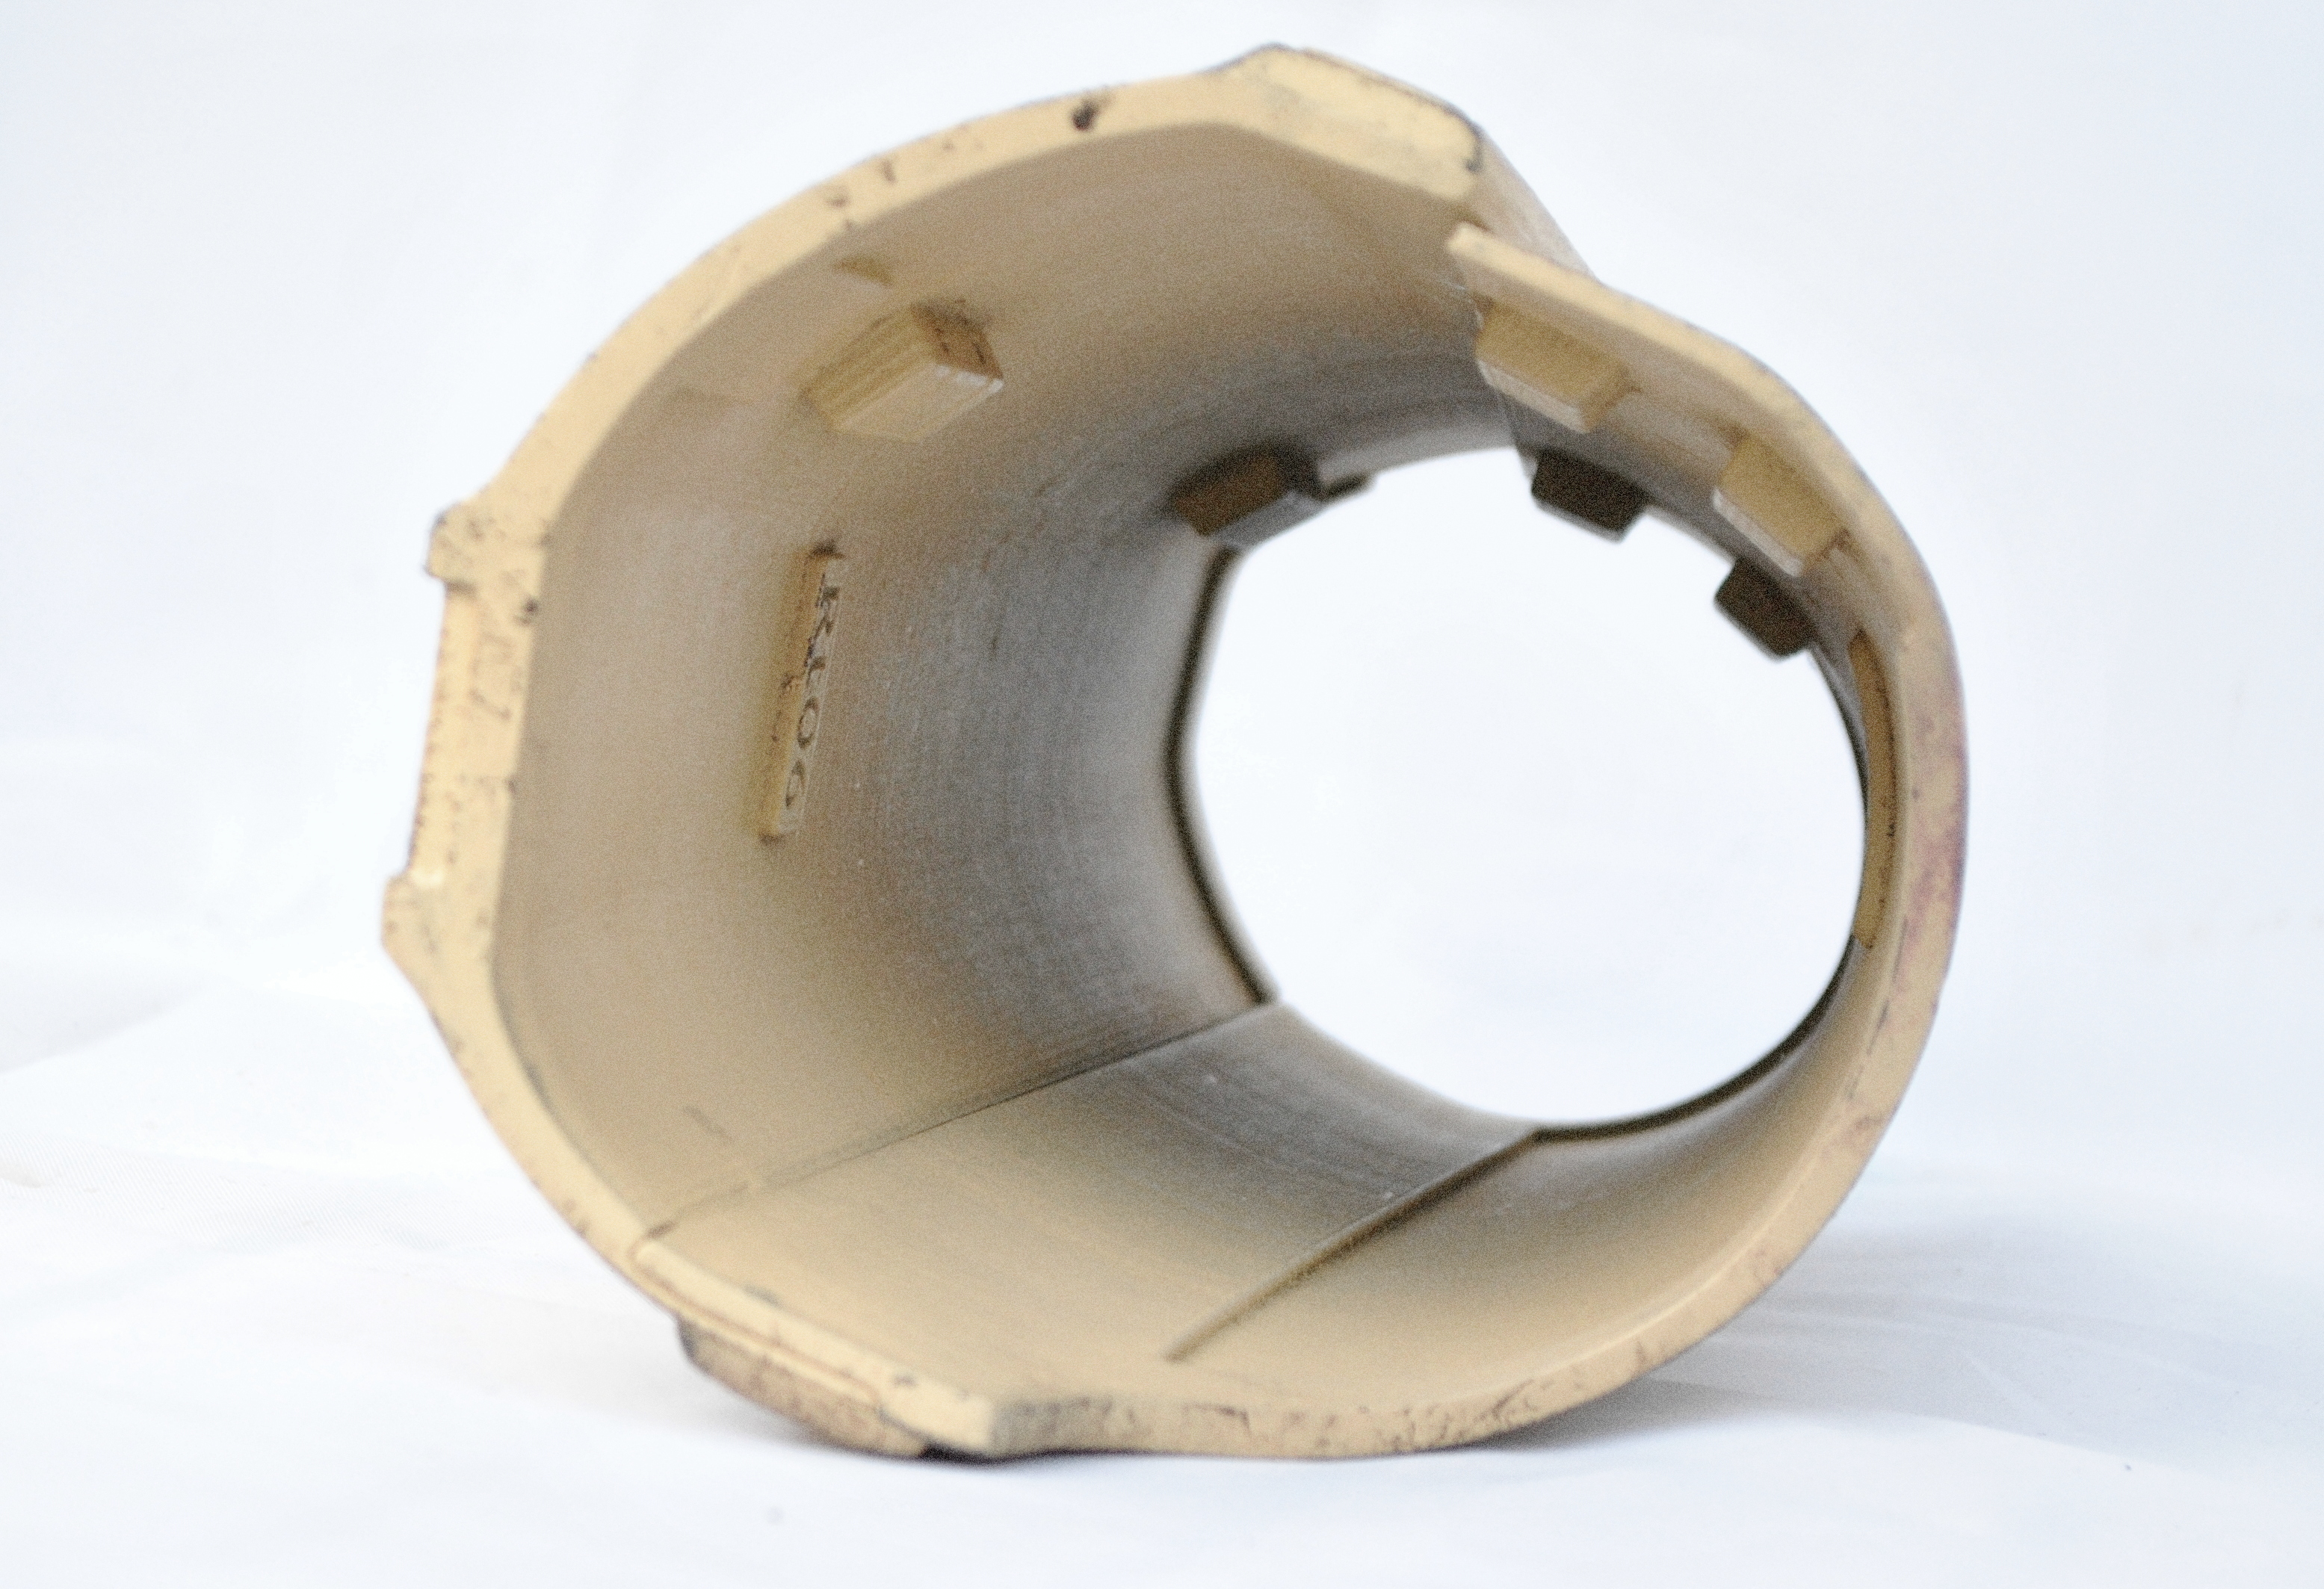
@Lt. Dan if your forearms are from Denis, they are 3D printed with an Armory Shop special semi-flexible filament then painted. Did you line them with the fiberglass like you did the larger pieces? If your forearms are one piece split, then you can gently heat the inside with a hair dryer. Then gently and slowly compress the diameter to make the circumference smaller. Make sure you spread out your applied pressure across the entire surface area. You dont want to end up with a thumb indentation like the ANH TK bicep. The paint should bend with the PLA, Denis uses a primer with his paint. Where it will be tricky is the two wrist bands, but the diameter should be sufficient enough to open and close around your wrist.
-
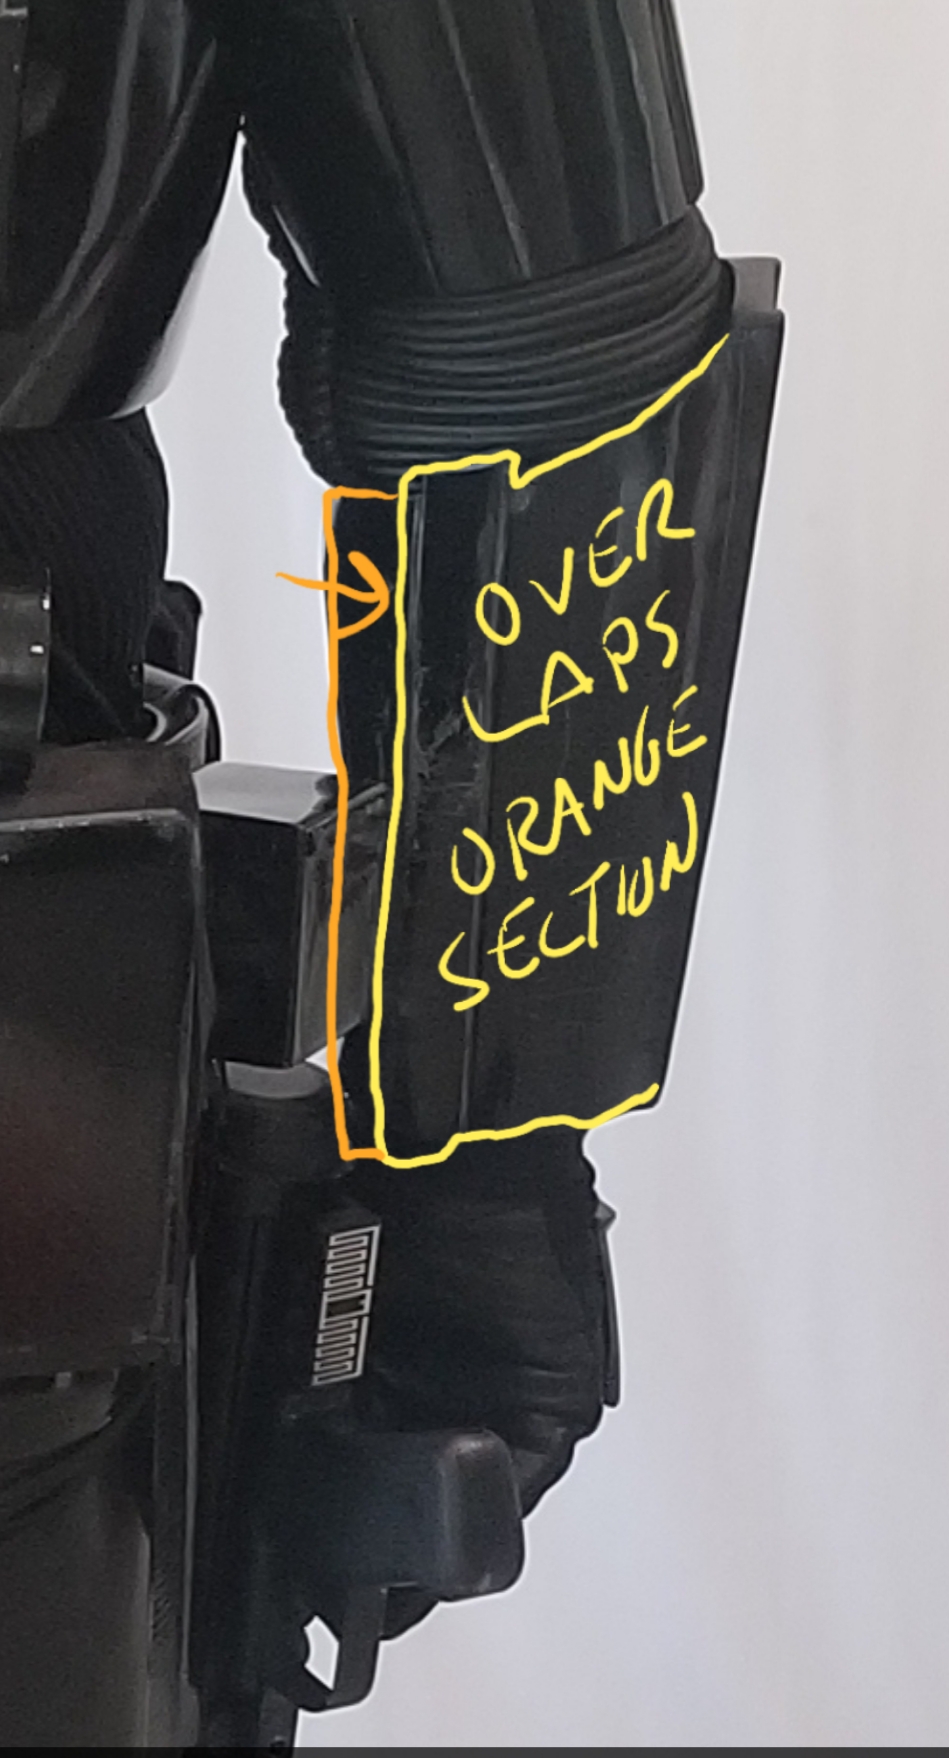
@Lt. Dan If you go for a clamshell type closure you can easily adjust the radius smaller, when making the overlap use the side that has the least amount of detail. If that makes sense. On the shins, use the cover strip attached to the outside piece to overlap the inside piece. Thin velcro along the seam keeps them closed. When you pad the insides to fill out the extra space, you run the chance of the armor looking "un-proportional"
-
LOL yessss! A DTS2
-
Thank you! Hopefully!
-
Just got word from my GMLs that my DT Version 2 has been approved. As soon as they update my profile I'm dropping my Specialist Level 2 application. So siked!
-
You have several options with the boxes. 1. put the Chicago screws so that female side is epoxied to the inside of the box and the male side is outside and thru the belt. 2. place a thin layer of E6000 on the inside edges and then put the front panel on. If you have to get to the screws you and always pry off the fronts, clean the E6000 off and repeat as needed. 3. E6000 small magnets inside the boxes and the front, only issue with this is that they can get knocked off. I use the #1 setup.
-
Daniel when you get to the strapping part give me a shout. I use a combination of UKSWRATH's harness system, a simple suspender type set up for the abdomen corset stuff, and part of the Paul's Shoretrooper strapping techniques. I trooped for the first time in my overhauled set up and I was quite impressed at how much more comfortable everything was. Hopefully when Denis made your kit all the measurements came out, if you need to make adjustments post up here first, I am sure someone has encountered the same issue. Best of luck!
-
Hey Brother, I changed my set up to include a corset design and am going to a trooping today so hopefully I won't have to make any adjustments . I'll post up how I incorporated the abdomen and lower back armor pieces. It basically looks like the Shoretrooper.
-
CyberNinja's Death Trooper Build WIP
Chaos replied to CyberNinja89's topic in Imperial Death Trooper
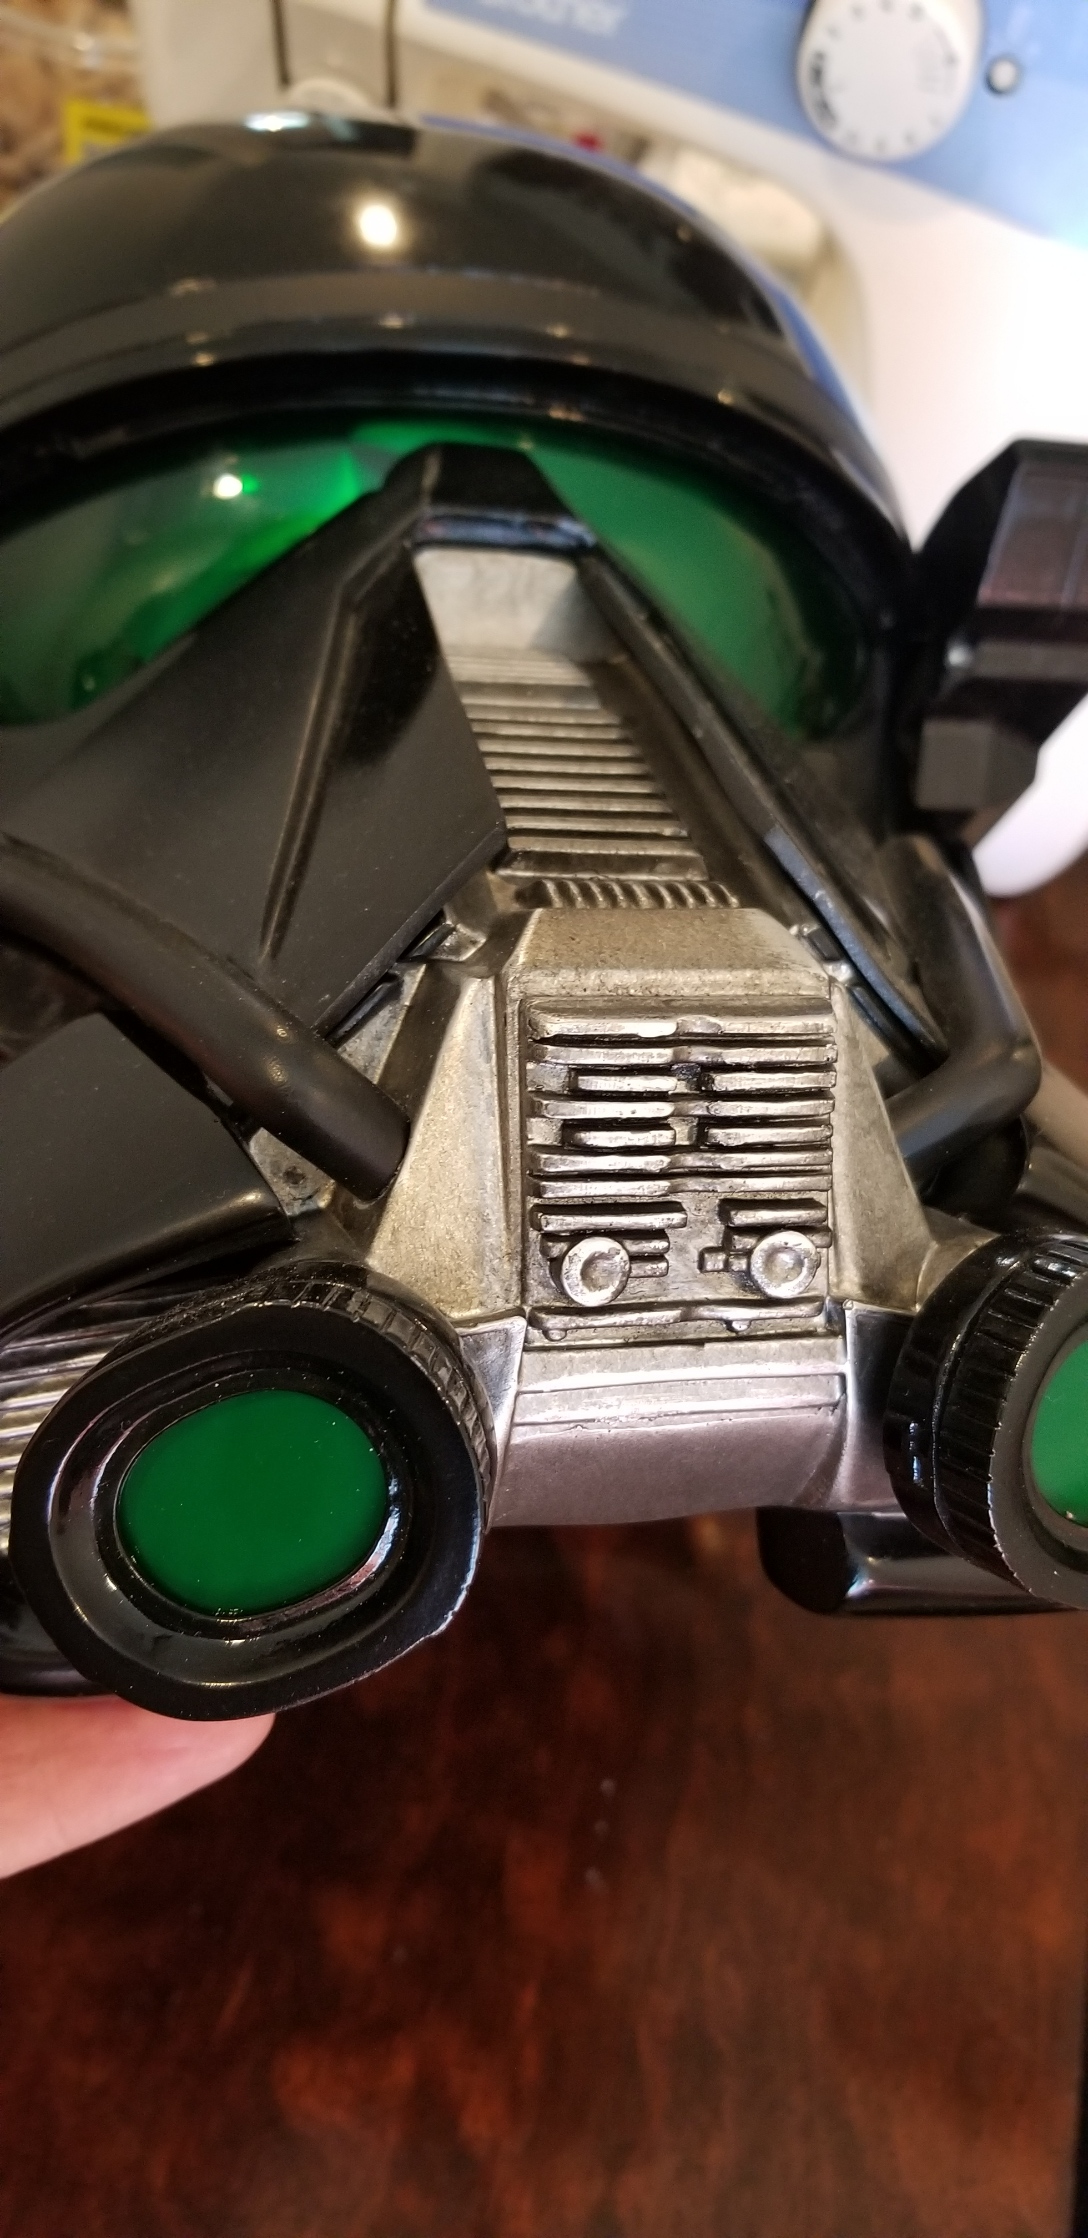
Jeffrey, the center bridge and tusk area vents look good. I have attached photos of my Anovos for reference, you could add a little more black weathering to to the side vents. Al ways remem ber that less is more when it comes to "weathering"