nanotek
-
Posts
2,238 -
Joined
-
Last visited
-
Days Won
155
Content Type
Profiles
Forums
Events
Everything posted by nanotek
-
The seller is using the ripped Battlefront II game renders for displaying their wares. Without seeing the actual files it's hard to comment. I know from looking first hand at the ripped models that they are extremely low-poly and in most cases the meshes have been simplified with all the details left in the textures. If you can reach out to others that may have bought the files, ask to see screenshots of the STL files.
-
It doesn’t really go away (the smell) and I guess in some ways that’s a good thing? They really are a great boot and they are comfy. I recommend getting a better insole as you will want your feet to be as comfortable as possible
-

Finalizing CRL Proposal - Lieutenant Janek Sunber (SW:E)
nanotek replied to IcyTrooper's topic in Lieutenant Janek Sunber
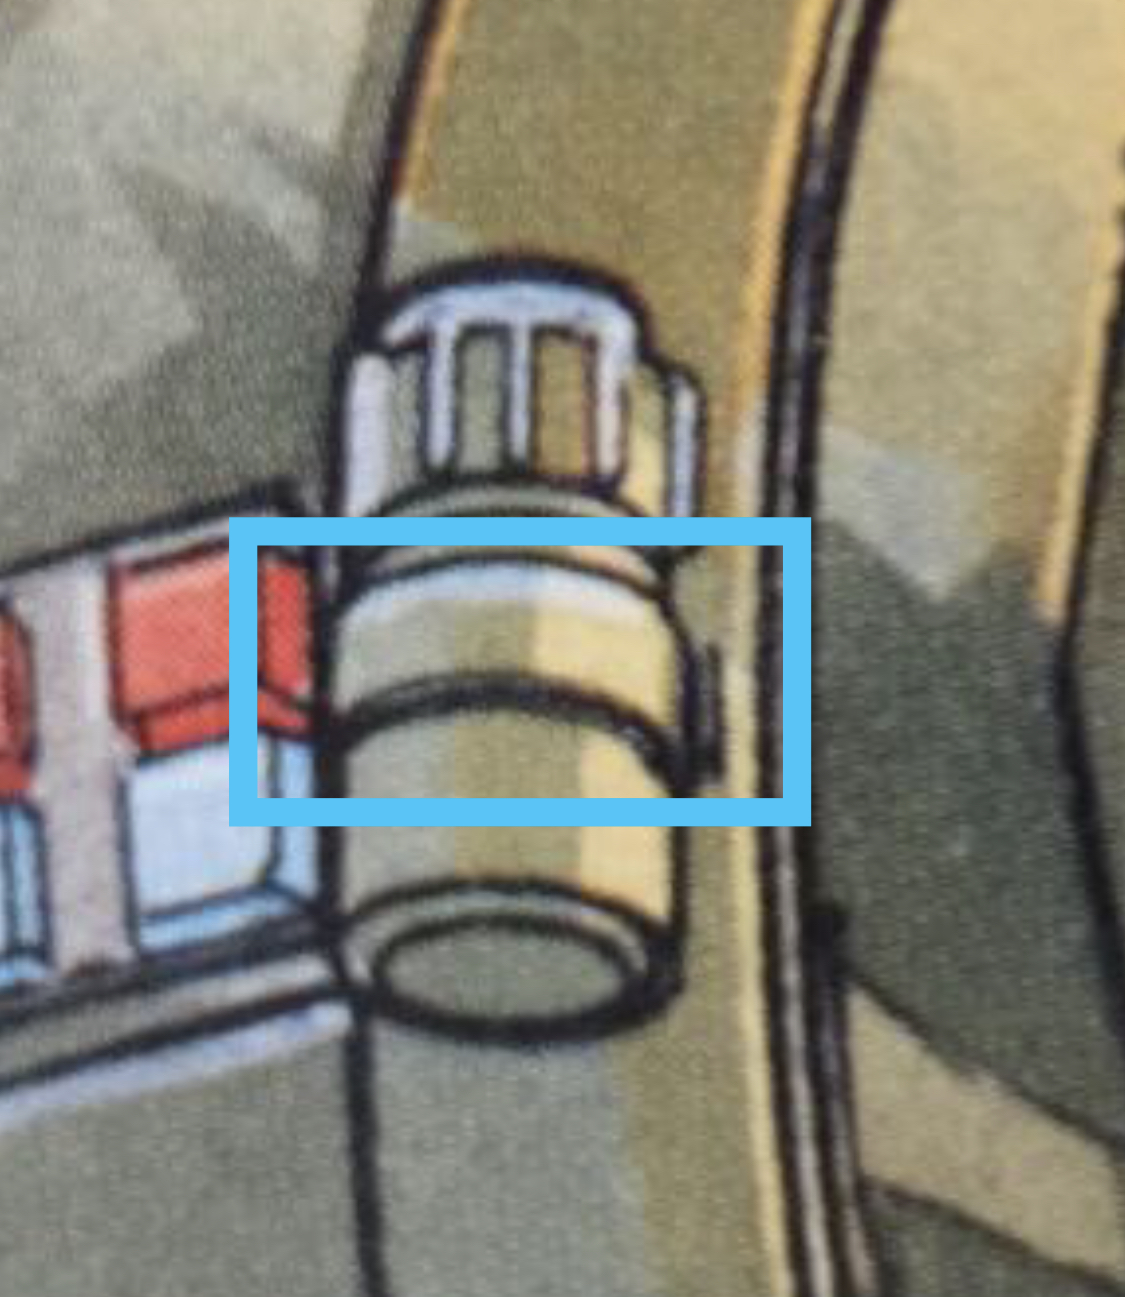
This looks like a strap to secure it to the shoulder strap maybe? Not part of the commlink?
-
Finalizing CRL Proposal - Lieutenant Janek Sunber (SW:E)
nanotek replied to IcyTrooper's topic in Lieutenant Janek Sunber
N00b question, but is the commlink the cylindrical object located on the left strap across the chest? -
New CRL Proposal - Sith Trooper (TROS)
nanotek replied to RAIDER's topic in First Order Sith Trooper
We are every close, I am still waiting on a few pictures from the model. Items that remain are main pic, belt, gorget, spats and soft goods. -
I think you've made a great choice, they are great boots, really comfortable and you don't have to modify them. I had to put some new insoles in because I have high arches, but they are really good shoe. I own two sets of Jereds and one IB, and I always go the IB. Next wave will be soon and they ship quickly!
-
I don't believe there is any can of worms here. What becomes level 2 is an open discussion with the detachment based on evidence. If everyone concurs that hidden things are part of a L2 or even L3 then so be it. L1 is achieving the overall look, the higher levels are going for the accuracy. So in short, if we start finding things that are essentially hidden, but know that they exist, can prove they exist and everyone agrees that they should be part of the higher levels, then cool. Otherwise it doesn't make it into the CRL and is just something extra we know about the costumes. As a side note, not directing this at anyone, just a general "all social announcements" thing: I think everyone can agree that there is plenty more work to go on this CRL. CRL's are never set in stone and development will always be ongoing and open for discussion, but it also requires work and participation in the development. A significant amount of work was done on getting it to this level (a long way from where it began) and there is still room for improvement. If you want to be involved, be prepared to work and put in the time. We bring people in and out of CRL teams all the time, but you have to highly active on the forums as a prerequisite.
-
A GML will try to interpret between the text and the picture in the CRL. We cannot comment too much further on this because every GML is different and often overlook certain details. If the boots are a close match to the CRL picture and L1 text you should be ok. L2 text in blue, is Jereds or replica like the IB version. I don't see why you're asking for "sway" when it's already given...
-
Resizing Tom's files to fit - Who's done it?
nanotek replied to mjt82's topic in Imperial Death Trooper
If you purchased the files from Tom he will provide you with all the support you need in resizing, just flick him a message -
Thanks for the shout, we will help you as best as we can! It's a common theme, that's exactly what I did, came in Shadow then Rogue One came out, DT all the way from there. I later did the Shadow Scout instead! Look forward to your progress and see where the ride takes you
-
Mate, you're doing a fantastic job! Really, I love your dedication to this build.
-
POLL: Crimson Stormtrooper/Magma Trooper Rename
nanotek replied to RAIDER's topic in Crimson Stormtrooper
Lumiya has been relegated to Legends I think and the guards you are referring to would be these guys? https://starwars.fandom.com/wiki/Emperor's_Royal_Guard_stormtrooper_armor For reference Lumiya's guards is in the description for the Crimson Trooper. -
Sorry to hear about your recent run of bad luck! Hopefully you recover quickly. Your eyes look great!
-
I think you were referring to @Chaos stated below: To be honest with you, I would just buy the Imperial Boots because I'm lazy. Leather matching and sewing leather to already treated shoes just sounds too painful to me
-
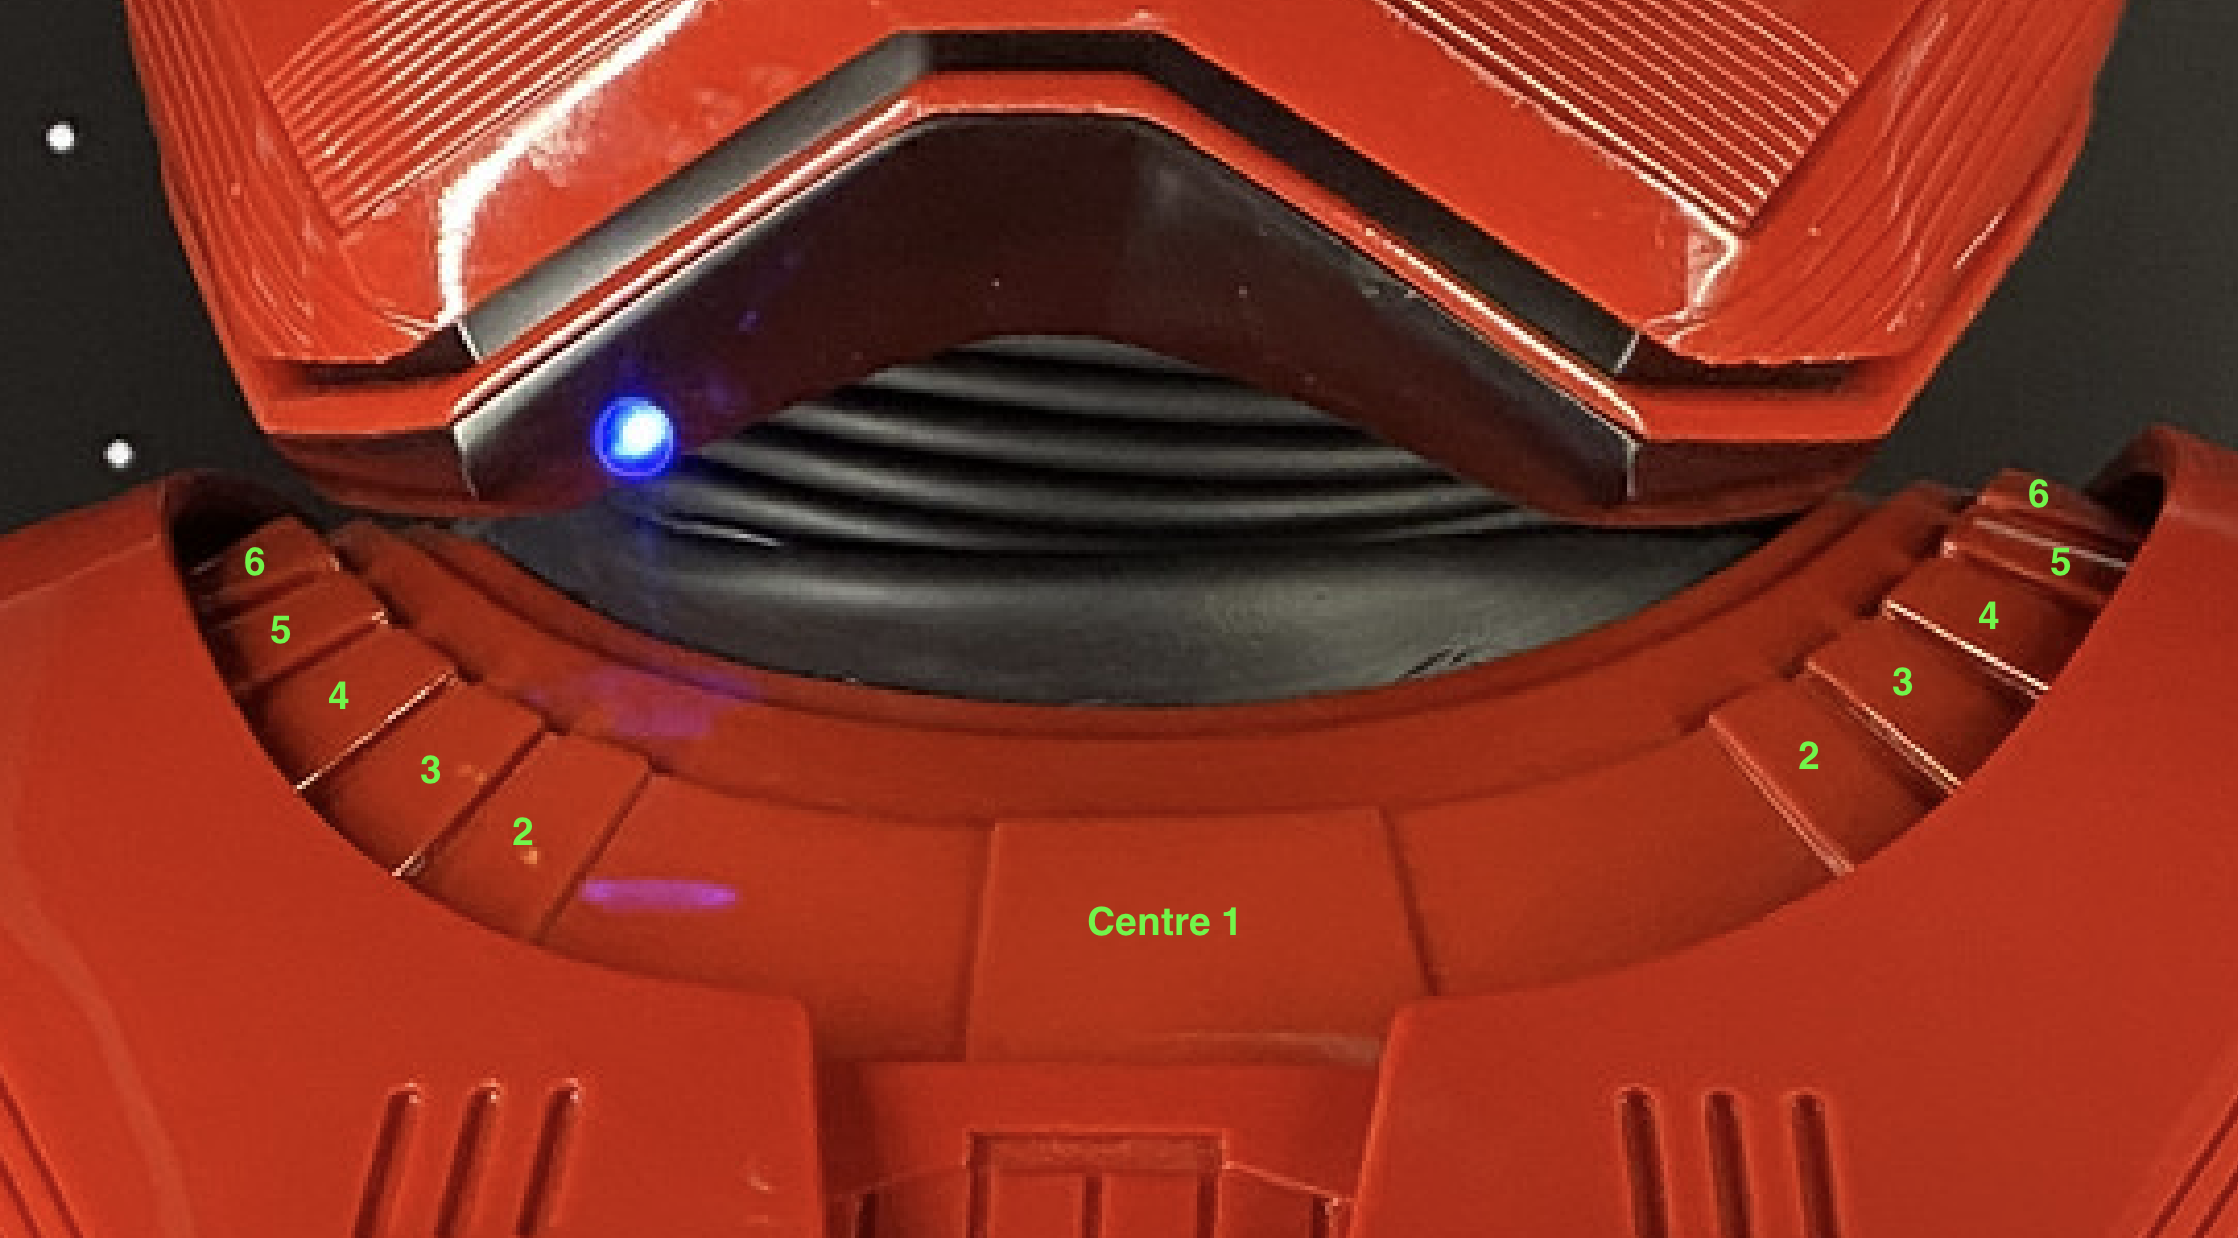
Sorry for the extremely late advice but the shape of the centre trapezoidal section on your gorget is incorrect. The trapezoid's narrowest side should be closest to the neck; for some reason Jim's with kit it is upside down. There are other issues with the spacing of these sections, but are ok for L1.
-
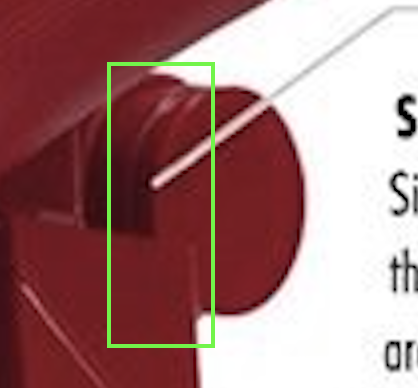
Looking great! I just noticed the extra detail you have added (the white "clip") do you plan on making that a little less protruding? I'll try and find a good photo of that for you, it is one of the details that is really hard to see given that it is so small! Your boots look great btw! I noticed that you said that you applied a high gloss to them. Do you mind sharing what you used? Is it flexible enough to stand up to regular walking? Thanks!
-
It's a really hard colour to replicate 100% because it's not a painted kit. You will likely need to try a couple of different colours (every region has different paints) and try to match as best as possible. Keep in mind you will need to try and colour match the boots too, so my tip would be work on the boots first then colour match from there. Depending on your approach with the boots; will probably inform the colour you can use on the rest of your armor. While I'm here, you may want to check the nose/bridge/snout detail of your helmet (it appears to lack the detail).
-
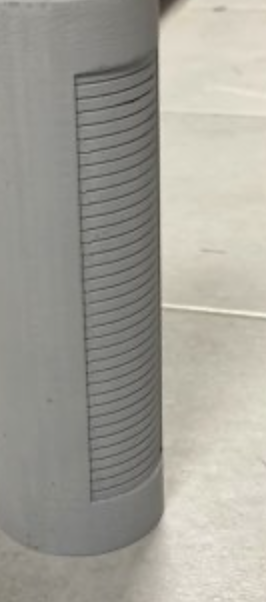
A lot of my 3D printed work is fibreglass reinforced and fibreglass resin coated. Even just coating both the inside and outside of 3D prints with resin strengthens the piece quite a lot, but it also adds to the weight. Sealing 3D print lines with any kind of resin/epoxy is a good idea, it definitely makes the removal of 3D print lines easier. I see a lot of work where they just use spray fillers and you can still see the lines through the paint (because it isn't sealed correctly).
-
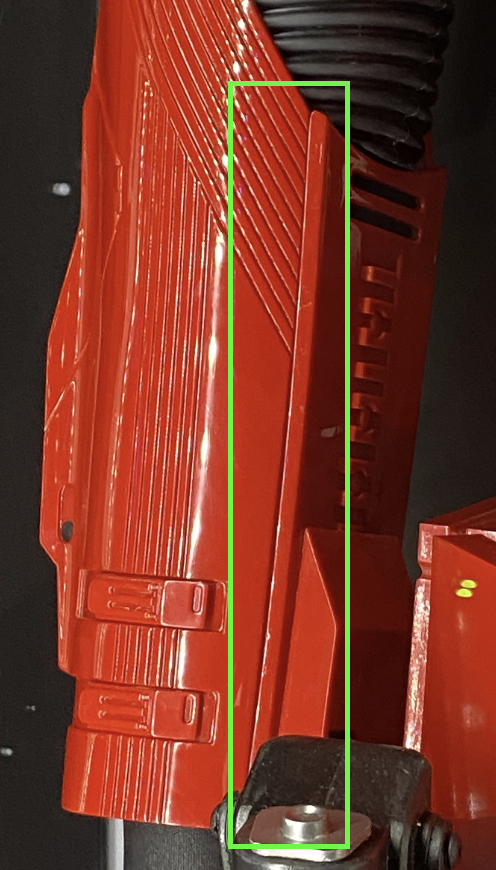
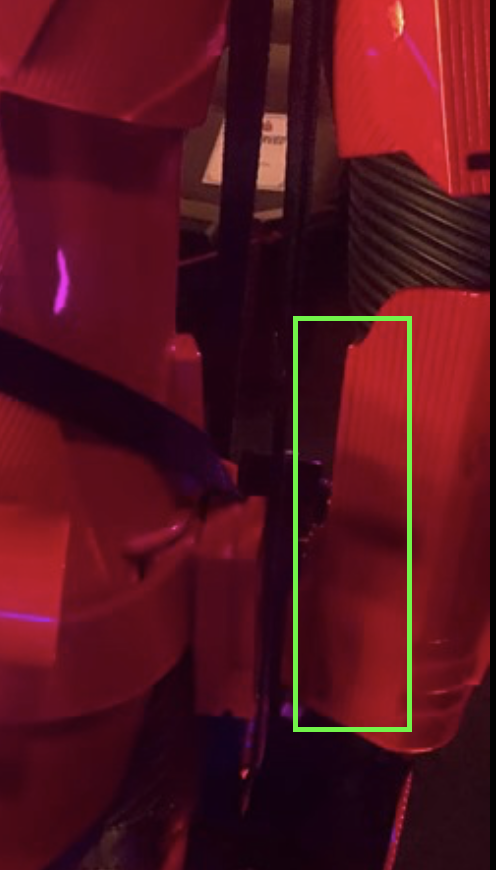
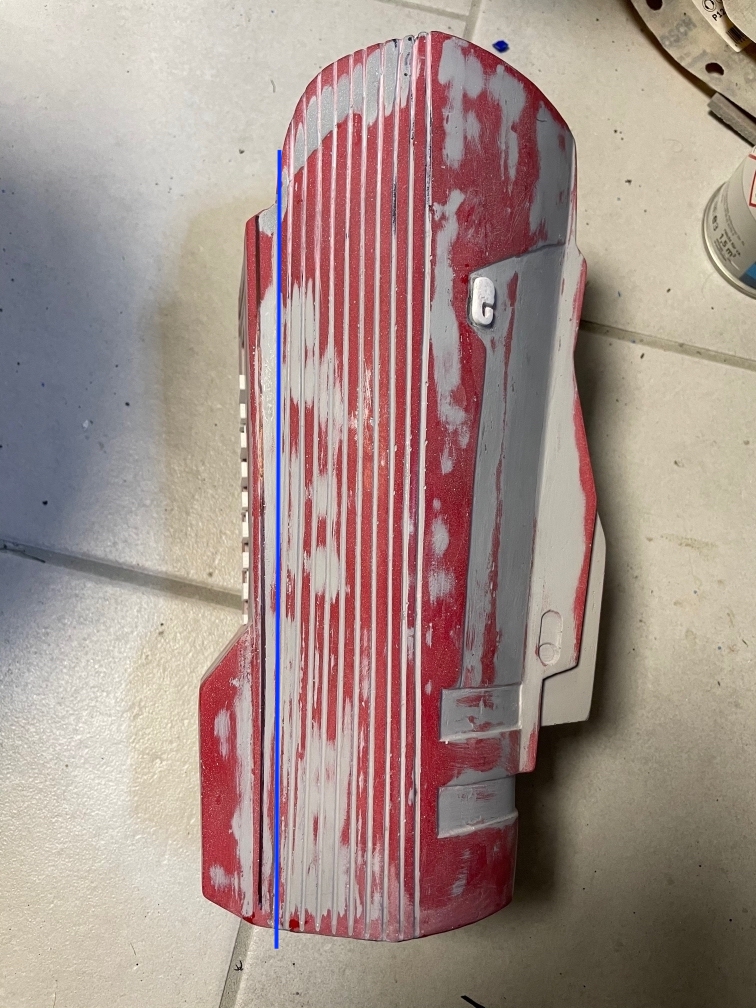
Bicep seam could be a little wider but is good for L1 in my opinion. Looks like the seam on the front is too far from the panel. Here are a good reference shot of the panel from the front, and a poor one from the rear. The panel is the same thickness all the way through. I think your black line on the back closely replicates what is seen below and the front one not so much. I think at a minimum I have attempted to draw a blue line for your one below, which could solve your issue of the same thickness, but then it probably won't look like the reference. Either will work, it's just up to you how closely you want to match
-
I don't quite understand what you mean for the vertical seam on the back. Can you please elaborate? Other than that you're doing a fantastic job! Don't forget the buttons for the pickatinny rail! I think the angles of the 'V' are a little steep but overall will be fine. I agree the clips look wrong, but they are passable. The vertical seam that runs up the middle will need to be added and if you're doing L2 there's that small stepped recess just above the clip.
-
Hey Dave, the files look ok, there are some areas I think that could use improvement, but overall these should be good enough to get you through L1.
-
Both of those alterations look great!
-
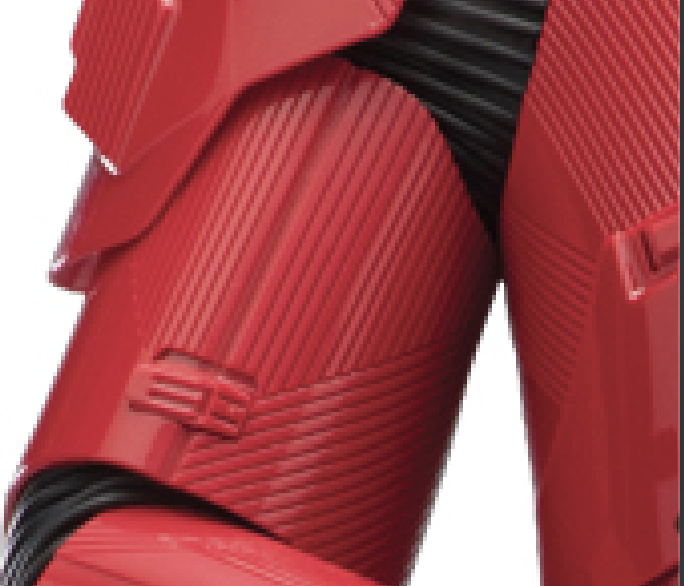
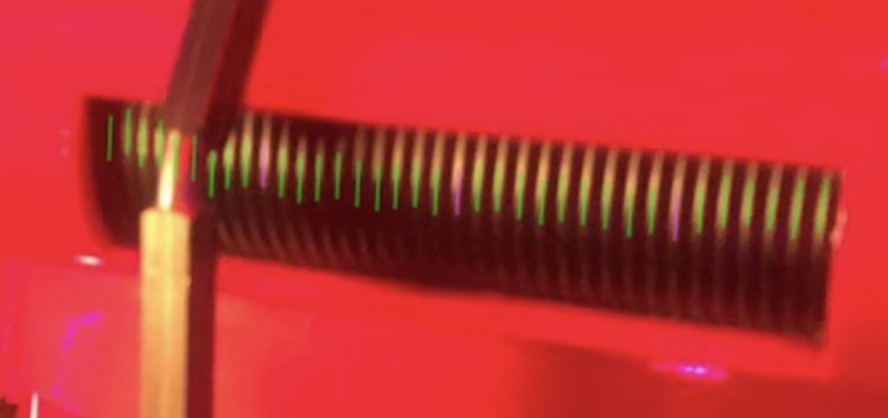
That centre shape looks wrong to me, we are fixing up issues with CRL and pics currently. I think what you were working on originally looked better. The centre piece should be a bit more of a trapezoid. Please check my latest post in the CRL discussion thread for more details. Also your thermal detonator looks great. My advice would be to make the channel of the end-cap a little wider, and the black ribs should be a little bit more like ribs.
-
New CRL Proposal - Sith Trooper (TROS)
nanotek replied to RAIDER's topic in First Order Sith Trooper
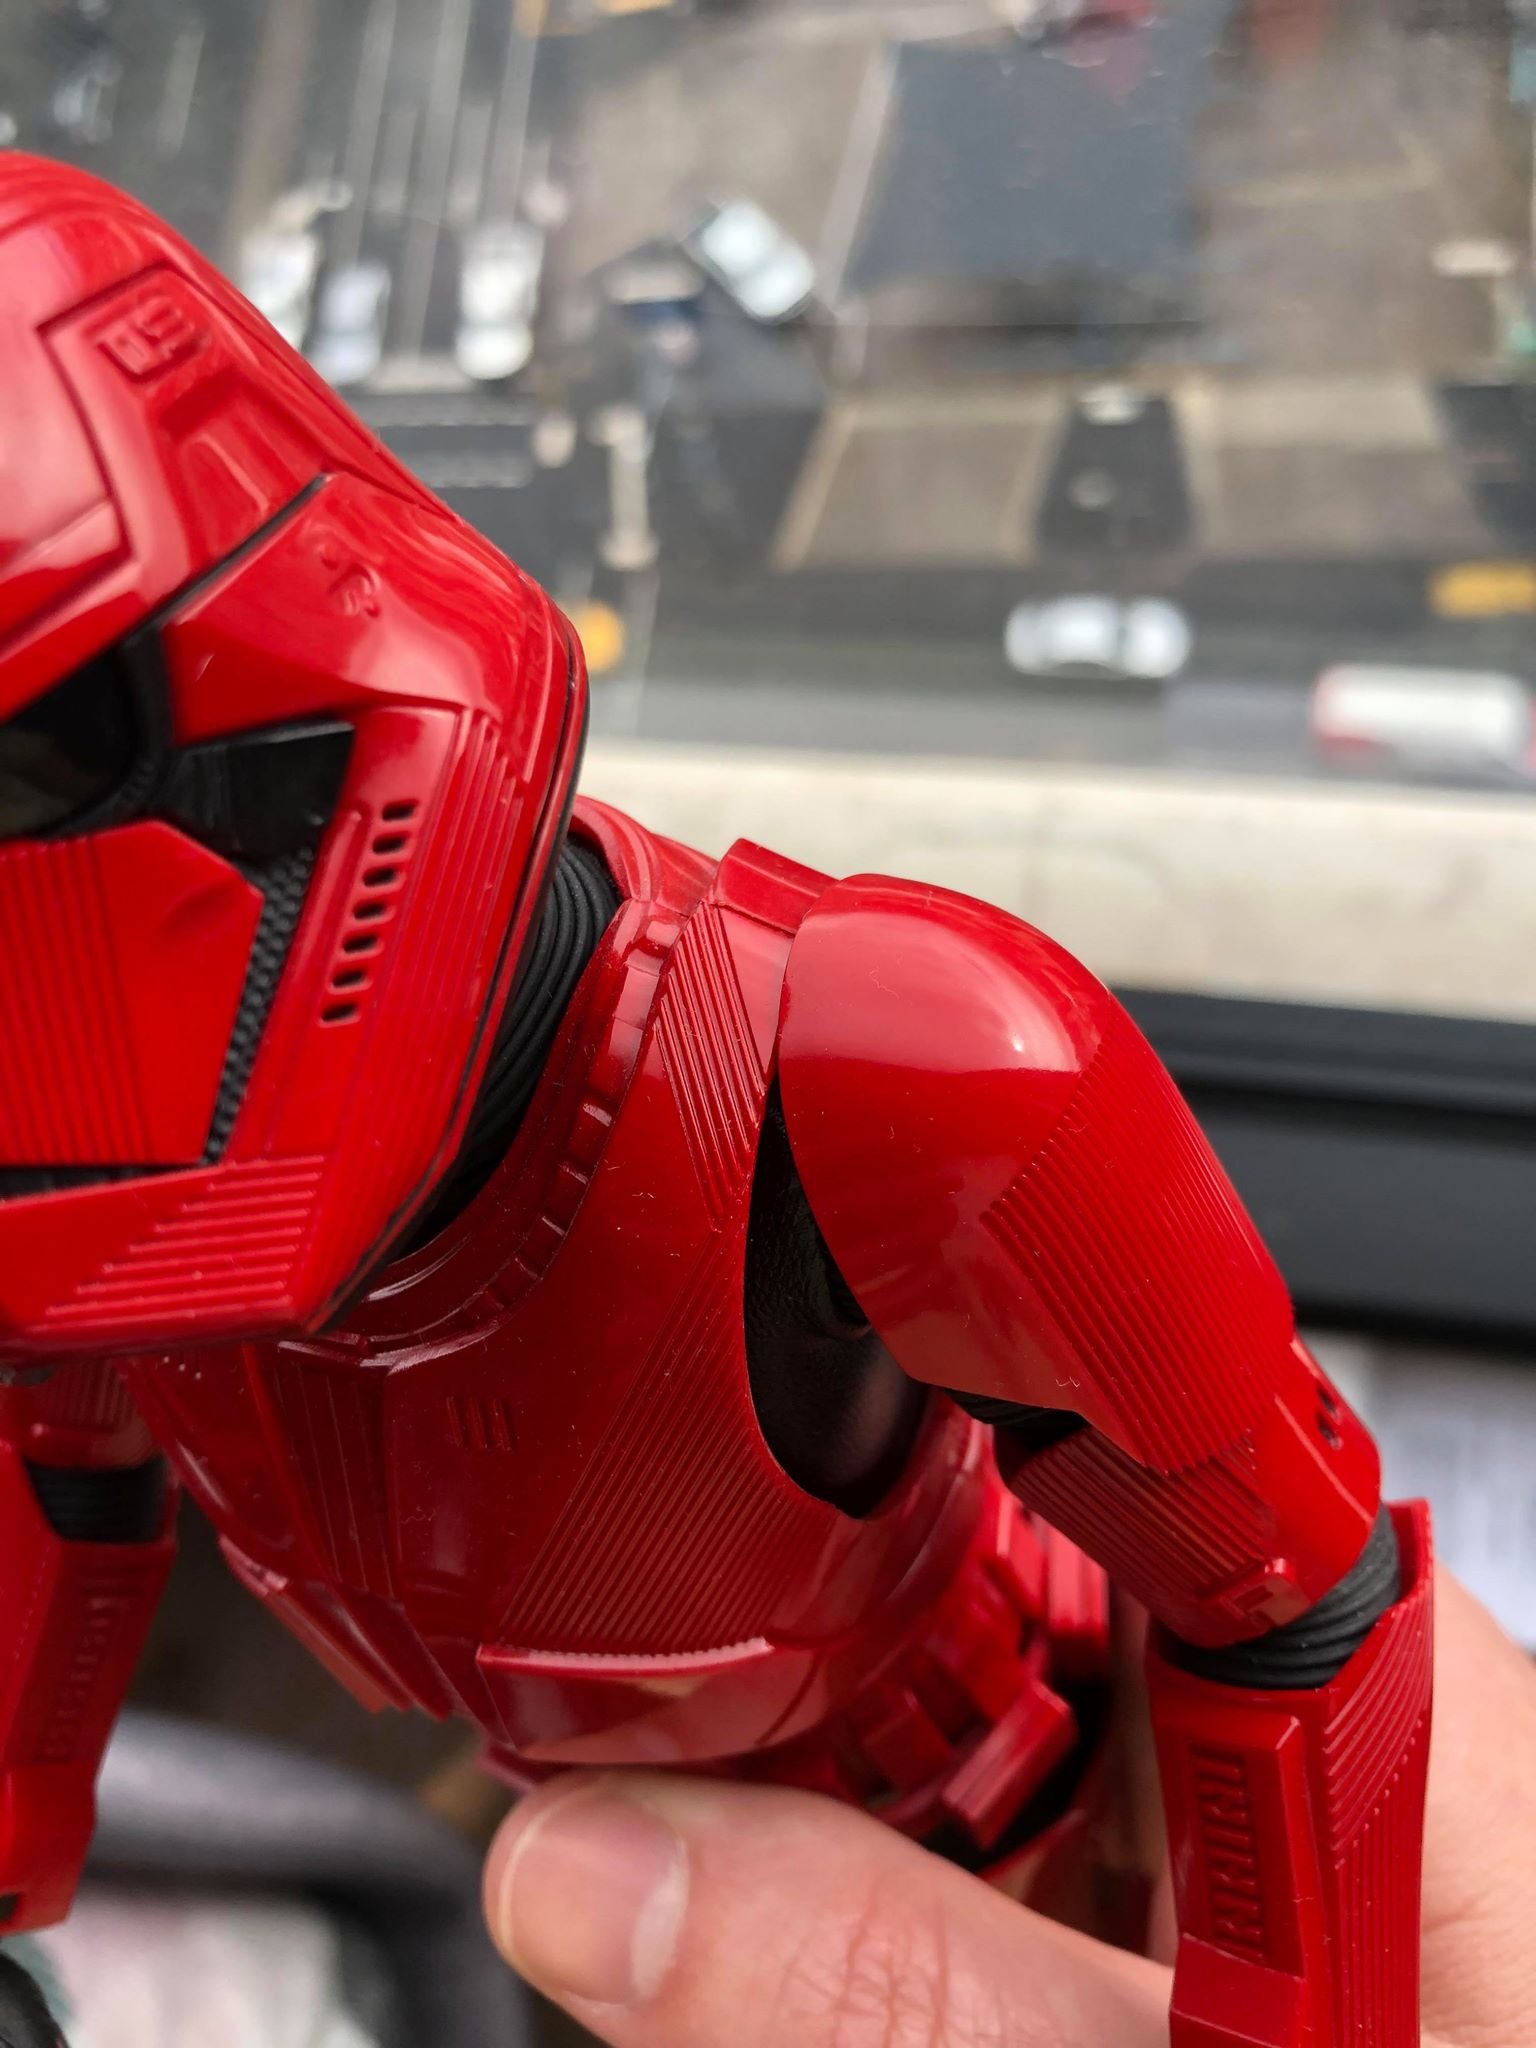
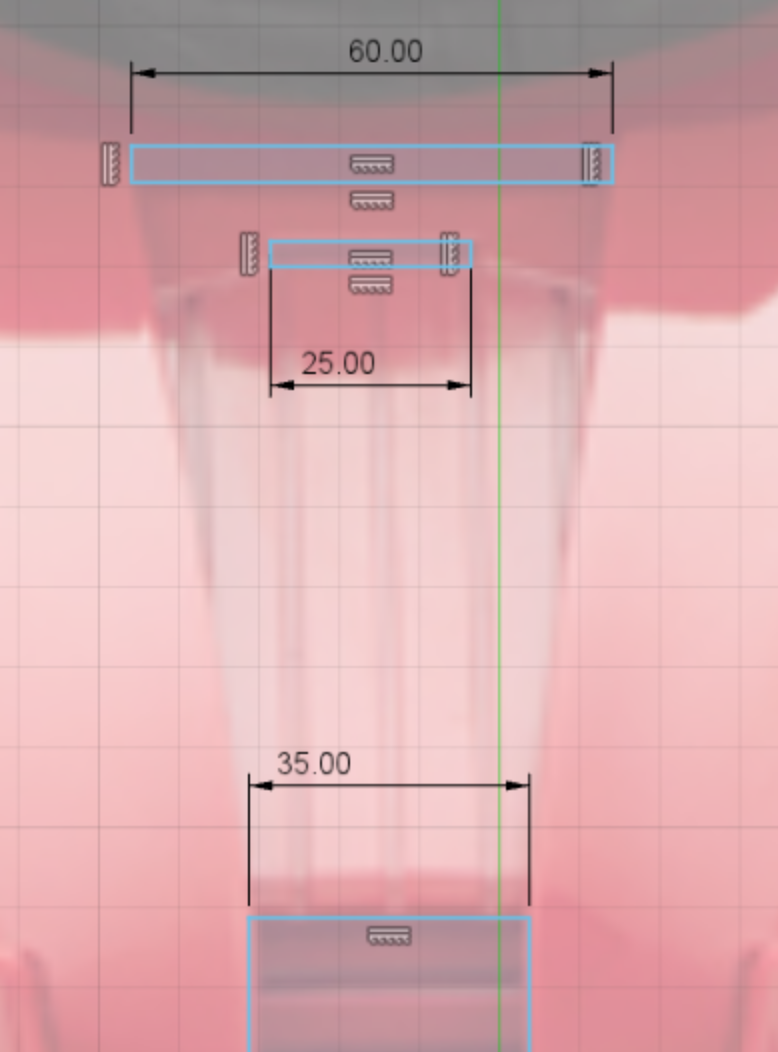
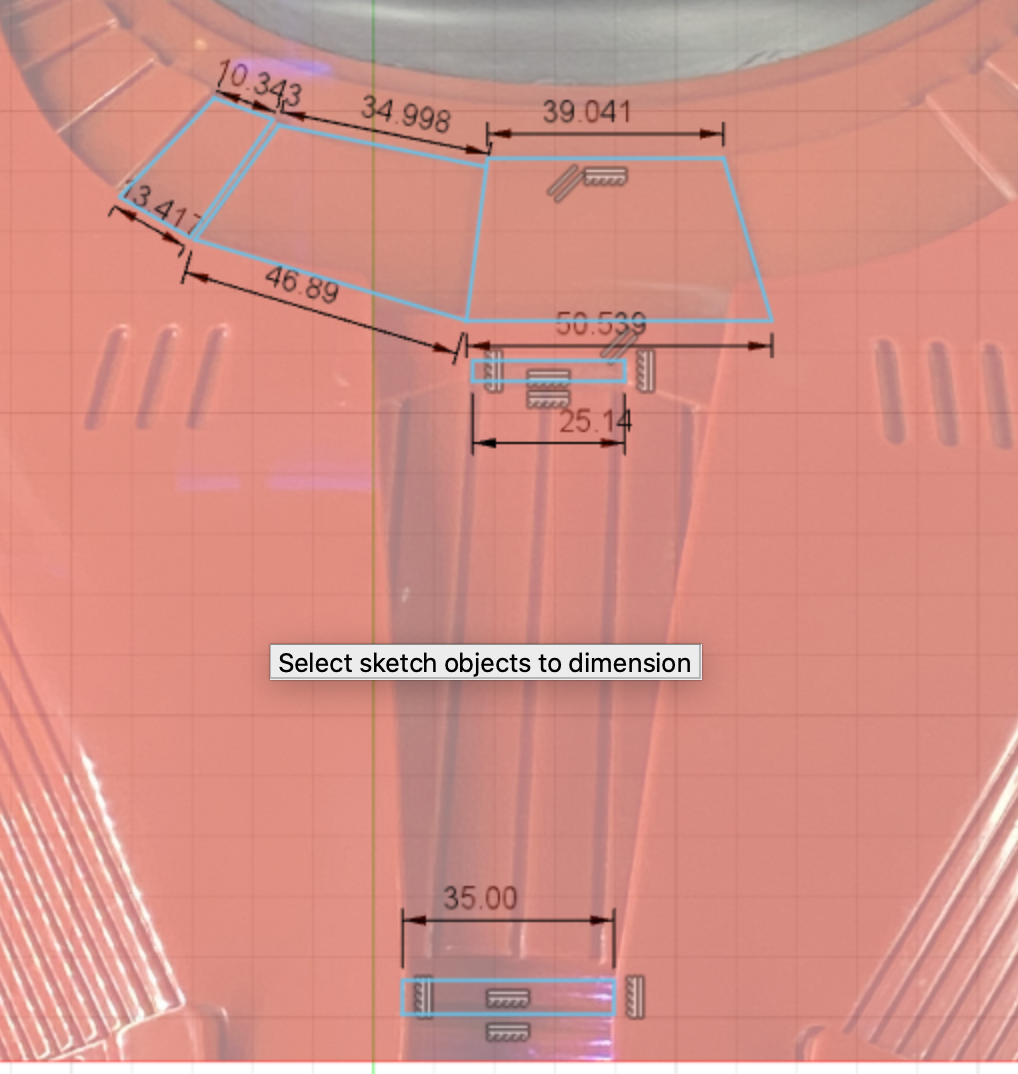
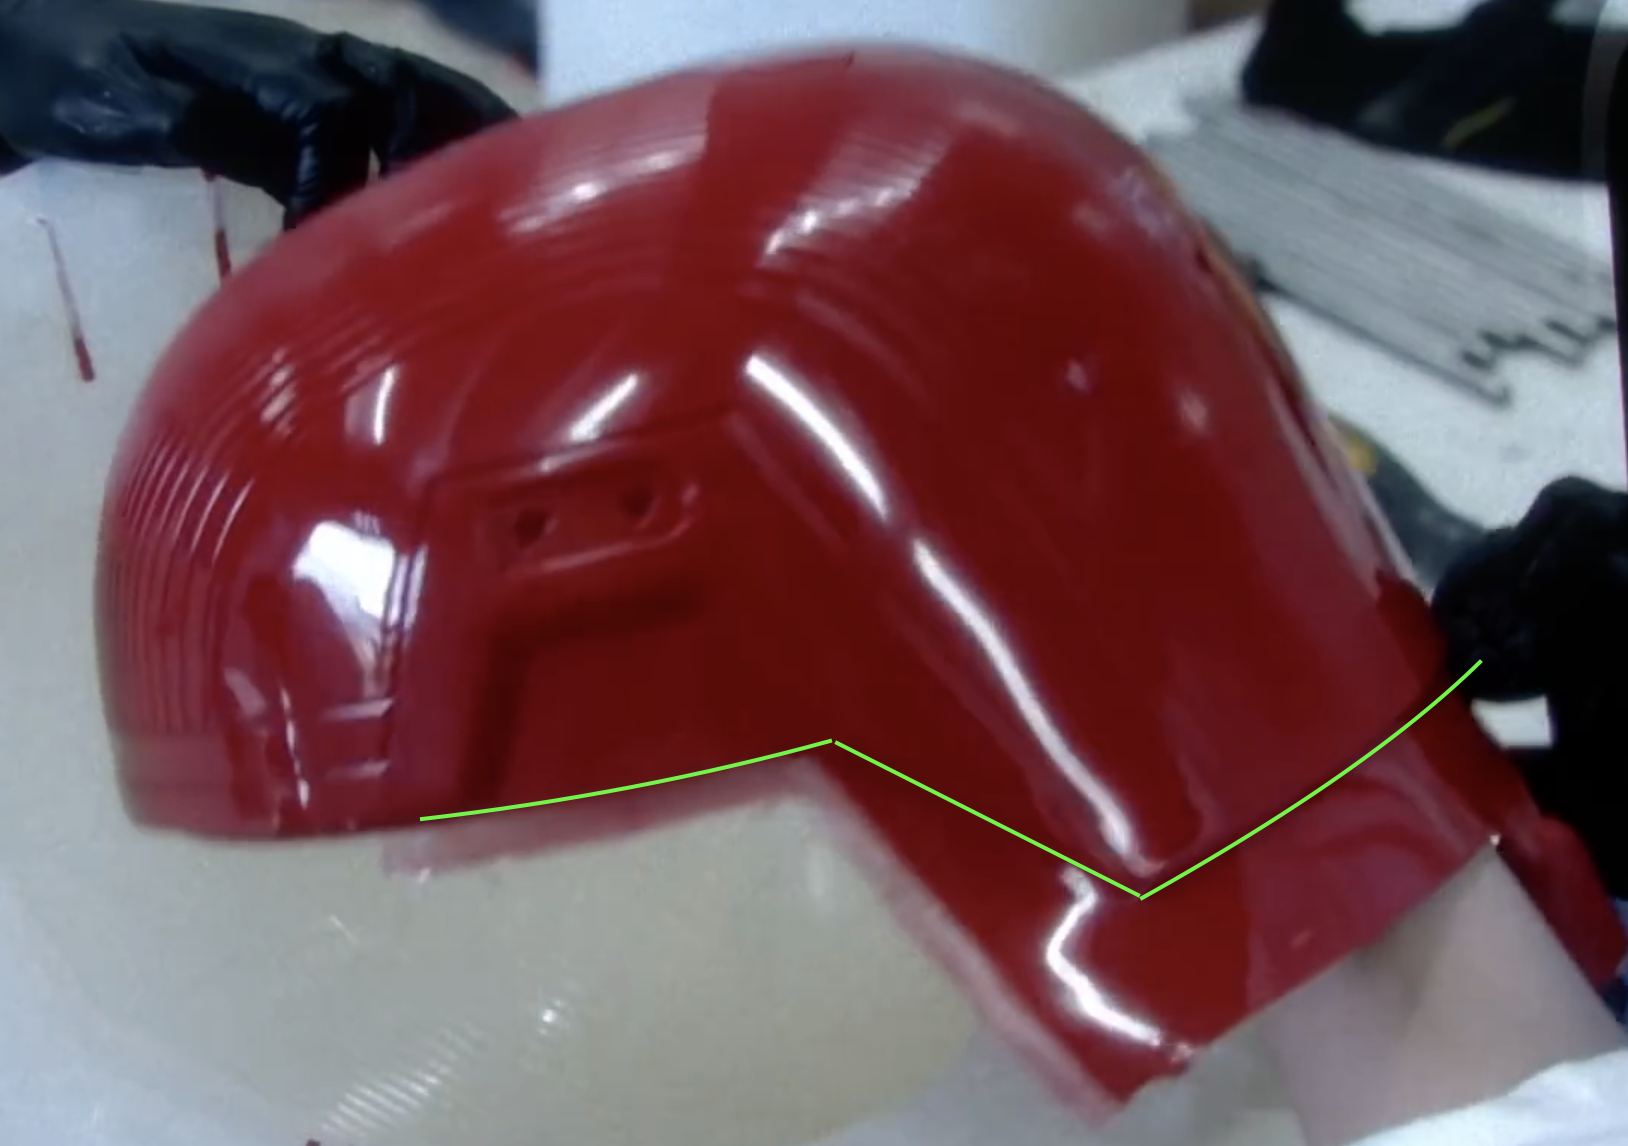
I am going to revisit this part as I noticed an inconsistency when we were reviewing the CRL parts. The wording of the CRL will need tweaking to ensure the shape and spacing between the segments is correct. As you can see the between the pictures above there is a significant difference between the two pieces in terms of the shape of the centre segment and the spacing.
-
New CRL Proposal - Sith Trooper (TROS)
nanotek replied to RAIDER's topic in First Order Sith Trooper