-
Posts
2,238 -
Joined
-
Last visited
-
Days Won
155
Content Type
Profiles
Forums
Events
Everything posted by nanotek
-
New CRL Proposal - Sith Trooper (TROS)
nanotek replied to RAIDER's topic in First Order Sith Trooper
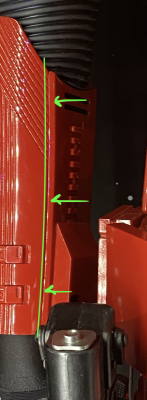
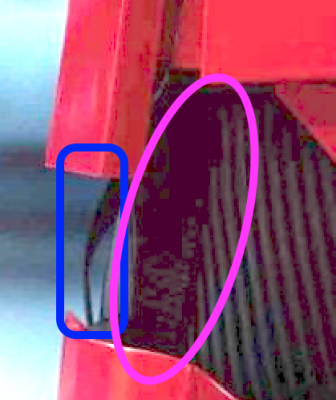
There's a couple of things I should have posted here instead of the other posts, so will do so now. My apologies. After reviewing the component again for accuracy I found the above missing The Inside of the forearm is a panel connected to the rest of the forearm forming a seam line. References: -

complete Sithtrooper Helmet - Draft CRL Development Discussion
nanotek replied to nanotek's topic in CRL Discussion Archive
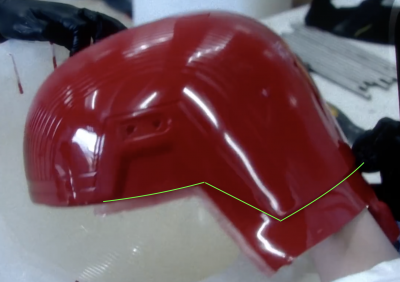
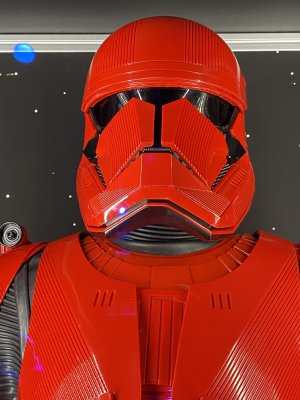
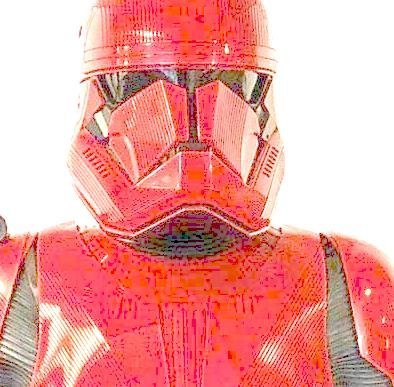
Apologies on digging this up, I proposing to make a couple of minor changes to this section of text. When I was looking at some of the references I had forgotten this costume is made up of components. The top of the helmet is separate from the lower half which forms a seam starting from below the traps, extending diagonally towards the back and terminates at the horizontal line at the back. I then realised that the line was not referenced in the text and that the seam should be added for L2. A line starts at the bottom-back of the trap extending horizontally downwards to the back, intersecting with the diagonal line that extends from the brow and interacts with the horizontal line that separates the mohawk lines from the 5 recessed lines at base of the back. Level 2 addition: The line that runs from the traps/brow to the back is a seam. References: -
Those pics are not from a great source, the undersuits and gaskets are not accurate. I would look a the celebration pics in the reference pictures.
-

New CRL Proposal - Sith Trooper (TROS)
nanotek replied to RAIDER's topic in First Order Sith Trooper
I still need to make some tweaks here and there. Mostly concerning L2. Keep finding stuff ? -
Moving this to the build area
-

New CRL Proposal - Sith Trooper (TROS)
nanotek replied to RAIDER's topic in First Order Sith Trooper
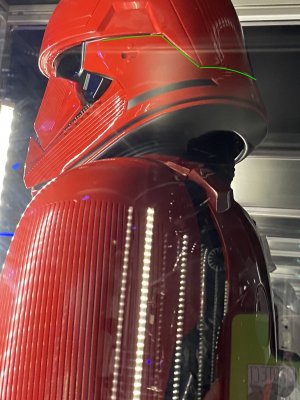
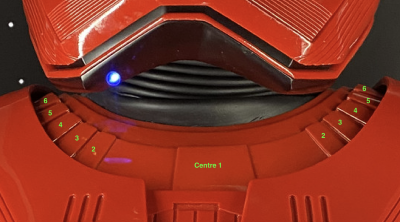
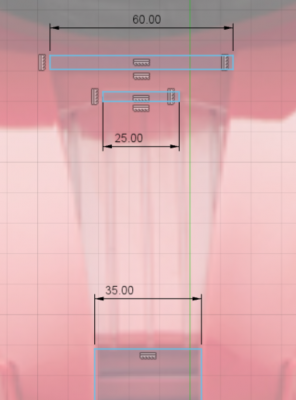
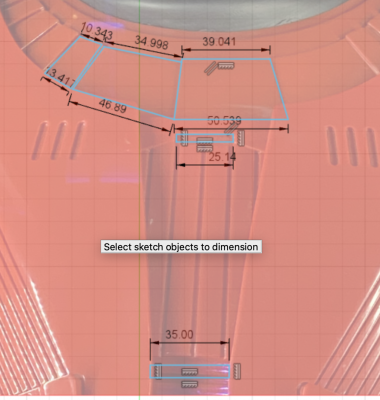
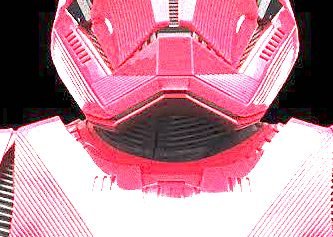
@Raider and I have been having some discussions about the Gorget wording and what it all means. There will be some changes to this part of the CRL based on the findings There are 3 visible steps forming rings around the neckline, ascending from the neckline to the cuirass or chest/back. The third ring from the neckline and is closest to the armor has the following details: 15-17 raised sections that start and end at the shoulders, one centre raised section at the centre front that matches the width of the opening of lower front part of the cuirass opening, 7 smaller and evenly spaced raised sections that extend towards the shoulder. Segments 1-5 (from the center section) and 7 are roughly 1" (25mm) wide. Segment 6 (from the center) is roughly 2" (50mm) wide. In an attempt to make this all make more sense we will be providing a visual guide to support this part of the CRL. Here is what we see from the font: Here is what we see from the top: (Unfortunately we only have the Anovos statues and the Hot Toy to confirm the 7th and 8th raised sections) I also decided to use Fusion 360 to get some approximate dimensions to help with this I imported an image of the Sith Trooper and calibrated the image according to the belt size, then sketched some shapes to get some dimensions. Please bear in mind this is not exact measurements, I have not taken into account distance/angle of camera from parts. It was just to get a slight better idea of the proportions: (Dimensions are in mm) Based on what we can see here I am going to propose 2 things, one is reworded text and two is L1 and L2 split Gorget (Collar) Finished in a high gloss deep red that matches the colors of the entire costume. Forms part of the Cuirass which is comprised of the chest, back and gorget. One piece that goes under the cuirass to form the neckline of the armor. Finished in a high gloss deep red that matches the colors of the entire costume. Duplicate Sits flat around the neckline. added to next bullet point Sits under the cuirass (or chest/back), fits closely to the neck seal, sits flat around the neckline and appears to be part of the cuirass. If there is a seam, it is as discreet as possible and shall be securely closed with no visible overlaps or gap present. There are 3 visible steps forming rings around the neckline, ascending from the neckline to the cuirass or chest/back. The third ring from the neckline and is closest to the armor has the following details: (Please refer to guide picture for further info) 13-15 raised trapezoidal segments that start and end at the shoulders, forming the neckline at the front of the gorget Segment 1 (Centre front) is approximately 2" (50mm) Segments 2-6 and 8 are approximately 1/2" to 5/8" wide (12mm to 15mm) wide Segment 7 (sits on the shoulder) is approximately 2" (50mm) wide Segment 7 and 8 are optional OPTIONAL (Level 2) The gorget must be a separate piece with no seam constructed of a flexible rubber like material. Segments 7 and 8 must be present -
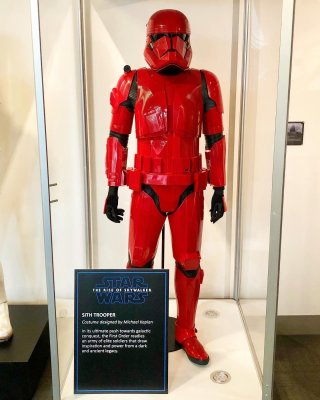
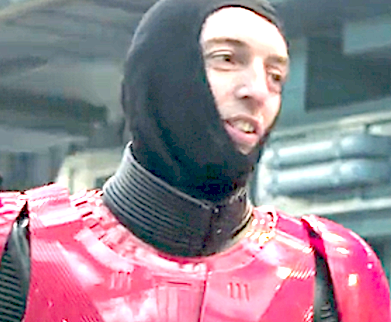
Regarding the zipper at the front, and I want to discuss this because I know where have a lot of material that would seem to suggest that the zipper can go either at the front or the back. I am supporting the case that the zipper should always be at the front and using the invisible zipper method. In all of the film related references and LFL promo materials the zipper is at the front. It is concealed quite well with the actually zipper being obscured by the invisible enclosure method. There is a difference between some of the shots of the actors in the film and the photographic promo where the it appears the enclosure is pressed flat for the promos. I think the costume displays were set up incorrectly and the actors used for the promotional events dressed incorrectly. If we take a look at the following photo of the LFL costume display we can see that the zipper is not at the front, but there is bunching of the undersuit to suggest that it has been put on back to front. It would also go towards explaining why the shoulder seams are more prominent in these photos than in the screen/promo pics. LFL Costume Displays: I think with the actors, I think most of them are 501st and probably assumed, like all other costumes, that the zipper goes towards the front. See below where the zipper is at the front and we do not see the shoulder seams for the gaskets. Your back is broader than your chest, so it makes sense
-
they even have the exact sole On mine they do, logo and all!
-
I recommend gluing the front of the spat to the boot
-
Seeing as they are a very close replica I do not see why not. I would have to look at them very closely and check the updated text being prepared by @Chaos I don't have time to do this research at the moment due to heavy workload
-

New CRL Proposal - Sith Trooper (TROS)
nanotek replied to RAIDER's topic in First Order Sith Trooper
Corrections^^^ -

New CRL Proposal - Sith Trooper (TROS)
nanotek replied to RAIDER's topic in First Order Sith Trooper
That was for the shins, updating to reflect ^^^ -

New CRL Proposal - Sith Trooper (TROS)
nanotek replied to RAIDER's topic in First Order Sith Trooper
Cuirass & Gorget (Chest/Back Armor) Finished in a high gloss deep red that matches the colors of the entire costume. Cuirass is comprised of the chest and back, with a gorget forming the neck opening. Cuirass Chest Finished in a high gloss deep red that matches the colors of the entire costume. Forms part of the Cuirass which is comprised of the chest, back and gorget. 3 vertical oblong recesses near the collar on each side of the chest near the center opening. The chest extends over the shoulder towards the back forming the shoulder straps which have an attached trapezoidal buckle that appears to connect to the trapezoidal buckles on the upper back armor. There are recessed lines extending diagonally out from the back collar to the shoulder, these lines intersect a few recessed lines deep with the vertical horizontal lines on the front. Raised smooth/flat section at front extends around the under arm of the wearer towards back. Starts as rectangular and tapers to match shoulder/arm hole. There are two raised panels on the lower section of the chest, each extends under the arms towards and forms the lowest part of the sides. Each panel has the appearance of a separate piece and there is a recess that runs around the outside edge. Left lower panel has one recessed diagonal channel. Right lower panel has a small rectangular box/raised area with at least 12 evenly spaced, vertical and slightly angled recessed lines, the bottom of the box/raised area extends slightly outwards from the wearer. There is a clip & buckle greeblie separated by a ratchet strap greeblie in a recessed cavity just above the box (refer to diagram). There are a number of vertically diagonal and evenly spaced recessed lines that start at the top of the rectangular part of the front boxes, and extend towards the armhole. There are a number of recessed diagonal lines under the arms that extend from the armhole towards the front, intersecting with the curve of the raised box section. There are a number of vertically diagonal, evenly spaced recessed lines that start approximately halfway under the armhole and extend back to and underlap the cuirass back. The recessed lines match the diagonal shape of the back armor. Both chest sides connect to the lower back armor. The center section of the chest has the appearance of being a separate piece that has rectangular and horizontal recesses in lower section, vertical recesses in upper section and a small rectangular recess near the top. OPTIONAL (Level 2) Chest shoulder buckle is a separate piece. Ratchet strap greeblie has 5 visible teeth. Small rectangular box on the right chest has 13 recessed vertical lines. There are 8 recessed lines extending diagonally out from the back collar to the shoulder, these lines intersect 6 recessed lines deep with the vertical horizontal lines on the front. On the front chest there are 27 vertically diagonal and evenly spaced recessed lines that start at the top of the rectangular part of the front boxes, and extend towards the armhole. There are 12 recessed diagonal lines under the arms that extend from the armhole towards the front, intersecting with the curve of the raised box section. The center section of the chest has the appearance of being a separate piece that has 12 rectangular and horizontal recesses in lower section, 5 vertical recesses in upper section and a small rectangular recess near the top. Cuirass Back Finished in a high gloss deep red that matches the colors of the entire costume. Forms part of the Cuirass which is comprised of the chest, back and gorget. The back has an O II (02) shape is made up of recessed II and the O is a recessed circular line divided almost in half by an intersecting horizontal line. The bottom part of the circle is recessed, is black and is slightly smaller in appearance than the top half. There is a small black vertical oblong recess in the top half to the left side. The back has two trapezoidal "buckles" at the top back of the shoulders where it connects to the chest shoulder trapezoidal buckle. The back has a recessed trapezoidal shape at the bottom of the left shoulder buckle that has more than 13 recessed vertical lines. The bottom of this shape is the same length as the top half of the lower trapezoidal section. The angle of the bottom matches the angle at the top of the bottom trapezoid. The recessed/raised lines do not extend all the way to the bottom. The inside line of the trapezoid matches the angle of the buckle. On the back there is a raised trapezoidal section that starts at the base of the back and extends towards the left shoulder. There is a small recessed rectangle directly about the top of the trapezoid and is black. The top of the trapezoid is the same width as the bottom of the recessed trapezoid under the top left shoulder. The angle of the top of the this trapezoid is parallel to the bottom of the recessed trapezoid at the base of the left buckle. The raised section gets higher towards the top and arches out slightly from the wearer’s back. OPTIONAL (Level 2) Trapezoidal recess on the back under the left buckle has 15 recessed lines. Gorget (Collar) Finished in a high gloss deep red that matches the colors of the entire costume. Forms part of the Cuirass which is comprised of the chest, back and gorget. One piece that goes under the cuirass to form the neckline of the armor. Finished in a high gloss deep red that matches the colors of the entire costume. Sits flat around the neckline. Sits under the cuirass (or chest/back), fits closely to the neck seal and appears to be part of the cuirass. If there is a seam, it is as discreet as possible and shall be securely closed with no visible overlaps or gap present. There are 3 visible steps forming rings around the neckline, ascending from the neckline to the cuirass or chest/back. The third ring from the neckline and is closest to the armor has the following details: 15-17 raised sections that start and end at the shoulders, one centre raised section at the centre front that matches the width of the opening of lower front part of the cuirass opening, 7 smaller and evenly spaced raised sections that extend towards the shoulder. Segments 1-5 (from the center section) and 7 are roughly 1" (25mm) wide. Segment 6 (from the center) is roughly 2" (50mm) wide. OPTIONAL (Level 2) The gorget must be a separate piece with no seam constructed of a flexible rubber like material. Chest shoulder buckle is a separate piece. Ratchet strap greeblie has 5 visible teeth. Small rectangular box on the right chest has 13 recessed vertical lines. Trapezoidal recess on the back under the left buckle has 15 recessed lines. There are 8 recessed lines extending diagonally out from the back collar to the shoulder, these lines intersect 6 recessed lines deep with the vertical horizontal lines on the front. On the front chest there are 27 vertically diagonal and evenly spaced recessed lines that start at the top of the rectangular part of the front boxes, and extend towards the armhole. There are 12 recessed diagonal lines under the arms that extend from the armhole towards the front, intersecting with the curve of the raised box section. The center section of the chest has the appearance of being a separate piece that has 12 rectangular and horizontal recesses in lower section, 5 vertical recesses in upper section and a small rectangular recess near the top. -
Great start! Looking forward to seeing how your build progresses
-

sithtrooper Sith Trooper reference pictures
nanotek replied to gmrhodes13's topic in First Order Sith Trooper
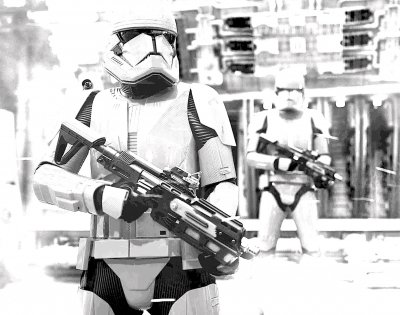
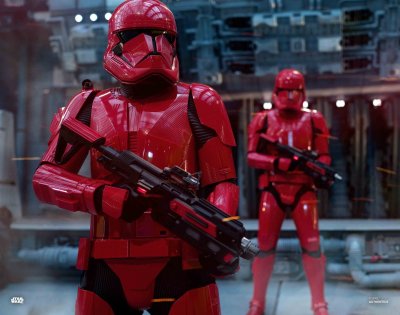
For those of you who are interested in the thigh strapping, I found a reference picture that shows how the thighs are strapped. This is similar to the Death Trooper where there are two straps placed more to the outside of the hip to promote better movement whilst holding the thigh in a reasonable position I had to boost the contrast way up, but you can clearly see both straps. Here the pressure is on the front strap because the thigh is positioned more to the back thus a slack back strap. Taken from the original below: -

complete Sith Trooper Weapons - Draft CRL Development
nanotek replied to nanotek's topic in CRL Discussion Archive
transferred to CRL proposal: -
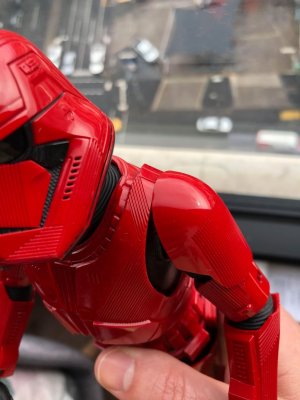
Are you asking if it should be L2? If this is the case then I would say no as it is seen on a lot of the references. It is not uncommon to have measurements on L1 items as has been stated before. The difficulty with a costume like this due to it's complicated design is do we go one rule for all, or mixture. I believe a mixture is the best approach. I think you raise a good point about where the seam is located, a lot of the reference materials show that it sits under the shoulder bell and slopes inwards toward the front of the chest. There are others where you can barely see it to not at all. I think it may be a good idea to word it in a way that shows that either/or is acceptable, but with L2 it will be mandatory. There is a vertical seam on the hips towards the rear where the front and back gasket ribs intersect My opinion is this; It would go without saying that you would see a clear change between the rib directions between the patterns on the front and the back, therefore a seam would be present. It's more to support what a GML would bee seeing. I think it stands at L1 as a default.
-

complete Sith Trooper Weapons - Draft CRL Development
nanotek posted a topic in CRL Discussion Archive
Optional Accessories ST-W48 Blaster Based on a replica Glock 17 repeating pistol, scratch-built, or a modified commercial Stormtrooper toy. Details to be painted satin or matte black, red (matching the armour) and silver per reference photos. Can come in two variations; Rifle Mode (with stock) and Carbine Mode (without stock) OPTIONAL Level two certification (if applicable): Has working lights Mesh present in forward grip Sonn-Blas FWMB-10B Repeating Blaster Blaster may be scratch-built, or a modified commercial toy Stormtrooper blaster. Details to be painted satin or matte black, red (matching the armour) and silver per reference photos. -

New CRL Proposal - Sith Trooper (TROS)
nanotek replied to RAIDER's topic in First Order Sith Trooper
The whole costume is Polyurethane (flexible rubber) with a shore strength of hard. Maybe around the Shore A70 or Shore D20-30.

