-
Posts
2,238 -
Joined
-
Last visited
-
Days Won
155
Content Type
Profiles
Forums
Events
Everything posted by nanotek
-
Welcome to Special Ops! Looking forward to seeing your build progress. You are most definitely right, this is a rite of passage and can be very challenging! Good luck and sing out if you need any help.
-
I'll see what I can do this weekend if I get a chance! It's pretty simple
-
I agree. Before doing anything maybe post up some pics so that all the builders here can assess the problem more thoroughly. I would also avoid EVA foam as it will affect the overall look of the shin. It's too flexible and will possibly lead to a cracked finish in your paint work. Chaos's idea is on par with how others have fixed their sizing issues. I can't really comment too much as I didn't go the Jimi route and I am not entirely sure how the ABS will respond with Jim's flexi fibreglass in that area. I would go Lancer's advice if I was in a hurry and wasn't confident in making the adjustments. But you would have to contact Andrew and pass the measurements of your calf first to make sure it will fit Another option is to get it 3D printed to your size. It's a bit more work but may be a better option for fit.
-
Hey Chris, thanks for the files! I forgot tell you ages ago, but I downloaded them an altered them (I used to do my own audio engineering when I was a professional music producer). I removed a lot of the space between each chatter so that it was a little less random and a little more continuous. I removed the alarm signal that was at the beginning (because volume wise it's too loud - I'll explain) and then I increased the volume across the board, I could increase the volume a lot further without destroying the dynamics of the original performance. I'll forward you a copy if you're interested. I didn't bother with any complicated setups for talking as I have found that every voice changer for DT is not even close (for my liking) and that it's easier to just talk. I run the audio file on my iPhone on permanent loop which is connect via Bluetooth to a portable 20w speaker I bought from Amazon for 20 bucks. The combination is very grunty, probably a little too much really. But better to have the headroom than be pushing something louder than it can go. The Bluetooth speaker is velcro'd into my back armour facing outwards The speaker has it's own battery which lasts ages. I switch the Iphone into airplane mode but switch the bluetooth on (so as not to get phone calls)
-
The belt is rubber matting they should be available at any home hardware outlet. I bought an MP40 pouch from eBay and coloured in the stitching. I also made a pouch myself. Pauldron I went with Some guy who changed his name a fair bit. I think you can find him under the name Burkbench Designs. His pauldron is the best I have seen so far. The D ring under each arm should come with the kit and isn't the load bearing ring. The ones that take the weight are connected to the shoulder straps. Nice progress
-
Congrats! Looks great!
-
Bone Buddrus does the best rubber straps and buckles hands down. Derek Day for the belt buckle.
-
Hang in there mate. The blasters are easier than the armour. Take your time your kit looks great
-

New too Forum looking to join as a Death Trooper
nanotek replied to Darthjon's topic in Imperial Death Trooper
Welcome! Check out all the DT resources here. Join the Death Trooper Build Group on Facebook. Study the CRL! There's a wealth of information now so you're in good hands! -
Welcome and good luck with the build!
-
Whoop! That's fantastic news! I am really looking forward to seeing your build!
-
Good luck with the build. Am happy to answer questions. I'm a little snowed under with life outside the legion at the moment but will do my best! Best of luck with your build. It's a time consuming one that can and will test your patience but it's totally worth it!
-
Yes! Congratulations! Looks fantastic mate!
-
Nice one! Looks great
-
Good luck mate. I'm sure there'll be no issues with your approval.
-
Good luck with your build!
-
Which model? Mine are 5mm I think. I can check later for you. If you can I would take the pieces to a model shop and try a couple of rods to see. I chose ones that required a bit of forcing in so they stayed in position I hope this helps
-
I went the 3D printed route and can honestly say I wouldn't do it again in a hurry. It's A LOT of work to get it right and even with strengthening using fibreglass it can still crack. I fibreglassed several areas that were very thin and weak. Butt plate, abs, shoulders, chest and thighs. I can safely sit down without issue I didn't go with other kits because there are a few features that I felt didn't match the screen used ones. At the time the ArmoryShop 3D print was the closest I could source without buying a printer myself. It was a very adventurous build and was satisfying once it was “finished†but there's still work to do. Not to mention ongoing repairs and repainting from trooping. My next build will most likely be the TLJ FOTK and will get a Jimi kit as that looks like a good one. Maybe by the time I afford to build again there might be something different.
-

Shoulder Buckle and Side V Ring
nanotek replied to christopherskog's topic in Imperial Death Trooper
Source for the lower v-ring? -

Shoulder Buckle and Side V Ring
nanotek replied to christopherskog's topic in Imperial Death Trooper
I think someone found them, however they are really heavy. They were possibly looking at recasting it in aluminium but I don't think it happened. You will have to trawl through the research thread to find the post. I don't know anyone who offers them cast in any metal. Seems to be some rubber ones I think? Sorry just read you were after both too and bottom sets. The top ones the d-rings are available through a couple of people. The buckle is an ejection seat harness buckle. I got mine through eBay. The bottom ones as above -
Thanks mate! Appreciate it! I am looking forward to the completion of your build!
-
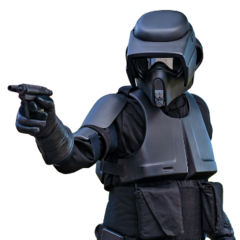
TX10322 reporting for duty. Well actually already did my first troop within 24 hours of receiving my numbers So happy! I'll be continuing this build thread a bit more as I have some more to share
-
I used the Rustoleum 2X High Gloss Black. I'll try to post close up pics so you can see the difference. My painting skills have improved but not professional:D I have not used any clear coat. But may do in future as it may help protect the finish a bit longer.
-

Plastic Arms Dealer Gel Coated Fiberglass DT Kit
nanotek replied to amcclary's topic in Imperial Death Trooper
This kit looks great! I wish it was available back when I started mine! Looking forward to seeing more of this kit as it looks like a far better investment than 3D printed armour -
My modifications continue... after seeing how easily my shoulder bells kept slipping around on my undersuit, I decided to use some rubber matting to line them. This worked a treat! Glued in using Foss adhesive. Also experienced the insane heat and lens fog in my bucket so decided to install my fans. Awesomely enough the Anovos bucket has a nice seal around the opening so it was easy to conceal all the wiring behind it. One of the switches for turning fans on and off again These are Henry's fans. Really quiet and powerful.


