-
Posts
4,133 -
Joined
-
Last visited
-
Days Won
382
Content Type
Profiles
Forums
Events
Everything posted by IcyTrooper
-

Finalizing CRL Proposal - Lieutenant Janek Sunber (SW:E)
IcyTrooper replied to IcyTrooper's topic in Lieutenant Janek Sunber
Glad you supported the name change! I think it flows a ton better that way across the board. With the macrobinoculars I can support the original proposed text, as it allows more interpretation. We may want to do some serious gallery images and such to ensure won't have anything that is too weird out there. We essentially only have the rear-right and front right views based on the comic panels. Here is the updated text, purple indicates the change: Macrobinoculars Scratch built or high end prop replica that is similar to the reference images. Must be painted olive green in color OPTIONAL Level Two certification (if applicable): The view lenses are tinted red on the end that is held up to the eyes. -

Finalizing CRL Proposal - Lieutenant Janek Sunber (SW:E)
IcyTrooper replied to IcyTrooper's topic in Lieutenant Janek Sunber
Since they are standard boots we can finalize that. I did do a slight name change to create some continuity amongst the other CRLs and that is the term that is use for the FISD HWT and the MEPD Sandy and it is macrobinoculars. I updated the finalized belt pouches text to change electrobinoculars to macrobinoculars. Macrobinoculars Styled after the ones used by the Sandtrooper in the Special Edition scenes of ANH. Must be painted olive green in color OPTIONAL Level Two certification (if applicable): The view lenses are a red tint on the end that is held up to the eyes. There are only 3 panels where we see the macrobinoculars in them and they look like the ones that we see with the FISD HWT and MEPD Sandy CRLs: -

Finalizing CRL Proposal - Lieutenant Janek Sunber (SW:E)
IcyTrooper replied to IcyTrooper's topic in Lieutenant Janek Sunber
We are very very close! -

Finalizing CRL Proposal - Lieutenant Janek Sunber (SW:E)
IcyTrooper replied to IcyTrooper's topic in Lieutenant Janek Sunber
I went through one more time just to make sure it looked good and I think we are solid for it. I added the text to the finalized section. Time for the boots! Boots Below the calf black or green leather or leather-like material. Free of laces, decorative stitching, buckles on the instep or any other embellishments. Zippers on the inside of the boot are acceptable, so long as they are concealed. If the zipper is not covered by vinyl/leather, it is painted black. OPTIONAL Level Two certification (if applicable): Olive green 8” to 9” (20-23cm) high boots. Pants legs shall be tucked into boots and fluffed to give appearance of original source art. Weathering of the boots is encouraged. This was the standard boot text from the IAT. -

Finalizing CRL Proposal - Lieutenant Janek Sunber (SW:E)
IcyTrooper replied to IcyTrooper's topic in Lieutenant Janek Sunber
Hey, thanks! I do agree with the MOLLE styled pouches. I think we should make the text mention MOLLE style, so anytime pouch is mentioned we could put something like "2 rectangular MOLLE style pouches", etc., would that be better? I do agree with changing that so that it matches the Engy. I also agree with the L2 detail. I concur and will make the change on the finalized text section to remove "utility". You'll see the applied changes below in the purple text. Belt Pouches Belt pouches are olive green in color and should be made of nylon or similar material. 2 rectangular MOLLE style pouches with a top flap, and strap from top to bottom securing it shut, sit to the right of the belt buckle where the harness meets the belt. A large pouch sits on the right of the above pouches. The pouch may be a utility pouch, gas mask pouch, SAW pouch, or other MOLLE style pouch of similar size. A tactical triple AK magazine PALS belt or MOLLE style pouch should be on the rear of the belt. An electrobinoculars pouch sits on the left of the belt buckle where the harness meets the belt. 2 rectangular MOLLE style pouches with a top flap, and strap from top to bottom securing it shut, sit to the left of the electrobinoculars pouch. OPTIONAL Level Two certification (if applicable): The large pouch will make use of a visible double snap closure or appear to have such. Electrobinoculars are present. -

Finalizing CRL Proposal - Lieutenant Janek Sunber (SW:E)
IcyTrooper replied to IcyTrooper's topic in Lieutenant Janek Sunber
I have finalized the belt text, here is the belt pouches text: Belt Pouches Belt pouches are olive green in color and should be made of nylon or similar material. 2 rectangular pouches with a top flap, and strap from top to bottom securing it shut, sit to the right of the belt buckle where the harness meets the belt. A gas-mask style pouch sits on the right of the above pouches. A tactical triple AK magazine PALS belt pouch should be on the rear of the belt. An electrobinoculars pouch sits on the left of the belt buckle where the harness meets the belt. 2 rectangular pouches with a top flap, and strap from top to bottom securing it shut, sit to the left of the electrobinoculars pouch. OPTIONAL Level Two certification (if applicable): Electrobinoculars are present. This was on the original proposal and I didn't see anything that looked out of place. -
Haha I hate when that happens! Get close and then have weird stuff happen. Can't wait to see the CRL pics!
-

Shoulder bells and belt for army troopers?
IcyTrooper replied to That one guy's topic in Imperial Army Trooper
Yeah, unfortunately if it is a fan mod for a game it wouldn't be able to get clearance. -

Shoulder bells and belt for army troopers?
IcyTrooper replied to That one guy's topic in Imperial Army Trooper
That is interesting! Is this an action figure? -
@RAIDER if I remember right you can round that inside part? I have seen it done on ROTJ scout before and the text is pretty close.
-

Finalizing CRL Proposal - Lieutenant Janek Sunber (SW:E)
IcyTrooper replied to IcyTrooper's topic in Lieutenant Janek Sunber
Let's try this updated belt text on for size: Belt Belt is a nylon military style quick release web belt or a cotton double prong buckle web belt. Belt is olive green in color. Belt buckles may be the following colors: Quick release style may be black or olive green. Double prong style may be olive green or silver. Belt may feature eyelets along both sides of its length, but these are not required for approval. OPTIONAL Level Two certification (if applicable): Belt is a nylon or cotton double prong buckle web belt and not the quick release style. Double prong buckle may be olive green or silver. I was going to put text that I changed in purple and then realized that the entire thing was pretty much changed -

Finalizing CRL Proposal - Lieutenant Janek Sunber (SW:E)
IcyTrooper replied to IcyTrooper's topic in Lieutenant Janek Sunber
Since we don't have a definitive color I think for L2 we could allow for either silver or olive-green. I'll just have to make sure to update the L1 text to allow for the quick-release square buckle or the double-prong belt. We'll definitely need the double-prong styled belt for L2 I'd say. -
The goggles look good to me!
-

Shoulder bells and belt for army troopers?
IcyTrooper replied to That one guy's topic in Imperial Army Trooper
I'd give a look into this build thread by @Kessel: There is also a good thread by @Hoda: They both did a fine job on their costumes and outlined a lot of the pieces they used. -
The only hard part that the IAT has is the helmet which is optional under version 1 of the costume. I think you may be thinking of the AT-AT Commander with the Armored Cavalry Detachment (ACD)? GMLs use the CRL for the costume (https://databank.501st.com/databank/Costuming:TX_imperial_army_trooper#Version One) completely when reviewing a costume for the garrison/outpost that you are going to be in. If you tried to wear the hard armor after the approval that'd be at the discretion of the garrison/outpost that you are in and their command.
-

Finalizing CRL Proposal - Lieutenant Janek Sunber (SW:E)
IcyTrooper replied to IcyTrooper's topic in Lieutenant Janek Sunber
I was definitely thinking it should be a L2 thing and allow the standard IAT belt for L1 for sure! Color wise for that silver part, it is definitely a toss up to me. In some panels it is olive green and then the others it is that silver color, but you never know if it is just off-colored to accentuate the details. That second belt link from Amazon is nice! https://www.amazon.com/Military-Double-Canvas-Army-Grommet/dp/B07F1DQQZ7 -

Finalizing CRL Proposal - Lieutenant Janek Sunber (SW:E)
IcyTrooper replied to IcyTrooper's topic in Lieutenant Janek Sunber
I put the finalized text for the Web Harness and Comlink up on the first page in the finalized text section! We can move to the belt text! Here is what I have: Belt Belt is a nylon military style quick release web belt. Belt is olive green in color. Belt may feature eyelets along both sides of its length, but these are not required for approval. OPTIONAL Level Two certification (if applicable): Belt buckle is olive green in color. I did notice that the belt looks a little different from the quick release style buckle: It looks like it goes through with a silver square buckle. I'd like to motion for this as a L2 detail. -
I second @nanotek, some better insoles goes a long way with boots from IB!
-

Force Unleashed Jumptrooper CRL Discussion
IcyTrooper replied to Fivezero's topic in TFU Jumptrooper
I'm in agreement about the chest piece part down to L2, L1 should always be about inclusive and universal ability with sourcing parts, etc. L2 we can get a little more strict on. The boot part as reinforcement patches or layered patching works for me. I'm eager to see the rest of the wording for the boots! -

Finalizing CRL Proposal - Lieutenant Janek Sunber (SW:E)
IcyTrooper replied to IcyTrooper's topic in Lieutenant Janek Sunber
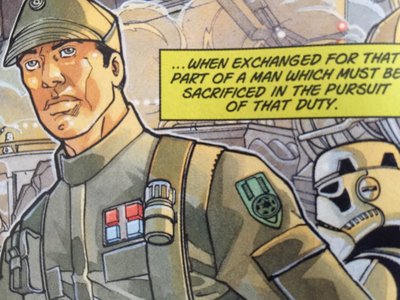
Yeah now that I'm looking back at it more I'm seeing that it is probably just an artistic detail so that it is shown that part is beveled outward. Yep! That is the comlink clip and holster. @Hoda nailed it with the text: Left suspender has a comlink clip/holster with a comlink contained within. The comlink clip/holster is positioned parallel to the rank bar and is form fitting to the comlink. The more I looked at the artwork I can see that when comparing that area we thought was black it is that lighter color that is present on various other parts of Sunber, which leads me to believe it is just shadowing or part of the art to accentuate the details: With that being said, I took what you had said above and added a few more detail pieces in purple text to include details or descriptors that we may have missed previously. I removed L2 from this. Comlink Styled after the comlink as seen in the Star Wars: Empire (Dark Horse Comics). An interpretation of the comlink is allowed, but comic accuracy is encouraged. The comlink is painted a matching olive green color and has the following details: A raised band around its upper section featuring equally-spaced raised vertical bars with recessed areas between each vertical bar. Underneath the upper section there is a recessed groove before the main body of the comlink. The bottom of the comlink is beveled to a flat bottom. Let me know what you think @RAIDER @nanotek @Blackwatch @Hoda I removed the L2 stuff for this as I don't think we have anything that would specifically warrant L2 for that. Personally, I'd say to just dump the L2 requirements for it and make the L1 stuff what is required. I checked over the comlink from the Stormtrooper ANH Hero for example, and it didn't match close enough to the reference images for Sunber to allow it for basic. I think it'd materially alter what we are trying to do -

Finalizing CRL Proposal - Lieutenant Janek Sunber (SW:E)
IcyTrooper replied to IcyTrooper's topic in Lieutenant Janek Sunber
For a second I thought you were going Occam's razor for the description of the comlink ? -

Finalizing CRL Proposal - Lieutenant Janek Sunber (SW:E)
IcyTrooper replied to IcyTrooper's topic in Lieutenant Janek Sunber
I can address both of these: Comlink: It is definitely placed there as a level of detail. I'm honestly thinking that the intent is to show that that circular area is raised (think battery access panel), which is more or less why I think we should include it. It isn't anything crazy to whether it is raised or just a circular line. Keep in mind, L2 is for enhanced details, hyper-real when looking at screen stuff (e.g., not art, etc.). @Blackwatch @RAIDER what do you say? I'm not opposed to removing it but just want to be sure we don't miss something. Harness: I have tried looking up pouch names from tac-vests online to see if where @Blackwatch derived that from and have had no luck. Maybe we say "rectangular utility pouch" as the specific pouch name? I really like the extra detail that you added into it as well as far as what it is made out of and the flap with strap text. ------------------------- Thread Continuation: As much as I'd like to push I'd really say let's nail down this text first and the rest should be pretty easy (minus the pouch part for the belt) -

Finalizing CRL Proposal - Lieutenant Janek Sunber (SW:E)
IcyTrooper replied to IcyTrooper's topic in Lieutenant Janek Sunber
Good points from both you. I'll try and touch both here: Tri-Glides I think that we could allow the tri-glides on the front provided that they are hidden by the pouches. They would need to be removed for L2 as the art doesn't show the tri-glides at all. That should allow for those who are looking to reuse the harness to be able to do so, however, it would require the next level of accuracy and modification for L2. Comlink I have weighed the options that were presented above and feel that we should include it under L1 with the applicable details for the comlink that is mentioned under Version 2 that @Blackwatch mentioned above seems the best suited for the text. I do feel that we should make reference to the Comlink in the Web Harness text and create a second section of the CRL for the Comlink itself to highlight the details as it is a required item. Here is the new text with both points: Web Harness Olive green colored, double strap "H" harness which travels from the lower back, and up over the shoulders. The harness system attaches to the belt. Harness is made of 2" (50mm) olive green nylon webbing. Visible snap-hook style fasteners that attach to belt eyelets are acceptable. Tri-glides may be present on front or back of suspenders. Back of suspenders may be permanently fastened to belt, but not required. Left suspender has a comlink clip/holster with a comlink contained within. The comlink clip/holster is positioned parallel to the rank bar and is form fitting to the comlink. The comlink must meet the details contained within this CRL in its own section. Right suspender has a rectangular utility pouch attached with the bottom of the pouch positioned with the right chest pouch flap closure. The utility pouch is olive green in color and should be made of nylon or similar material. The pouch has a top flap, with a strap from top to bottom securing it shut. OPTIONAL Level two certification (if applicable): Harness fasteners are not seen, and may be hidden behind the belt. Harness is fitted to the wearer and no tri-glides are present. Comlink Styled after the comlink as seen in the Star Wars: Empire (Dark Horse Comics). An interpretation of the comlink is allowed, but comic accuracy is encouraged. The comlink is painted a matching olive green color and has the following details: A raised band around its upper section featuring equally-spaced raised vertical bars with recessed areas between each vertical bar. Underneath the upper section there is a recessed groove before the main body of the comlink. The bottom of the comlink is beveled to a flat bottom. I borrowed some text from our Rocket Trooper pack that allows for subtle interpretations, which helps GMLs out. When describing details this is the best shot of the comlink that we have: -
Very nice!! I can tell that green is super close!
-

Finalizing CRL Proposal - Lieutenant Janek Sunber (SW:E)
IcyTrooper replied to IcyTrooper's topic in Lieutenant Janek Sunber
I updated the glove text to the finalized version since it seemed simple enough. I know this Web Harness will be a good discussion: Web Harness Olive green colored, double strap "H" harness which travels from the lower back, and up over the shoulders. The harness system attaches to the belt. Harness is made of 2" (50mm) olive green nylon webbing. Visible snap-hook style fasteners that attach to belt eyelets are acceptable. Tri-glides may be present on front or back of suspenders. Back of suspenders may be permanently fastened to belt, but not required. Left suspender has a comlink clip/holster that is positioned parallel to the rank bar. Right suspender has a vanity pouch attached with the bottom of the pouch positioned with the right chest pouch flap closure. OPTIONAL Level two certification (if applicable): Harness fasteners are not seen, and may be hidden behind the belt. Harness is fitted to the wearer and no tri-glides are present. Comlink is present. I think we need to determine if the Comlink should be required for L1 or not. Whether it is L1 or L2 with the requirement that'll determine where we list the Comlink section and the description and image for the Comlink.


