-
Posts
4,131 -
Joined
-
Last visited
-
Days Won
382
Content Type
Profiles
Forums
Events
Everything posted by IcyTrooper
-
The updated CRL and images have been loaded into the wiki and will take some time to propagate on the servers so that the end-users see it. We have also added a ton of gallery images to assist costumers and GMLs.
-

Finalizing CRL Proposal - Lieutenant Janek Sunber (SW:E)
IcyTrooper replied to IcyTrooper's topic in Lieutenant Janek Sunber
At least it'll look like some weathering -

Finalizing CRL Proposal - Lieutenant Janek Sunber (SW:E)
IcyTrooper replied to IcyTrooper's topic in Lieutenant Janek Sunber
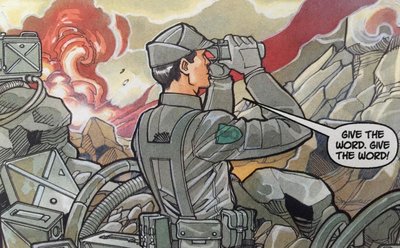
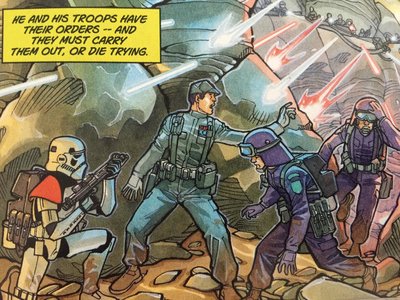
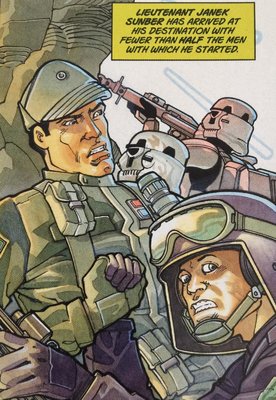
I have updated the main post above with the finalized text for the Imperial Rank Bar. Now we can move onto the Olive Gloves! I have been looking at the panels and I believe that these gloves are going to be like the L1 requirements for the IAT and IAS, but the L2 should match that of the IAS with the square pad on the back. We can see the square part on many of the panels of his gloves. As we have done with the flight suit there are distinct differences that would set this apart from the IAT gloves. The square padding part should be L2. Olive Gloves Olive drab, wrist length gloves constructed of leather, Kevlar or similar material. Enclosed fingers. No buckles, straps, etc. May have square padding on the back of the hand. OPTIONAL Level two certification (if applicable): Square padding is present on back of hand. -

Finalizing CRL Proposal - Lieutenant Janek Sunber (SW:E)
IcyTrooper replied to IcyTrooper's topic in Lieutenant Janek Sunber
Agree with that text. I didn't even think to check the CRLs at IOC for this! I'd agree to add that to the second bullet for L2: Rank tiles are are affixed to a singular rank bar with no line in between the 2 red tiles on top and 2 blue tiles on the bottom. Two rank bars are not permitted. How does that sound? It takes the guess work out of it with the last sentence as well. -

Finalizing CRL Proposal - Lieutenant Janek Sunber (SW:E)
IcyTrooper replied to IcyTrooper's topic in Lieutenant Janek Sunber
Here is the final text that will be updated in the master post above: Green Imperial Flight Suit One-piece olive green coverall / jumpsuit / flight suit with a front invisible zipper and mandarin collar with one of the following: The mandarin collar has no visible method of how it closes, or A single snap near the closing point and olive green in color. Each shoulder has a patch as noted below. Below the patch on each arm there is a small pocket with the rectangular flap closure that is roughly 1.25" (32mm) tall and ends just above the elbow. 2 large chest pockets. The 2 chest pockets feature flap closures made of matching fabric, as wide as the pocket, and roughly 1.25" (32mm) tall. 2 large cargo pockets sit on the outside of each leg from around mid-thigh and not extending past the bottom of the knee, with a rectangular flap covering the top. There are no leg pockets below the knees. Pockets may feature gussets. OPTIONAL Level two certification (if applicable): Mandarin collar is closed by a chevron shaped strap across the neck. The mandarin collar has no visible method of how it closes. ------------------------------ With that being said we can bypass the Imperial Army Patch since it is the standard patch from the IAT and we'll use that text for this. That'll move us to the rank bar: Imperial Rank Bar Rank consists of colored plastic tiles mounted on a metallic finish square. Rank bar corners are hard angled or slightly rounded. The rank of Lieutenant (2 red tiles on top of 2 blue tiles) is the only acceptable rank. OPTIONAL Level two certification (if applicable): Rank bar corners are slightly rounded, not hard angled. Rank tiles are are affixed to a singular rank bar with no line in between the 2 red tiles on top and 2 blue tiles on the bottom. Two rank bars are not permitted. I took a look at the comic panels and in most of them the corners are slightly rounded, so making that L2 was a good one! -
Very nice! We should be able to have a direction for it in finalized form this evening.
-
Anything new on this front?
-

Force Unleashed Jumptrooper CRL Discussion
IcyTrooper replied to Fivezero's topic in TFU Jumptrooper
I agree with @RAIDER for the E-11 now and we can add the second when able. -
Getting close! I like that action figure on the belt
-

Force Unleashed Jumptrooper CRL Discussion
IcyTrooper replied to Fivezero's topic in TFU Jumptrooper
Here is what I have below in light orange. I just changed up the measurements to match our CRL editing guide for the standards. I also added the text about no third square button for L2 requirements. Belt The ammo belt shall be made of similar material and color matching the overall armor. It is comprised of 6 rectangular boxes, with two square buttons on each end of the belt. The soft belt proper is made of canvas, or material with a canvas covering and must be 2” to 3” (50-75mm) wide. The belt closes by overlapping in the rear center of the kidney/posterior armor. Two white pouches hang on either side of the belt face. Each pouch features two sections with a single flap covering both sections. The right pouch is approximately 6.25” x 4.5" x 2" (160mm x 115mm x 50mm). The left pouch is approximately 8.625” x 6.125" x 2" (220mm x 155mm x 50mm). OPTIONAL Level two certification (if applicable): The ammo belt shall have longer ends than standard TK-style belts. The 6 rectangular boxes are angled on each side. There is not a third square button in the center like standard TK-style belts. The corners of the white plastic ammo belt shall be trimmed with a small angle at the top and a large sweeping curve that meets the outer edge of the canvas belt. The canvas belt must be 2” (50mm) wide. The top of the ammo belt should sit at or just above the bottom of the central and vertical abdomen button panels. Thigh Armor The thigh armor may open and firmly close in the back allowing the two halves to appear sealed. Overlap construction is only allowable for kits that come with the cover strip molded into the part. The front cover strips are approximately 2” to 2.5” (50-65mm) and run the length of the thigh. Rear cover strips must end at the top of lower ridge. An additional ridge is present on the outside of the thighs, running to the lower ridge. If the two parts of the thigh armor cannot fit the user, shims can be used to close the back of the thigh armor. Shims shall have a similar material and color to the whole armor, should be flush without seams OPTIONAL Level two certification (if applicable): Must be constructed using the butt joint cover strip method. Overlap construction is not allowed. The front cover strips shall have an angled cut that meets at a sharp point at the top of the thigh. -

Finalizing CRL Proposal - Lieutenant Janek Sunber (SW:E)
IcyTrooper replied to IcyTrooper's topic in Lieutenant Janek Sunber
Yeah we'd probably have to make both acceptable for L1 and then something that requires more forethought for L2. -
So cool to also see that Sideshows is doing that 6th scale one!
-
-

Force Unleashed Jumptrooper CRL Discussion
IcyTrooper replied to Fivezero's topic in TFU Jumptrooper
I'm in agreement with almost all of what @RAIDER put. The only comment that I have with the belt is to leave the part in there about the two white buttons on each end as you have in L1 and then for L2 probably just remove that part about ROTJ because it is a different belt. The ROTJ belt just has two rivets with no squares on it and this one has the squares...unless we were aiming to have flexibility to allow those to use belts off old costumes to create the TFU look? I agree with the gasket stuff or molded lip around the knee part, however we have the text on the other costume. The thigh part to L2 is good too. -

Finalizing CRL Proposal - Lieutenant Janek Sunber (SW:E)
IcyTrooper replied to IcyTrooper's topic in Lieutenant Janek Sunber
I updated my post with the light orange text for the jumpsuit text to add stuff in L1 about the pockets on chest, on each arm under the patch and about no visible method of attachment for the mandarin collar. I also added L2 text allowing for either that Velcro and exterior stitching or the snap near the chevron point on the collar that is olive green. -

Finalizing CRL Proposal - Lieutenant Janek Sunber (SW:E)
IcyTrooper replied to IcyTrooper's topic in Lieutenant Janek Sunber
Yep that makes sense to me. I can add the updated text and move specific details to L1. -

Finalizing CRL Proposal - Lieutenant Janek Sunber (SW:E)
IcyTrooper replied to IcyTrooper's topic in Lieutenant Janek Sunber
That is a good point as well. May be worth moving the unique stuff to L1 so that way it doesn't appear that this is just a generic IA officer jumpsuit, etc. -

Force Unleashed Jumptrooper CRL Discussion
IcyTrooper replied to Fivezero's topic in TFU Jumptrooper
Sounds good to me! Rolling right along. We'll give the measurements and text a once over as we are getting ready to put them into the CRL wiki. -

Finalizing CRL Proposal - Lieutenant Janek Sunber (SW:E)
IcyTrooper replied to IcyTrooper's topic in Lieutenant Janek Sunber
I'd be in support of adding no snaps/stitching for L1 and then for L2 to have stitching or snap; however, we should make it either stitching or snap to make it consistent. I'd vote for a snap since the IAT has that and that could be the interpretation for it. What do you guys think? I'm also in agreement for adding the rectangular flap closure on the arm pocket. It is visible on many of the comic panels: I know that @Blackwatch suggested that the chest stuff is L2, would we want to make the arm pockets L2 as well? -

Finalizing CRL Proposal - Lieutenant Janek Sunber (SW:E)
IcyTrooper replied to IcyTrooper's topic in Lieutenant Janek Sunber
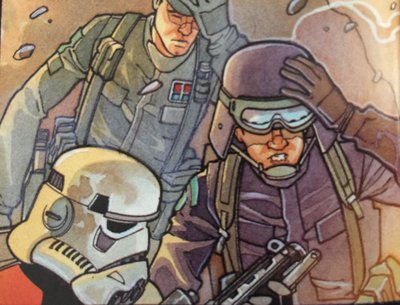
Agreed @Blackwatch, I'm sure we may have some discussion on the flight suit. I copied the IAT flight suit over and removed the part about the rank bar as the Lt. has one, and changed the snap text over to possible stitching from Velcro?: Green Imperial Flight Suit One-piece olive green coverall / jumpsuit / flight suit with a front invisible zipper and mandarin collar. The mandarin collar has no visible method of how it closes. Each shoulder has a patch as noted below. Below the patch on each arm there is a small pocket with the rectangular flap closure that is roughly 1.25" (32mm) tall and ends just above the elbow. 2 large chest pockets. The 2 chest pockets feature flap closures made of matching fabric, as wide as the pocket, and roughly 1.25" (32mm) tall. 2 large cargo pockets sit on the outside of each leg from around mid-thigh and not extending past the bottom of the knee, with a rectangular flap covering the top. There are no leg pockets below the knees. Pockets may feature gussets. OPTIONAL Level two certification (if applicable): Mandarin collar is closed by a chevron shaped strap across the neck. Collar is closed by one of the following: A rectangular piece of Velcro with stitching is visible from the exterior, or A single snap near the chevron point and olive green in color. I know that there was some discussion based on the comic panels that @Hoda brought up as well. I see the stitching in this panel but that is about it for the Lt.: The stitching doesn't appear in any of the other panels: Perhaps we don't have any snap on this one or make the snap acceptable for L1 and then no snap for L2 and can close with any method necessary as long as we don't see stitch lines? -

Finalizing CRL Proposal - Lieutenant Janek Sunber (SW:E)
IcyTrooper replied to IcyTrooper's topic in Lieutenant Janek Sunber
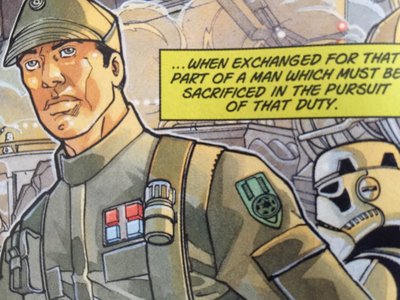
I have updated my post as well to reflect your input and notated that in the edit note as well. I concur with the code disk for the Lt. as it is visible in his specific reference pictures as well: -

Force Unleashed Jumptrooper CRL Discussion
IcyTrooper replied to Fivezero's topic in TFU Jumptrooper
Yep, once you get that update in there I can jump back into it again! -
Never disappointed with the progress pics!
-

Finalizing CRL Proposal - Lieutenant Janek Sunber (SW:E)
IcyTrooper replied to IcyTrooper's topic in Lieutenant Janek Sunber
We'll go item by item and add the finalized text to the first post as we get it completed! The first order of business is to knock out the Olive, Hat which was pulled from the IAT CRL: Hat, Olive Fabric is a medium weight suiting material of olive green. Base of the hat is conical, with a crown about 4" (107mm) tall. Front and rear “flaps” overlap on the sides and are about 4" (107mm) high. Front bill extends 3" (76mm) down, decorated with (5) (6) or (7) concentric stitches. An Imperial Code Disk is positioned in the center of the front vertical “flap”.

