Chaos
-
Posts
1,465 -
Joined
-
Last visited
-
Days Won
111
Content Type
Profiles
Forums
Events
Everything posted by Chaos
-

TookBreaker's Death Trooper - COMPLETED
Chaos replied to TookBreaker's topic in Imperial Death Trooper
@TookBreaker I had the same issue, I used a lot of Devcon Plastic Weld 2 part epoxy. Rough up the two surfaces you want to join, clamp/secure them in position and together. Then begin to put the epoxy into the gaps. You can use hot glue or duct tape to close off the opposing side so the epoxy stays in place. I also used the epoxy to fill the gap on the tops and only used a little auto body bondo to smooth out the seams. -
DoggyDoc’s Jimmiroquai Imperial Death Trooper Build Thread
Chaos replied to DoggyDoc's topic in Imperial Death Trooper
I see no issues, looking good Trooper! -
DoggyDoc’s Jimmiroquai Imperial Death Trooper Build Thread
Chaos replied to DoggyDoc's topic in Imperial Death Trooper
If you are going to mount speakers under the vents I would advise against using a rigid/solid frame and attaching it to the helmet. You'll have two solid surfaces mated and by doing so any vibration of the speakers will be transferred to the helmet body. This will increase chances of getting feedback at higher speaker volume levels. Don't over think the mesh and black matting attachment. Once you drill out the vent holes, cut a piece of screen slightly larger than the vent opening area and simply hot glue the screen edges in place, then repeat for the black matting. After you have done that, take a piece of sound proofing foam tape and cut it to the size of your speakers edges, then cut out the inner section to create an opening much like a gasket. Mount the speakers using the foam tape gasket you created. This gasket will prevent vibrations from the speakers being transferred to the helmet. Once you have the speakers mounted cover the entire area with at least two layers of the foam tape making sure that you have no gaps. This was from a previous thread: To be honest, I went to my local hardware store and bought a metal window screen repair kit, I think it was #20 size but can't be sure. I put the screen under the vents and then painted the silver weathering color. It turned out great. I did put a piece of black weed blocker fabric under the mesh before I installed @ukswrath's helmet audio sound system so that the speakers were not visible.
-
Probably best if you start a new thread, it makes it easier to search for in the future and provide you needed feed back.
-
DoggyDoc’s Jimmiroquai Imperial Death Trooper Build Thread
Chaos replied to DoggyDoc's topic in Imperial Death Trooper
Nice job! Looking good. -
DoggyDoc’s Jimmiroquai Imperial Death Trooper Build Thread
Chaos replied to DoggyDoc's topic in Imperial Death Trooper
Anytime Brother! -
DoggyDoc’s Jimmiroquai Imperial Death Trooper Build Thread
Chaos replied to DoggyDoc's topic in Imperial Death Trooper
Ok found it, let me know if you have any questions.
-
DoggyDoc’s Jimmiroquai Imperial Death Trooper Build Thread
Chaos replied to DoggyDoc's topic in Imperial Death Trooper
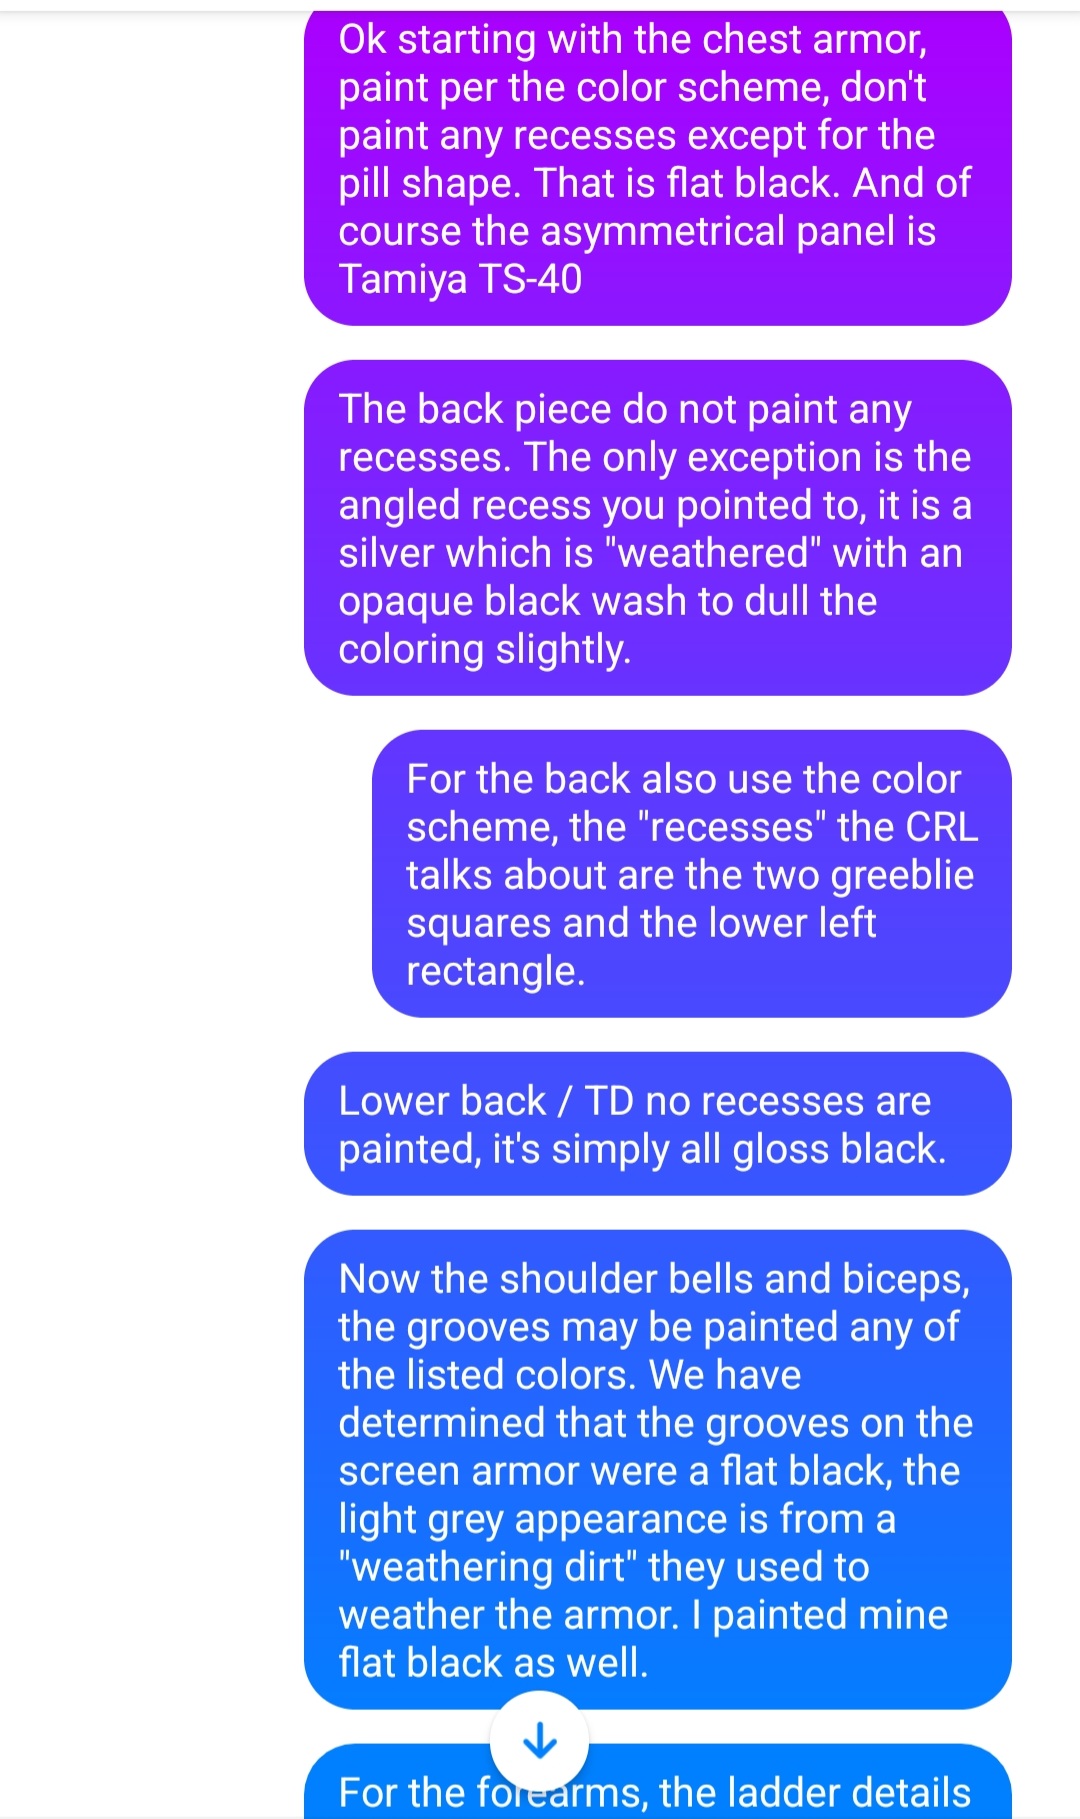
@DoggyDoc So the screen used suits only had the asymmetrical panels painted. The rest of the suit was gloss black, the gray look is the result of theatrical "dirt" being sprayed on the suits to present a weathered look. Under bright lighting it reflects and looks like paint. The CRL allows for the painting of the grooves. The CRL is very specific as to which grooves are painted and what color. I've got a pretty good explanation out there somewhere, I'll try and find it. Stand by. -
DoggyDoc’s Jimmiroquai Imperial Death Trooper Build Thread
Chaos replied to DoggyDoc's topic in Imperial Death Trooper
There are makers of the bands, check Etsy, I just cut a 6x6 black pvc rubber coupler into two bands. -
DoggyDoc’s Jimmiroquai Imperial Death Trooper Build Thread
Chaos replied to DoggyDoc's topic in Imperial Death Trooper
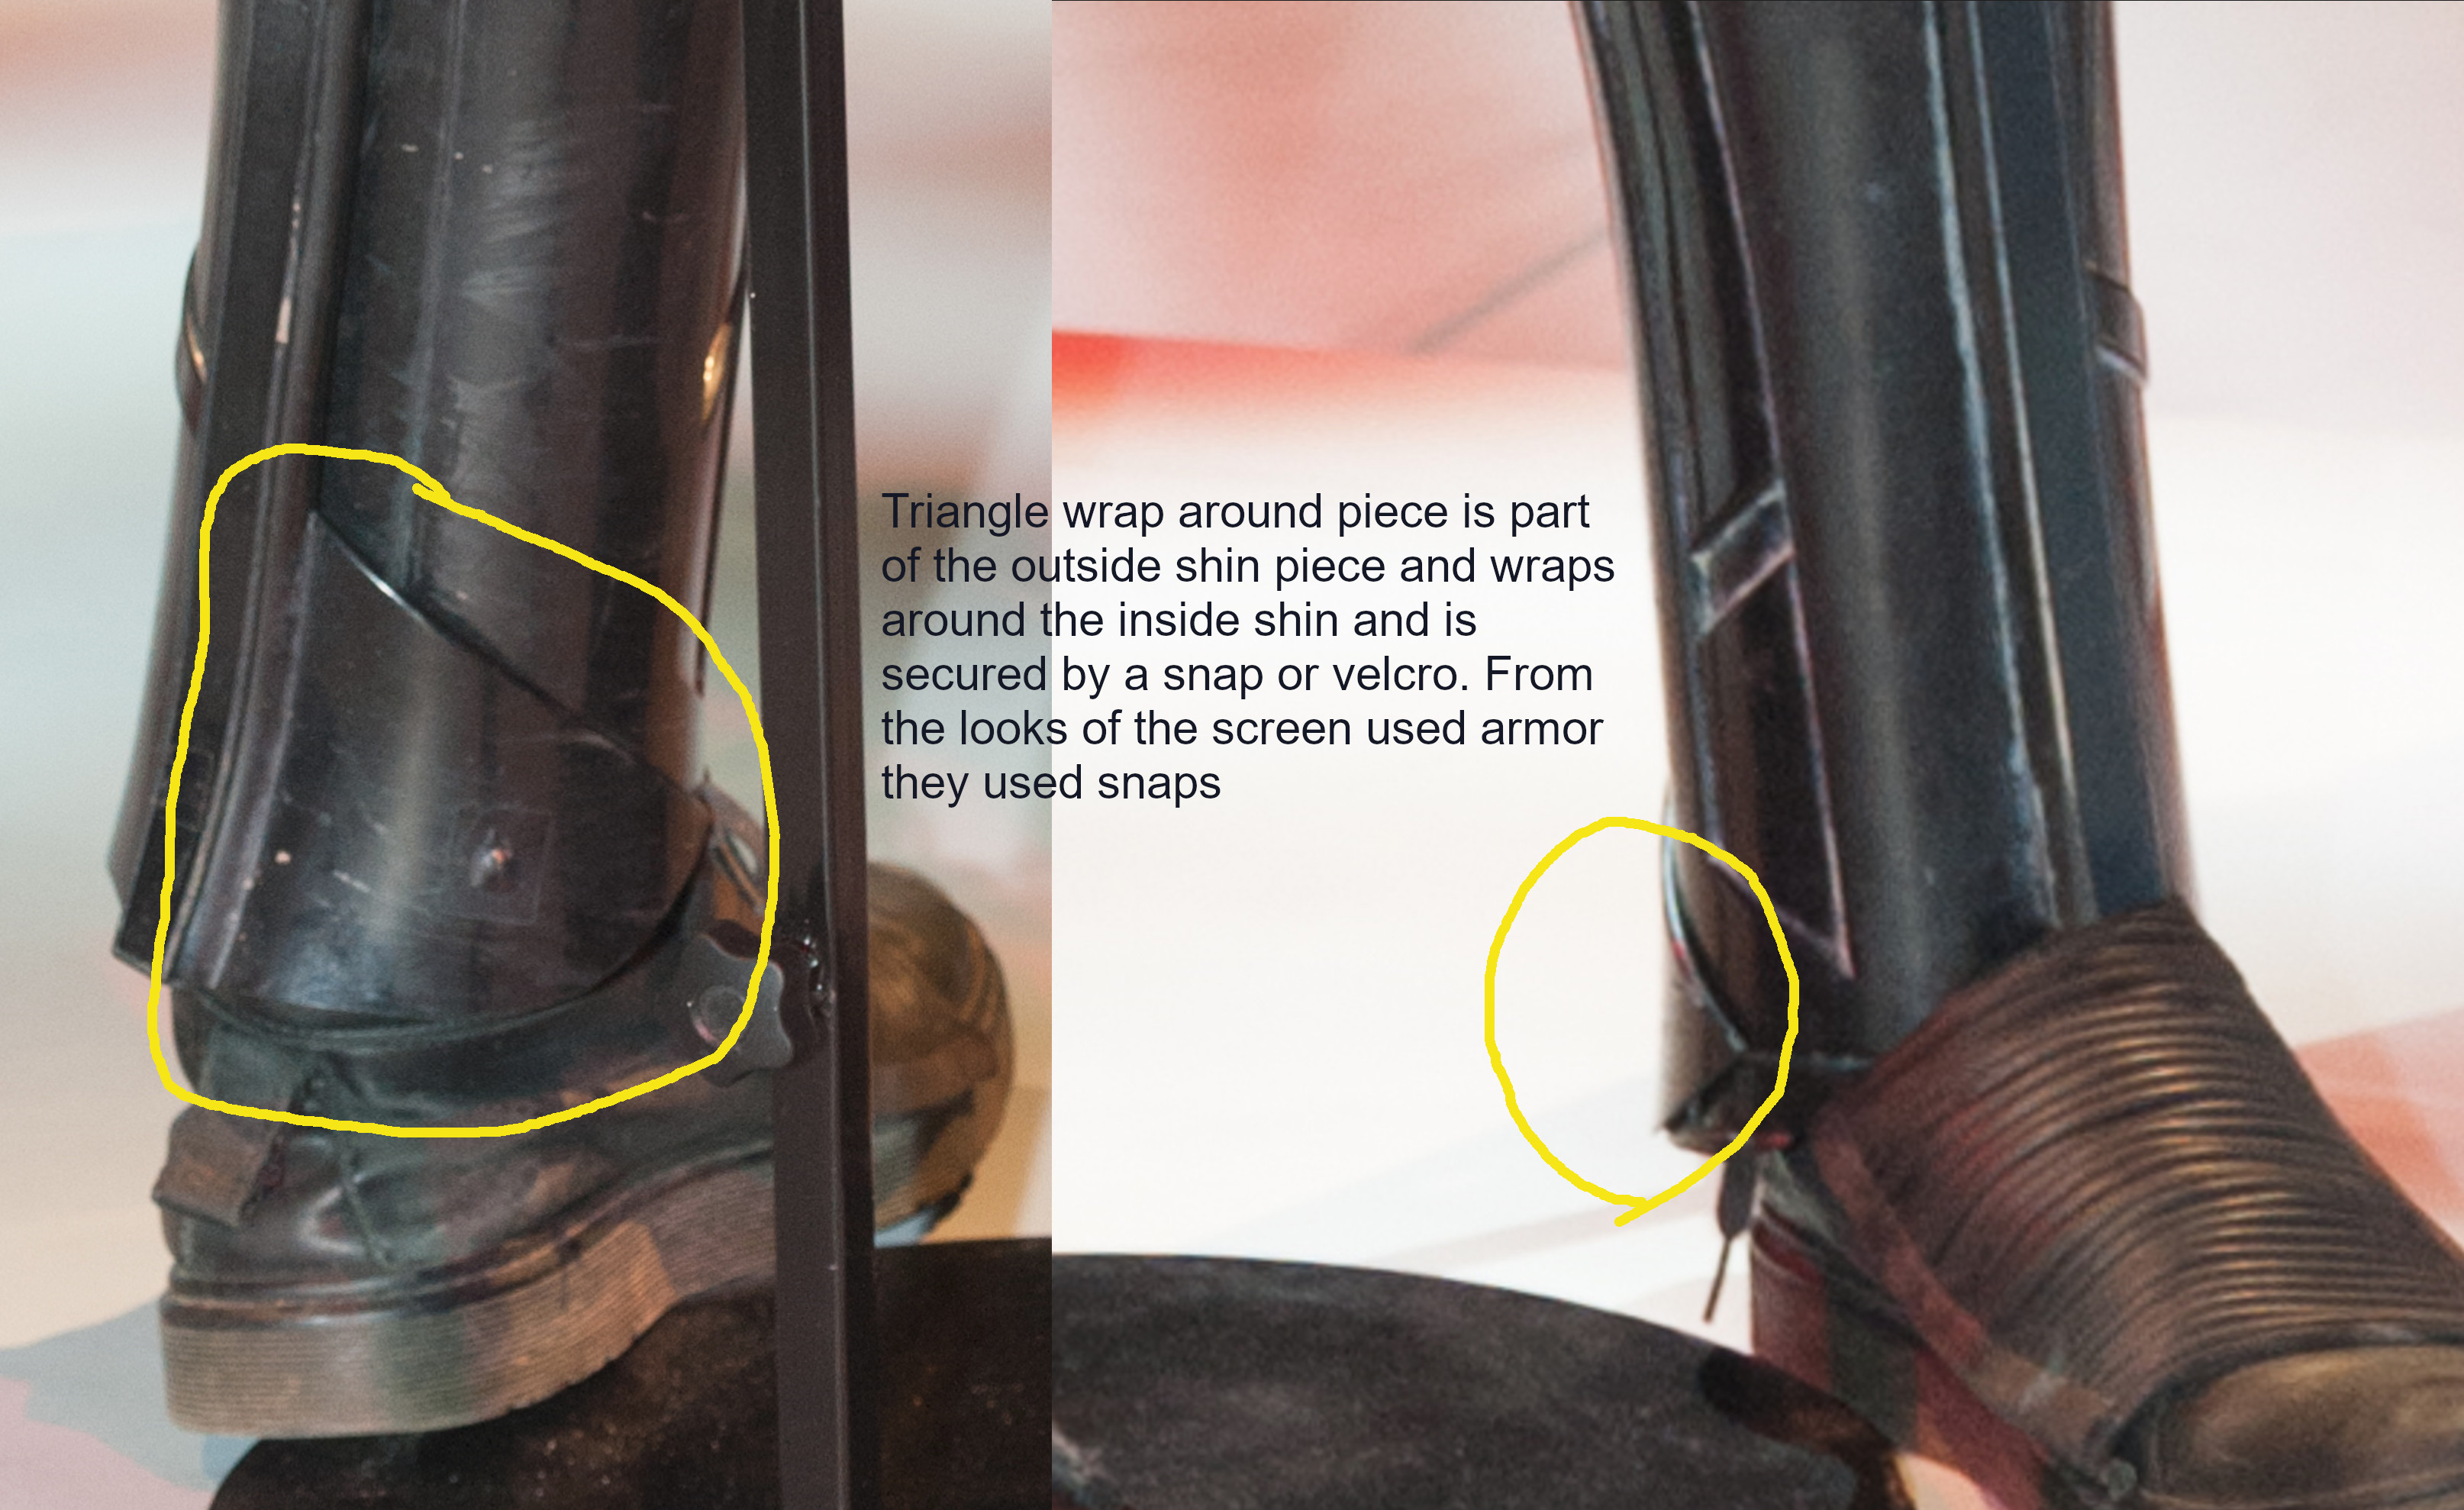
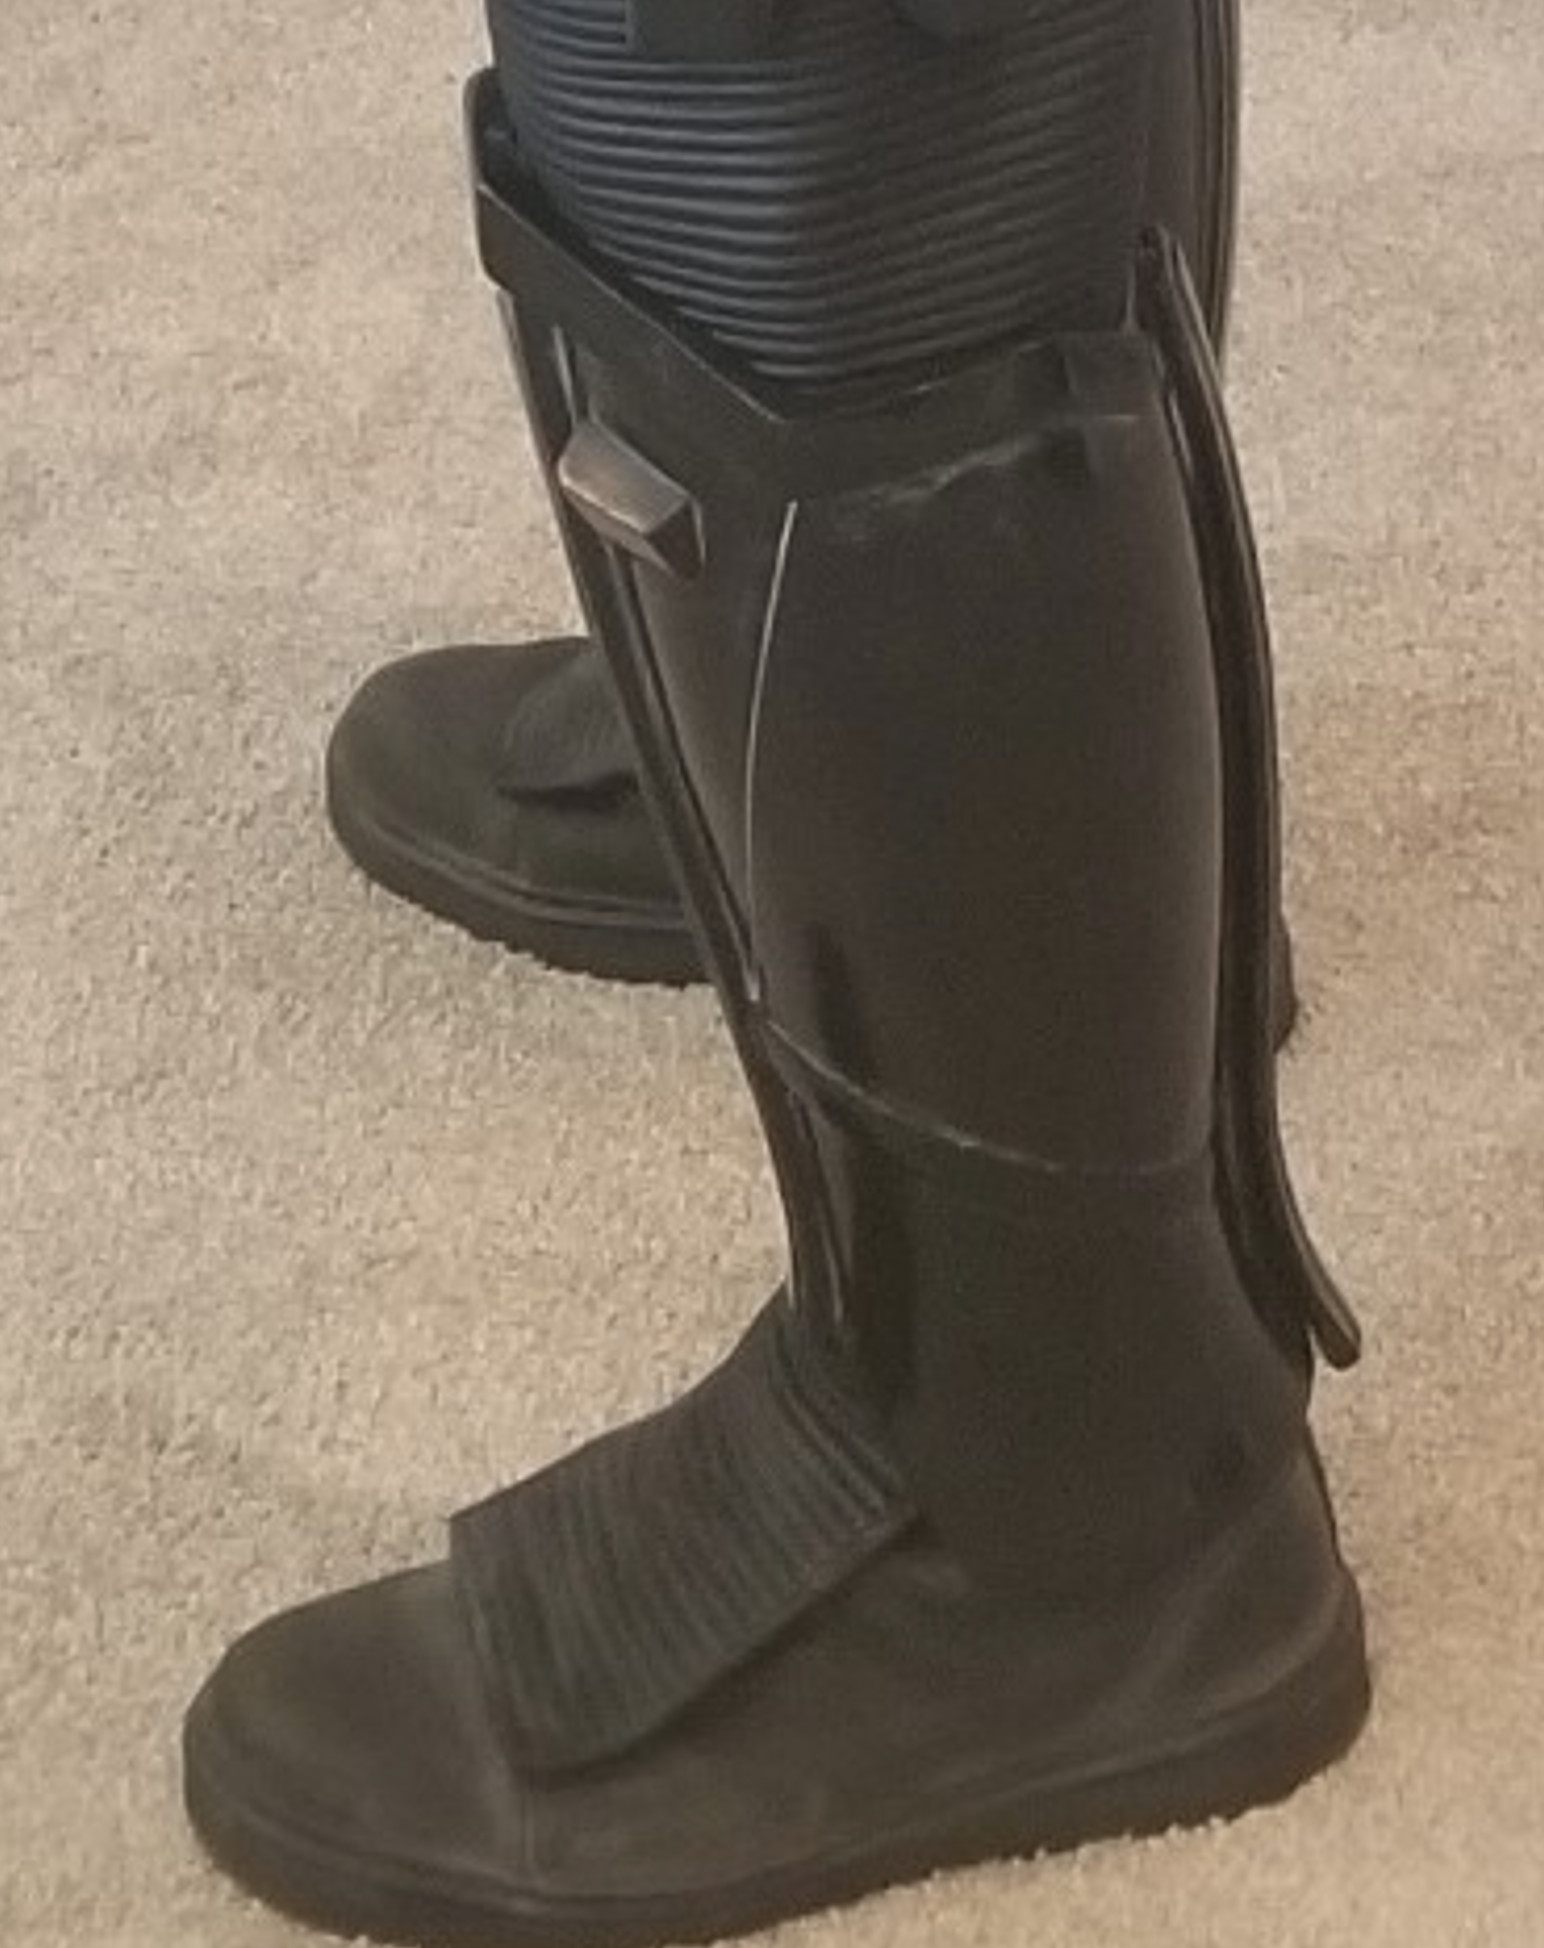
@DoggyDoc Good catch, yes you will have to continue the shape around. If you rough up the surface Bondo sticks pretty well. Another option is to use a piece of ABS cut and epoxied to the shin. I have seen someone sand down the raised area smooth, then make an ABS piece that is attached to the outside shin and wraps around the inside shin much like the original suits did. Either way is CRL Level 1 and 2 acceptable. Or you can just keep the seam facing out and only shim the outer shin. There is nothing in the CRL that says the seam has to be facing in. Mine faces out and is really not that noticeable.
-
DoggyDoc’s Jimmiroquai Imperial Death Trooper Build Thread
Chaos replied to DoggyDoc's topic in Imperial Death Trooper
-
DoggyDoc’s Jimmiroquai Imperial Death Trooper Build Thread
Chaos replied to DoggyDoc's topic in Imperial Death Trooper
I originally plastidip coated my Jimmi kit and it worked for almost a year. Unless you use an adhesion promoter, the plastidip will rub off in the spots that receive a lot of rubbing from your undersuit. I eventually lined mine with a felt fabric. It lasted longer than the plastidip and it prevents overlapping armor pieces from scratching the painted surfaces. Just something to consider. https://thefeltstore.com/collections/sae-industrial-felt/products/f-55-industrial-felt-by-foot -
DoggyDoc’s Jimmiroquai Imperial Death Trooper Build Thread
Chaos replied to DoggyDoc's topic in Imperial Death Trooper
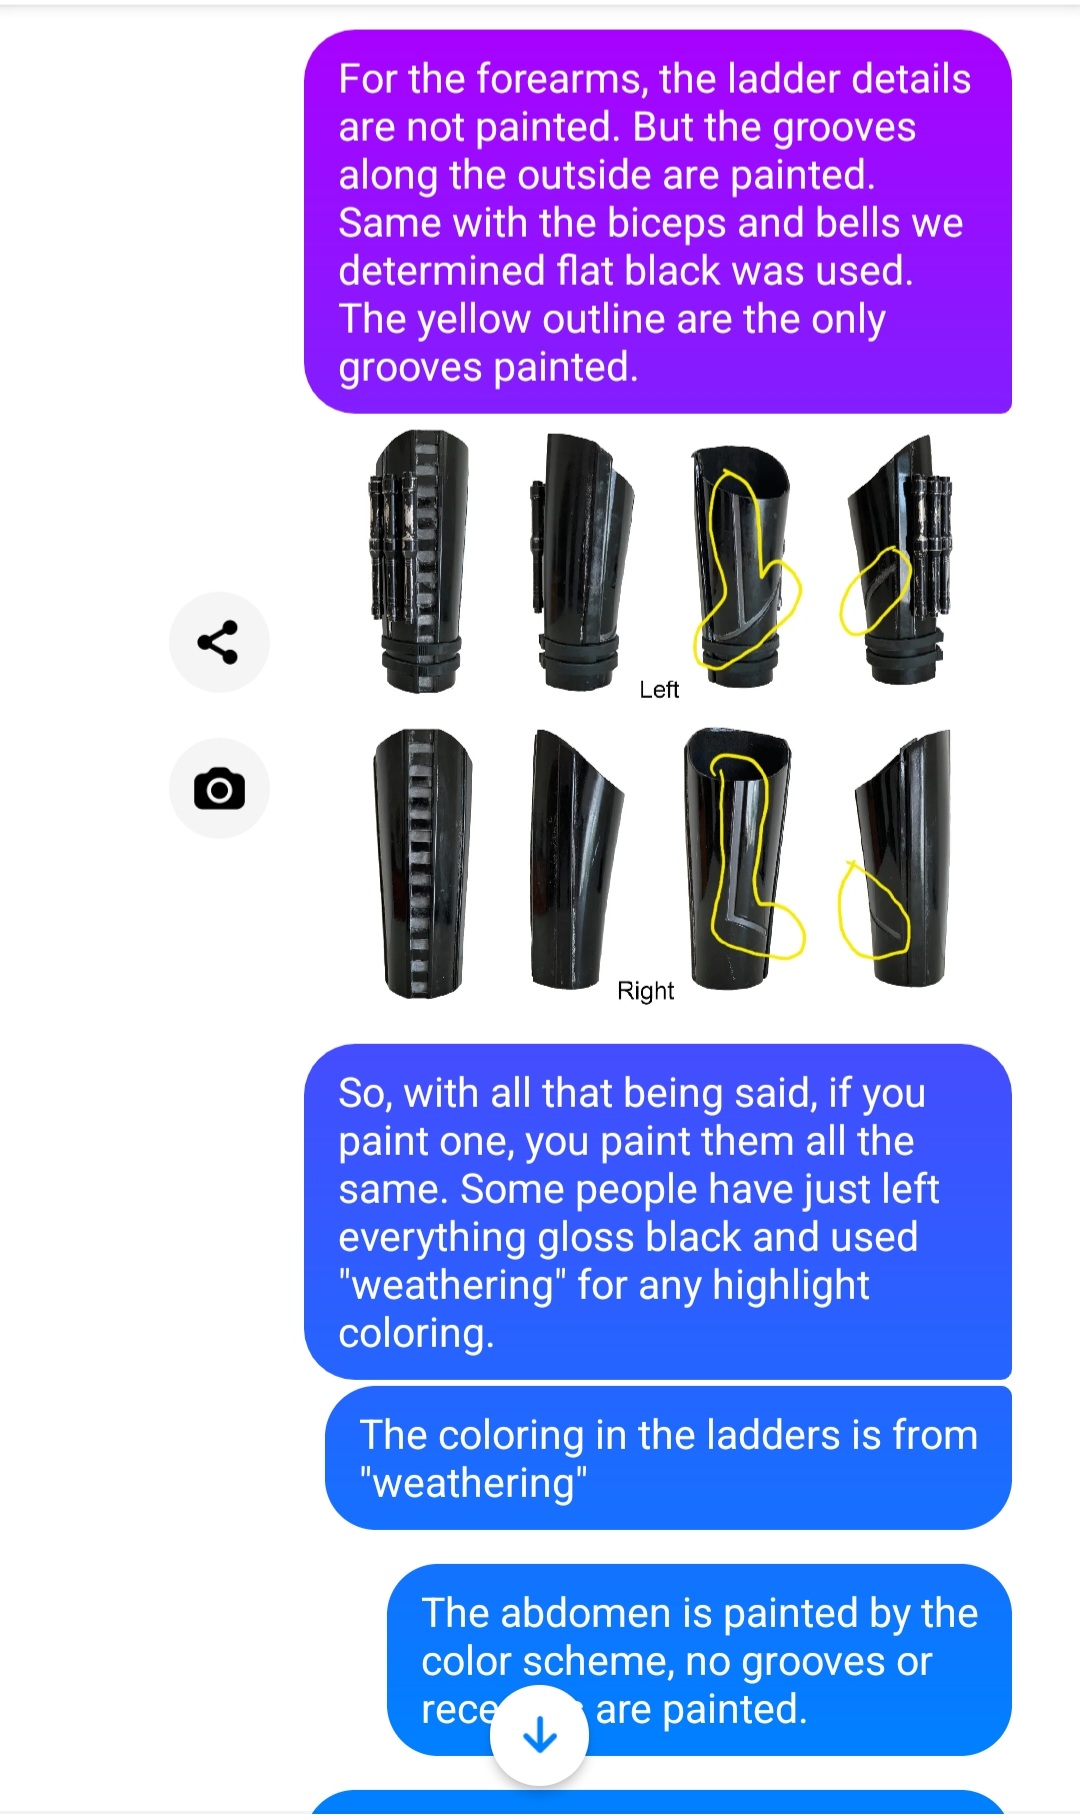
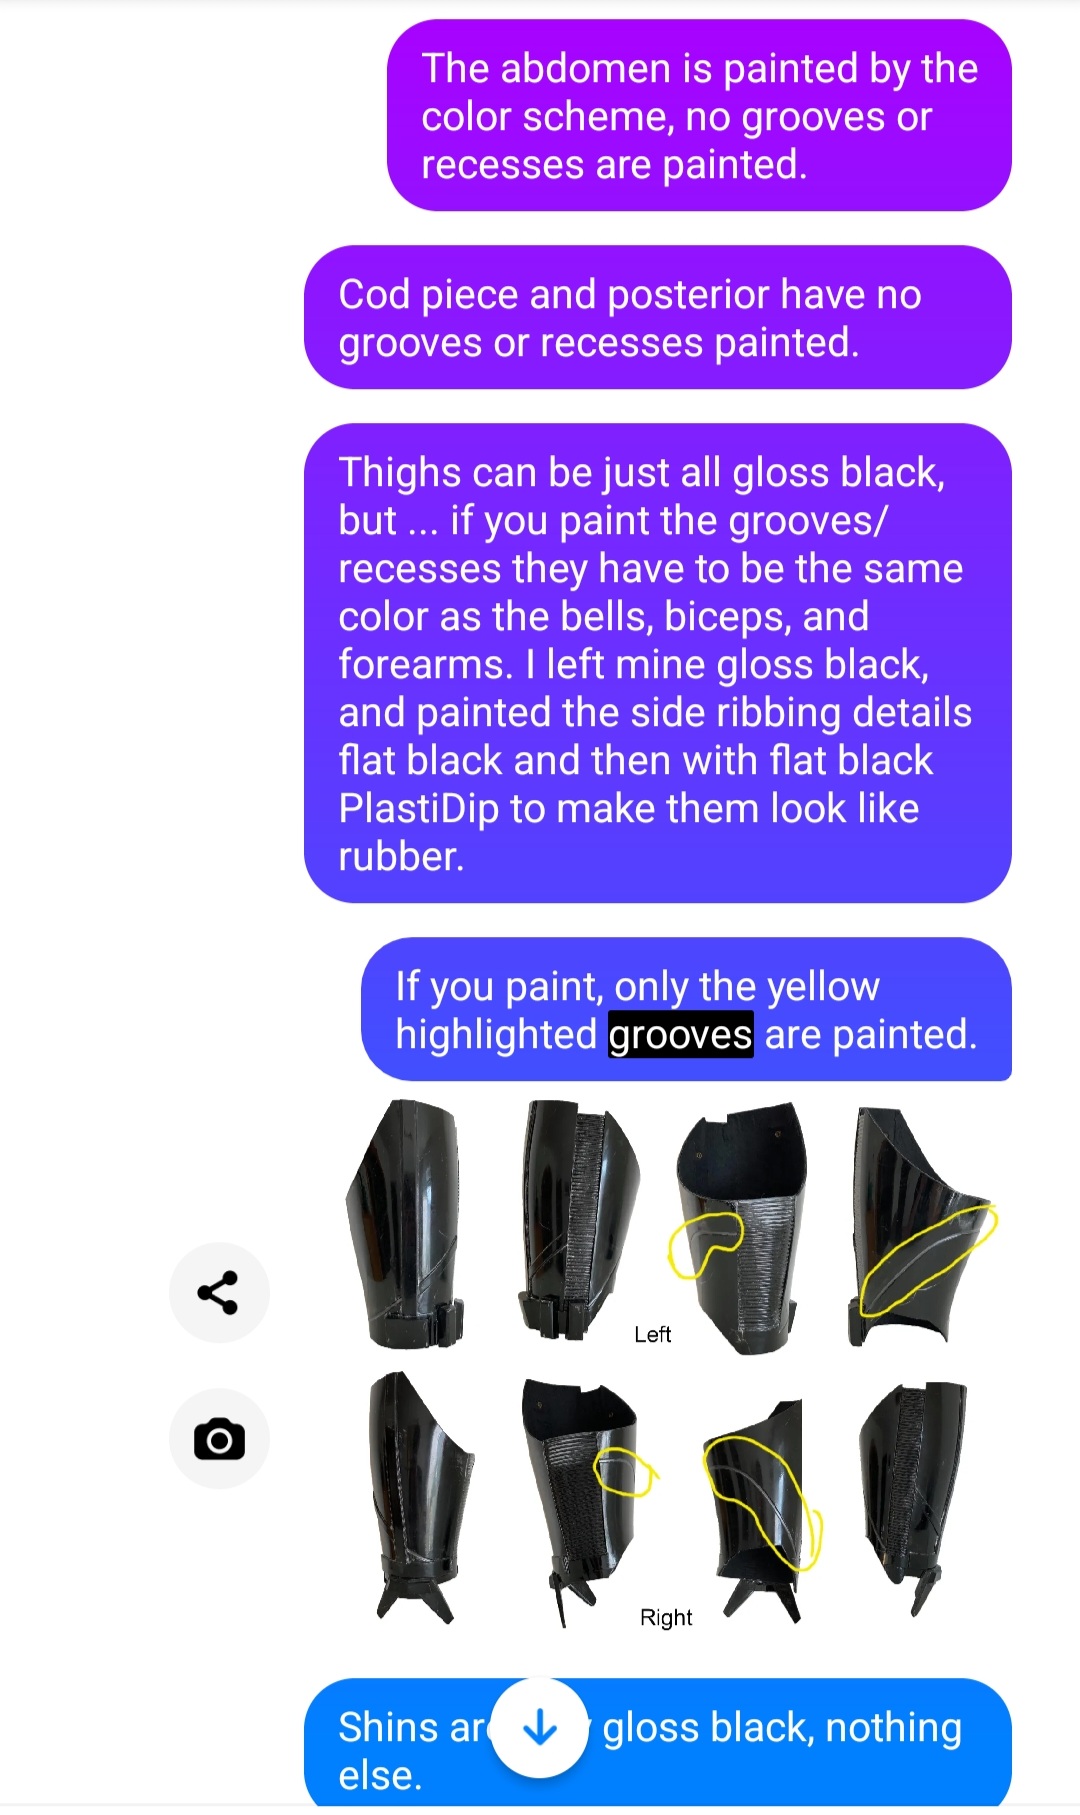
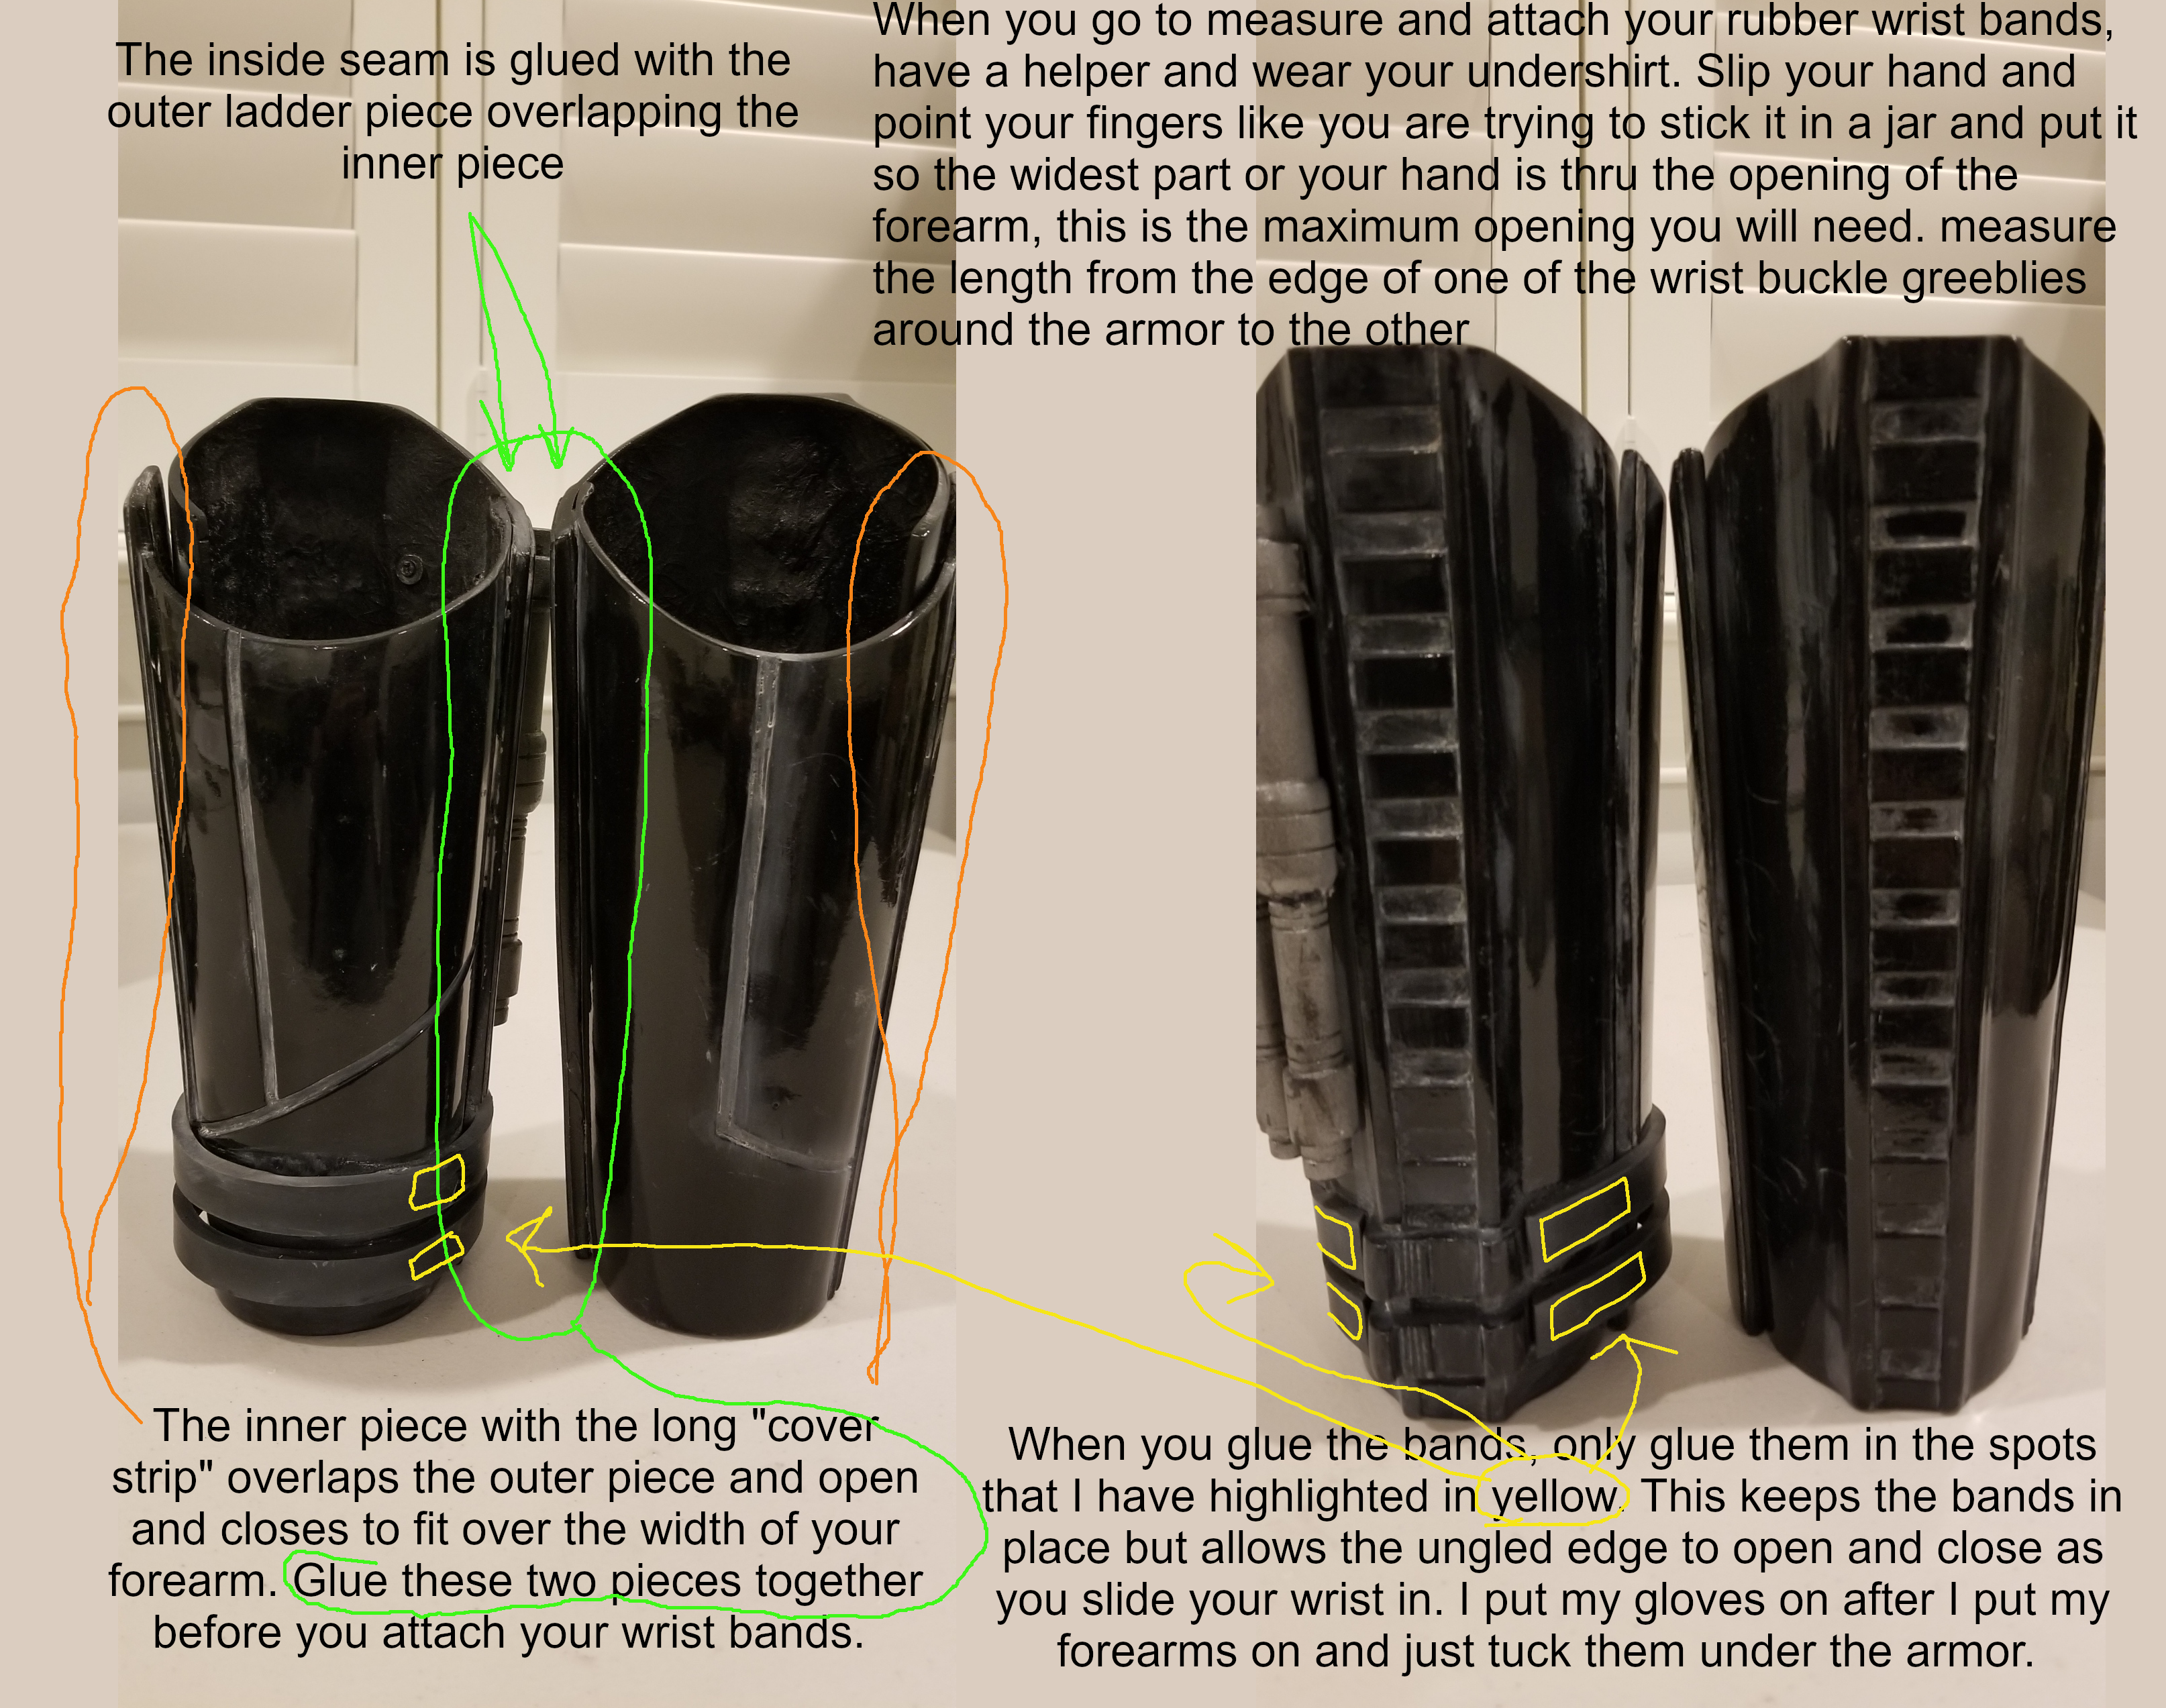
@DoggyDoc Here is something I put together a while back but should help you with your forearms. Since I have a Jimmi kit and have modified it several times over the years so feel free to contact me if you have any questions or issues.
-
DoggyDoc’s Jimmiroquai Imperial Death Trooper Build Thread
Chaos replied to DoggyDoc's topic in Imperial Death Trooper
How you attach the forearms together is really dependent upon how big your forearms are. Personally, I used the clamshell technique when I assembled my forearms. I kept the circumference smaller so the inward force helps hold them in place. I am traveling today but will post up a photo of how my are constructed. The pieces of Jim's kit can be hot water bathed to shape. Don't use a heat gun or anything hotter than a hair dryer as it will scorch the smooth surface of his casts. -
The heat brazing looks good. I would see if your electronic audio has a sound closer to this one. Its the E11D DT and the ST-W48 blaster sound. E11D or ST-W48.wav
-
@FN1313 Kyle, I was able to finish up your request. You can share this with anyone you wish. Please let me know if you or your Trooper have any questions. Thank you again for what you do for the Legion. Alpine Garrision DT Request.pdf
-
@FN1313 Kyle, Work hindered me completing my assessment today, however I am done with the helmet down to the belt. I hope to finish it up tomorrow. If I wasn't scheduled to fly tomorrow I would stay up late and complete it tonight but the FAA has an issue with pilot's not getting enough sleep before taking off. Thank you for your patience and that of your Trooper.
-
@FN1313 Kyle, I just took a quick look. Please do not approve this submission yet. There are quite a few CRL basic approval issues. Also it might be helpful if we could get a look at all his submission photos. I'm seeing a mixture of Version 1 and incomplete Version 2 items. Thanks again.
-
@FN1313 Kyle, Thank you for reaching out to the Detachment. As one of the DCAs and also a DT I'll take a look in the morning and also chime in. I'll do it as quickly as I can. You can also book mark a subforum over on the Legion site that GMLs can post up these types of questions. It's monitored by the Detachment Staff and our DCAs. As a GML you should have access to it. https://www.501st.com/forum/viewforum.php?f=267 Thank you again for what you do for your Garrison, without you, the Legion couldn't exist.
-
Wow! No other words available!
-
Plastic covers for specialist chest rig?
Chaos replied to Tiderion's topic in Imperial Death Trooper
@Tiderion Here ya go. https://www.facebook.com/groups/DeathTroopersBG/permalink/5763673860337549 -
Plastic covers for specialist chest rig?
Chaos replied to Tiderion's topic in Imperial Death Trooper
@Tiderion Yes I do, I'll send them to you later today. -
Some Questions about a Death trooper build
Chaos replied to DoggyDoc's topic in Imperial Death Trooper
Gerald, Welcome to the Darker Side of the Darkside! You're going to love this build! It's going to challenge you, but in the end you'll be amazed at the wonder you've created. To answer your questions; Yes Jim's undersuit will meet Level 2 requirements provided you have it sized properly. Good choice on Tom's files. You can get all 3 blasters from him at a great price. Here's his FB profile. Send him a message that way. https://www.facebook.com/profile.php?id=100007031235190 If you are going to build your Jimmi kit to Level 2 specs, make sure you take a look at the CRL requirements and use the Specialist submissions for more visual references. It'll save you a lot of time. Best of luck and we are here to help! -
Plastic covers for specialist chest rig?
Chaos replied to Tiderion's topic in Imperial Death Trooper
@Tiderion Ethan,, do you have access to a 3D printer? -
SWEET! Excellent work Sal, your dedication has paid off!

.png.8a6da14f0e31635a3b66d7d999327769.png)