-
Posts
3,316 -
Joined
-
Last visited
-
Days Won
400
Content Type
Profiles
Forums
Events
Everything posted by RAIDER
-
Alot of progress today! Knives painted. Far left came out the best Its the spare as the other 4 will be pretty much sheathed all the time. Id love to get rubber ones made Anyone know someone? Anyways, finishing up smoothing and painting 2 larger ones to use unsheathed. Attached smooth custom shoulder straps to chest (also finished all of the interior strapping today…just waiting for glue to cure)…heres a shot with the knives ok chest. Attached the sheath to the thigh. This was scary as it required some drilling. Side note…an L2 req i will recommend is to NOT have rivets on the ammo pack. Something I will fix later. Here you see the holes (and how we messed up on the first go). Luckily the straps and pad hide them. Straps and pad are secured by these screws and then I added some glue in spots as additional support from leather to thigh. With knife… And then just something I wanted to show (I should have done a before and after)…heavily weathered TD boots…stained to the point I couldnt get em white. But this paint worked wonderfully! Cant remember who suggested it in another thread but it was a winner. Whats left??? Waiting for some glue to cure on strapping. I still need to finish left shoulder bell along with fitting straps from shoulder straps out to each bell…and then strap the left bell down to the bicep for support. Paint helmet tear and rear stripes. Install a fan (ur boy is in Florida) and sound. Slash weathering. My wife loaned me a thin heated foam cutter that I think will work. Gonna test it on some scraps…then I need to determine if some additional weathering like airbrushing or something will be needed. Plan is to test fit it all tomorrow or Tuesday and add the final few straps.
-
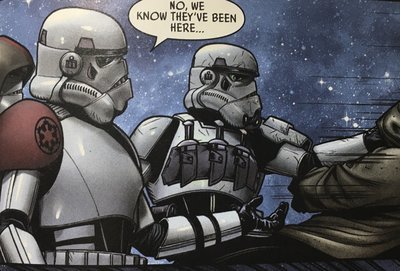
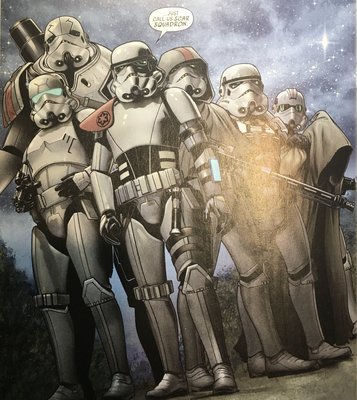
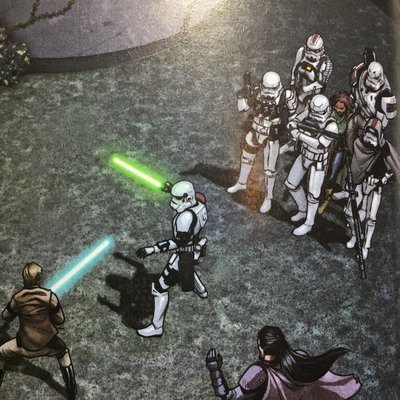
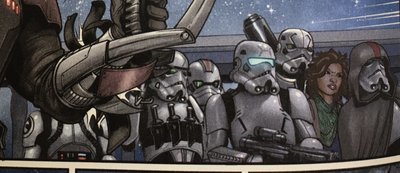
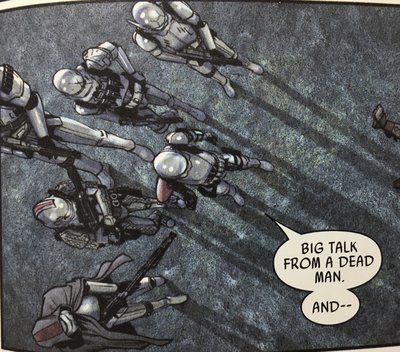
Before I pulled the trigger on the all black w white lines torso, I had to see what it would look like as the white V. Ive been going back n forth about this because the all-black is literally only in that one panel in all the arcs and Im getting more n more convinced its an artist consistency error. As far as character consistency across the squad…there really isnt any…each one is unique and several are vastly different. Anyways, what do u think? I think the shadows of the lines give the “black line” feel from the references without being actually painted black. And here was the last thing to paint…the helmet…using black tube stripes per the references instead of blue (this would prob be an L2 req). I still need to paint stripes in the tear and rear traps This used to be a heavily weathered TD and like all the armor needed a repaint to match the white of the 3D printed parts. What a pain! Tomorrow we are doing the final strapping and a test fitting. If all goes well, the slash weathering will be the final touch. EDIT: Test fit will be of everything minus the left shoulder bell. Thats not rdy quite yet
-
Weather continues to be favorable and ao I have essentially finished painting what was once a Sandtrooper w heavy weathering back to a clean white including the boots. I even had to do a total repaint of the helmet including all the details. Will show all this when I test fit. After your feedback I need to go back and repaint the abdomen and paint my knives. I received my updated left shoulder bell print. No longer flared at the bottom…and the side details are straight instead of swooping upwards. An inner bell (which is actually in one of the references was added to give the shoulder strap a lower connection point so the bell sits higher than a normal bell. The goal is to finish the shoulder and any remaining painting this week so that I can finish strapping and fitting w help on Sunday. Hopefully I have a test fit to show by then.
-
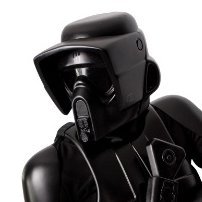
Sergeant Kreel WIP. Comic Star Wars (2015) Issue #59&60
RAIDER replied to darthRivera's topic in Sergeant Kreel
@darthRivera How many stripes did you put in the tear traps of the helmet? The rear traps? -
Thanks! I was leaning the other way just because a) more panels 4-1 show that center section of the abdomen as white and b) even tho theyre different story arc references, panels in those also show it as white So the all black with white lines seemed more like an artist inconsistency error @darthRivera @nanotek @Blackwatch @Fivezero @stevechewbacca thoughts?
-
Painting the armor to have the same white finish has been a pain. Reminding me why I really don’t enjoy costume building lol. Anyways, here is my current progress BUT need some feedback as well… The knives are not painted yet and the leather parts are not attached. And since taking this picture Ive finished the other shoulder strap and a couple arm/leg pieces. Here’s where I need some help…the abdomen. I need a consensus in prep for CRL…should I paint it solid black OR white center with black outside the recessed lines??? References are not consistent. All black here with lines as white (though I think thats just to show they are there/depth)… These show black outer and white inner…more of these references but not as clear as the one above… I’m leaning towards white/black as there is only one reference showing all black. Thoughts?
-
That Im aware of there are only 2 companies out there attempting this character…. Armory Shop Props @Spiel and @jimmiroquai Where did you get the helmet from?
-
Congrats! You’ve been at it here a long while and really appreciate your activity here. Well done!
-
hey t…i unhid this post as it isnt fully complete to how we’d like to present in line w our other vendor lists yet…but scroll to the bottom… https://forum.specops501st.com/topic/8128-scout-trooper-parts-vendors/
-
looks real good from the front man.
-
@Rowen Just keep in mind @Griffin-X (rip brother) posted this back in 2017. The CRL has gone thru updates since then so it might be good to ask.
-
@CrookKnight yea u will need the suede i believe christian cucblack makes one i know chefs creations does as well
-
Id peruse the pinned build pge…
-
If you look at other issues outside of this arc, you see the same characters doing twisting and contorting and the art clearly shows folds and bends. In this arc it doesnt…and in every arc there are clear differences to show how the armor has evolved/changed. So yea you’re right the logic cuts both ways…but maybe Im applying it differently cuz i some arcs it’s definitive and in others its not (so definitively not? lol). Im sticking w that haha For me at least this was one of the delineations to distinguish the variations of the costume among each story arc…art definitively shows folds and bends in some arcs…here it definitively doesnt leading to the hard armor lean. (fwiw I dont disagree w the doubt…we brought it up and im even having an alternate soft part made for my Cav build for kicks giggles and if I decide to do another variant that clearly shows the folds/bends). With TK style costumes though the cod/ab connection can go both ways…and speaking for builder flexibility…it seems to make sense to allow a fused piece at L1 for anyone making a kit conversion (though Id personally split it).
-
its seen in that panel BUT it wont be seen in a normal costume suit up cuz 99% of the time itll be covered by the canvas belt. kreel wont be doing any jumping like in that panel in real life im betting lol…and no trooper should be required to show a gml an internal shot showing the split beneath the belt i kid kinda but thats really what the L2 boils down to ps…we did discuss the ab possibly being a soft good but in the discussion it was determined there was no definitive way to 100% say that in the art…and so we left it as a hard armor part. keep in mind as panel to panel consistency is difficult enough as it is, CRLs for comic characters tend to get waaaay more flex than a on-screen characters
-
To be fair @Bfkn the black outline is pretty thin in reference…much less than the ROTJ exmaple shown above.
-
Its not black around the greeblie? In pics , it looked like it
-
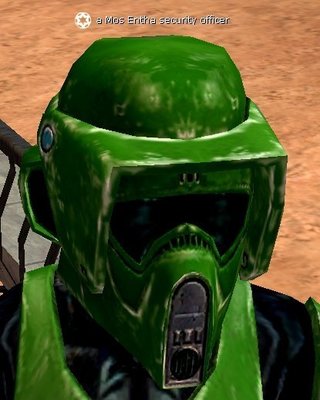
Since the CRL update I believe @Bfkn may be the only build that’s been approved at Specialist and would be your best example. (there is one other swampy specialist…the one you pictured…retired and approved back in 2016 i believe…outdated for sure) Indeed, there should be NO gray in between the nose bridge stripes. That is what the original game references show…black stripes ONLY and so a standard ROTJ scout decal would not be what you need. The snout greeblie would be gray with a black outline. EDIT: The amount of lines is flexible (hence no count in the CRL text) BUT if u examine the reference it appears to be more than 5.
-
i didnt answer ur other question lol. weathering…again i would say check the references. being a low res vid game character there is flexibility BUT the reference pics are your starting point followed by the special notes paragraph below the character pics in the CRL (see pic) Emphasis is on the words “slightly” and “minor” tho i think if an update ever happened we could examine if those words are accurate Anyways here is a link to the reference thread…u should notice that the weathering is indeed white scuffing…not the black spray paint style often seen on ROTJ scouts
-
The original reference is from a low res video game. (see the pinned reference thread). Being a mudtrooper ur accustomed to the “pantones” but those are only listed in the CRL for that costume because the paint used on set and in production for muddies is known…a person in the paint department shared that information. im not sure u will find another crl mentioning pantones in the legion…dont think any do. anyways, If ur trying to achieve the closest-to-reference paint for a swampy, the best we can point you to is that reference thread which has screencaps of the game the character originated from. Hope that helps answer a bit.

