

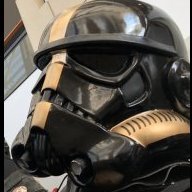
Fivezero
-
Posts
1,259 -
Joined
-
Last visited
-
Days Won
70
Content Type
Profiles
Forums
Events
Everything posted by Fivezero
-
Helmet is nearly, nearly finished up! I got the ears glued on, which was the last big thing on the list. Just a couple more spots to touch up and then I'll give it a few coats of filler primer. Sand the primer down a bit and then a few coats of some gloss paint and then it should be ready to start making the mold! And then to start switching gears, I sanded down the glue joints on the all the other 3D printed parts for the armor and the jetpack, then started gluing it all together. Finally, the last piece of the chest plate just finished printing. Just one more print left for the armor!
-
Finally got started (and just about finished) on the visor. First up was cutting some material away on the inside so it can fit around the helmet and the brow trim. After that I threw some filler on it, sanded it down, more filler and more sanding, then gave it a coat of spot putty. Hoping to finish up the helmet this weekend and then move on to the armor!
-
Well here's the latest progress (been sick, so haven't gotten too much done). Cleaned up the traps, the teeth, the nostrils and the hose inlet. Also sanded down the body filler in the ear pockets and gave them another coat of spot putty to finish that up. Almost there, a couple more days of finish work then this thing will be good to go. Then on to the visor! Also made up a new 3D model for the weapon, a "rail detonator" according to the action figure packaging. Here's the original model from the game with the new model below it. Still have a few things to tidy up and need to make some internal channels to run dowel rods through, but it's pretty much good to go!
-
Thanks! Yeah it's been awhile since I've built a trooper, so it's nice to get back into it. The 3D printer has been a godsend as well, so much better than the stuff I had to do on the EVO Trooper (i.e. clay sculpting or cardstock/pepakura). My EVO helmet in particular has some pretty bad warping in comparison and was a nightmare to get to a decent state because the cardstock couldn't hold the shape. So this Jumptrooper helmet has been a pleasure to work on!
-
Here's some more progress on the helmet! Mapped out and cut details like the teeth and traps and the little "nostrils." Also threw some filler in the ear pockets and the little cutouts below the frown. Then threw on some spot putty to finish off the traps. Also started printing out the new chest plate. The 3D printer has been giving me some more sass, so I haven't gotten as much printing done as I wanted. Also modeled an insert to 3D print for the back plate (yes the Jumptrooper has a mostly unique backplate!).
-
Thanks for the pics Torri! Yep, they've been helping with planning some of the smaller details on the helmet, the pics I have aren't nearly as good. You can never have too many reference pictures. Anyway here's the helmet progress, it's getting there but still needs a little more finish work. Unfortunately the pockets for the ears need to be redone as well. I should have used regular body filler to begin with, I've been fighting myself using only spot putty in this area. I'm hoping to start cutting the traps and teeth out tomorrow as well as getting the "ears" shaped and glued in. Anyway here's the helmet as it sits now. And the printing is done on the jetpack! Thought I was done 3D printing for this trooper, but I've decided to reprint the chest plate after making some changes to the model.
-
@Scubacat Yeah Torri, I was going to shoot you a message to see if you still wanted to make a Jumptrooper. I've been going back and forth about making a mold of this helmet, so I'll proceed with making a mold and then cast some helmets. Anyway, here's the progress for today. Started sanding the spot putty I put on yesterday, then started cleaning up the area for the mic discs. I still have to 3D model then print the discs, I might do that tomorrow night. Then glued the new hose inlet on and promptly applied spot putty over it and the sides of helmet. Also brought the little detail pieces for a quick mock up picture, then ended sanding those real quick and then more spot putty! And here's the progress on the jetpack printing, only two pieces to go! Encountered a bit of hitch with the 3D printer, had some underextrusion on my last print. Luckily it just needed some cleaning around the extruder motor, so it should be good to go now.
-
Thanks Torri! I'm going to try and keep this thread updated a bit more often, so here's a quick update on the helmet. Nothing crazy, cut off the little bits that stick out the side and glued in the new ends. Also started shaping the lens area. And finally, started cleaning up the sides, mouth and edges. Now for some more sanding and filler work!
-
Thanks guys for the comments! Been hard at work this past week getting the helmet knocked out, still have some work yet to do. But it is coming along nicely (much better than my EVO helmet, thank you 3D printer), basically lots of sanding, filler, sanding, filler and so on. Here are some pics of the progress! So the surface is pretty much ready to go right now. Next step is to start cleaning up the edges around the eyes/mouth and the little valleys on the sides. I also have some new parts to graft on (hose inlet and some parts for the things sticking out the side). Then the traps will get cut on the dome and the helmet sculpt should be finished. Then it's on to the visor and getting that fitted! Also here's the progress on the jetpack printing.
-
Been awhile,but I'm diving back into this build! Got tied up with our WWII halftrack and other projects that left me with zero time for 501st related stuff recently. But I'm back at it! I also had some issues with my 3D printer and it sat dormant for far too long. So I fixed the printer and did some quick test prints and got back to work printing Jumptrooper parts and well, this picture should speak for itself. Also modeled and printed some new detail parts for the helmet. So the helmet is glued together and started doing some sanding/smoothing before I slap some body filler on it. I'll probably give it another pass before filler, but I'm pleased with how it's looking so far considering how rough the original model was. And then got on a search for the boots for this trooper and came across this pair is quite close in style to the references. Finally, started printing out the jetpack, the last thing to be printed for this build.
-
Got some parts printed, and really loving how the lights looks! Fivezero
-
Helmet is up on Thingiverse.
-
Glad to hear there's another one in the works!! I guess I should get on restoring those pictures.... (should be tomorrow night). Anyways, got around to making one of the arms. Unfortunately I'll have to reprint it, since I got the scaling wrong (forgot to check before hand...). I also cleaned up the model a little more. I'll try to reprint it tomorrow night. But it's not all bad, got a quick mock up made up, very pleased with the result. Fivezero
-
While I wait for more filament for the 3D printer, I started working on some of the decals for the helmet. I recently bought a vinyl cutter, so I can make my own decals and paint masks now. I still have a couple things to draw up and a couple little adjustments to make, but I'm pleased with how everything turned out. And then I did a test cut of the decals and brought out my EVO Trooper helmet sculpt for a quick mock-up. Dome decal Ear And the cheek stripes Once I finalize them, I'll throw the templates in the Jumptrooper Files thread. Fivezero
-
Dusted of the 3D printer today, and finally got some more printing done for this project. Don't worry it'll be a chest plate eventually. Two parts to print out, and that is done. Then the main box will be made from sheet plastic and glued in place. Then I can finish printing the helmet then move on to the jetpack. Fivezero
-
Dusting this old thread off! Been thinking for awhile for some new plans to make it a bit more troopable. Unfortunately, many of my clear parts have fallen part over the last couple years, so they are no longer serviceable. One of the big things too, was the lights looked awful in full light. However, I'm going to use some natural PLA on my 3D printer to make translucent parts. The layers from 3D printing provide a FANTASTIC diffusion effect. Here's a quick mock-up using a part from my Jumptrooper. This performs so much better than before. And yes, the shoulder bell is lit up in that one picture... Stole some 3D models from Battlefront... I've been doing some work to get them 3D printable, but they should work out just fine. I'm also going to be using a new power supply. A couple portable, rechargeable battery packs should do just fine. Better than the dozens of little 12V batteries I was using previously... And it should last a LOT longer, anything is better than the 10 minutes I got before... So this trooper is getting a BIG overhaul. Fivezero I'll also be moving the photos off photobucket soonish, so I can get this thread and my EVO thread restored.
-
Hey everyone! So here are all the files I've made up in the process of building my Jumptrooper from the Force Unleashed. This should the final version of every detail made for my build. A note on the big armor pieces and the helmet. These are taken directly from the video game model. They will require significant work to make into usable armor. I used these as a base to make vacuum forming bucks and the helmet mold. Jumptrooper Details: https://www.thingiverse.com/thing:2787056 Armor Parts: https://www.thingiverse.com/thing:5430737 Helmet: https://www.thingiverse.com/thing:2788066 Helmet Details: https://www.thingiverse.com/thing:4852864 Jet Pack: https://www.thingiverse.com/thing:5430735 Rail Detonator: https://www.thingiverse.com/thing:5429091 If any future Jumptroopers find something that I missed, please let me know and I'll update the links above. Fivezero
-
Great update Dorothy! Can't wait to see you build this trooper! Fivezero
-
Nice build! Glad to see someone else going after this trooper, here's a picture to motivate you. I've got a few things to fix on mine, namely new clear parts, they're pretty brittle and have fallen apart on me unfortunately... Let me know if you need help at all! Fivezero
-
Thanks for the comments guys! Yeah the armor building skills are a little rusty (been much too long since I've made a trooper), but it's coming together nicely. Torri, I'm making the version from the first Force Unleashed. And yes I plan to 3D model a BFG, but right now the main focus is on getting the armor together to get the trooper approved. Anyway, been busy working on other projects, so haven't had a whole lot of time this week for armor. I did get the shin I have together and mocked up with a knee plate. Fivezero
-
Hey Torri, check your PMs. Holding off on uploading the files right now, just to make sure everything prints out fine. Anyway more progress! Finished printing the other shoulder bell. Next step is to drill all the holes out and then smooth the surface. Finished sanding the cod plate and hit it with some filler primer. Then I started to make up the chest plate. Did some shaping with a heat gun and then fiberglassed it. Unfortunately the heat from the fiberglass curing started to warp it. So I scrapped it, and started to make one from Sintra. Got tired of that and decided to work on the 3D model to get it ready for 3D printing. Hopefully I should get some time later this week to start printing it out. The main box is easily enough made from sheet plastic so that won't be 3D printed (hence the giant hole in the chest plate model). After the chest get printed out, I'll start printing the rest of the helmet. I also had a kidney plate that I had cut up for an old project. Tried to glue it back together, but became too much of a hassle. I'll just get a new kidney plate. Also found some leg armor from other abandoned projects, they'll work just fine for the Jumptrooper. Just need to get a right shin and I'll be all set for parts! Fivezero
-
I haven't forgotten about this build. Recently did some reorganizing in my workshop and found some spare parts to help move this build along. Also finally got my 3D printer freed up from projects for other people, so I could finally get some 3D printing done for this build. Started off by 3D printing the chest extension. And here it is on the ab plate. The ab plate was an old part I found, and have started cleaning up. The Jumptrooper still has the usual 9 buttons, but no other detail on the little center raised part. And today I was able to print out the kneeplates as well as one of the shoulders. Been using a 1.6mm diameter nozzle (as opposed to 0.4mm nozzle I usually use), so I can get these parts printed out extremely fast. Only downside is there can be some interesting artifacts on the surface, but I don't care too much since I will sand and fill them anyway. The other shoulder will be finished tomorrow, and then I can finish printing the helmet. And finally I've started converting the regular TK-style cod plate to match the Jumptrooper cod. Started by using some sheet plastic to fill in on each side of the ridge. Then I put a few coats of body filler over this to make it a Jumptrooper cod plate. I sanded the filler and then applied some spot putty to take care of some of the voids. Tomorrow I'll get that sanded down and then hit it with some filler primer. After the cod/ab are ready to go, I'll be tackling the thighs since I dug some up from my spare parts box. And then on to getting the chest plate made while I get parts printed out! Fivezero
-
EVO Trooper Part Files, Supply List and Templates
Fivezero replied to Fivezero's topic in EVO Troopers
Next Celebration, tag team Jumptroopers? -
Yep, Torri I have the files and will probably work on getting them uploaded tomorrow or Monday. Completely free, no payment needed. I'll make a post just like my recent EVO Trooper post, with everything listed. Next weekend, I think I'm going to start making up the 3D models for this guy's blaster. For all my future trooper projects, I plan to post all the 3D models that I made/used to help you guys out. Right now, it's looking like I'll need another 4 rolls of filament to finish the armor. Probably 6 total needed including what I've printed already and the blaster.
-
Dusting this thread off, way past time to get back to armor building! So I've been back tracking a little bit on this build. I decided to go straight to 3D printing most of the new parts, so I've been working on new 3D models for some of the parts that I had made from foam. The chest and cod piece will still be made from foam, but almost everything else is getting 3D printed now. I've done some experimenting over the summer with my 3D printer. I drilled out a spare nozzle to 1.6mm, formerly it was 0.4mm. So it lays down thicker lines, which in turn means it spends less time building up a thick wall and drastically reduce the overall print time. The downside is that the surface is a little messier, but I don't care much since I'll be sanding and filling it anyway. Worked on the little chest plate extension first. Then started working on the shoulder bell. It took a lot of trial and error, but I finally got something workable. After printing I'll need to drill all the holes in them, no big deal. And finally the knee plates are the same as the EVO Trooper. They just have a bunch of holes in them and they don't have the edge trim. SO everything should be ready to do some 3D printing! I'm going to go through all the parts and figure out much filament I need this weekend and get some material ordered! Fivezero

