tipperaryred
-
Posts
596 -
Joined
-
Last visited
-
Days Won
24
Content Type
Profiles
Forums
Events
Everything posted by tipperaryred
-
That is a very similar chest rig to Del's, and I know a lot of the early clearances used that exact rig. Just keep a close eye on the CRL text if you go with it, as there are some key differences which will necessitate some modifications.
-
Pouches in general seem hard to find at the moment, I've seen similar issues with them for other costumes too. Even back when I bought mine I had to buy it in a two pack - the second pouch had no oiler pouch so was no use for Del. If there are really none online at the moment, a back up plan might be to find someone who can sew some canvas from a simple pattern for them. If I see or hear of any, I'll post here.
-
The outermost boxes on each side are also a different shape to the Scout's overbelt.
-
⬆️ What he said 🙂 One other small addition, you mentioned you were printing a detonator from Scout files? Please be aware that the regular biker scout detonator is slightly different from Del's, so might need some alterations to be clearable. Great to see you diving into it though, keep up the great work.
-
It would be great to have you join us Chris, and Del Meeko is a great choice, even if I'm a little biased myself 😉 I wouldn't know of any specific STL files for those parts, but if you find any and would like a second opinion on their accuracy, don't hesitate to throw them up here. Wishing you the best of luck with your build!
-

Rick Steen - Inferno Squad Del Meeko W.I.P
tipperaryred replied to Rick Steen's topic in Inferno Squad Del Meeko
Great to see another Inferno in progress, especially one just over the other side of the Irish Sea 😉 Don't hesitate to give a shout if you have any questions! -
As a print that looks perfectly good to me for all clearance levels.
-
Sorry yes, I did check that through and thought I replied already, but clearly not! All looks great on the models you shared. When painted up correctly, that should be perfect.
-
Thanks a million mate. Good to get this one step closer to the finishing line.
-
So sorry guys, been an extremely busy month and had a few health issues into the bargain. So we've agree on wording for the text for all items at this point 🙂 . It's just a second pair of eyes to go over the wording for everything from the jetpack down to make sure it's fit to submit for a new CRL. I'll give another shout out to the other DCAs too to see if anyone is free to help out.
-
No worries. If you look back on the first page, any items that are in green have been fully approved. Any items in yellow are ones that have been agreed by us here, but have not yet been approved by additional DCAs. We'll try and get those approved ASAP.
-
Yes, the shin / knee plates look okay to me. My instinct is that we should leave the wording flexible so that builders have a choice between them being permanently fixed together, or two pieces that are hinged together to allow a small amount of flexibility. Some of the other pieces have not yet been reviewed by other staff, but I will speak with the other DCAs and ask one or two of them to review our work so far.
-
You know what Kevin, I think you're 100% correct. Looking at the side angle, I think the white line is indeed at the same elevation as the shin / knee armour around it. As you say, it would also make sense that it mirrors what appears on the wrist armour. I'll go ahead and rewrite that when I get a chance, but by all means go ahead and work away with those changes. Good work!
-
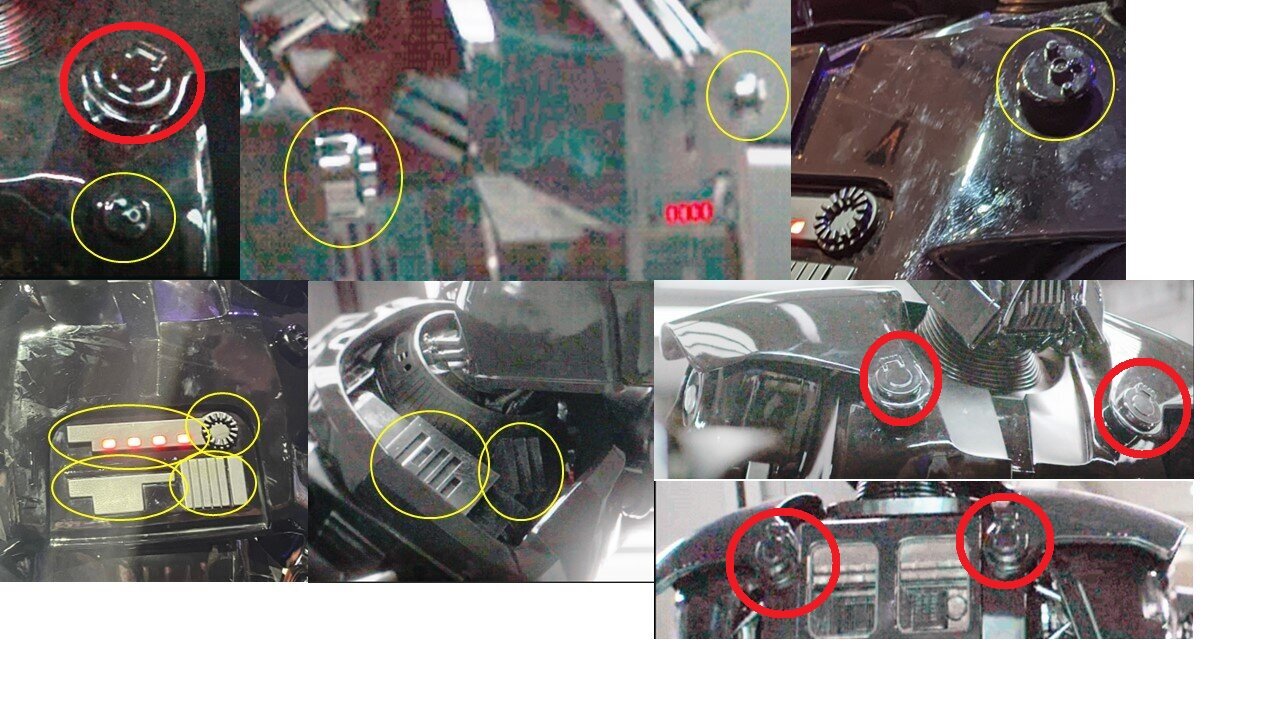
As mentioned previously, the compad is the most awkward part of this, as the posing of both the sculpts and artwork ensures that the gloves ride up above the compad, obscuring them from view. Give that: 1) The flightsuit is otherwise identical to the standard Inferno one. 2) The named Inferno characters in this source material have the compad visible while wearing the same flightsuit. I think it is entirely reasonable to assume that the same compad is present for the generic troopers. The best concession would seem to be to leave the details of the compad wide open, including being able to clear a regular TIE pilot compad. There is no point having Level 2 criteria for something we can't see. Taking the Del Meeko Battlefront 2 CRL as the basis again: Compad Rectangular communications pad with patterned painted details matching reference photo. Compad is worn with the four large, rectangular buttons pointing towards the wearer’s elbow. Compad is rectangular in shape and fits within the flight suit's compad pocket window. Details of the compad differ from the standard TIE Pilot compad. Black buttons are smaller than the red and white buttons; the white button located adjacent to the button with multiple dimples may be a single piece, instead of split in two segments. Compad base color is silver, metallic grey, or weathered silver. Compad size is 2.5" x 2" (63.5mm x 50mm). Compad is fully visible above the glove, facing outward on the arm. An Inferno style compad as per Inferno Squad - Del Meeko CRL is accepted for clearance. A compad with the button/greeblie configuration show in the Shatterpoint Del Meeko artwork (see reference gallery) is also acceptable. For basic approval (Level 1) A standard TIE pilot style compad painted and worn to match game references may also be accepted for use. OPTIONAL Level two certification (if applicable): Compad shall be Inferno Squad style with correct button sizes, layout and colors. Two black buttons at the top of the pad are smaller than the white and red buttons. The white button adjacent to the button with holes/dimples is not split. Compad is moderately weathered / stained. EDIT - The Del Meeko artwork from the same source does in fact show a compad, which seems to be a simplified drawing with a few elements from both the Inferno compad and the regular TIE pilot compad. I would also be inclined to permit the clearance of a compad that follows the button/greeblie configuration shown below:
-
Detailing all looks good to me 👍
-
Hi Jim, you are in fact correct, there shouldn't be screws visible on the Inferno Squad helmet. I can see where you mean when I zoom in to the CRL photos, and they technically shouldn't be there.
-
Yes, you're right that it isn't supposed to sit flush there. Whether or not there's too much of a gap there is a difficult one to call. The best bet is probably to have a chat with your local GML. They will have the final say on your clearance, so if they are happy with that then it will save you having to do a lot of work.
-
Brilliant to see another Inferno underway! Let us know if you need any advice or assistance along the way.
-
Purge Trooper Phase 1: Commander - CRL Discussion
tipperaryred replied to nanotek's topic in Purge Trooper Phase I: Commander
Yep, I'm more than happy to jump back into this and continue work on the text if we have one or more builders in progress. As a general rule, it is safe to say that for any shared components between the two costumes, the reviewed Commander CRL will largely mirror the Electrostaff Specialist. But if you'd like to build towards the higher standard, make sure that you work with us here so that we can be sure that what you're building matches the evolving text review 🙂 -
One additional tweak I would like to suggest to make the costume as accessible as possible without sacrificing accuracy - the "detail indents". These black lines are present across many of the costume parts, and we went with the "detail indent" language to stay consistent with similar costumes in other Detachments. As we've noted in the discussion however, the animated style does not clearly show a change in elevation for any of these "indents". I would therefore suggest the possibility of adding a special notes that allows these details to be painted on, rather than having to be sculpted into the armour. IE. Giving GMLs their own discretion to clear both methods of highlighting these details. Something along the lines of: Where this CRL refers to a "detail indent", these details may present as either a recessed detail sculpted into the parts and then painted black, or be simply be painted onto a flat surface in black to create the same visual effect.
-
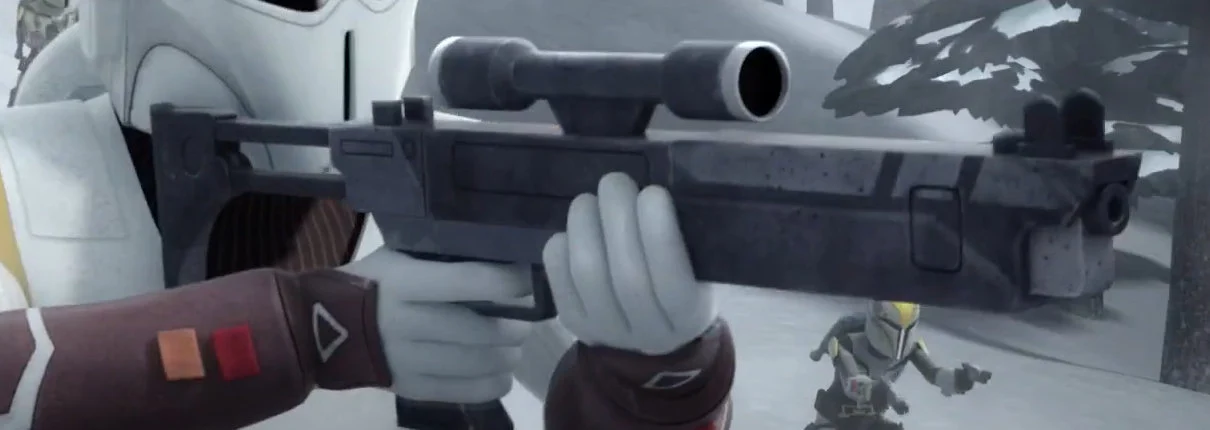
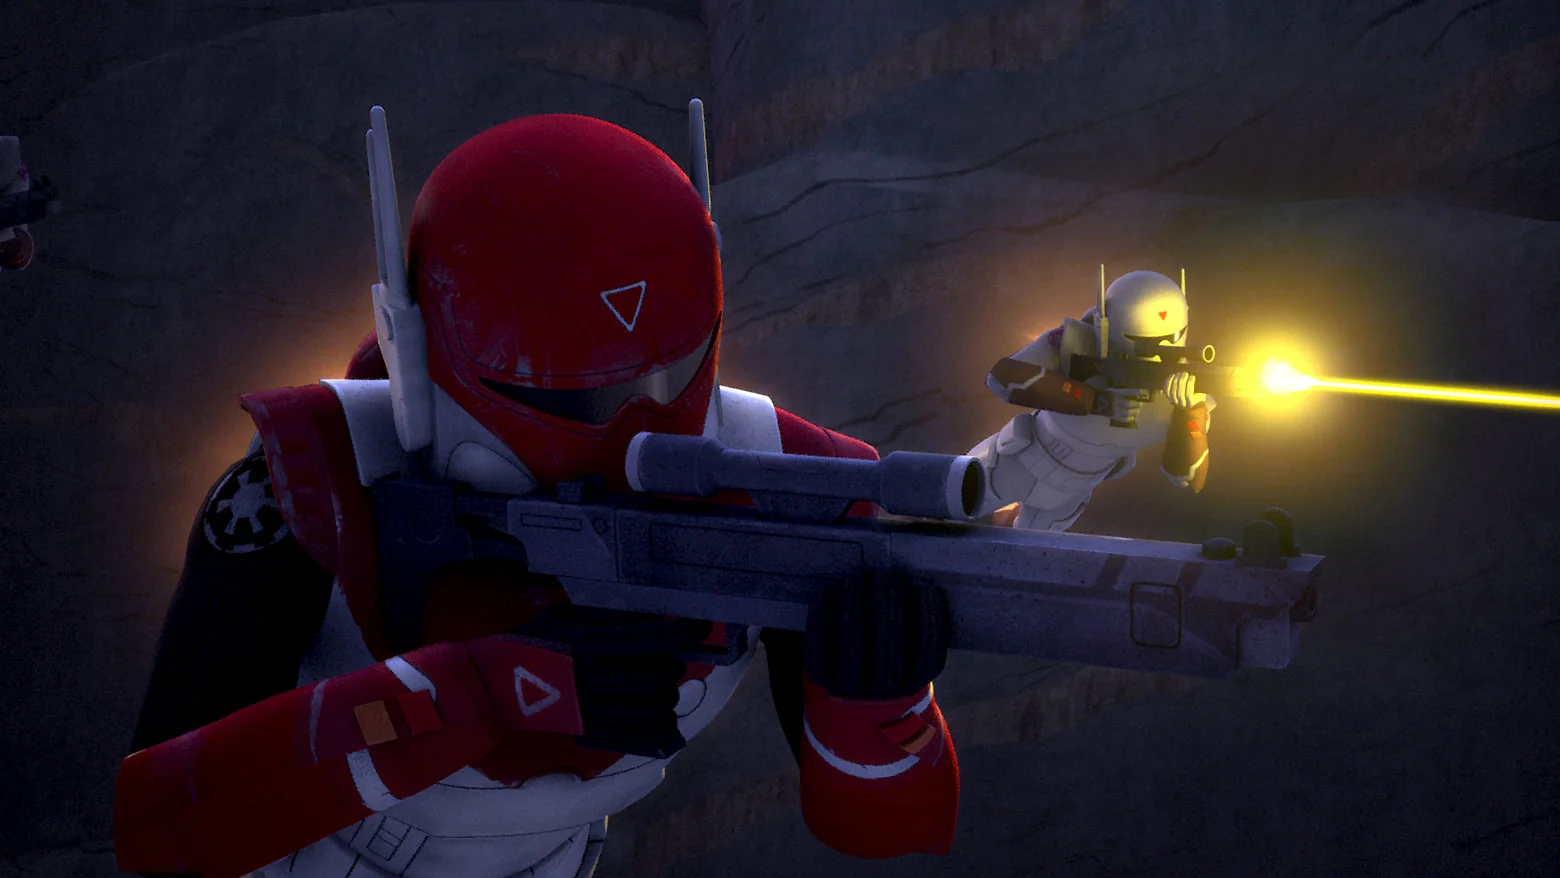
ISC Blaster Carbine

-
This seems to be a blaster that's unique to the ISC, so I guess we'll start from scratch! Optional Accessories Items below are optional costume accessories. These items are not required for approval, but if present appear as described below. If adding in an accessory after initial approval, the item still needs to be submitted to local GML for approval before use. Imperial Super Commando Blaster Carbine Unique blaster carbine accurate to screen references. The receiver and scope are painted in three tones of grey, matching visual references. Dark grey / black telescoping stock with an end plate and circular recessed detailing (may also be painted) on either side. May be functional. Dark grey barrel protrudes from the end of the receiver, with a light grey cuboid shape protruding underneath. Symmetrical detail indents (may be painted) on each side of the receiver: 3 rectangular shapes 2 circular shapes Symmetrical detail indents (may be painted) on the dark grey / black grip. Rifle scope scaled correctly to the blaster. Dark grey dual front and rear sights on either side of the scope, with a dark grey circular greeblie sitting just behind the front sights. OPTIONAL Level two certification (if applicable): Telescoping stock should be functional.
-
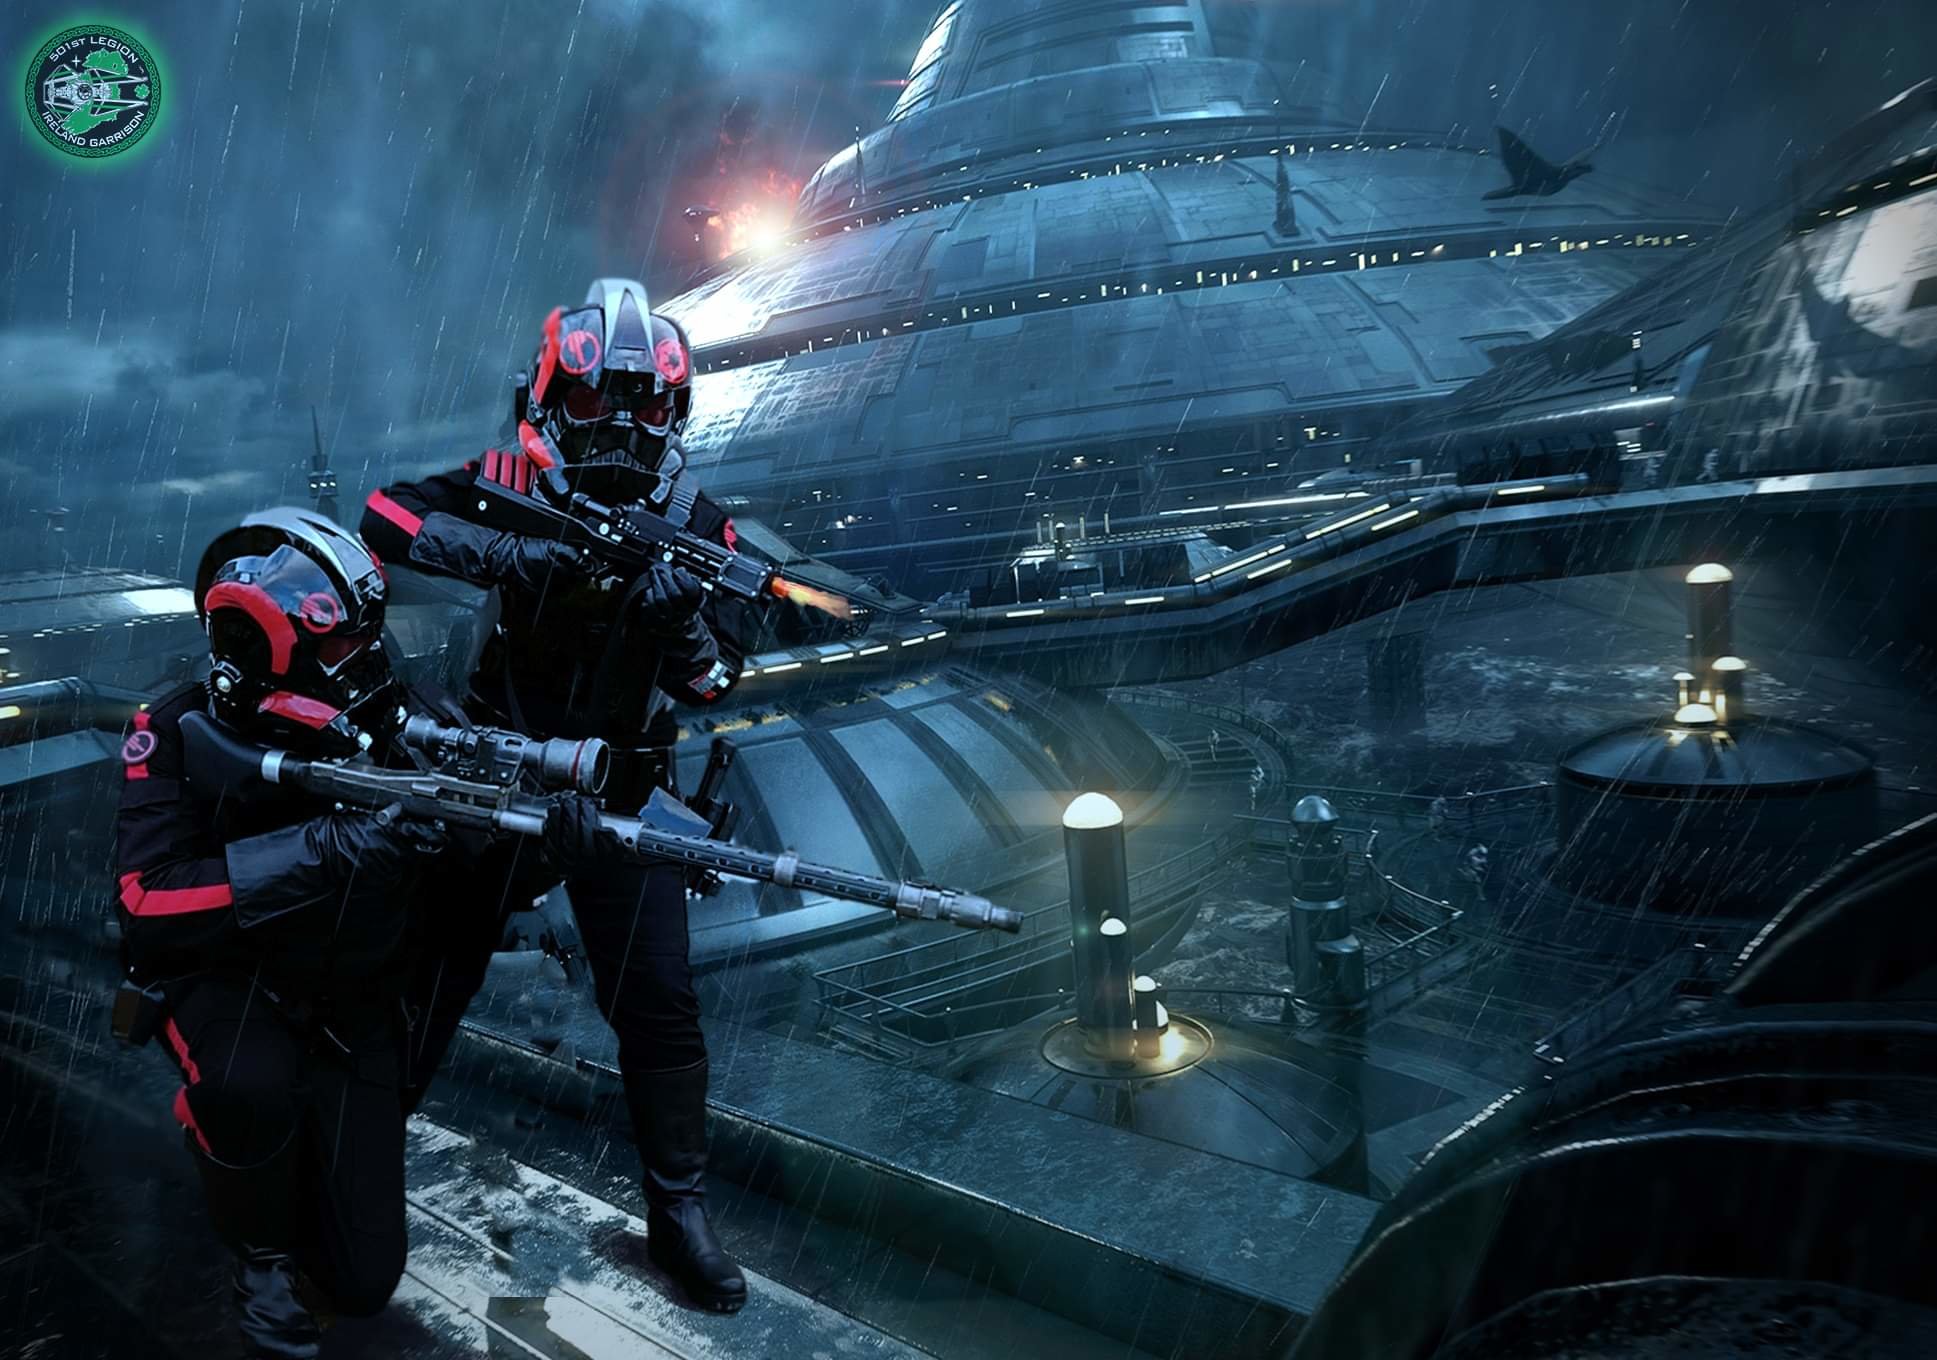
The balaclava seems pretty simple, so can leave that as is and move on to proposed changes to the Del Meeko flightsuit used as a base for this. The toughest call will be the com pad pocket, as it is the only part we can't clearly see due to the posing in both the artwork and the miniatures. Maybe the best call is to leave it as an "optional" element of the CRL, and just use the current Inferno standard if it is used? Logically I think it is safe to stick to the existing Inferno template, but equally I'm not sure if we can enforce it if there isn't a single visual reference for it on these particular troopers. EDIT (30/04/2025): The compad and compad pocket are clearly visible in the Del Meeko artwork, and as the flightsuits are identical I believe they can be safely assumed to also be present for the unnamed ISF troopers. One additional note - it looks like the publisher's figure painter accidentally painted the red stripe down *both* sides of the flightsuit on the models published on their website. I believe this can safely be assumed to be a mistake and discounted for two reasons: This was also done to the Iden, Del and Gideon figures, and we know that the red stripe should only be present on the right side of each. The main artwork being used as the visual reference for ISF troopers clearly shows both the right and left sides of the suit, and the right stripe is *only* present on the right, in-line with what we would expect from an Inferno flightsuit. Balaclava A balaclava is a black head sock/hood that is worn under the helmet and is used primarily to hide any view of the wearer's skin and/or facial hair. A balaclava must be worn when the helmet is worn. Flight suit Flight suit details from the Inferno Squad - Del Meeko CRL are allowable for clearance. One-piece black fabric flight suit is made out of canvas or similar heavy material. The full length of the front zipper is covered by a black panel. Approximately 1.5" (38mm) tall mandarin collar with a chevron shaped, left-over-right Velcro closure. An approximately 2.5" (63.5mm) red embroidered or PVC Inferno Squad emblem, on a black background, is present on both shoulders. The shoulders of the suit are slightly padded. If a compad is to be worn with this costume, a compad pocket that properly fits the compad is placed below the left elbow above the left glove so that the pocket is not hidden, and faces outward on the arm. On the left bicep below the cog emblem, there is a code cylinder pocket with no flap, and vertical stitching dividing it into pen sleeves. No code cylinders are present. There is a piece of nylon strapping sewn below the pen sleeve openings and is the same length as the top of the pocket. The bottom front corner of the pocket is cut off at a bevel on the side pointing in view direction, with the broader upside forming the border of the pen sleeves. The right sleeve has a cargo pocket below the cog emblem, with a chevron flap. Two large chest pockets and two large front pockets with chevron flaps are present below the belt. There are no leg pockets below the knees. There are two red stripes that run up the right side of the flight suit. The first begins at the bottom of the right leg and continues up to the right armpit. The second begins at the right wrist and stops at the bottom of the arm pocket. The stripe then continues above the arm pocket, behind the patch emblem to the shoulder seam. The red arm stripe stops at the top of the shoulder seam, but continues up and over the shoulder as a black stripe. There are two black stripes that run up the left side of the flight suit. The first begins at the bottom of the left leg and continues up to the left armpit. The second begins at the left wrist and stops at the bottom of the arm pocket. The stripe then continues above the arm pocket, behind the patch emblem to the shoulder seam. The black arm stripe stops at the top of the shoulder seam, but continues up and over the shoulder to the collar. For basic approval this can be accomplished with topstitching. The black portion of this stripe stops at the collar. A piece of leather or leather-like material is sewn below the pen sleeve openings and is the same length as the top of the pocket. OPTIONAL Level two certification (if applicable): Patches are vinyl on textile with no edge border. If twill is used for the patch material the fabric texture will be vertically oriented. The black stripes on top of the shoulders shall be a material matching texture and weave of the red stripe. A heavy canvas-like material is most accurate for the flight suit construction as it is a thick materials with a "solid" structure. A "loose", soft or lightweight material is not accurate.
-
Great work. Is there additional description needed for the four circular greebies at the bottom edge of each pauldron (front and back)? It seems like this could be the connection point for each. Circled in red below:
-
Further tweaks: Helmet The Inferno Squad helmet is modeled after the 3D model specific to Battlefront II game. Helmet details from the Inferno Squad - Del Meeko CRL are allowable for clearance. The Rogue One TIE Pilot style helmet is allowed for Basic Approval when requirements outlined below are incorporated. Original Trilogy TIE Pilot style helmets are not permitted. There are no screws visible on the helmet. Lenses are bubble or flat, are red in color, and must be sufficiently dark enough to obscure the costumer's eyes. Translucent or mirrored red lenses are acceptable. The front trident area is shorter than a traditional pilot helmet. There is a rectangular indentation on top of the mohawk above the trident. There is one retaining clip greeblie in the left side trident indentation. A Nissan retaining clip is most accurate. The top of the mohawk outside of the raised triangle is painted a dark gun metal color down to the inside edge of the helmet opening. There is a pill box just above the back bottom edge of the mohawk. The pill box is the same black color as the helmet and does not need to be functional. Spaces between the teeth are cut out and backed with a dark gray or silver mesh material. The vocoder is it's own separate greeblie with distinct tubes, not bumps molded into the helmet. The teeth and vocoder are painted flat black. Oxygen mask connectors are molded into the helmet just in front of the ear caps above the cheek tubes on both sides of the helmet. There are Imperial disc greeblies without notches on each ear cap. There are two red painted or decal logos on the forehead of the helmet. The Inferno Squad logo on the right side and an Imperial cog on the left side. Logo and Cog are equivalent in size, and shall be scaled appropriately to the helmet. There is a red painted or red decal area on the ram’s horn on the right side of the helmet. There is a red painted or red decal area on the right cheek tube. There are molded greeblies painted silver inside the hose ports that cover the openings. Helmet may have light weathering/ staining. Silver is not permitted. A balaclava must be worn when helmet is worn. OPTIONAL Level two certification (if applicable): Helmet is strictly made from the game's 3D model and correctly sized/scaled to the wearer. Hose connectors are made from machined aluminum. Imperial Cog and Inferno Squad logo will be 2.15" to 2.25" (54-57mm), scaled to wearer's helmet size. Lenses are backed with round-holed mesh/screen. The pill box is functional. Lenses are bubble type.