-
Posts
511 -
Joined
-
Last visited
-
Days Won
22
Content Type
Profiles
Forums
Events
Everything posted by tipperaryred
-
Purge Trooper (Phase II) - Kenobi - Discussion
tipperaryred replied to nanotek's topic in Purge Trooper Phase II (Kenobi)
Most parts look pretty clear to me now, though please let me know what you think of my interpretation of the top greeble: I'm seeing three height levels. The first "step" (red in my simplified diagram) is the same shape as the black outline, but sits inside it. Then I'm seeing a rectangular bar (green in my diagram) that sits on top of that. I see an angled notch on the right side of the first step (red), and a rectangular notch at the bottom of the second step (green). I can also see the recessed line above this second notch (green). Are you seeing the same arrangement as me? -
It's a tricky one. Seen in isolation it does often look white. But every time it is side by side with the white armour, it definitely looks darker to me. Would 100% agree it's nowhere near as dark as his Mauldelorian suit, but I'd be inclined to call it a very light grey or a dirty white. I think we definitely need to distinguish that the suit and armour are different shades.
-
Purge Trooper (Phase II) - Kenobi - Discussion
tipperaryred replied to nanotek's topic in Purge Trooper Phase II (Kenobi)
My apologies, I had no idea that was a display of an actual screen used helmet - I thought it was a close up of one of their figures. If that is in fact screen used, then of course that's an ideal reference to take everything from. -
I completely forgot that there's a separate card for the T-21 trooper. Unfortunately however, I just checked and they're presented on it as little more than a silhouette in front of a sun in the background. In saying that, the profile doesn't suggest that they have a bulky bandolier on, so I'd say ignore my last suggestion to link them. As for the figures, I do still have a couple of squads ready to be painted by being primed in grey with a simple white zenithal highlight. So that picks out the details very nicely, without there yet being any of my own interpretations on them yet. I'll get a ring light out at the weekend and take some decent photos. EDIT: So the highlight was a bit chalky, so not the best of images. They do however capture most of the details for the Unit Leader, T-21 Trooper and Trooper miniatures. Added to the reference gallery.
-
Perfect, text reassembled with your addition (tweaked slightly to clear up my original meaning in the first text). And yes, they definitely took inspiration from the Clone packs there! Pauldron A black pauldron made of leather or a leather-like material, worn over the right shoulder. There are six vertical panels at the front, and six at the rear. On the right side of the trooper, these are joined by the main, largest panel of the pauldron over the right shoulder. On the left side, these are joined by a smaller inverted trapezoid panel at the side of the neck. The pauldron has hems of the same leather or leather like material running around the full inside and outside circumferences of the pauldron. The main shoulder area of the pauldron is grey (current images suggest black to me?). A black strap runs under the right arm, attached to the front and back of the pauldron at the points where the front and back ribs meet the largest panel of the pauldron. Strap is attached to the front and the back using a gunmetal popper or rivet. A black strap, made from leather or leather-like material, extends from the front left corner, under the left arm and attaches at the back left corner. Attachment is out of sight, under the pauldron. The strap has a buckle attached under the left armpit that resembles a ratchet-strap, as per the reference image. Three ammo cartridges are attached to the strap over the chest. Each cartridge has a raised U-shaped profile at the bottom, and a recessed rectangular notch in the centre of the top.
-
Flight Suit rewritten Ryan's original text in white, my additions in yellow, areas I'm unsure about in red with my notes in green. Must be a cotton or cotton blend two-piece garment, and must be properly fitted and shaped to the wearer. (If going with British military style pullover, material would commonly be acrylic it seems.) Must not have any visible pockets, pouches or zippers. The upper body part of the flight suit is maroon-colored, in a heavily ribbed style similar to British military pullovers. The neck area of the flight suit goes halfway up the neck of the wearer to conceal skin when the helmet is worn. On each shoulder of the flight suit there is a white Imperial Cog emblem on a black background. The cog is 3” (76.2mm) or 3.5” (88.9mm) diameter and 1” (25.4mm) from the shoulder seam. The cog may be embroidered or vinyl. The lower body part of the flight suit is colored to match the white of the armor pieces (in the references it looks more like a light grey, definitely a shade or two darker than the white armour?) . The lower part may be a separate trouser garment, or part of a one piece flight suit. If a one piece jump suit, the upper body jumper should be worn over the garment so as to obscure any view of the flight suit underneath. The lower body part of the flight suit has the following seams: On the outside of each leg there is a double-lapped seam which runs the entire length of the suit showing from the top of the shins up under the belt. On the front just above the top of the knee armor which wraps around to the back of the flight suit and appears on the back. On the back from the knee seam there is a seam that runs up the back of each thigh and then curves to the outside of the back under the belt. There is a horizontal seam that runs across the butt connecting both of these seams running up the back of each thigh. On the back there is central double-lapped seam which runs from under the belt to the crotch of the wearer.
-
Purge Trooper (Phase II) - Kenobi - Discussion
tipperaryred replied to nanotek's topic in Purge Trooper Phase II (Kenobi)
HELMET rewritten - remaining problem areas in red, with my comments in green. White text I'm happy with. Gloss black in colour, consistent with the rest of the costume. Is in proportion to the rest of the costume. The eye lens is one continuous piece with a mirrored red tint and should obscure the wearer’s eyes. There is a black hexagonal front plate, with matte black greebles. Very difficult to call colours here. It definitely looks like a different finish to the rest of the helmet. Centre top greeble is rectangular in shape with two clipped dog ears on the top right and left corners. Recessed line follows the outline of the greeble and includes a horizontal intersecting line that runs across the bottom third. One longer line is just below the horizontal line on the left bottom. One shorter line is just above the horizontal line on the right. The descriptions in red above don't really fit with what I can see there. It might just be difficult wording, or we might be seeing different things due to the poor quality of references. Any chance of better shots? T-shaped vocoder is in the lower centre of the plate. Small black rectangles with rounded corners at the top left and top right of the vocoder. 9 raised ridges run vertically across the vocoder. Small raised horizontal rectangle with recessed line is located below the vocoder. Square profile side tusks run back from the lower edges of this front plate. Recessed rectangular metallic silver screens are inset into the greeble in the front of each side tusk. Each greeble has a raised ridge on 3 sides, angling up from the bottom side of the greeble. Six pill shaped symmetrical recessed stripes on each tusk, with the bottom of the recesses filled with red to match the pauldron, belt accessories and left bicep armour. Raised teeth painted silver, with black/silver in the recesses. Alternately the recessed may be cut out and backed with mesh to obscure the wearer's face. I'm a bit reluctant to rely entirely on the Hot Toys here, especially when the show's screens don't have quite the same look, and that it breaks from usual "teeth" convention. Hopefully we may get a second opinion here. Silver rectangular plate on the nose, between the teeth and the front plate, with a silver half moon greeble on top. This plate is recessed below the angled face plates on either side. The half moon greeble is level with the adjacent face plates. Symmetrical recesses with pill shaped greeble on each side between the side tubes and the cheeks. Top of greebles are split in half with the top half being flat and the bottom half having 4 raised stripes that are level with the flat half. The picture you supplied for this one didn't seem to upload. From the other pictures I can see what you mean, but it looks like the lower ridges are below the flat plate above to me. Do you have a better image that shows different? Sharp angular cheekbones sculpted into helmet face plate running in a triangular shape below the lens opening. Three raised ridges run from the centre of the brow, over the top of the helmet and down to the rear centre of the helmet skirt. The central ridge is roughly 2.5 times wider than the ridges to either side of it. Top of the helmet is separated from the face plate by a horizontal band running above the brow. A groove separates the top of the helmet and the rear skirt, running across the back of the helmet, meeting the brow band on either side. The side greebles (communicators/range finders) are attached on top of the joins between the band and the ridge on either side of the helmet. Symmetrical rectangular greebles (communicators/range finders) with semi-circular ridges underneath, present at the back of each side of the brow band, situated on top of the point where the front band meets the rear groove. Greeble contains two raised and stacked squares, each with a circular LED or sculpted imitation located near the front, and a single recessed line in the shape of a square outlining the back two thirds of the greeble. OPTIONAL – top and bottom may be lit using LEDs. Top LED must be white/yellow/orange (more confirmation or references needed on this?), bottom LED must be red. Two small pill shaped double indentation in the bottom corners of the faceplate, under each ear. The rear indentation is vertical and slightly longer than the front indentation that angles toward the front of the helmet. -
The T-21 trooper is always equipped with the bandolier, so we could perhaps add "If equipped, the trooper should also wear the bandolier listed here as an optional extra" to the T-21 text? Or words to that effect? Everything else discussed seems to have all but exhausted the available resources. We are essentially just going with a modification of the existing Inferno CRL, using sculpts and art work to fill in some blanks. And 90% of those changes are simply colour changes. The only other thing I could potentially do is take some hi-res photos of one of more of the sculpts from all angles?
-
Purge Trooper (Phase II) - Kenobi - Discussion
tipperaryred replied to nanotek's topic in Purge Trooper Phase II (Kenobi)
Cheers, those are a great help and explain pretty much all of those points. I'll redraft a new version once I'm done with work. -
Perfect! I'll merge what we have together next time I'm with my laptop. I'd tend to agree on the commando style jumpers, that looks pretty close to me. Kevin makes a good point that it wouldn't make sense to use the same material for the trousers. So if we go with that, we'd either be looking at separate top and trousers, or an under suit made from the trouser material, with a jumper over the top? Either way, a 2 piece construction instead of the previous 1 piece option?
-
I suppose that's the only colour we know the under suit to be. If we list it as only sleeves and neck, you could potentially have someone with a bright green torso which is CRL approvable 😅 I know where you're coming from, but if we don't have clear evidence that the torso is a different colour, best practice would be to consider it the same. Ultimately, if you had an under suit with a slightly different colour torso, it's not going to be visible in any clearance photos anyway, so we don't need to lose any sleep 🙂
-
From current CRL, with some possible additions in yellow: Pauldron A black pauldron made of leather or a leather-like material, worn over the right shoulder. There are six vertical panels at the front, and six at the rear. On the right side of the trooper, these are joined by the main, largest panel of the pauldron over the right shoulder. On the left side, these are joined by a smaller inverted trapezoid panel at the side of the neck. The pauldron has hems of the same leather or leather like material running around the full inside and outside circumferences of the pauldron. The main shoulder area of the pauldron is grey (current images suggest black to me?). A black strap runs under the right arm, attached to the front and back of the pauldron at the points where the front and back ribs meet the largest panel of the pauldron. Strap is attached to the front and the back using a gunmetal popper or rivet. A black strap extends from the front left corner, under the arm and attaches at the back left corner. Strap is attached out of sight, front and back, under the pauldron. (We'll also need a description of the buckle, it almost looks like a ratchet style to me?) Three ammo cartridges are attached to the strap over the chest. Each cartridge has a raised U-shaped profile at the bottom, and a recessed rectangular notch in the centre of the top.
-
Purge Trooper (Phase II) - Kenobi - Discussion
tipperaryred replied to nanotek's topic in Purge Trooper Phase II (Kenobi)
Cheers, my own thoughts in green: HELMET Gloss black in colour, consistent with the rest of the costume. Is in proportion to the rest of the costume. The eye lens is one continuous piece with a mirrored red tint and should obscure the wearer’s eyes. Agreed. There is a (matte??) black hexagonal front plate plane, with matte black greebles. (have we verified that this is matte and not gloss??) Definitely not verified as matte. In Hot Toys it doesn't look much different to the rest of the helmet, but the screenshots and set photos seem to show a very different finish. I would guess it is either it is gloss dark grey, or black with a matte or satin finish. Center top greeble is rectangular in shape with two clipped dog ears on the top right and left corners. Recessed line follows the outline of the greeblie and includes a horizontal intersecting line that runs across the bottom third. One longer line is just below the horizontal line on the left bottom. One shorter line is just above the horizontal line on the right. T-shaped vocoder is in the lower center of the plane with two small rectangles located at the top right and left side. (Small rectangles have a smaller rectangular inset that is matte black?) 8 recessed and 9 raised lines run vertically through the center of the vocoder. Small raised horizontal rectangle with recessed line is located below the vocoder. Can you send on some close up images with front plate, greeble vocoder details? I take it these details are taken from Hot Toys rather than high res screens or set photos? Square profile side tusks run back from the lower edges of this front plate. Rectangular metallic silver (screens?) are inset into the greeble in the front of each side tusk. As above, can you post any close ups to help with this? Six pill shaped symmetrical recessed stripes on each tusk, with the bottom of the recesses filled with red to match the pauldron, belt accessories and left bicep armor. Agreed. Raised teeth painted silver, with matte black(??) in the recesses (OR cut out, backed with mesh?). (Note from Scott: can we verify that the bottom of the teeth are matte black? What I'm seeing is the silver runs over the teeth and down each side and then back up to the top of the next tooth.) I also would approve the cut out and adding a screen mesh. I know this is allowed for a number of the other TKs. I did this for my Del Meeko and love the look and the venting. I would do it to this bucket if we agree to allow it. Agreed that it could also be one colour and just looks darker in the recesses. No clear evidence seems available yet. I was going more by the usual TK/TI convention of having a darker colour in the recesses, or them being cut out completely. More sources/references needed. Silver half moon greeble on the nose (muzzle??), between the teeth and the front plate. The entire rectangular nose plate seems to be silver, including the half moon greeble. It is only the original Hot Toys promos that didn't show this, but it seems the final figures corrected this. Raised planes run on the top of the muzzle along each side of the half moon greeble and are the same height as the greeble. I'm not seeing what you mean here, are you able to show any pictures to explain a bit better? Symmetrical recesses with pill shaped greeble on each side between the side tubes and the cheeks. Agreed. Top of greebles are split in half with the top half being flat and the bottom half having 4 raised stripes that are level with the flat half. Can you supply any close ups to explain this better? I can't see this in the available references. Sharp angular cheekbones sculpted into helmet face plate running in a triangular shape below the lens opening. Agreed, can fix wording on next draft. Three raised ridges run from the centre of the brow, over the top of the helmet and down to the rear center of the helmet skirt. The central ridge is roughly 2.5x wider than the ridges to either side of it. No problem. Top of the helmet is separated from the face plate by a horizontal ridge (band??) running along above the brow and ends at the side greebles. A groove separates the top of the helmet and the rear skirt and continues around the back of the helmet runnin between the side greebles. Rear skirt of the helmet may be a separate part? (Note from Scott: For the rear skirt are we stating that it would be able to be removed as a separate piece?) All agreed except for "between the side greebles". I would say the rear groove runs underneath the side greebles and meets the brow band? For rear skirt, no requirement for it to be removable at all. I would simply suggesting leaving it open that builders can construct both ways - 1) One single piece, with a groove moulded in, 2) Two pieces, with rear skirt hinged/joined to top dome. Symmetrical rectangular greebles (communicators, range finders, communication transmitters?) (without sources stating their purpose, maybe we just leave it as "side greebles") with semi-circular ridges underneath, present at the back of each side of the brow ridge, in located between the horizontal band and rear groove that separate the top of the helmet and rear skirt. It looks to me like the brow band and the rear groove meet at the side, but the side greeble is attached over the top of this join? Greeble contains two raised and stacked rectangles (squares?), each with a circular sphere (LED? Can be moulded to look like one, or fully functioning in correct colour?) located near the front, and a single recessed line in the shape of a square outlining the back two thirds of the greeble. Agreed. OPTIONAL – top and bottom may be lit using LED. Top LED must be white yellow/orange (more confirmation or references needed on this?), bottom LED must be red. Two small pill shaped double indentation in the bottom corners of the faceplate, under each ear. The rear indentation is vertical and slightly longer than the front indentation that angles toward the front of the helmet. Agreed. -
Starting point for Flight Suit, please let me know what needs adding/removing/changing. Colours as always are tricky! Flight Suit May be one or two piece construction. Top should be long sleeved with vertical ribs. Top should be dark brown/maroon in colour. Each shoulder has a black and white imperial cog patch. Bottom should be constructed from six panels as shown in reference. Bottom should be white in colour. Bottom should be tucked inside Shin Armour. Garment should fit tightly to the wearer.
-
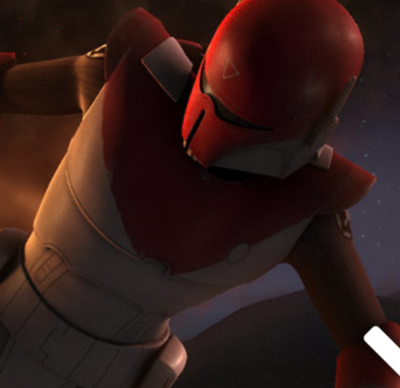
This will be the main listing and we'll tackle each part piece by piece (green is done, yellow is WIP, and red is not finalized): Helmet Flight Suit Chest Armour and Shoulder Pauldrons Shoulder Straps Abdominal Armour Jet Pack Gauntlets Gloves Hand Plates Belt Codpiece Thigh Armour Knee Armour Shin Armour Boots Rifle --------------------------------------------------------------- Description: Imperial Super Commando - Gar Saxon Prefix: TX Detachment: Spec Ops Detachment Context: Star Wars Rebels CHARACTER DESCRIPTION HERE Special Notes: The armor parts are a [color description here], or as specified in each part description, and made from one of these (or similar) types of materials: Fiberglass ABS (Acrylonitrile Butadiene Styrene) HIPS (High Impact Polystyrene) PLA, ABS, PETG (3D Printing) Polyurethane Rubber 3D Printed parts are permitted but all print lines and other artifacts must be removed. Blasters are not required for legion membership per our weapons policy. Helmet Imperial Mandalorian Super Commando style helmet, matching visual references from Star Wars Rebel animated series. Helmet should be painted and weathered to match references. Weathering/chipping of the red paint should match the light grey paint used elsewhere on the helmet. Helmet dome and face plate to be painted red as per references. Rear plate, raised rear panel detailing, the upper cheek plates, left ear plate and teeth must be painted light grey as per references. Lower cheek plates, raised rear panel, must be painted white (or a lighter shade of grey), as per references. Additional detailing on rear plate must be painted white. Ear caps and antennae may be painted light grey or a weathered white. All recessed panel lines are black or dark grey. There is an inverted white outlined triangle in the center of the forehead. This should be painted. A weathered decal may be acceptable if achieving the look of having been painted. Both visor pieces are black, and obscure the wearer's face. The lower visor tapers in slightly to its narrowest point at the bottom. Left ear cap is oval, with a raised circular detail at the top, and a slightly tapered antenna with a circular profile. Right ear cap is angled at the top, with a narrower half oval at the base. There is an angled recessed panel line in the bottom right corner of the cap. The cap has a raised circular detail at the top, and two antennae. The rear antenna matches that on the left side, while the front antenna is significantly taller. Twin recessed panel lines (1 & 2) run around the upper visor, angle up over the ear pieces, and join together in horizontal lines across the back of the helmet. A third panel line (3) runs parallel and just above the upper of these two lines (2), joined to this same upper panel line at both ends, and running horizontally across the central portion of the rear of the helmet. The distance between 2 and 3 is approximately half the distance between lines 1 and 2 at the rear of the helmet. Additional panel lines vertically bisect each ear plate, and run around their edges. Rear bottom lip of the helmet has a raised, curved rim, running between the rear edges of each ear plate. Back plate has a raised rectangular panel with details to match references. These are long vertical oblongs on both sides, a circle in the lower center, and a double striped rectangle within another rectangle in the upper center. Details are outlined by recessed panel lines. The back plate is light grey, but has white detailing painted on either side of the raised rectangular panel. There are six teeth, three on each side of the lower visor, with the recesses painted black or dark grey. Flight Suit: Must be a two-piece garment, and must be properly fitted and shaped to the wearer. If going with British military style pullover, material would commonly be acrylic. Must not have any visible pockets, pouches or zippers. The upper body part of the flight suit is maroon-colored, in a heavily ribbed style similar to British military pullovers. The neck area of the flight suit goes halfway up the neck of the wearer to conceal skin when the helmet is worn. On each shoulder of the flight suit there is a white Imperial Cog emblem on a black background. The cog is 3” (76.2mm) or 3.5” (88.9mm) diameter and 1” (25.4mm) from the shoulder seam. The cog may be embroidered or vinyl. The lower body part of the flight suit is colored to match the white of the armor pieces (in the references it looks more like a light grey, definitely a shade or two darker than the white armour?) . The lower part may be a separate trouser garment, or part of a one piece flight suit. If a one piece jump suit, the upper body jumper should be worn over the garment so as to obscure any view of the flight suit underneath. The lower body part of the flight suit has the following seams: On the outside of each leg there is a double-lapped seam which runs the entire length of the suit showing from the top of the shins up under the belt. On the front just above the top of the knee armor which wraps around to the back of the flight suit and appears on the back. On the back from the knee seam there is a seam that runs up the back of each thigh and then curves to the outside of the back under the belt. There is a horizontal seam that runs across the butt connecting both of these seams running up the back of each thigh. On the back there is central double-lapped seam which runs from under the belt to the crotch of the wearer. Chest Armour and Shoulder Pauldrons Armour is segmented with an Upper Chest Armour overlapping the Lower Chest Armour. These may be permanently fixed together, or fitted separately so long as they as attached firmly together when worn. The Upper Chest Armour also overlaps the Shoulder Pauldrons, which likewise can be permanently fixed, or able to be attached securely when worn. Armour is painted white and red to match reference images, and to match the white and red paint used on the helmet and other hard armour pieces. The front of the Upper Chest Armour has a semi-circular notch cut into the centre of the lower front edge. The red painted inverted triangle at the front covers the entirety of the shoulders and the Shoulder Pauldrons. The lower sides run from the front edge of each Shoulder Pauldron to meet at the semi-circular notch at the bottom of the Upper Chest Armour. A circular white detail indent with black outline is present halfway along the lower left (as worn) side of the front triangle. A linear detail indent borders the lower edge of the upper chest plate. The red painted inverted triangle at the rear likewise covers the entirety of the shoulders and the Shoulder Pauldrons. However the lower sides differ from the front as they run from the lower edge of the Pauldrons down to the bottom centre of the Lower Chest Plate, not the Upper Chest Plate. Note that much of this will be hidden by the Jetpack. The Lower Chest Armour has symmetrical, twin semi-circular notches cut into the lower front edge. The notches line up with the details featured in the Abdominal Armour. The lower edge of the Lower Chest Armour curves down to the sides from a arched centre point at the front centre. The rear edge therefore sits much lower than the front, and covers almost the entirety of the Abdominal Armour underneath. A linear detail indent borders the lower edge of the lower chest plate. The two layers of the Chest Armour may be joined in a clamshell front and back design, so long as the connection point is relatively seamless. Shoulder Straps. White painted hard armour "straps" sit on both shoulders connecting the front and back halves of the Upper Chest Armour. The material and white paint of the straps should match those of the Chest Armour. Abdominal Armour Made from the same hard material as the rest of the armour, and painted white to match all other relevant armour. May be constructed in a clamshell front and back design, so long as the connection point is relatively seamless. Is worn so that it is overlapped by the Lower Chest Armour above it. The Lower Chest Armour curves down at the sides so that almost completely overlaps the Abdominal Armour at the rear. Two symmetrical detail indents are present at the front, to match reference pictures. The outer edges of each design must be aligned with the cut outs at the bottom edge of the Lower Chest Armour. The inner details are rectangular, with a semi-circular top edge that sits just below the semi-circular cut outs on the Lower Chest Plate. The inner details are split into four segments, divided to match reference images. Jetpack: The same basic design as the Sabine Wren / Imperial Super Commando animated jetpack, but matching visual references for paint and markings. Central thruster is painted a dark gunmetal. Side thrusters are painted red and white to match other armour parts, with designs to match visual references. Red areas show medium to heavy weathering to match visual references, white in colour to match other armour parts. There is a curved bridge over the central thruster that is yellow/gold in colour with 3 white designs to match visual references. The height of the bridge piece is approximately 1/5 the length of the central thruster, and the top of the bridge piece is located approximately this same distance from the top of the thruster. Forearm Armour Armour is painted red to match the other armour parts. Moderate to heavy weathering in white is present on both forearms, with a horizontal scratch particularly visible on the left forearm. Each forearm has two raised rectangular compad buttons located just above the wrist. The button closest to the wrist is red. The upper button is orange. Armour is seamless on the outer edge. Due to the shape of the armour, a butted seam is acceptable on the inside if required. Elbow plate is integrated into the forearm. Left forearm has a spiralling white band painted above the wrist. This starts behind the red button, follows the contours of the armour around the back, and terminates just above and to the side of the orange button. Right forearm has an angled white band painted between the forearm plate and the integrated elbow plate, matching reference images. This band continues to the rear of the forearm plate, flush with the top edge. OPTIONAL Level two certification (if applicable) The rear lower portion of each forearm tapers slightly inwards towards the wrist, starting approximately at the same level as the gap between the two compad buttons. Gloves: Gloves are made from a textured fabric, closely matching the maroon of the upper flight suit. OPTIONAL Level two certification (if applicable): Gloves should be made from the same material as the upper flight suit. Hand Plates: Hand plates should be red in colour, matching other armour parts. Hand plates should extend up the wrist, running underneath the gauntlets. Hand plates may be constructed from a flexible material to facilitate movement. A white triangular design should be painted on both hand plates, matching visual references. Belt: Belt is of the same material and colour as other white armour parts. Comprised of approximately 16 vertically chained rectangles. Two of these rectangles meet with an interlocking design at the front centre. A white pouch sits on the belt at each hips, matching visual references. The belt may of the same material as the belt, or a white leather-like material. Codpiece: Codpiece is of the same material and colour as other white armour parts. Codpiece attaches under the belt. There is a 3 sided detail imprint on the front of the codpiece. Thigh Armour: The thigh armour is of the same material and colour as other white armour parts. The centre of each piece is rectangular in shape, with an inset rectangular detail indent. There are angled "wings" curving from both sides of the armour, each reaching the centre front and centre back of each thigh. These "wings" are offset from centre, sitting closer to the top than the bottom. The thigh armour must be attached with an "invisible" method. There should be no visible strapping. Knee Armour: Knee armour is painted to match red armour pieces, with white weathering consistent with visual references. The upper curve of the armour should sit just below the seam of the undersuit's thigh panels. The lower curve of the armour should sit inside the indent at the front centre of the shin armour. Knee armour may be constructed of a flexible material to allow a greater range of movement. Knee armour must be attached "invisibly", with no visible strapping. Shin Armour: Shin armour is painted to match red armour pieces, with white weathering consistent with visual references. The armour runs from the top of each calf, and overlaps the sides of each boot. The toes, bridge and heel of each boot remains uncovered, consistent with visual references. There is a semi-circular notch in the top centre of each boots. The knee armour is aligned with this notch. The armour may be constructed from flexible material to allow a greater range of movement. Boots: Boots are red, as close as possible a match to the red armour. There should be no decorative stitching. There should be little to no heel on the boots. OPTIONAL Level two certification (if applicable): Boots should have a tan coloured sole.
-
Purge Trooper (Phase II) - Kenobi - Discussion
tipperaryred replied to nanotek's topic in Purge Trooper Phase II (Kenobi)
I'm not sure if the forum supports native video playback, but feel free to throw up any links you have. Let us know how the first draft of helmet text compares to your own research, and we can take it from there! -
There's definite inconsistencies with the animations, so for now we'll just flag it up with a different colour and move on to the next step (under suit). So here is the draft text for the helmet. We can always return to it if there are any new references or inputs that are useful. Helmet Imperial Mandalorian Super Commando style helmet, matching visual references from Star Wars Rebel animated series. Helmet should be painted and weathered to match references. Weathering/chipping of the red paint should match the light grey paint used elsewhere on the helmet. Helmet dome and face plate to be painted red as per references. Rear plate, raised rear panel detailing, the upper cheek plates, left ear plate and teeth must be painted light grey as per references. Lower cheek plates, raised rear panel, must be painted white (or a lighter shade of grey), as per references. Additional detailing on rear plate must be painted white. Ear caps and antennae may be painted light grey or a weathered white. All recessed panel lines are black or dark grey. There is an inverted white outlined triangle in the centre of the forehead. This should be painted. A weathered decal may be acceptable if achieving the look of having been painted. Both visor pieces are black, and obscure the wearer's face. The lower visor tapers in slightly to its narrowest point at the bottom. Left ear cap is oval, with a raised circular detail at the top, and a slightly tapered antenna with a circular profile. Right ear cap is angled at the top, with a narrower half oval at the base. There is an angled recessed panel line in the bottom right corner of the cap. The cap has a raised circular detail at the top, and two antennae. The rear antenna matches that on the left side, while the front antenna is significantly taller. Twin recessed panel lines (1 & 2) run around the upper visor, angle up over the ear pieces, and join together in horizontal lines across the back of the helmet. A third panel line (3) runs parallel and just above the upper of these two lines (2), joined to this same upper panel line at both ends, and running horizontally across the central portion of the rear of the helmet. The distance between 2 and 3 is approximately half the distance between lines 1 and 2 at the rear of the helmet. Additional panel lines vertically bisect each ear plate, and run around their edges. Rear bottom lip of the helmet has a raised, curved rim, running between the rear edges of each ear plate. Back plate has a raised rectangular panel with details to match references. These are long vertical oblongs on both sides, a circle in the lower centre, and a double striped rectangle within another rectangle in the upper centre. Details are outlined by recessed panel lines. The back plate is light grey, but has white detailing painted on either side of the raised rectangular panel. There are six teeth, three on each side of the lower visor, with the recesses painted black or dark grey.
-
Purge Trooper Phase 2 CRL
tipperaryred replied to smoszer's topic in Purge Trooper Phase II (Kenobi)
Hi Scott, welcome from another Del, and thanks for jumping in to the discussion. We have made a short start to the CRL in the pinned thread below: Up until recently we hadn't had a builder actively engaging with the CRL discussion here on the forum, so other CRL developments with builders have taken a little more priority (we can't finish a CRL without the participation of builders, and it makes the whole process run a lot smoother). However, if you're happy to jump in and take part in the process along with our other recently arrived builder to jumpstart this, please do! We generally work from a top down basis, not moving onto the next part of the kit until we have a consensus that the previous part is finalised. Once the text for a part is finalised, it will be added into the pinned CRL post. So in the discussion thread above, you'll see we have some draft text going for the helmet. If you have any feedback on that, please jump in with any changes, removals or additions you can suggest. If you can post up relevant photos of your own build to highlight points, please do. -
For the gaps between teeth, I would suggest the same as the panel lines and say "black or dark grey". The antennae and ear caps are tough... Best we can do is place them relative to the other colours. We know upper cheek parts are grey, and lower cheek parts are white. The question is do we say that the antennae match one of those, or are a third colour? My personal instinct would be to suggest the same light grey as the upper cheeks for the ear caps. Then maybe a weathered white for the antennae as you both suggest.
-
Had a chance to run through all of the above again, and here's some new draft text based on the above: Under Suit and Neck Seal Under Suit has one-piece or two-piece construction with no visible zippers or logos. All materials are low-sheen leather or leather-like material. Neck seal may be integrated into the suit, or worn over it. Spacings of the ribs given below are approximate. Neck seal has 1.5” vertical ribs. Shirt has vertical 1” ribbing across the torso. The horizontal arm ribs taper from approximately 1" wide at the torso to ¾" at the wrist. Sleeves are joined to the torso with a curved 1/4” rib. The pants have a heavier taper in the vertical rib spacing, starting at 1.5" wide at the waist to 3/4" above the ankle. Ribbing appears to meet behind the cod piece. Shoulder Bib Material is low-sheen leather or leather-like material, matching the Under Suit. Spacings of the ribs given below are approximate. Centre front of the bib has three 1.5” vertical ribs, with 1.5” horizontal ribbing on either side. Centre rear of the bib has ten 1.5” vertical ribs, with 1.5” horizontal ribbing on either side. There is a 1/2” rib running along the outside of the garment, and around the inside of the neck.